¶ Tools
H3.0 hexagonal wrench
H2.0 hexagonal wrench
New belt
¶ Replacement Steps
¶ Precaution
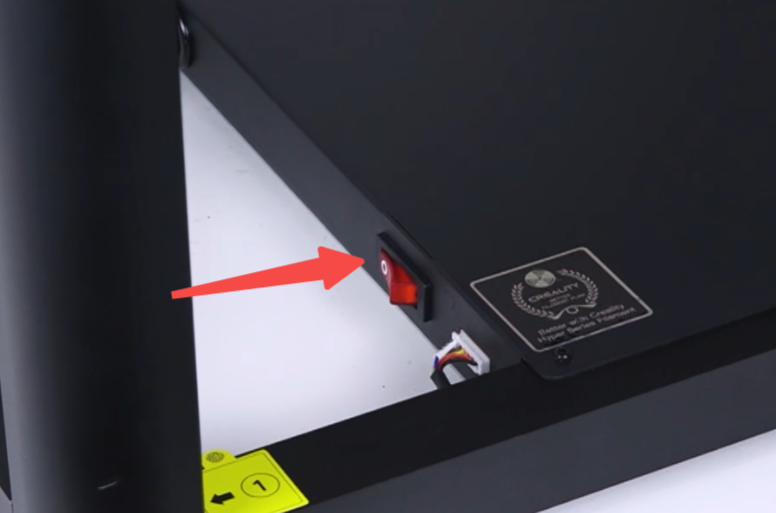
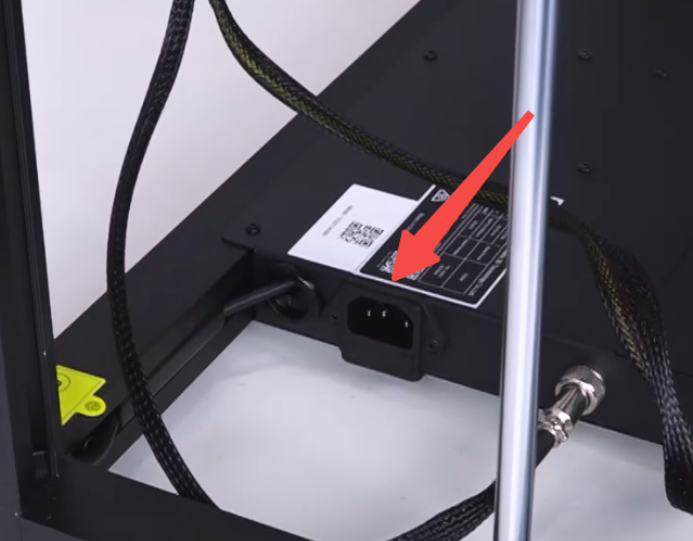
Before operate the following steps, turn off the power and unplug the power cord.
 |
 |
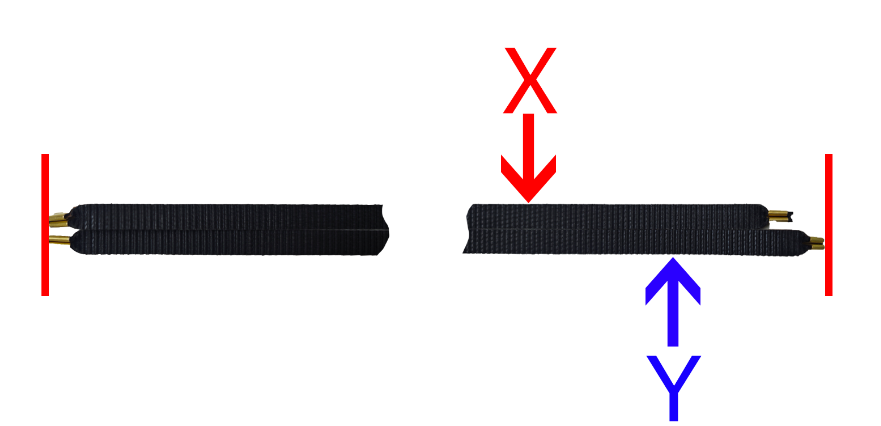
The X and Y axis belts have different lengths. The Y axis belt is slightly longer than the X axis belt, as shown in the following image:
¶ Loosen the belt
¶ Loosen the X-axis belt
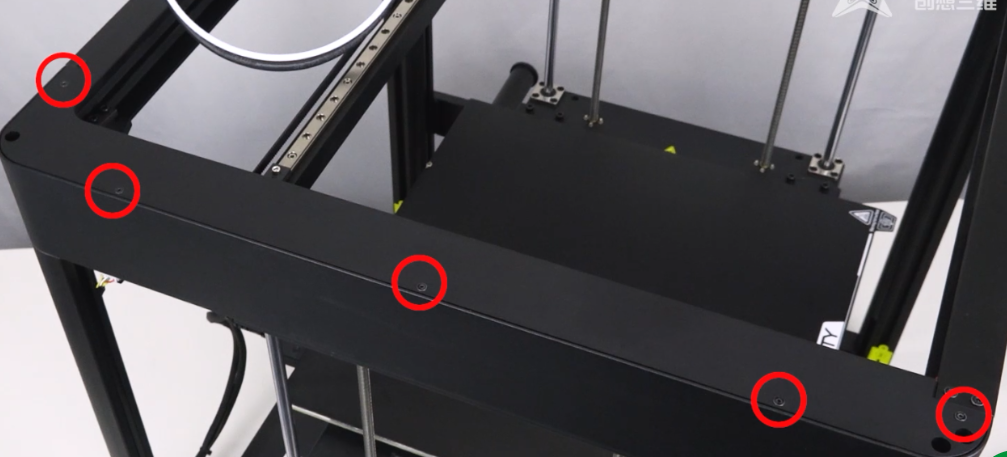
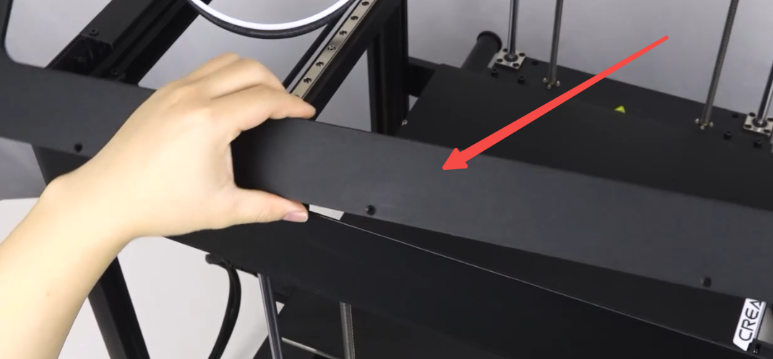
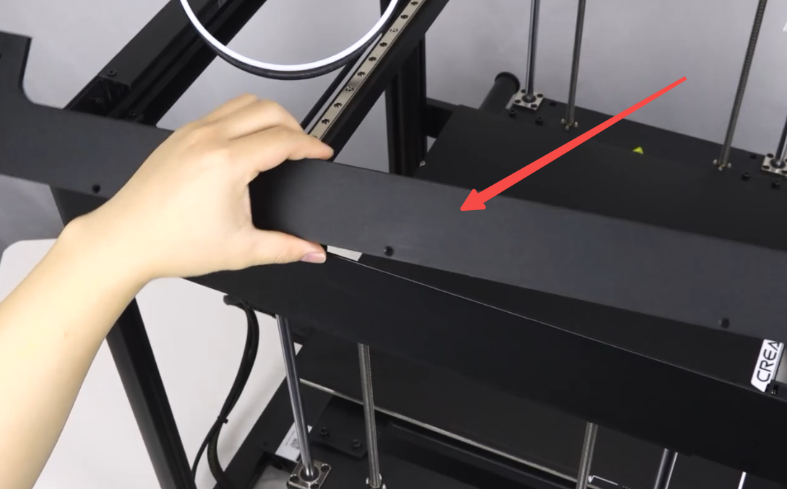
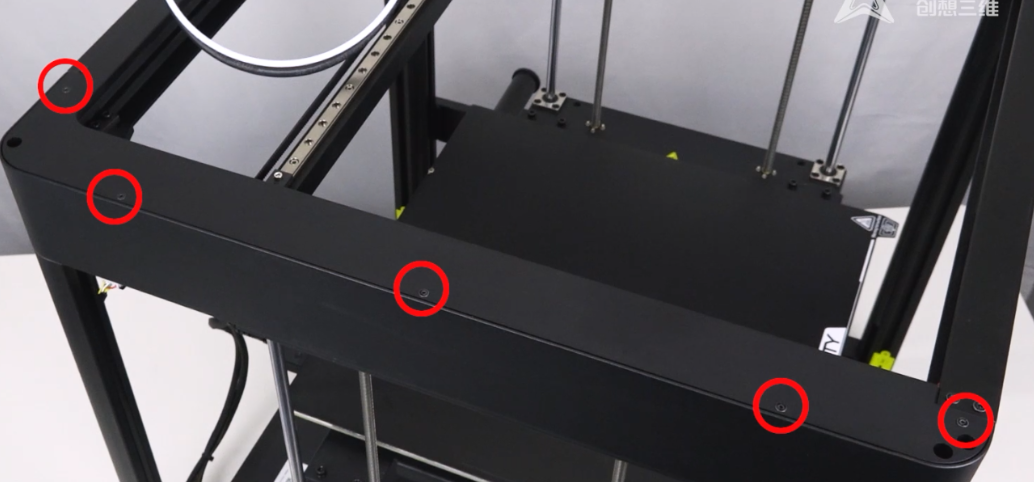
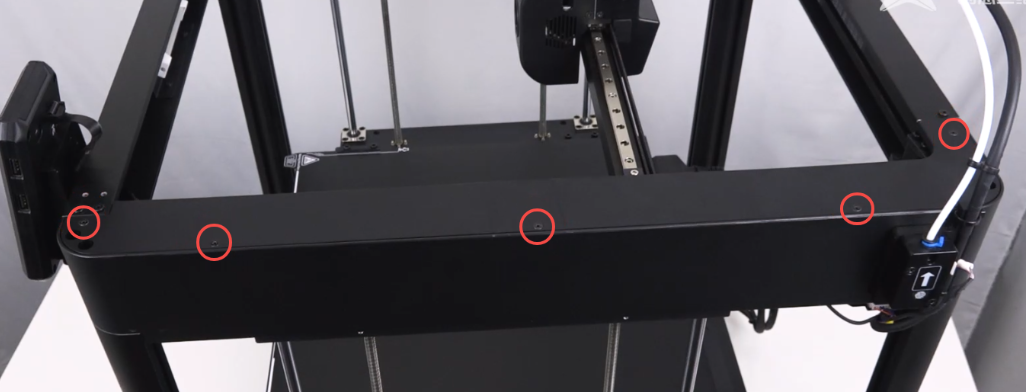
Remove the X-axis belt upper cover (unscrew 5 screws)
 |
 |
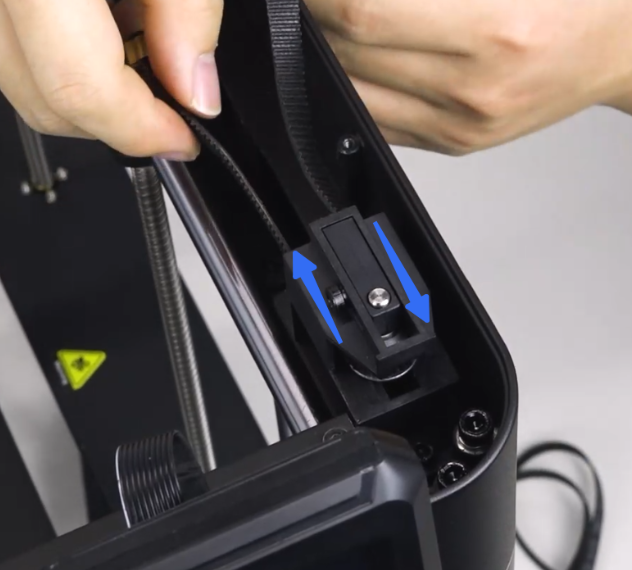
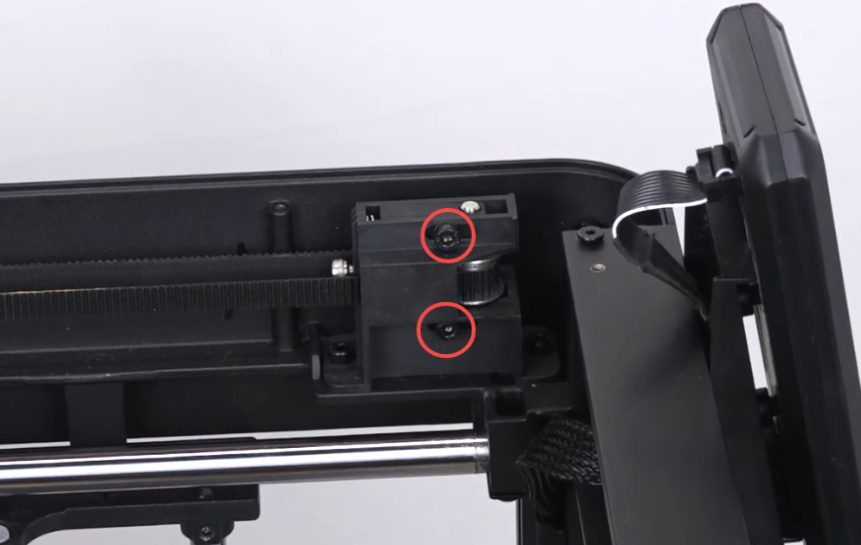
Loosen the 2 screws fixing the X-axis tensioner
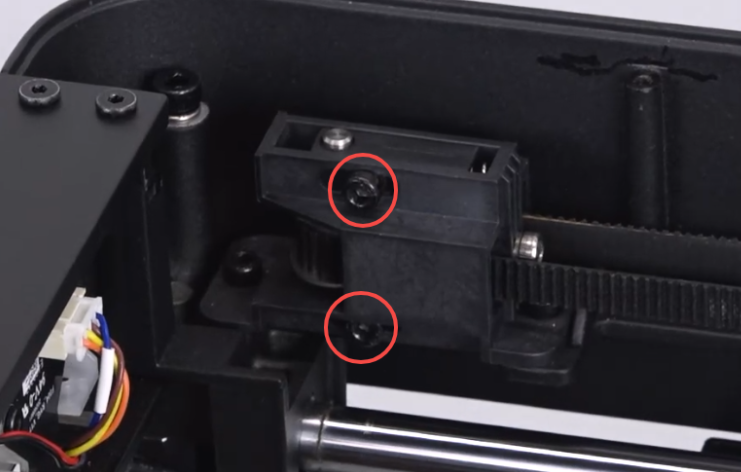
Use the hexagonal wrench to turn the adjustment screw to control the tension of the X-axis belt. Turn the screw clockwise to tighten it, retracting the tensioner to loosen the belt
¶ Loosen the Y-axis belt
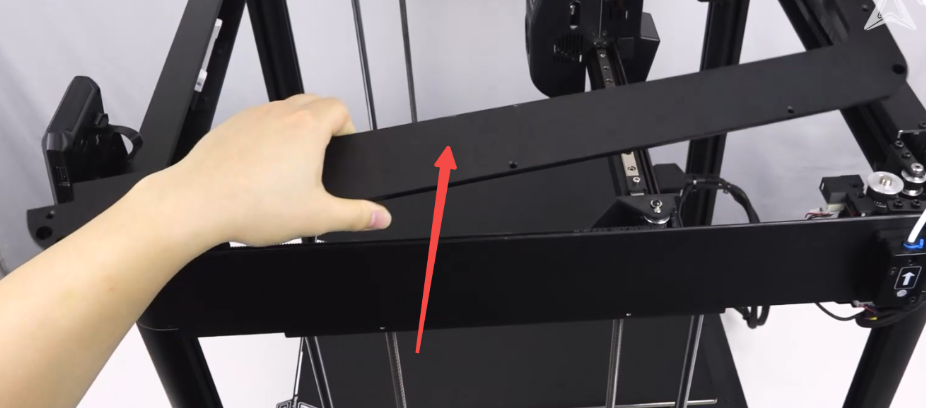
Remove the Y-axis belt upper cover (unscrew 5 screws)
 |
 |
Loosen the 2 screws fixing the Y-axis tensioner

Use the hexagonal wrench to turn the adjustment screw to control the tension of the Y-axis belt. Turn the screw clockwise to tighten it, retracting the tensioner to loosen the belt
¶ Disassembly
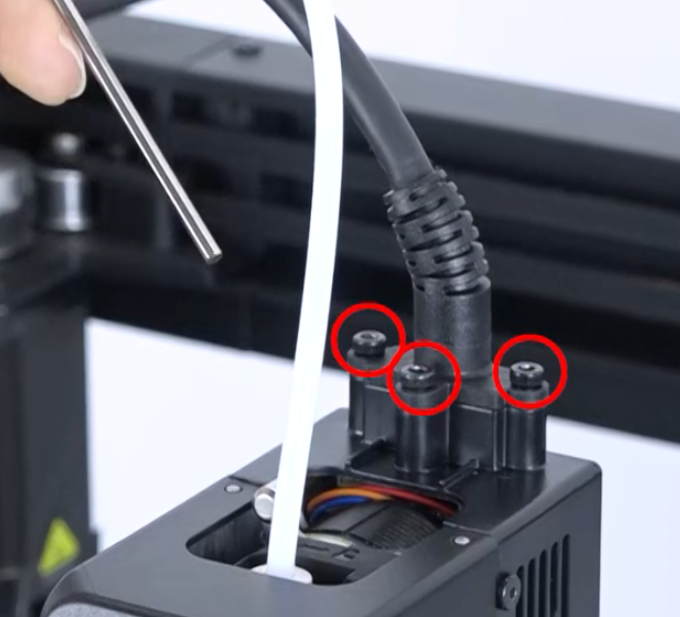
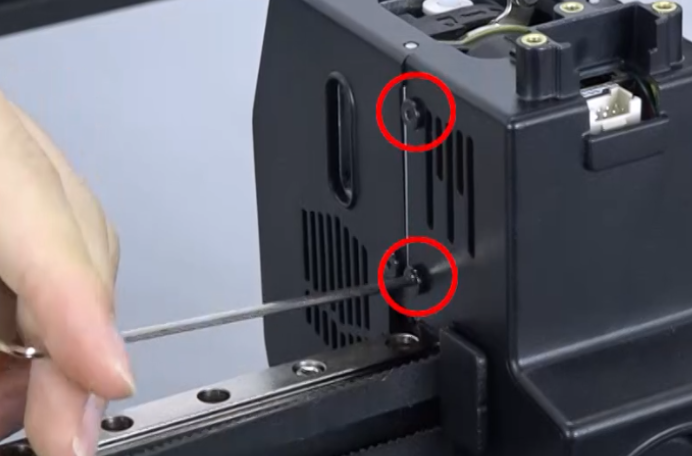
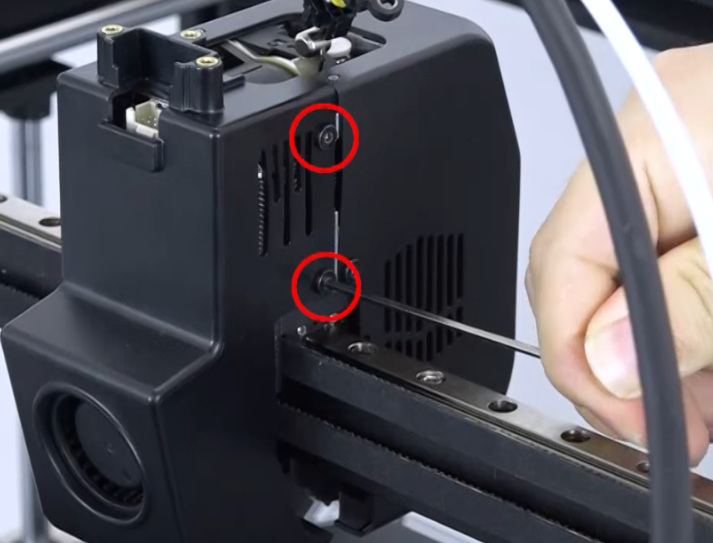
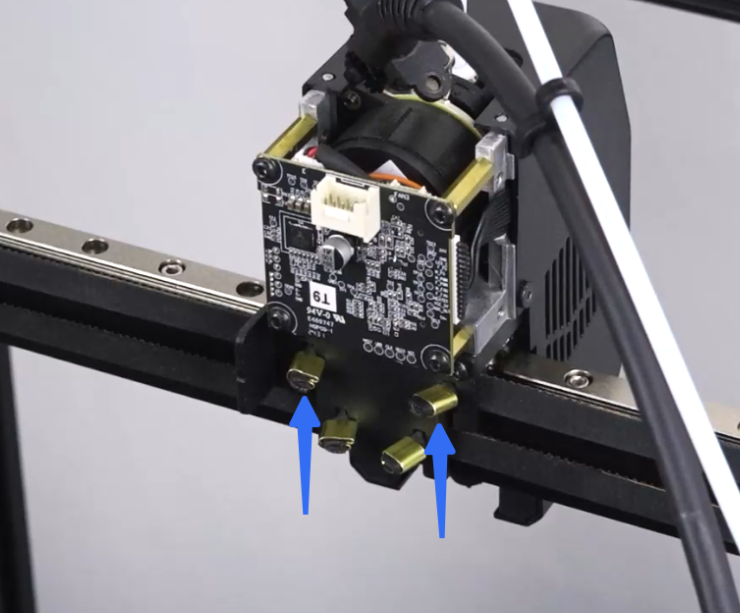
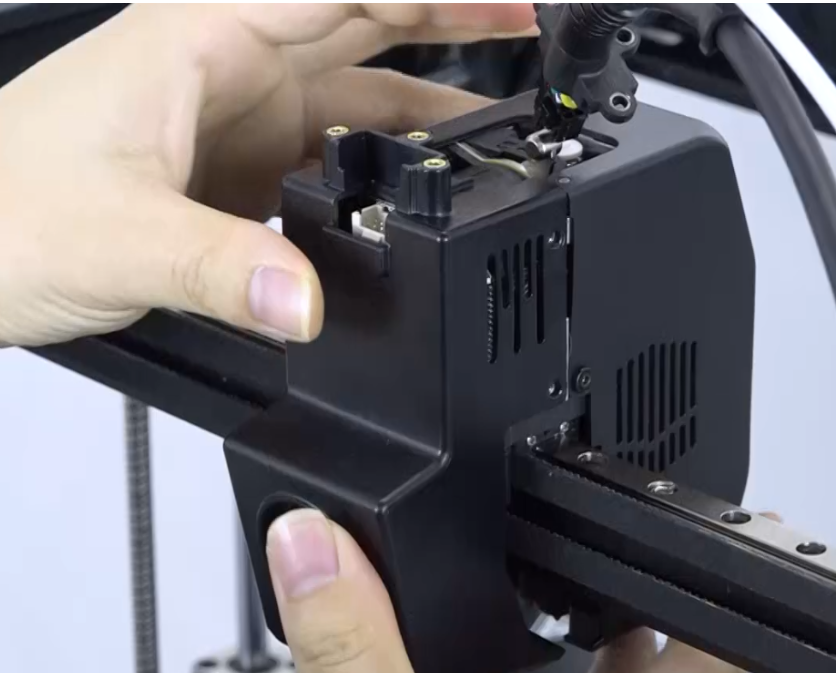
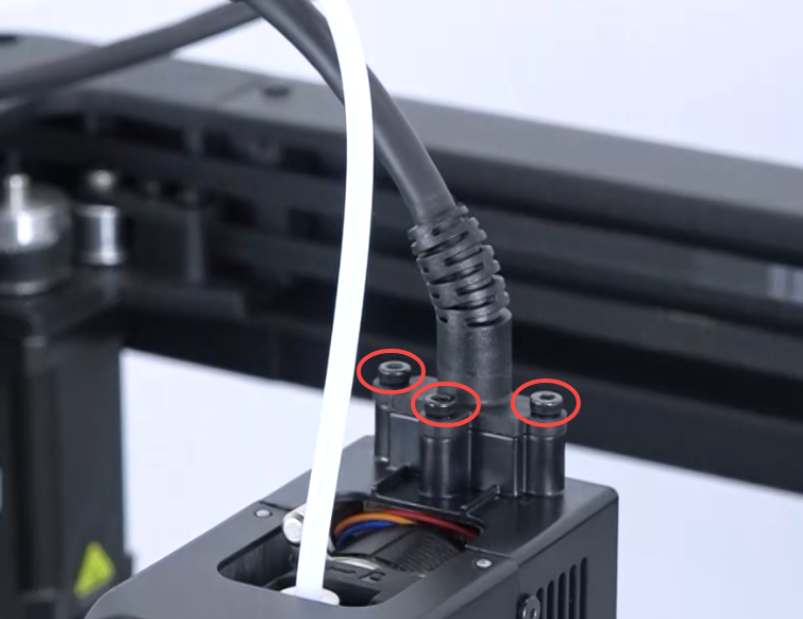
Unscrew 3 screws
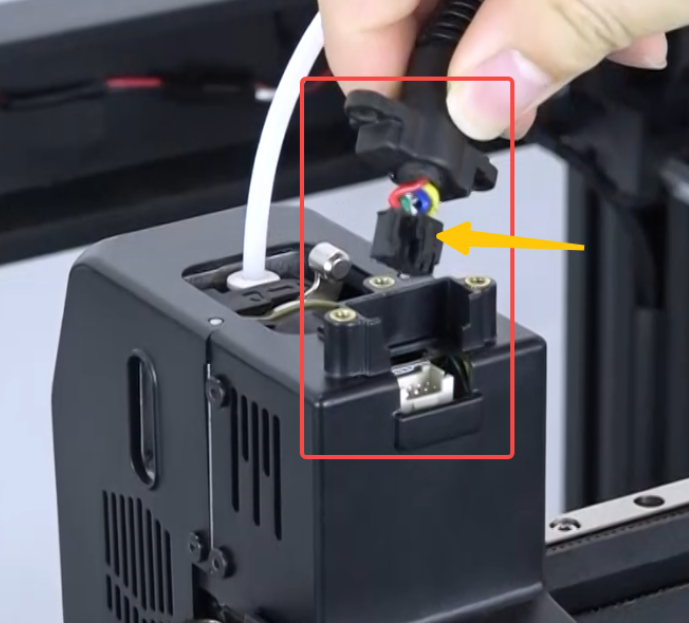
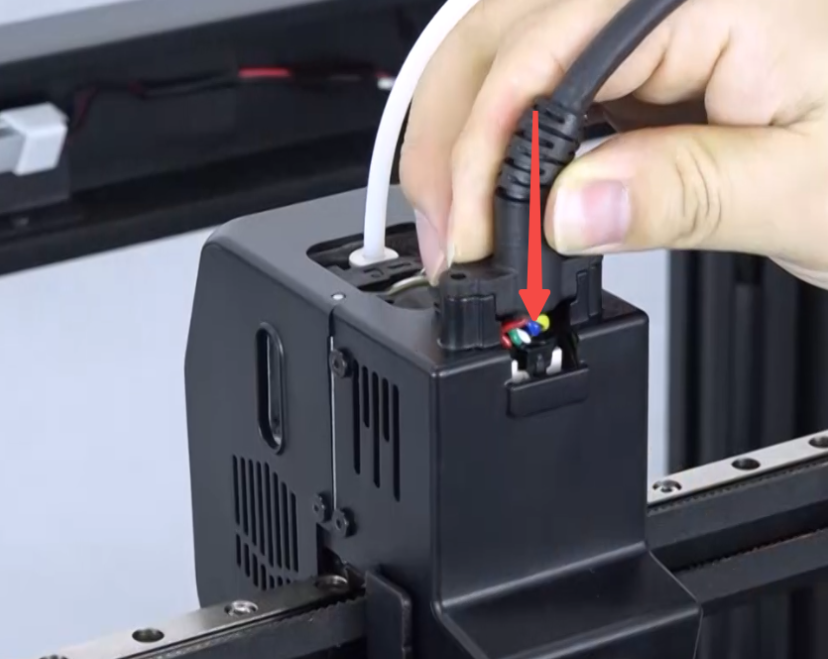
Unplug the hotend wire, press the clasp on the terminal when unplugging
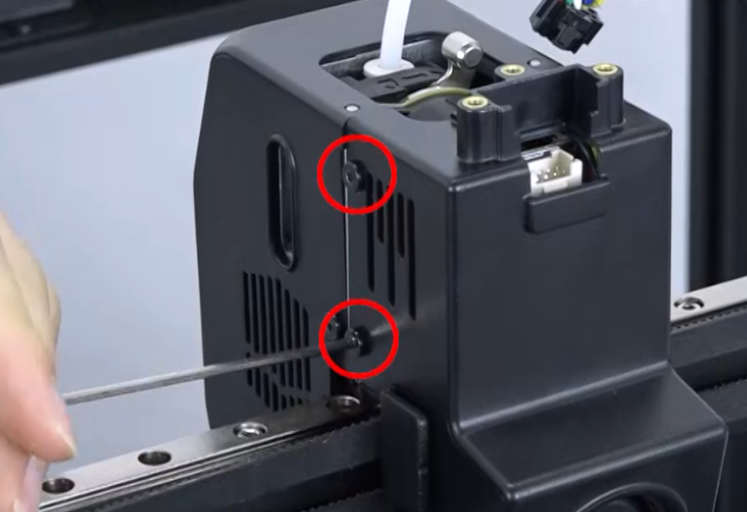
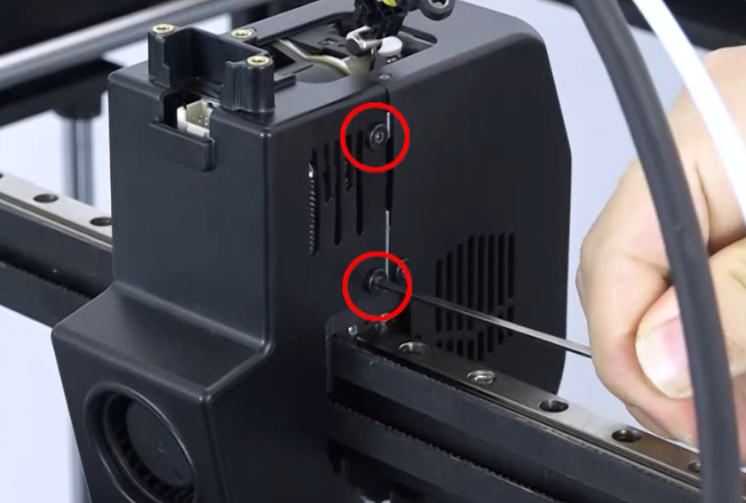
Remove the rear fan cover, unscrew 4 screws
 |
 |
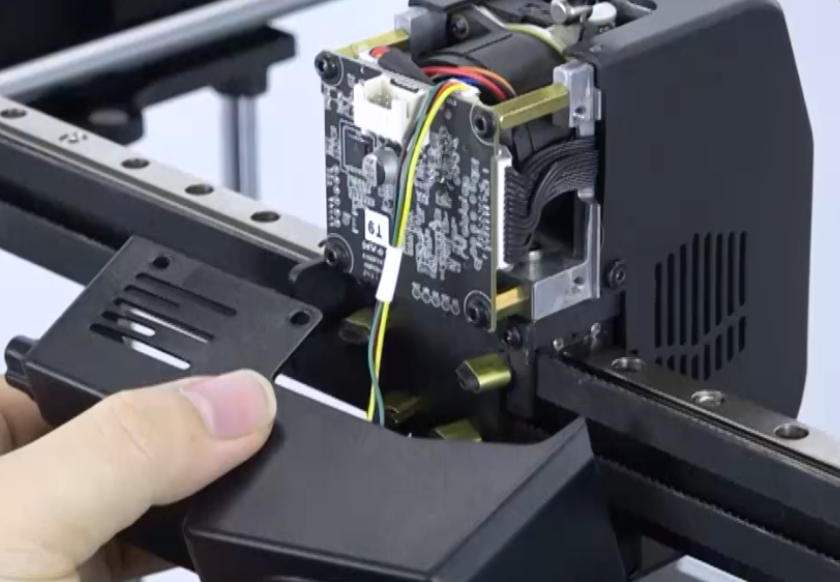 |
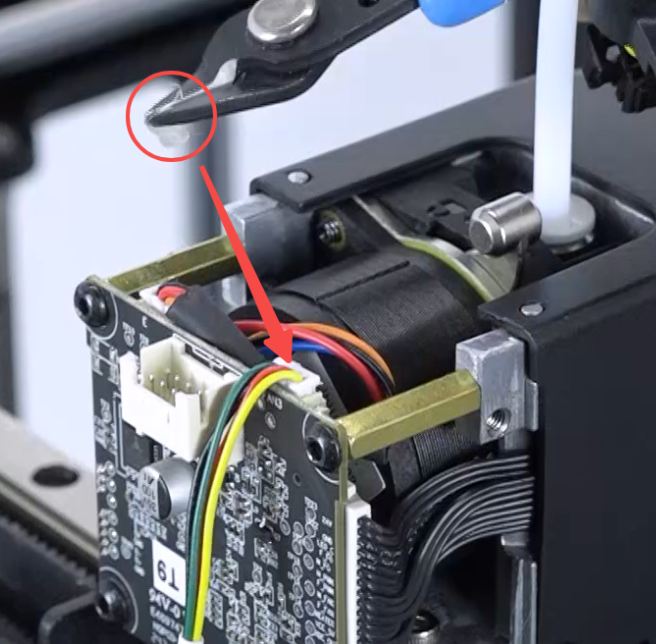
Use cutting pliers to remove the hot glue from the port. Note: Do not damage the port and wiring. Unplug the fan wiring
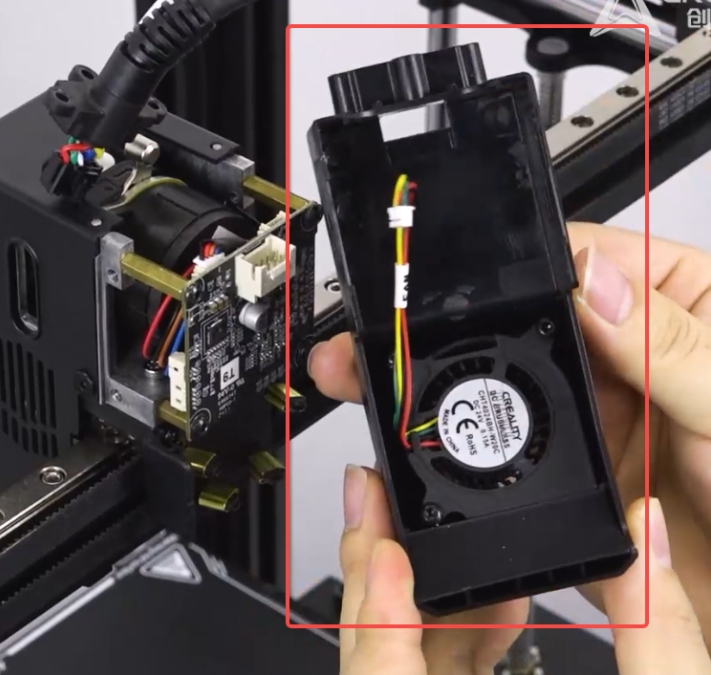
Remove the fan cover
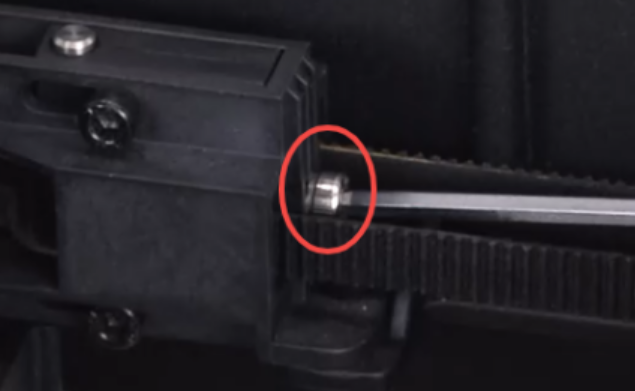
¶ Remove the Y-axis belt
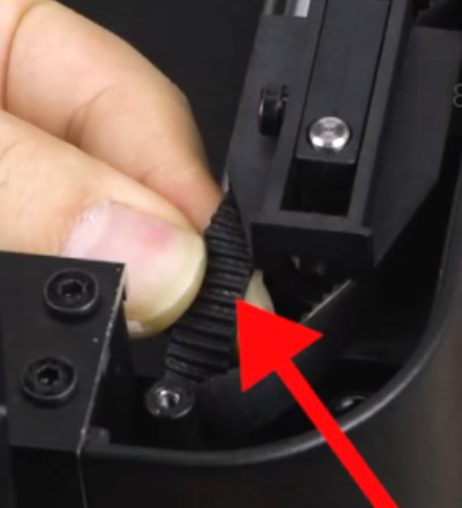
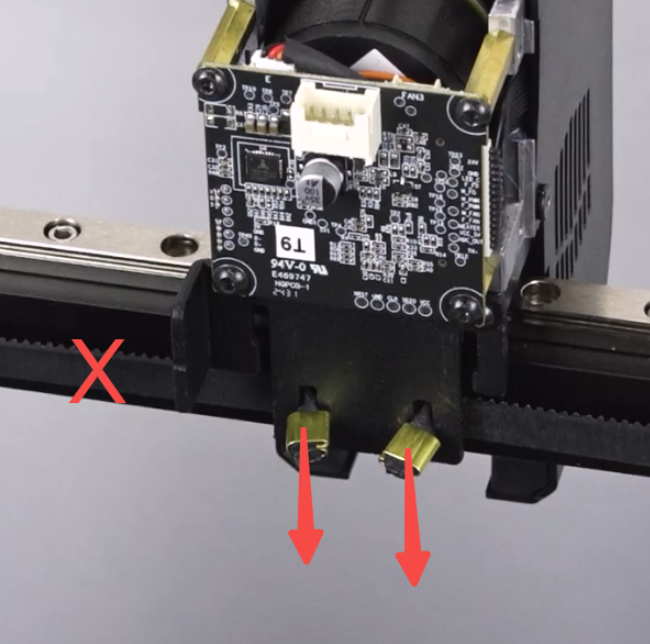
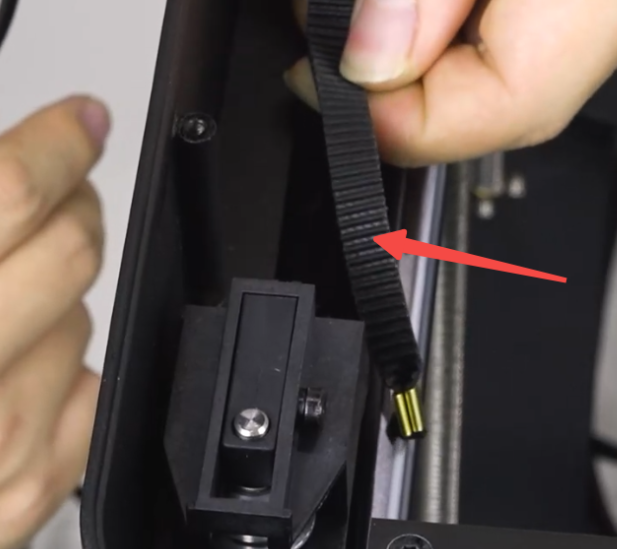
Slide down the copper sleeve clasp

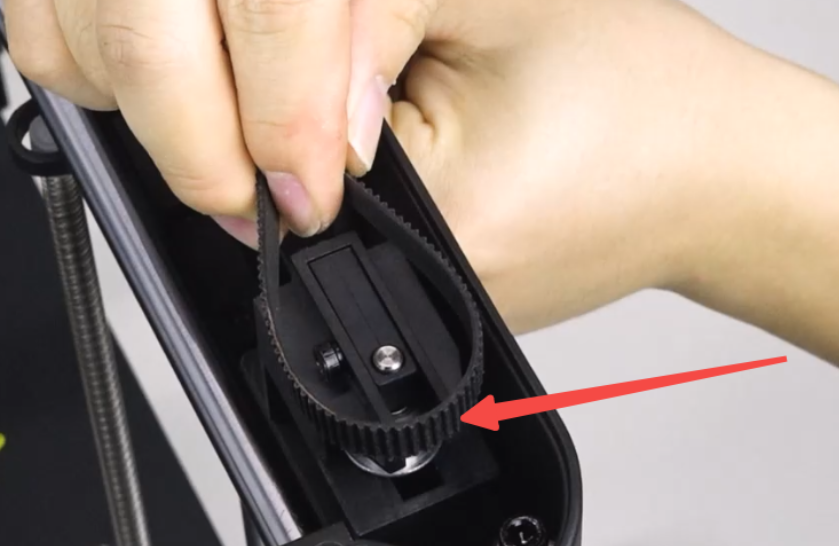
Remove the belt. Tip: If it's difficult to remove, you can first flatten the belt and pass it through before removing it
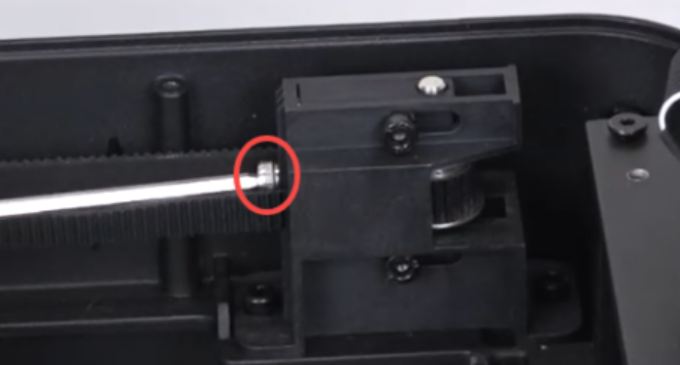
¶ Remove the X-axis belt
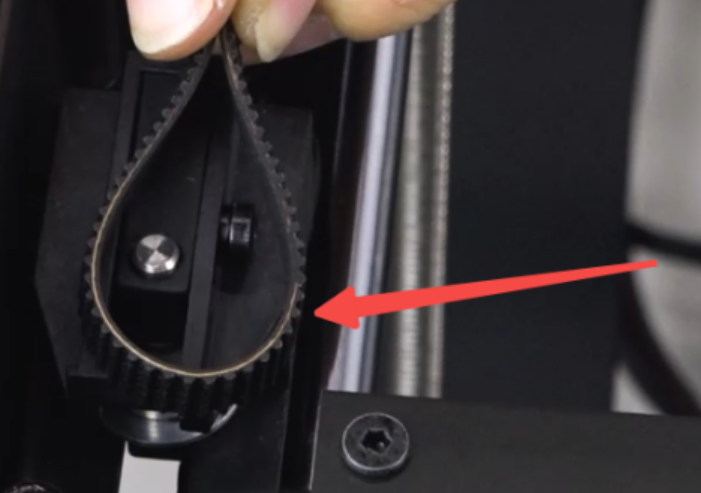
Slide down the copper sleeve clasp
Remove the belt. Tip: If it's difficult to remove, you can first flatten the belt and pass it through before removing it.
¶ Thread the belt
¶ Thread the X-axis belt
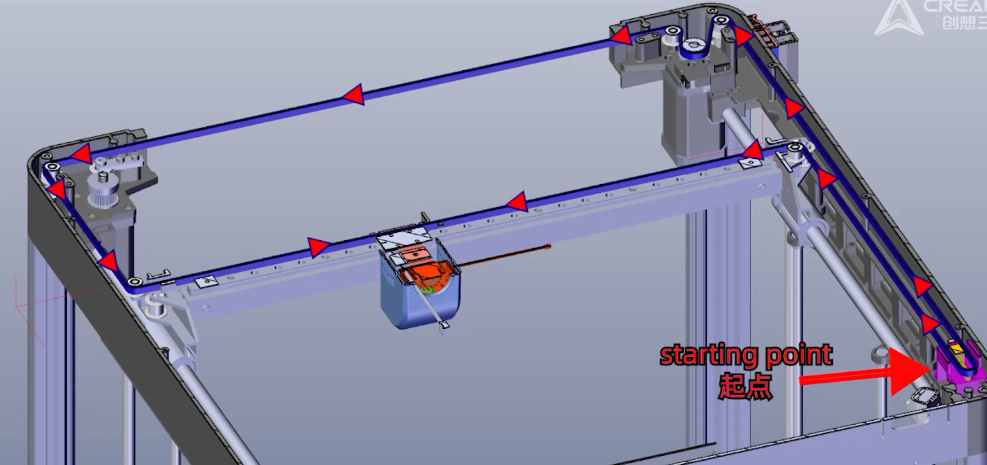
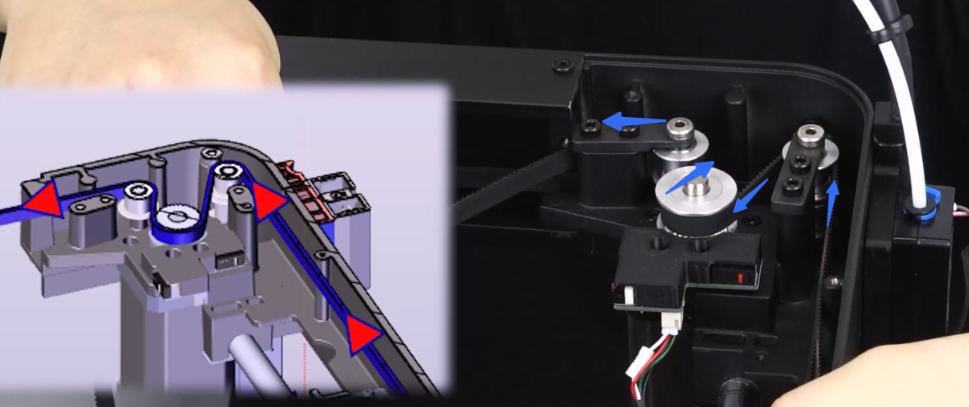
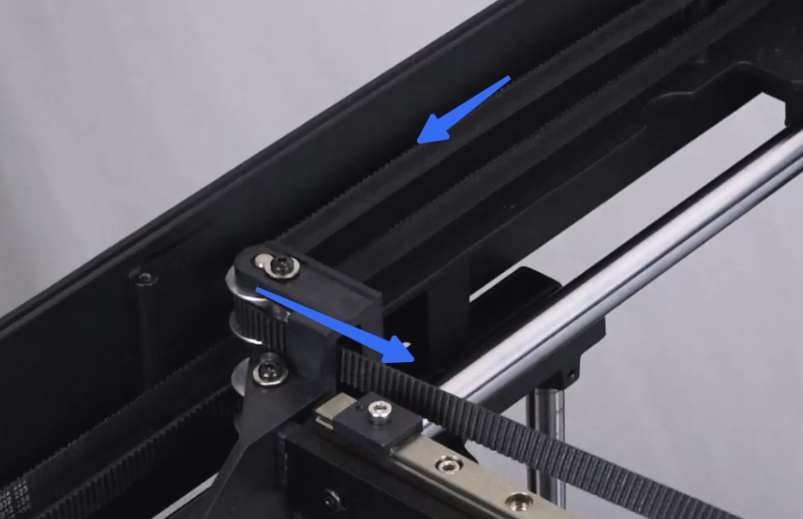
X-axis belt threading path diagram:
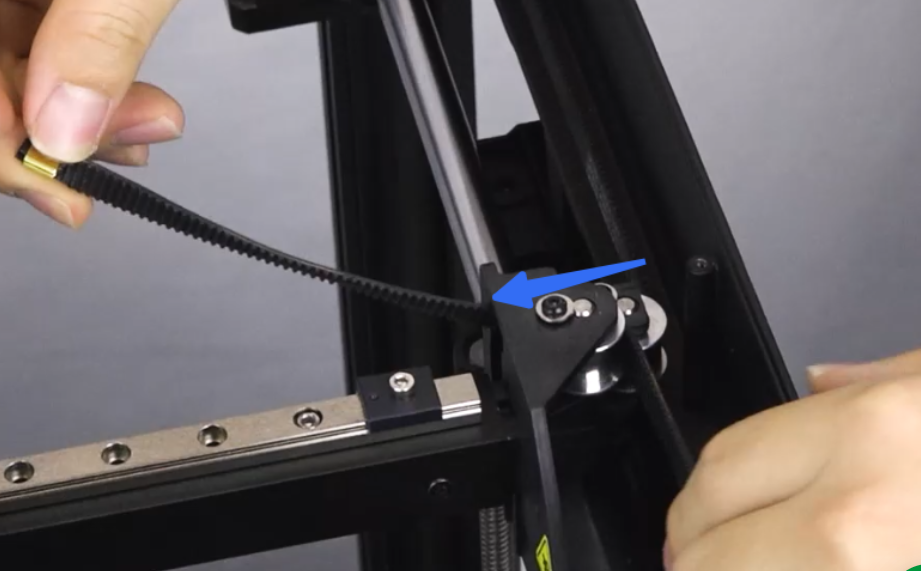
Note: The toothed side of the belt should face outward.
Tip: If it's difficult to thread through, you can first flatten the belt to pass through the hole and then position the belt correctly.
¶ Thread the Y-axis belt
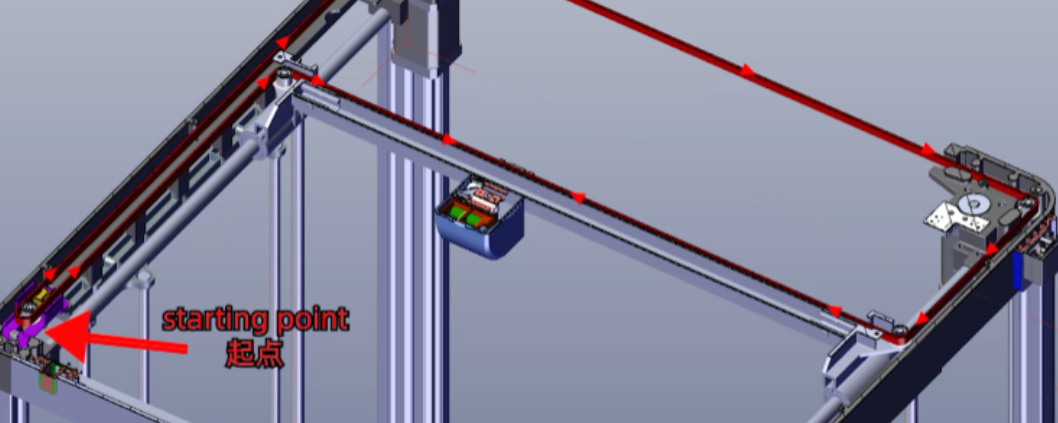
Y-axis belt threading path diagram:
Note: The toothed side of the belt should face outward. Tip: If it's difficult to thread through, you can first flatten the belt to pass through the hole and then position the belt correctly
 |
 |
 |
 |
 |
 |
Snap on the copper sleeve clasp.
¶ Adjust belt tension
¶ Adjust the X-axis belt
Use the hexagonal wrench to turn the adjustment screw to control the tension of the X-axis belt. Turn the screw counterclockwise to loosen it, releasing the tensioner to tighten the belt
After adjusting the belt, tighten the 2 screws, and fix the tensioner.

¶ Adjust the Y-axis belt
Use the hexagonal wrench to turn the adjustment screw to control the tension of the Y-axis belt. Turn the screw counterclockwise to loosen it, releasing the tensioner to tighten the belt
After adjusting the belt, tighten the 2 screws, and fix the tensioner
Slide the printhead assembly to test if it moves smoothly
¶ Install the cover
Plug in the fan wire and install the fan cover
 |
 |
Tighten 4 screws on the left and right sides
 |
 |
Plug in the hotend wire
Tighten 3 screws fixing the hotend wire
Install the X-axis belt upper cover (tighten 5 screws)
 |
 |
Install the Y-axis belt upper cover (tighten 5 screws)
 |
 |
¶ Power-on self-test
Plug in the power cord and turn on the machine
 |
 |
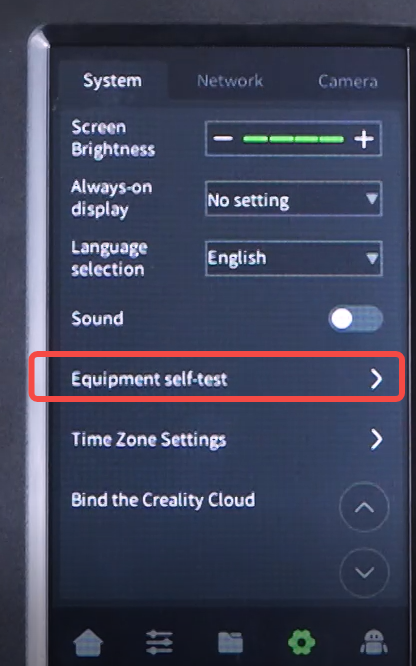
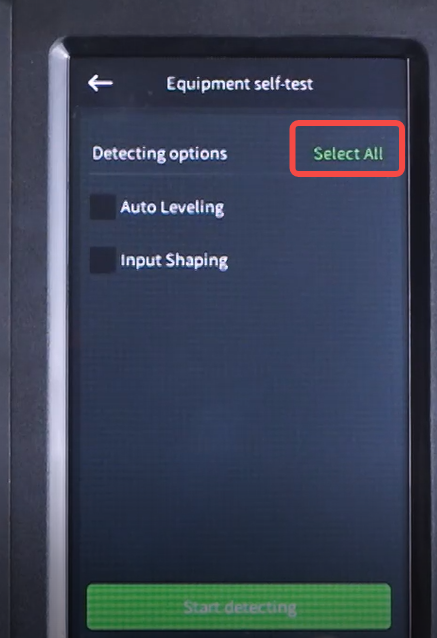
Click "Settings" - "Device Self-test" - "Select All" - "Start detecting"
|
 |
 |