¶ Ender-3 V4 Combo Connection Method
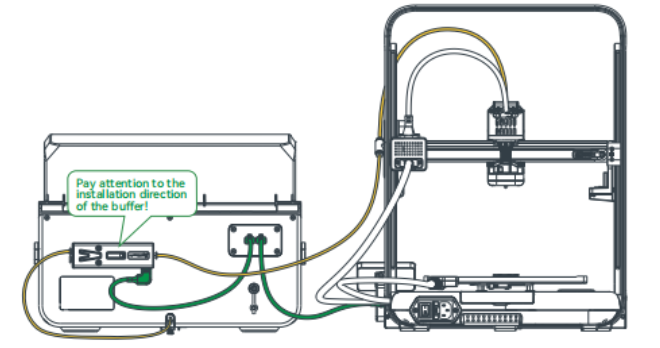
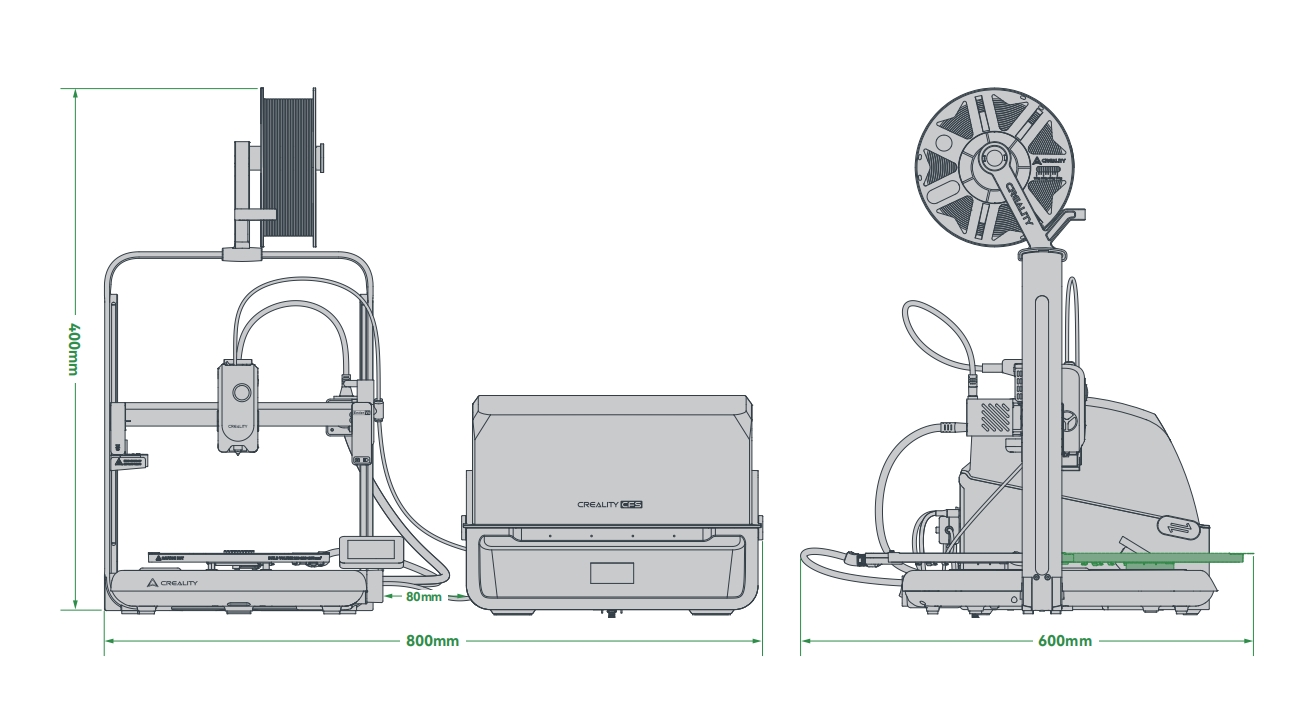
¶ Ender-3 V4 Combo Recommended Installation and Placement Position
(1) The above PTFE tube size is calculated as the optimal dimension based on the minimum distance of 80mm that needs to be maintained between the CFS and Ender-3 V4, for reference only;
(2) If you find deformation at both ends of the PTFE tube, you need to manually adjust the PTFE tube to make it round, otherwise it may easily cause filament jams.
¶ CFS filament editing/filaments reading
¶ Load/unload filament
Load the filaments: Put the filaments into the CFS, align the filaments head with the corresponding slots' teflon tube, and gently push them in. When you feel the tension, you can stop pushing. The filaments will be automatically loaded (extruded).
Unload the filaments: First of all, ensure that the filaments are not in the extruder, and directly pick up the filaments and pull them out.
If inside the extruder, you can first click the "Retract" and wait for the filaments to return to the CFS before removing it.
¶ Edit Filament
When the RFID filaments are loaded, the printer will automatically read the filaments information without editing. To view filament parameters, select the filament you want to check and click the edit button.
When inserting ordinary filament, after the machine automatically tightens and reads it, the interface will display "?". Click the edit button to manually edit the filament information.
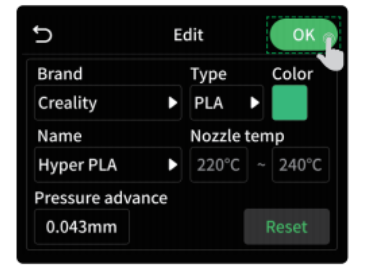
Click the button "Edit" , select Brand -Type - Name -Color, and click OK
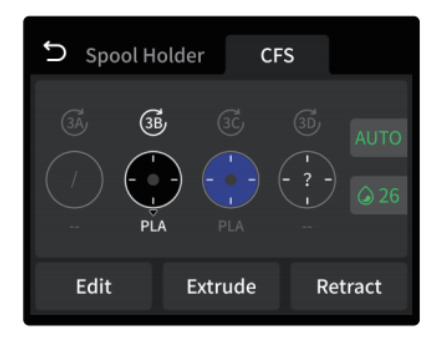
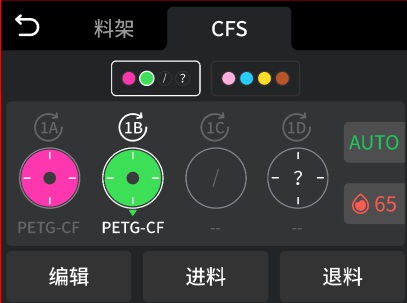
¶ CFS Filament Management
The filaments management page is divided into two parts: external rack [left] and CFS [right]
The number above the filaments in CFS, such as 3A, indicates the silos number
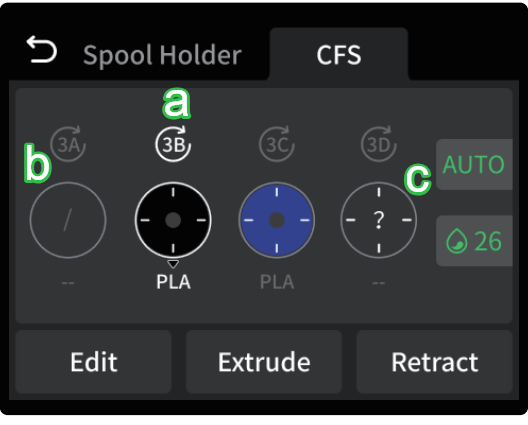
a is the Refresh RFID button, which can be used to read filament. If the reading is successful, the remaining filament and filament color will be displayed. If the reading fails, the filament editing button will be displayed, and the filament will be displayed as "?".
b is the empty slot state, displayed as "/", and editing is not supported;
c is the state where RFID is not read, the filament display "?". At this time, you need to click the edit button to manually edit the filament information;
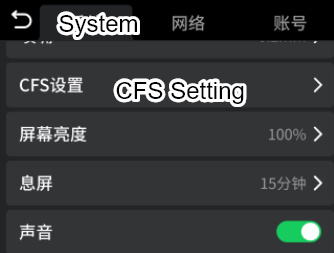
¶ CFS Setting
Click the Settings button to enter the page.
|
|
|
|
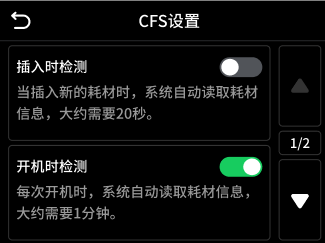
- Insertion Detection is the function of RFID filaments reading , and this button can be turned off if ordinary filaments are used.
- Startup Detection indicates that when the printer is powered on, it will read the RFID function in turn.
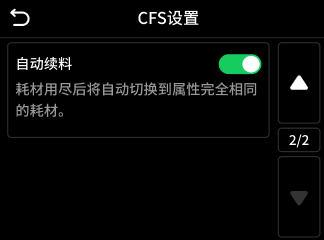
- Automatic Refill Filament functions as: The same color, the same type of filaments are used up, but the silo still has the same filaments, it will activate Automatic Refill, and the filaments will not remind you to renew.
¶ How to start printing on Screen?

Click on "Files" on the screen, then click "Print." Checking "Print Calibration" will execute automatic leveling.
Enabling the multi-color system indicates using CFS filament for printing; otherwise, spool holder filament will be used, and multi-color files will be treated as single-color files.

As shown in the figure, on the left side is the filament color and type included in the file. On the right side is the mapping status of the file to the filament slot.
When mapping fails, it will display '--', requiring the user to manually select the filament.
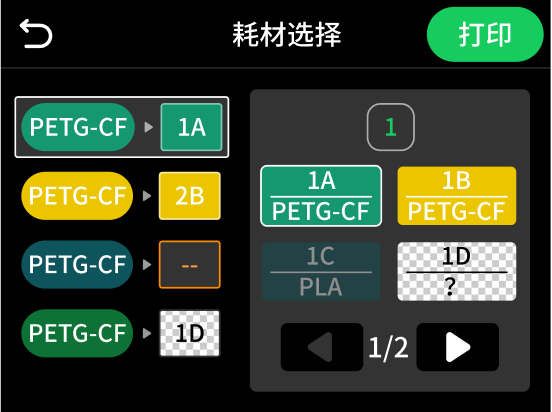
After clicking print, the CFS will automatically feed the filament for printing without manual intervention.
¶ Where to find multi-color models?
¶ Slice
Download the file and drag it into the slice.
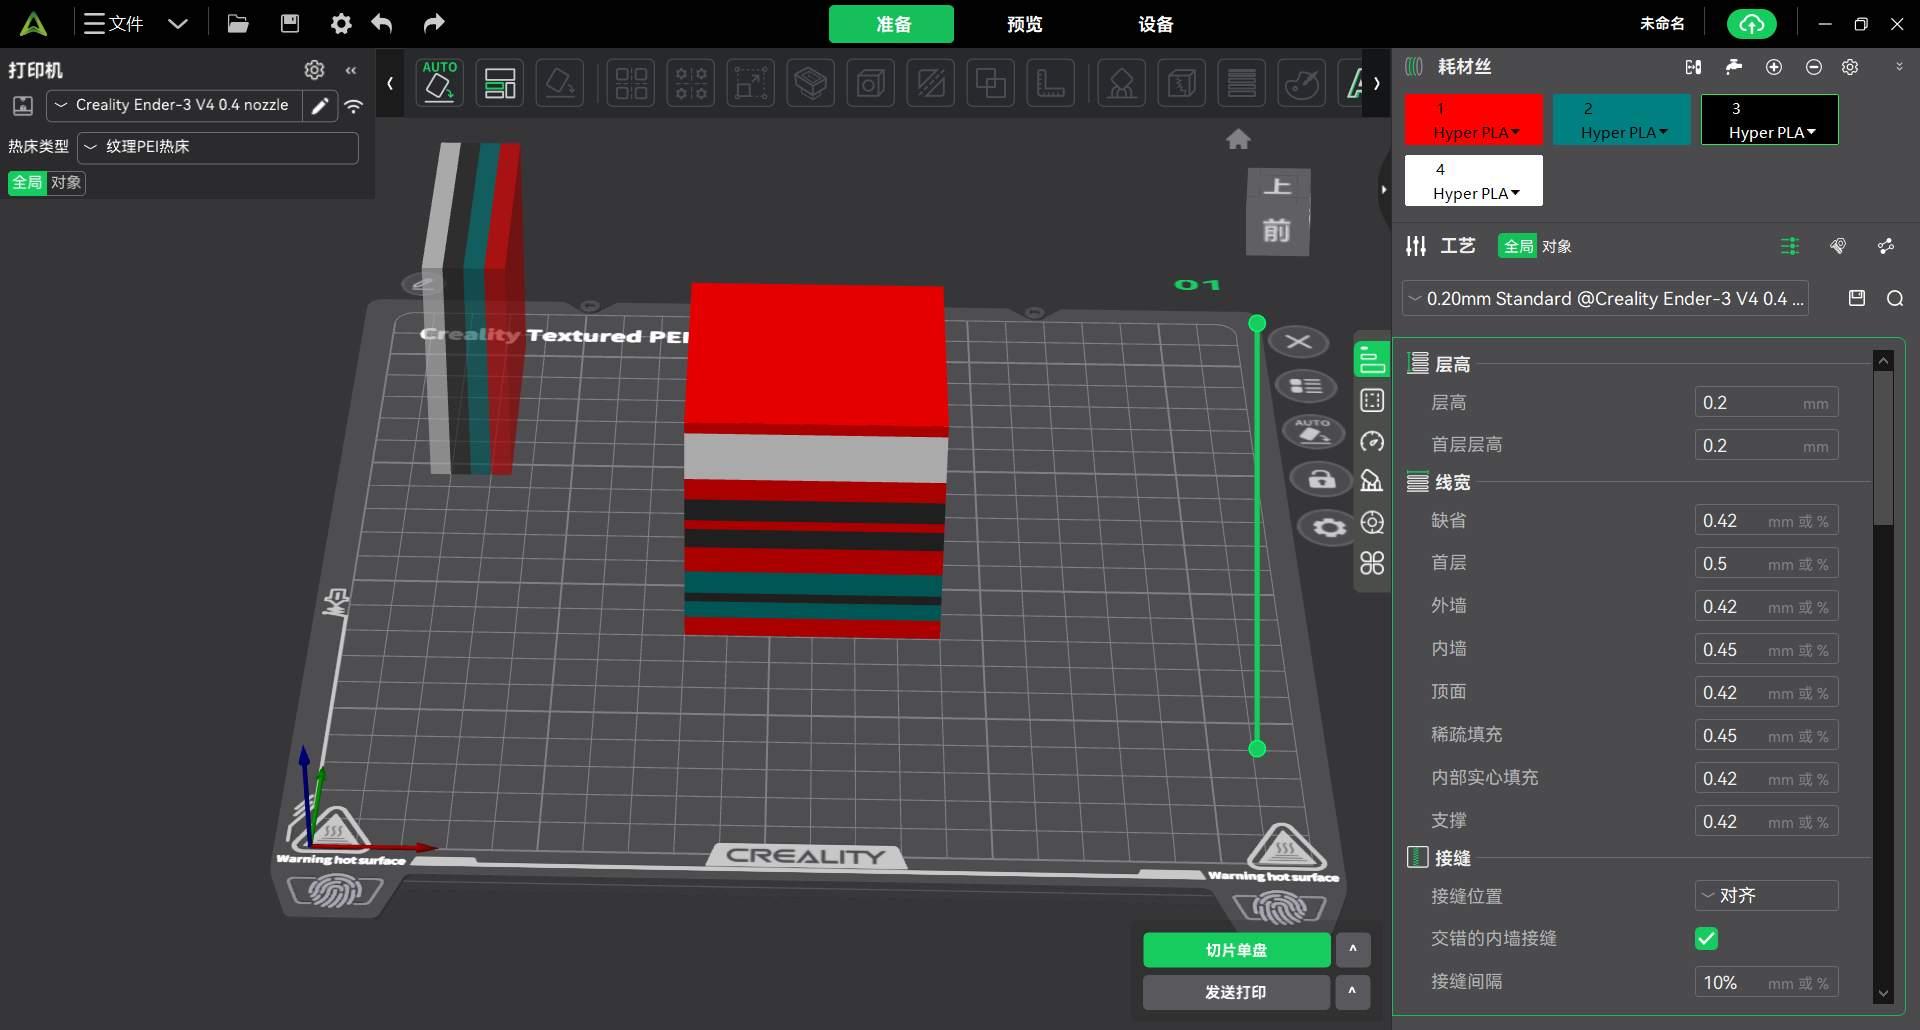
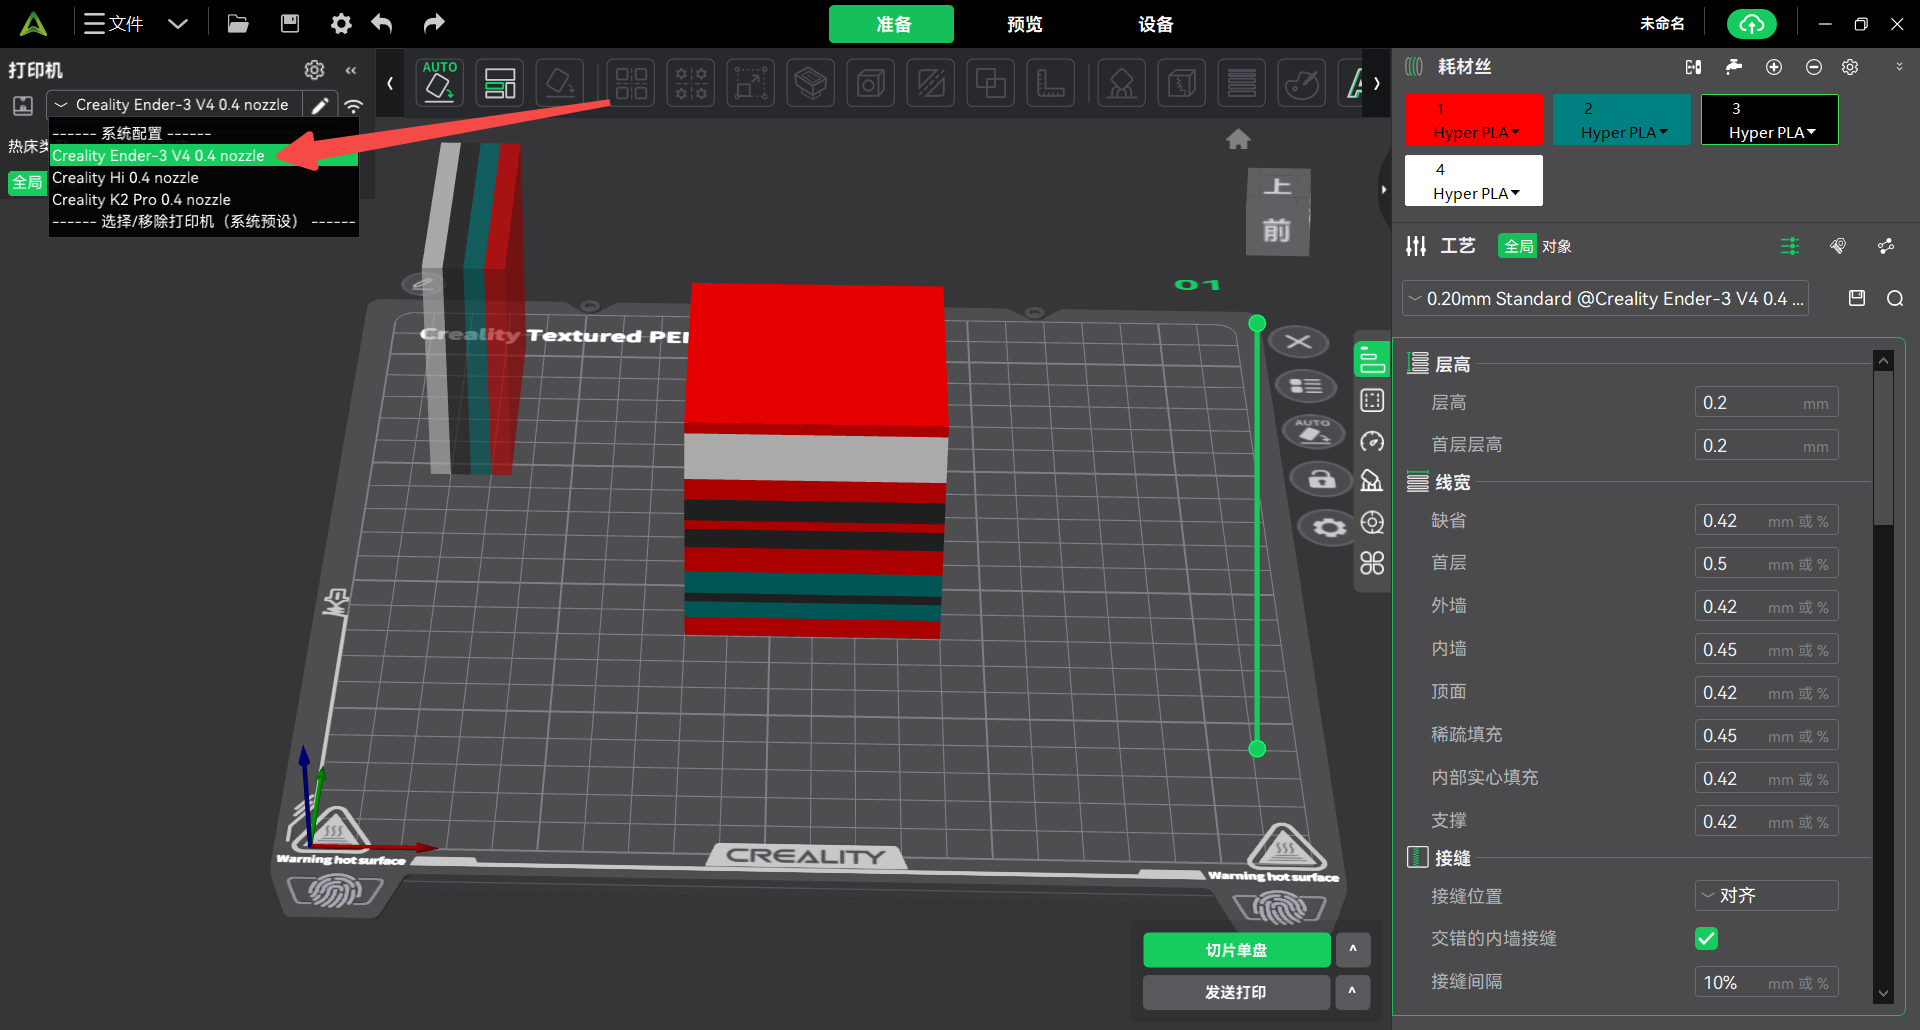
Change the printer to Ender-3 V4
Change the filament to HyperPLA or others.
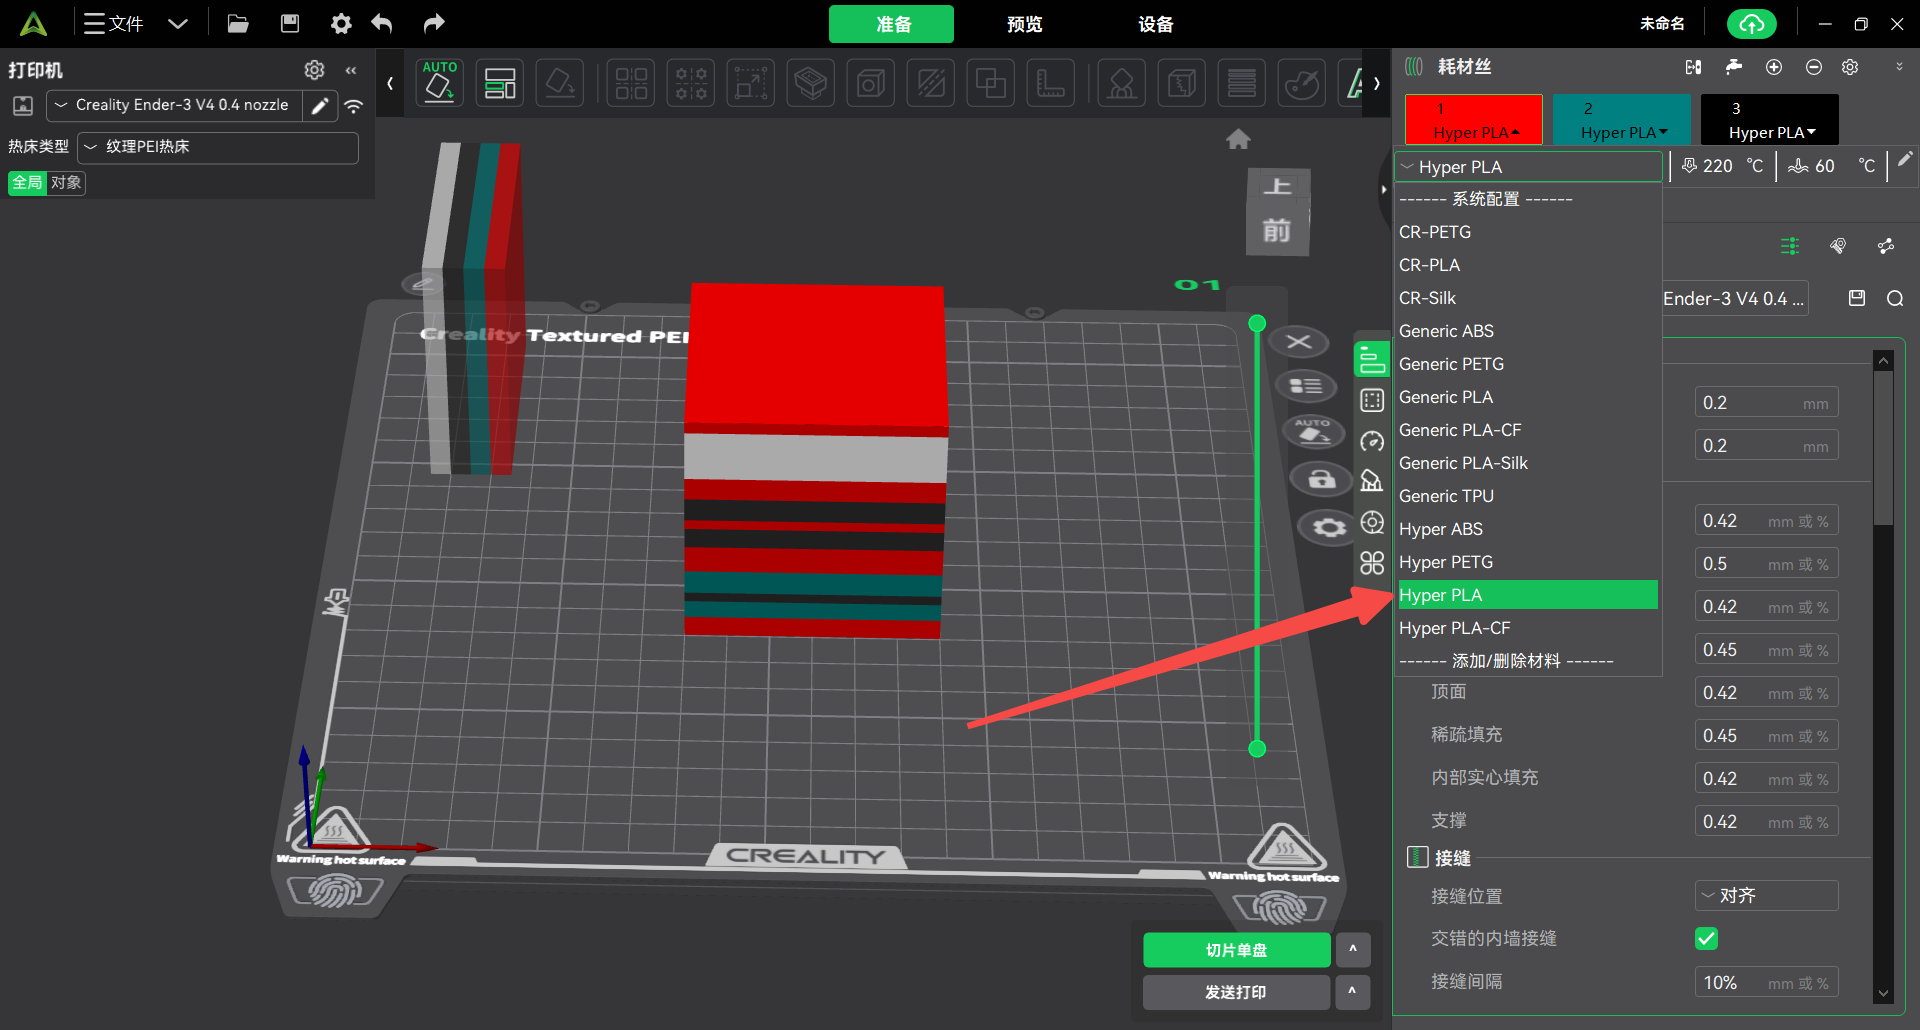
Start to slice the model
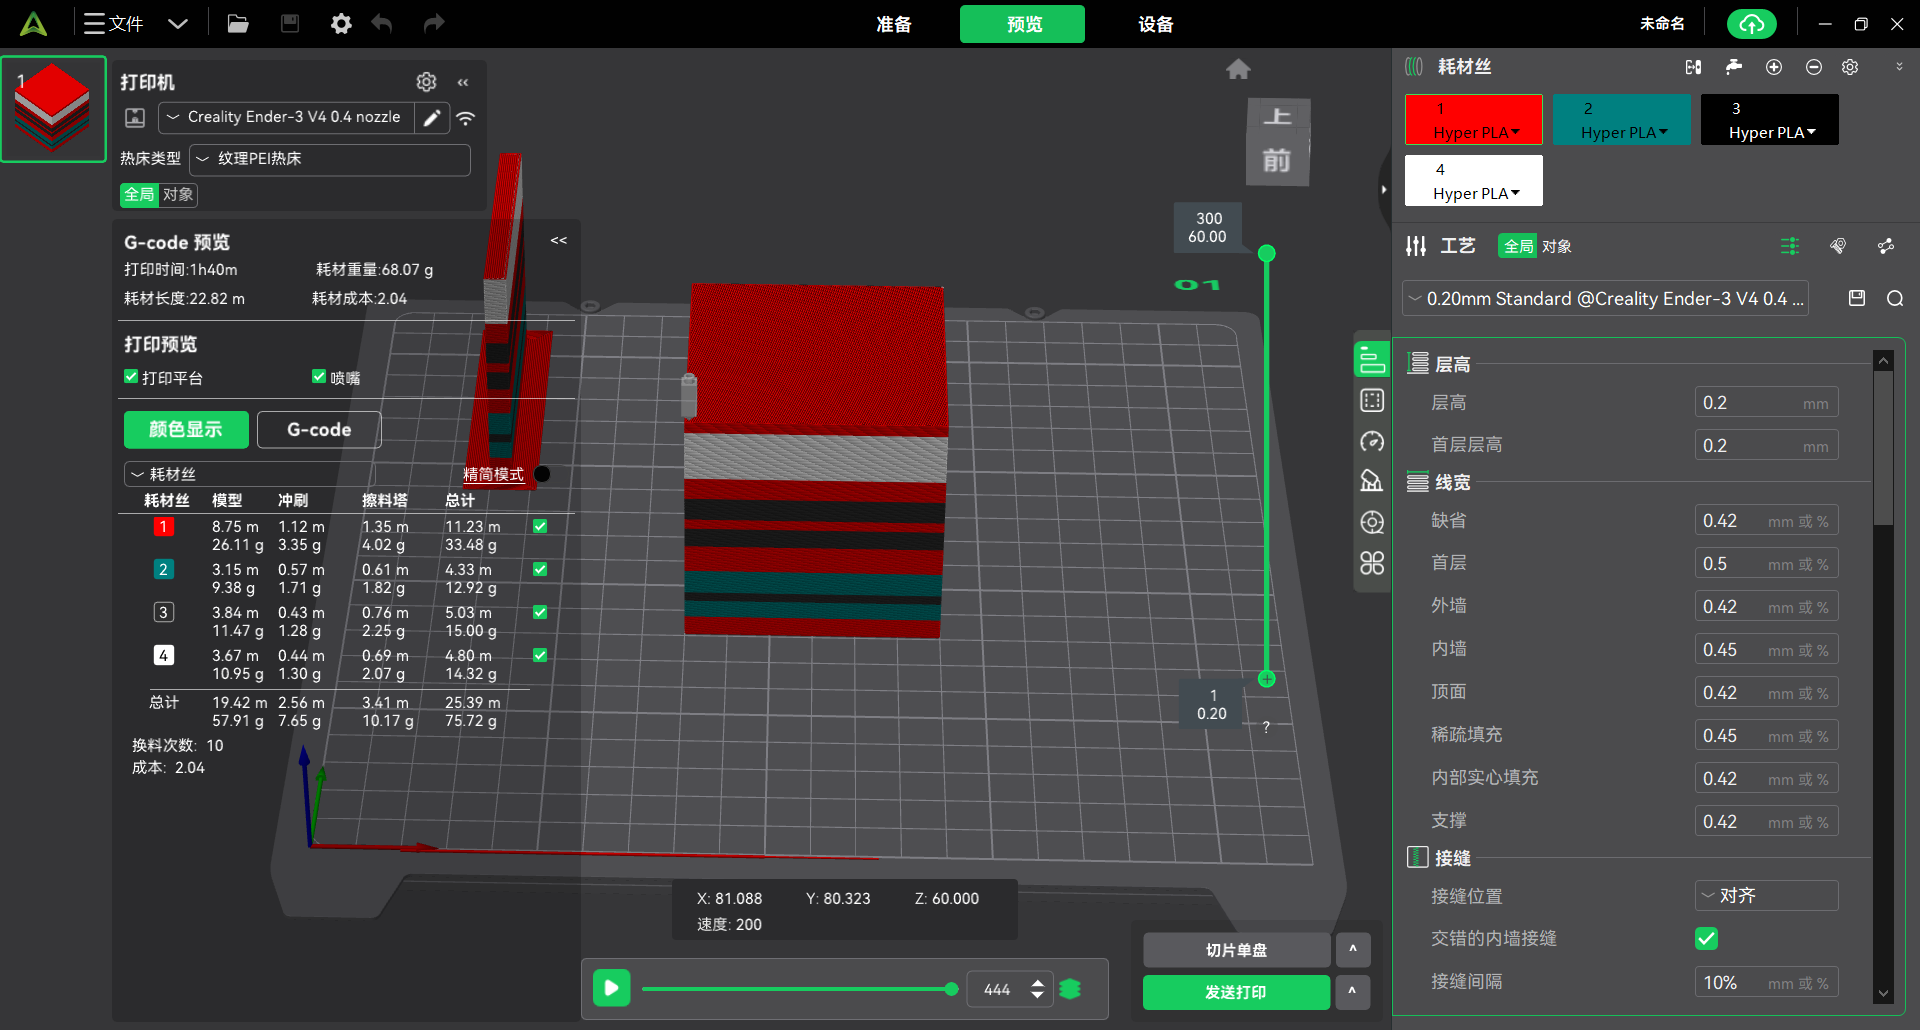
Slice and select the printer, and check whether the mapping of the filaments is correct
[The printer that is printing only supports to send gcode instead of printing; Printer that fails to connect to CFS and non-multicolor printer do not support filament mapping]
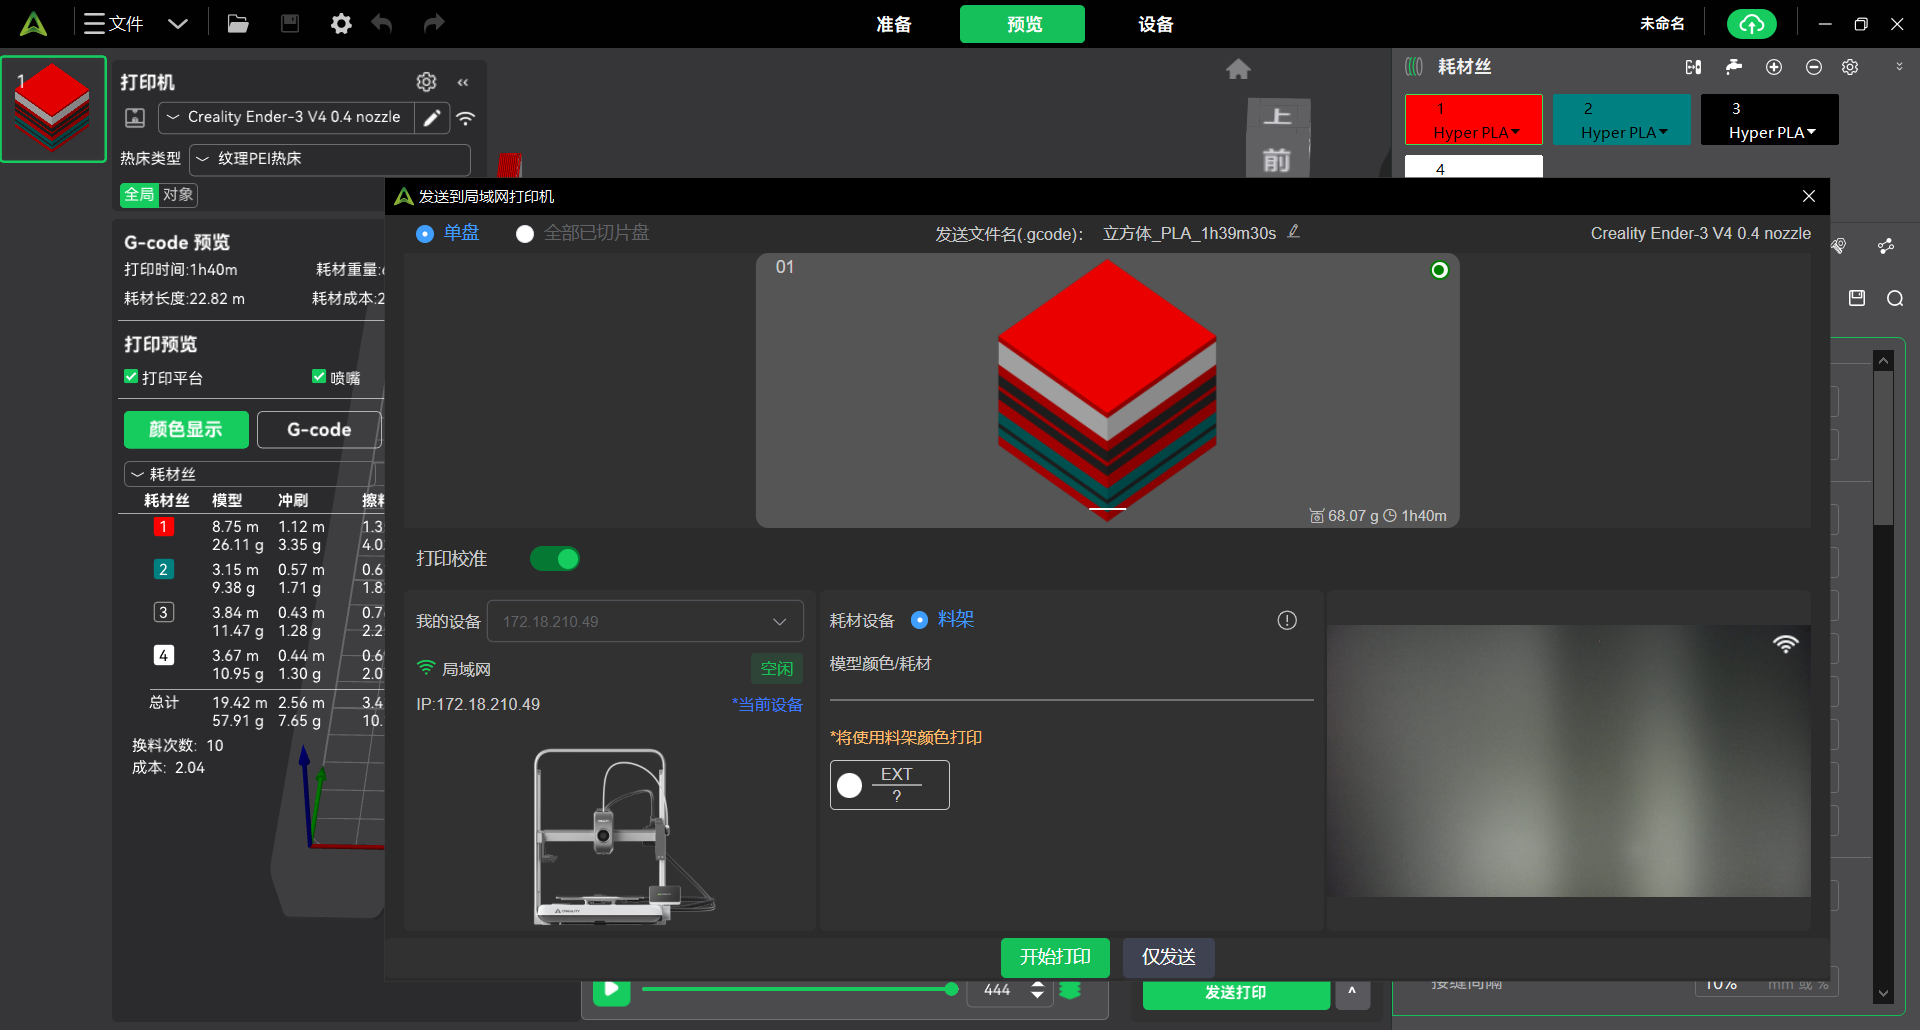
The filaments at slicing time automatically correspond to the filaments of CFS. This process is called automatic mapping.
If you are not satisfied with Automatic mapping, you can manually select the filaments. This process is called manual mapping.