¶ Connection Method for Creality Hi+CFS
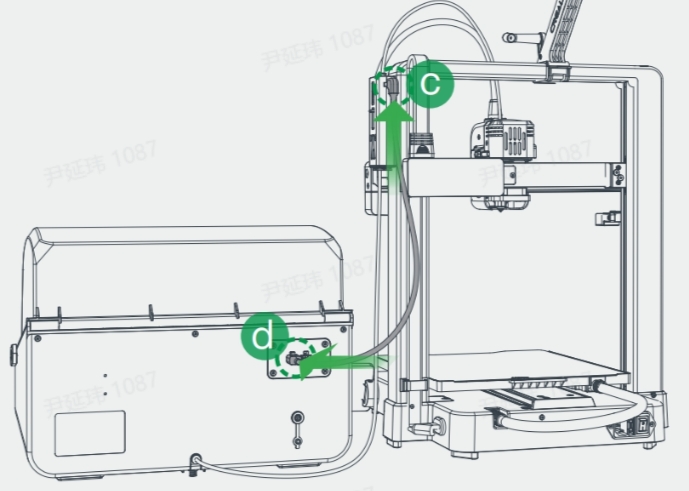
(1) The above PTFE tube cutting dimensions are calculated based on the minimum distance of 15~20cm required between CFS and Creality Hi, for reference only;
(2) If the PTFE tube ends are deformed, manually restore them to circular shape to prevent filament jamming.
(3) The buffer tube connector should be able to lift up with the PTFE tube. If it cannot lift with the PTFE tube, it may cause detachment during printing.
 |
 |
¶ CFS Filament Editing/Reading
¶ 1. Loading/Unloading Filament
Loading: Place filament into CFS, align filament end with corresponding slot's PTFE tube, gently push in until you feel tension, then release. The filament will load automatically.
Unloading: First ensure filament is not in the extruder, then simply pull out the filament.
If filament is in the extruder, click “Retract” and wait for filament to return to CFS before removing.
¶ 2. Editing Filament
When RFID filament is inserted, the machine automatically reads filament information, no editing needed. To view filament parameters, select the filament and click “Edit” button.
When regular filament is inserted, after automatic tension reading, interface will show '?'. Click “Edit” button to manually edit filament.

Click edit button, select Brand-Material Type-Material Name-Color in sequence, then confirm.
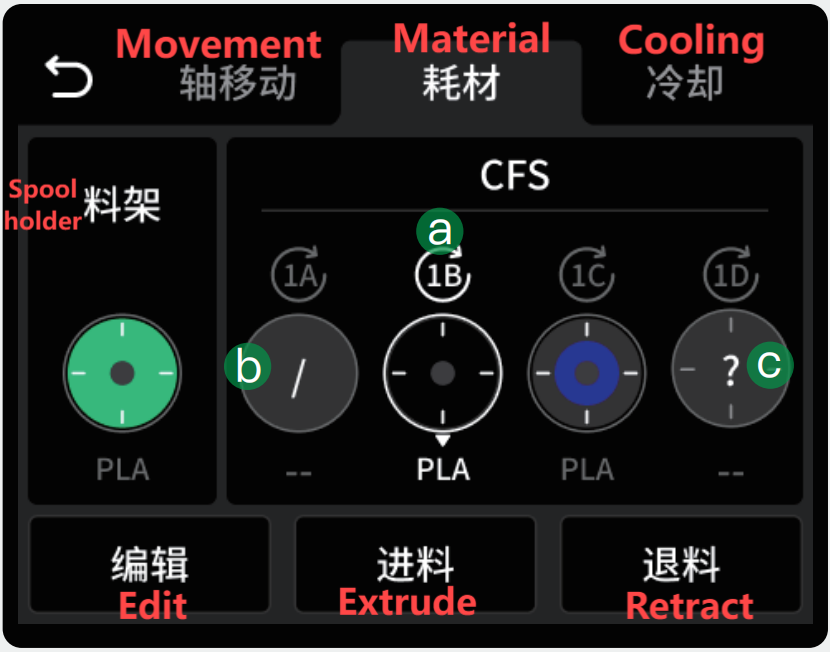
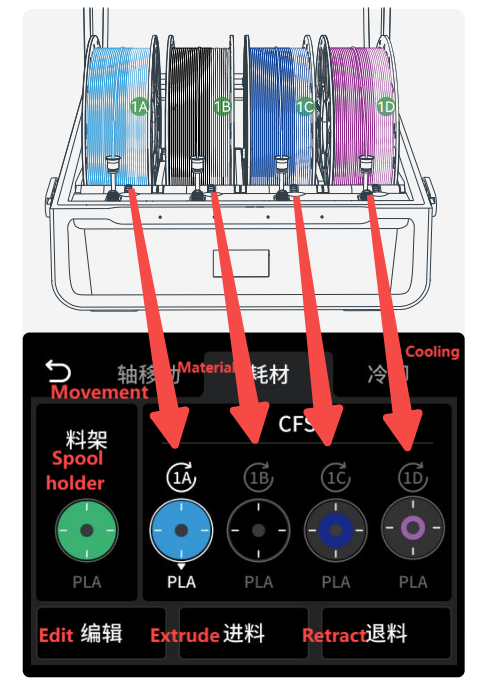
¶ 3. Filament Management Interface Introduction
Filament management page divided into external spool holder [left] and CFS [right]
Code above filament in CFS like 1A indicates slot number

a: Pre-load button for reading filament. Successful reading shows remaining amount and color; failed reading shows edit button with '?' display
b: Empty slot status, shown as '/', editing not supported
c: RFID unread status, shown as '?', requires manual editing via “Edit” button
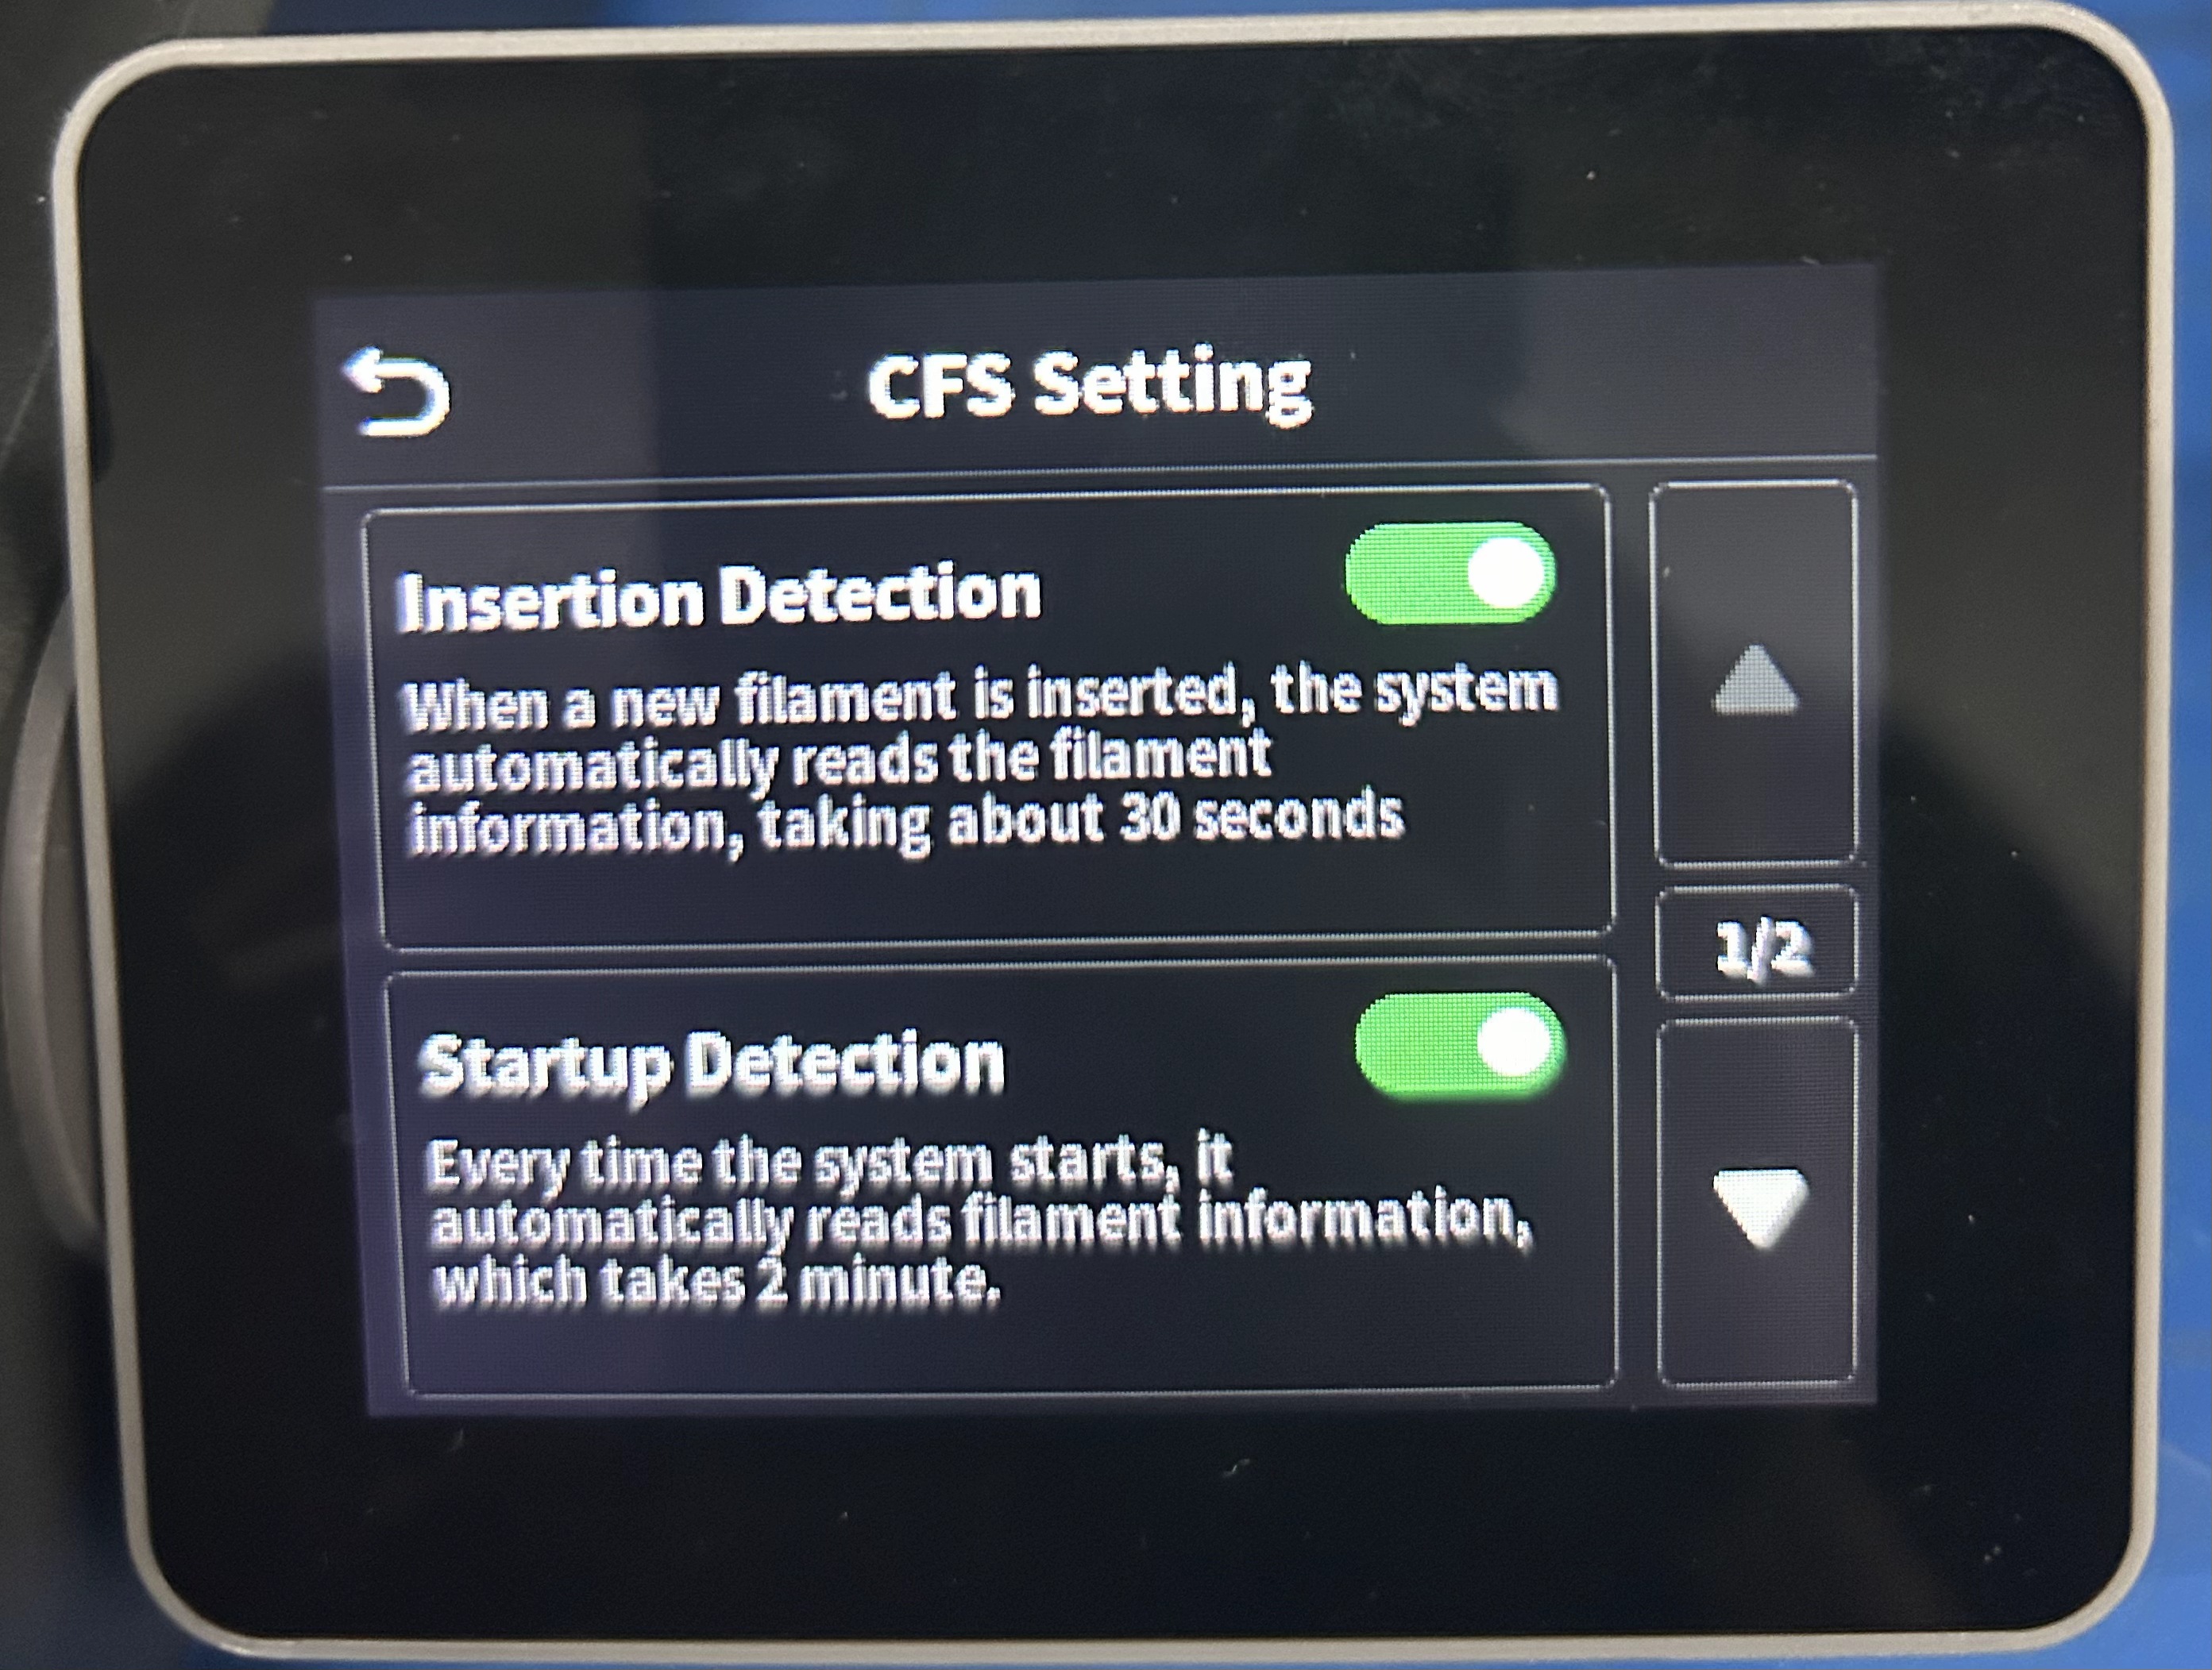
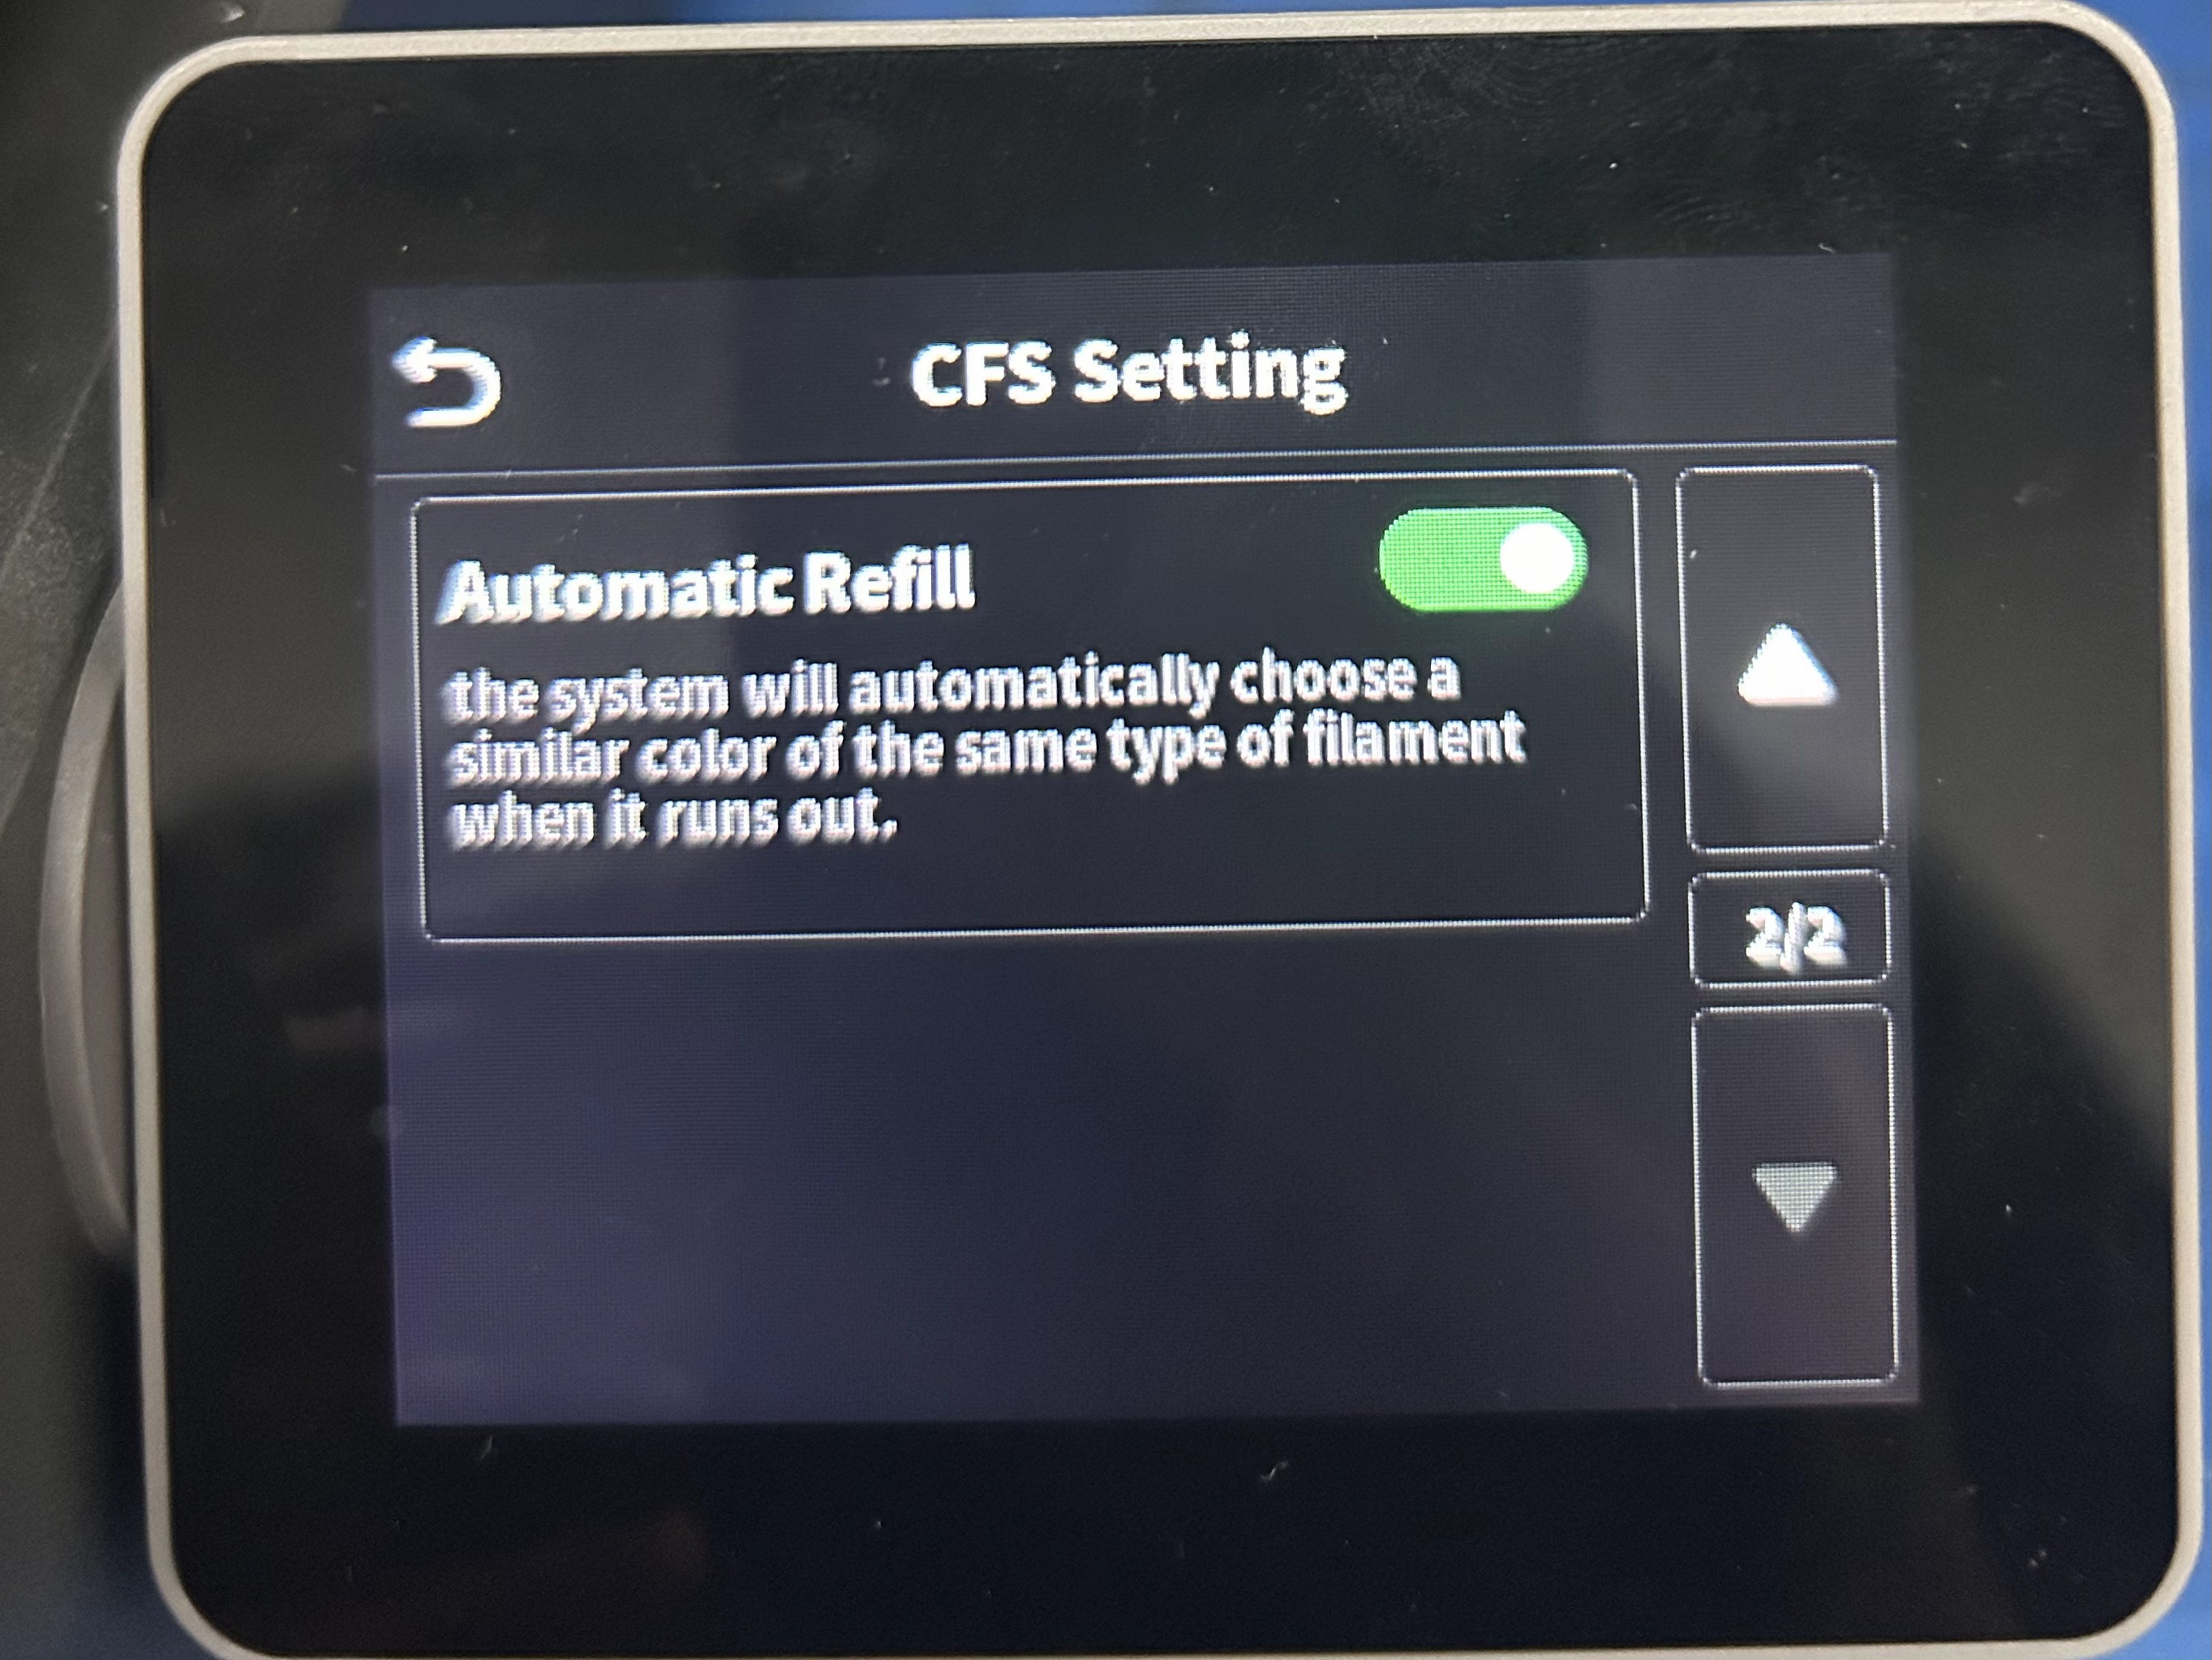
¶ 4. CFS Setting
Click CFS Setting button to enter CFS setting page.
 |
 |
Insertion Detection is RFID filament reading function, can be disabled for regular filament
Startup Detection performs sequential pre-loading RFID reading at startup
Automatic Refill button activates when same color/type filament runs out, automatically continues with identical filament from another slot without prompt
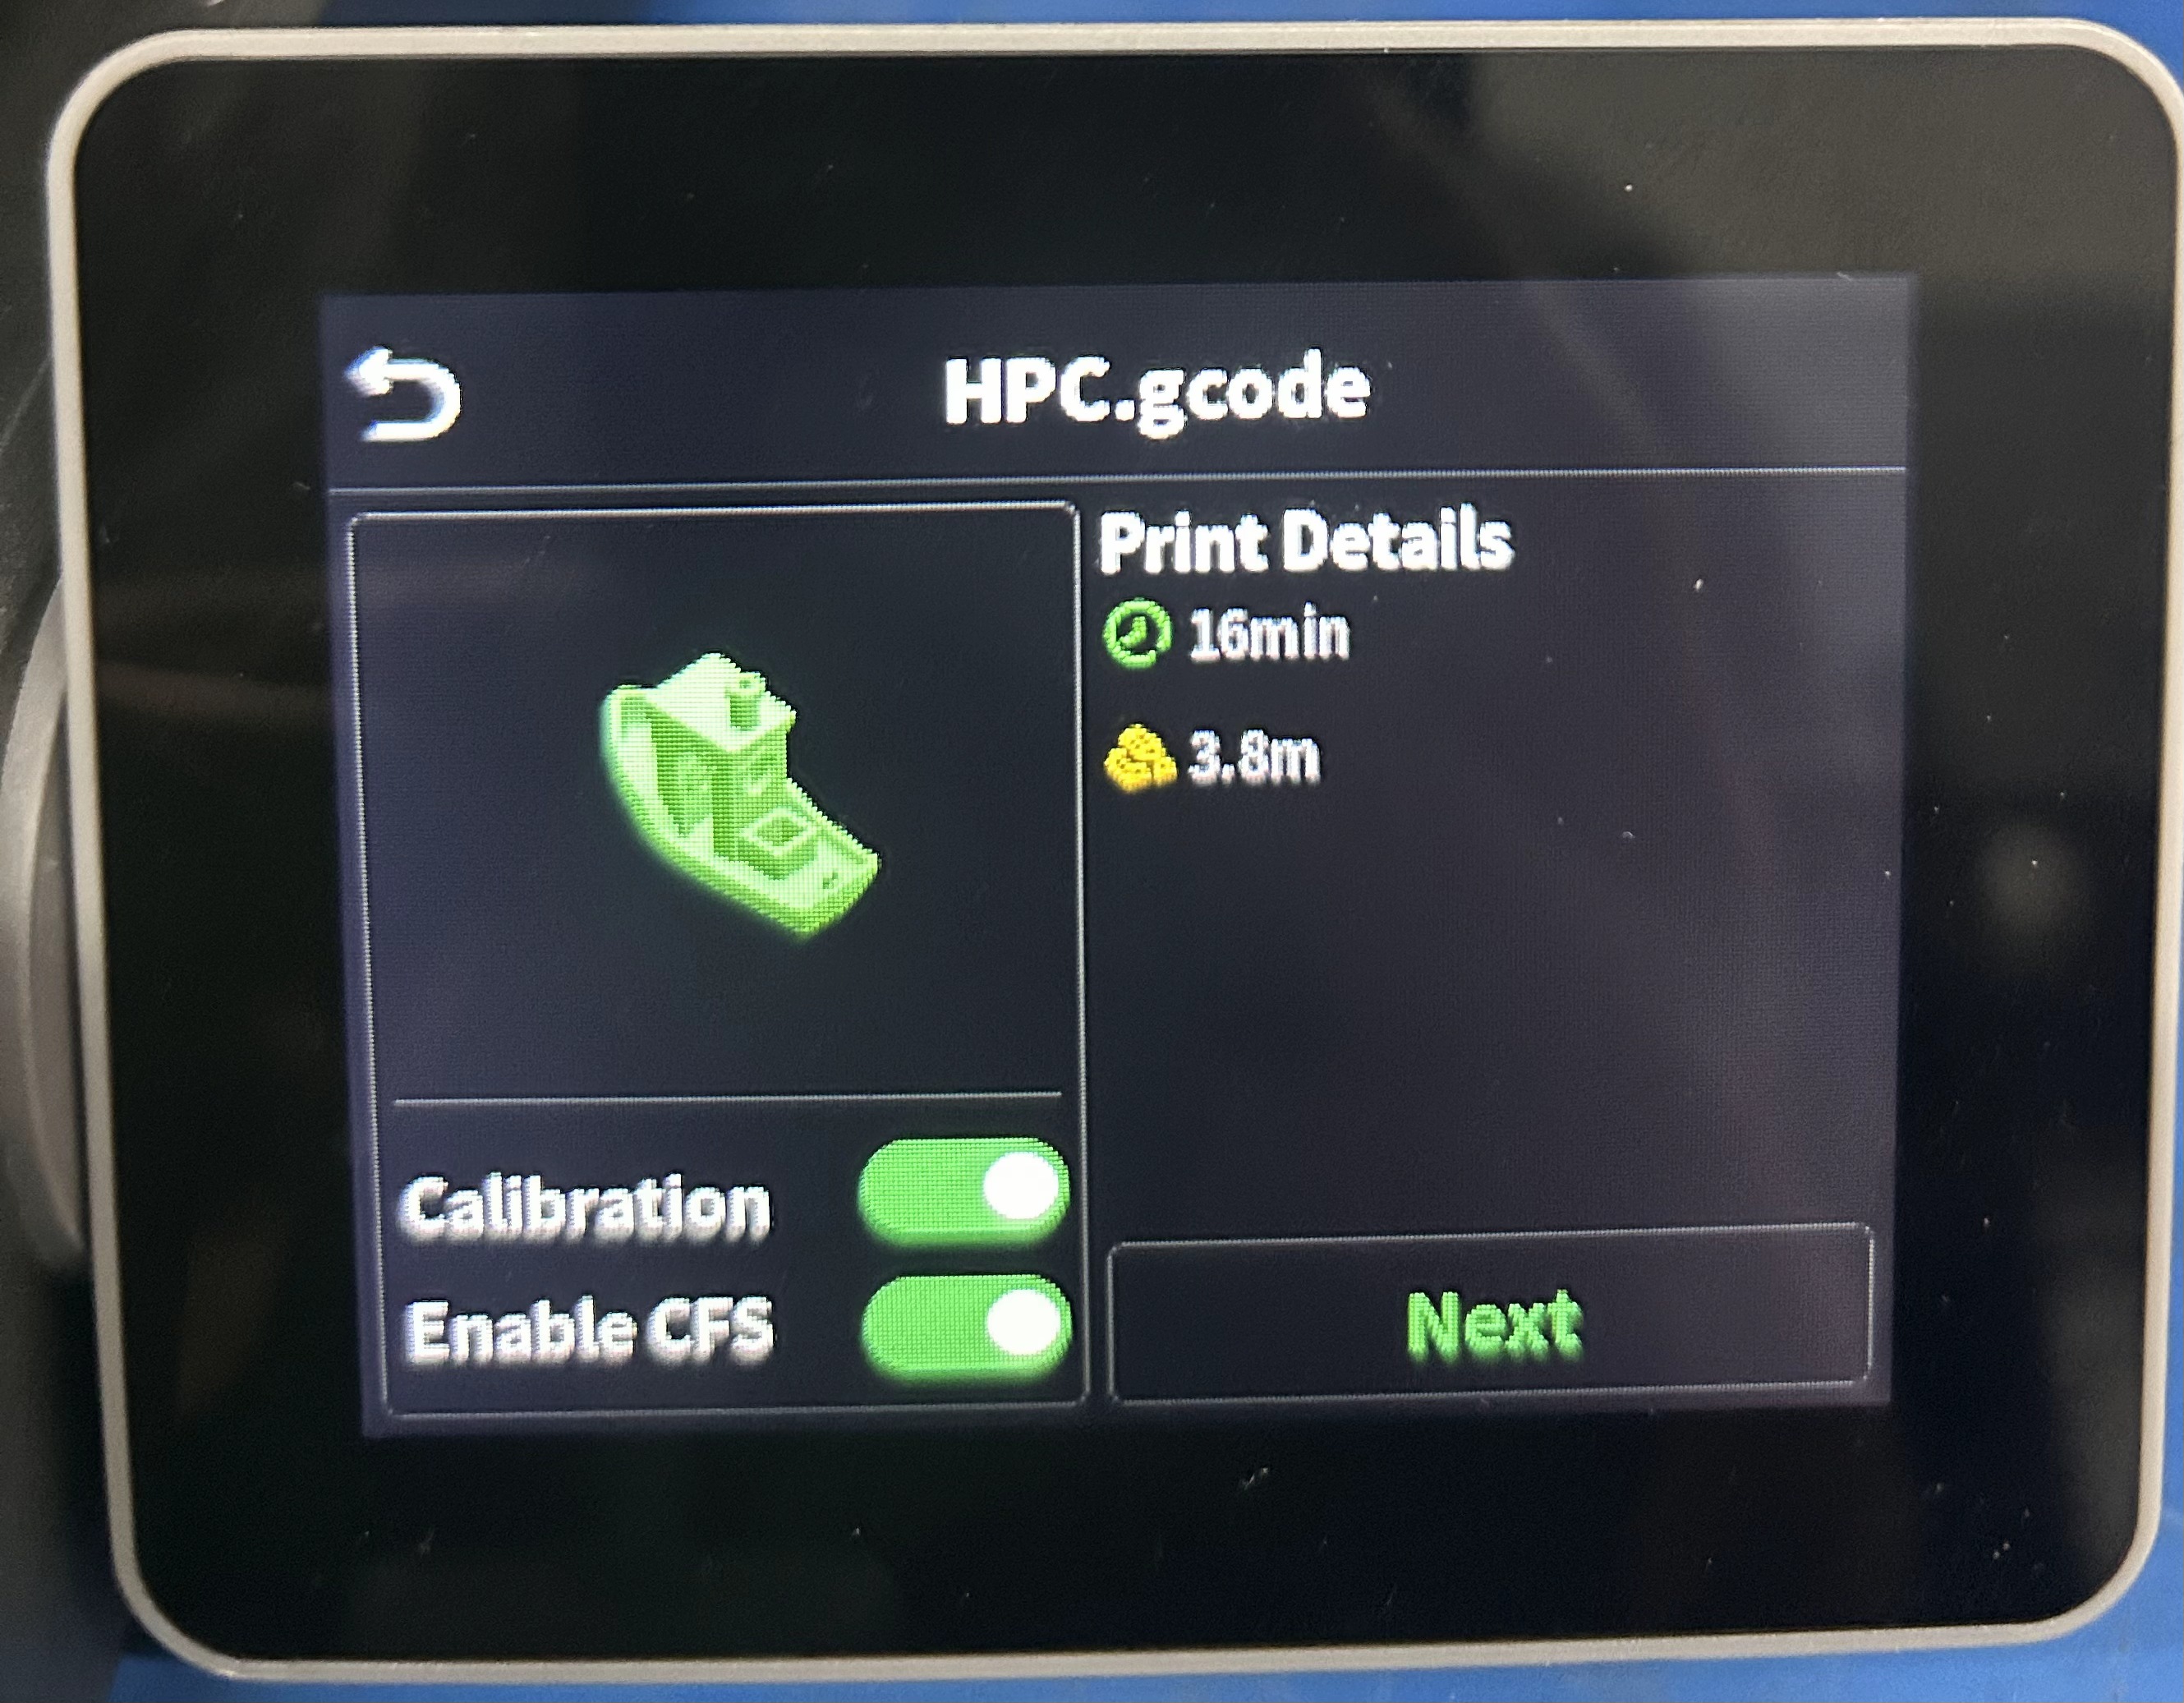
¶ Screen Printing
Click file on screen, click print. Check Print Calibration for auto-leveling.
Enable Multi-color System uses CFS filament; otherwise uses spool holder filament, multi-color files treated as single color
Left shows file's material colors and types. Right shows file-to-slot mapping status.
Failed mapping shows '--', requires manual material selection
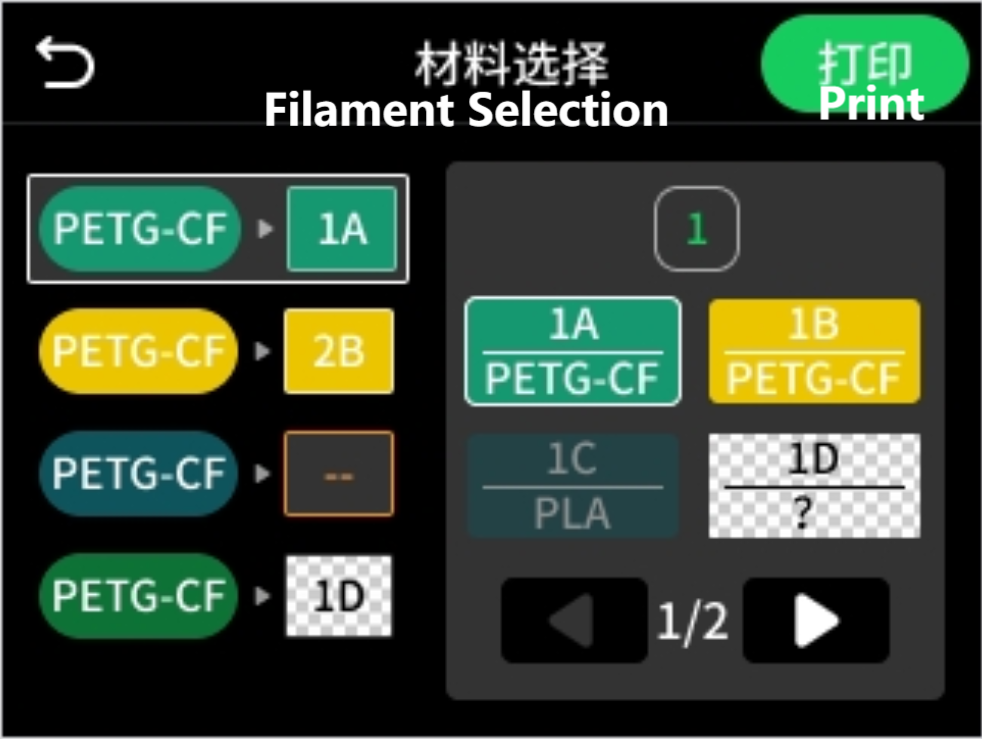
After clicking print, CFS automatically feeds without manual operation.
¶ Where to Find Multi-color Models?
¶ Slicing and Printing Process
Download and drag model file into slicing software (e.g. Creality Print).
Change machine to Creality Hi
Change material to HyperPLA or others
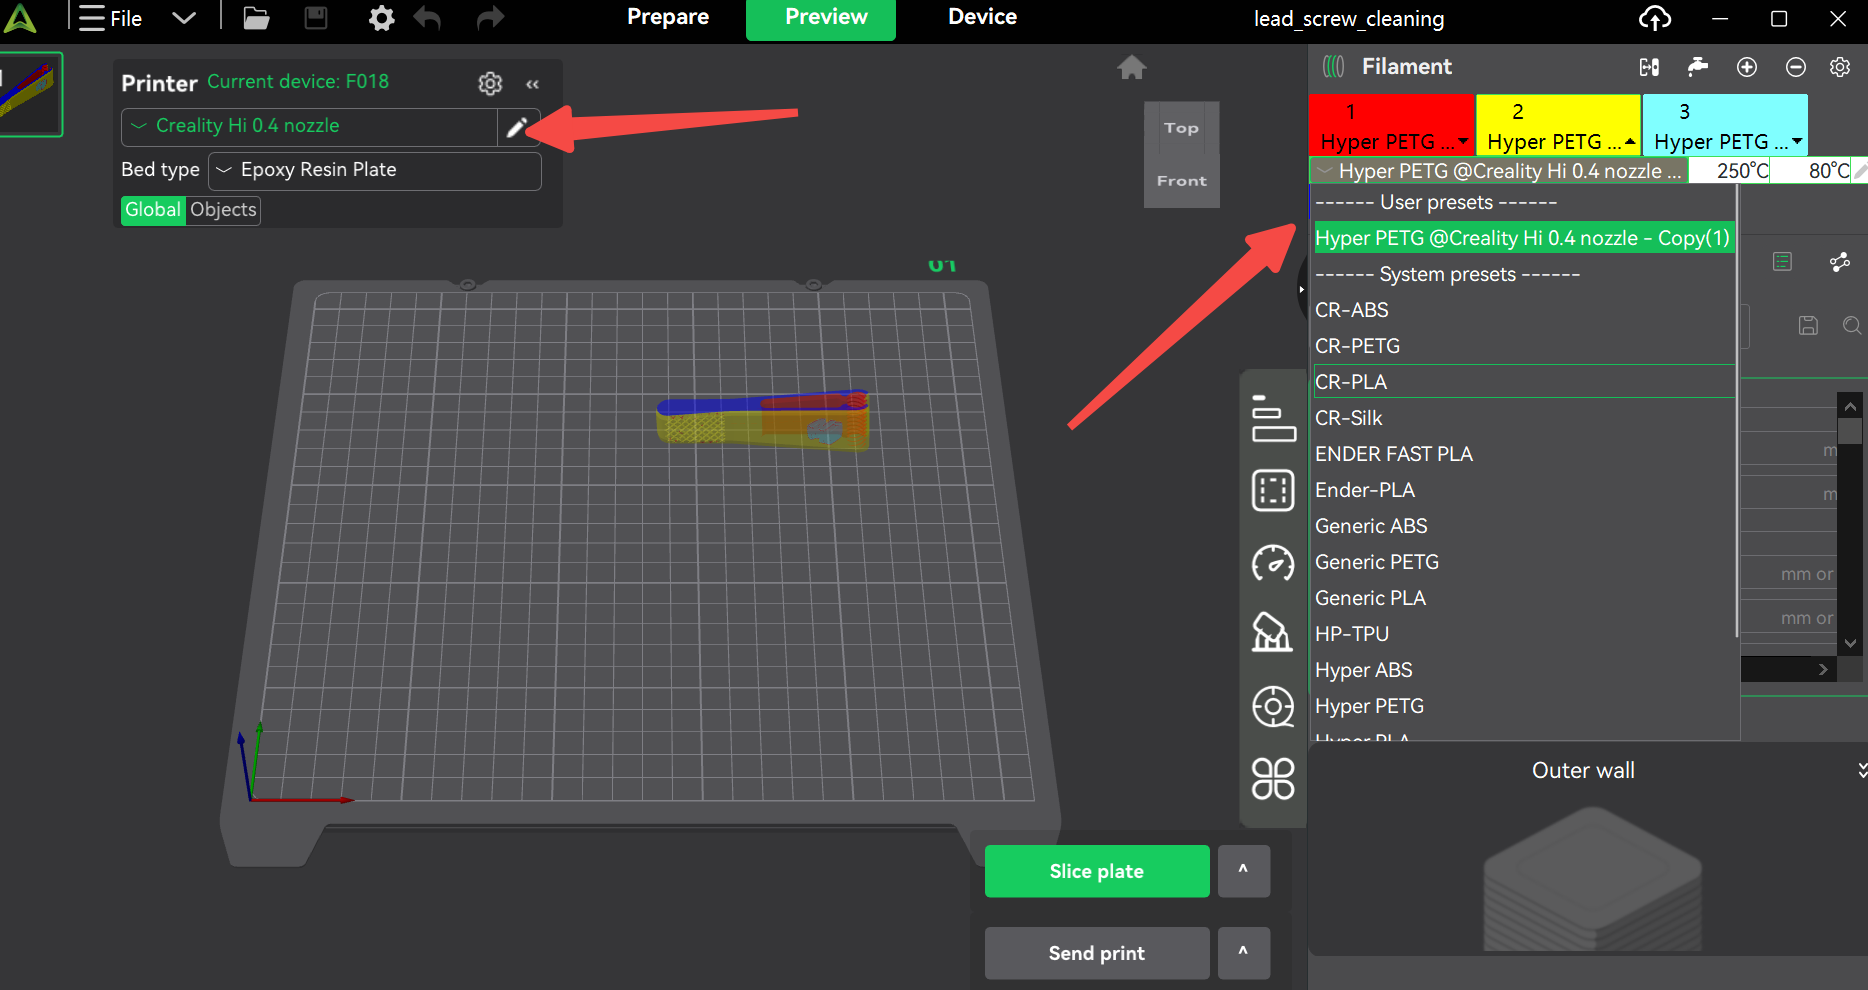
Slice
After slicing, select machine and check filament mapping.
[Printing machines only support gcode sending, not printing; machines without CFS and non-multi-color machines don't support filament mapping]
Automatic mapping refers to automatic correspondence between slicing filament and CFS filament.
Manual mapping is needed when automatic mapping is unsatisfactory.