¶ 1. Tools
Cutting pliers
L-shaped hex wrench
¶ 2. Steps
¶ 2.1 Remove
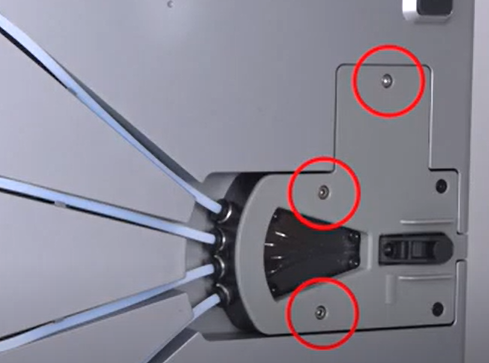
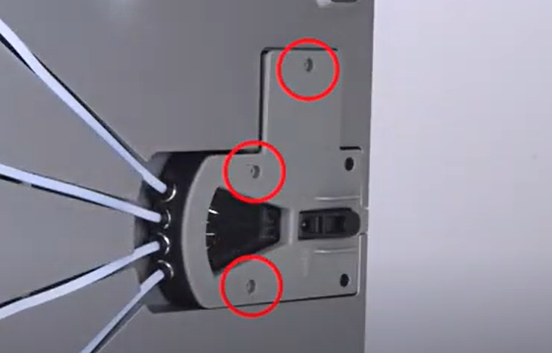
Remove the hub outlet assembly by unscrewing three screws.

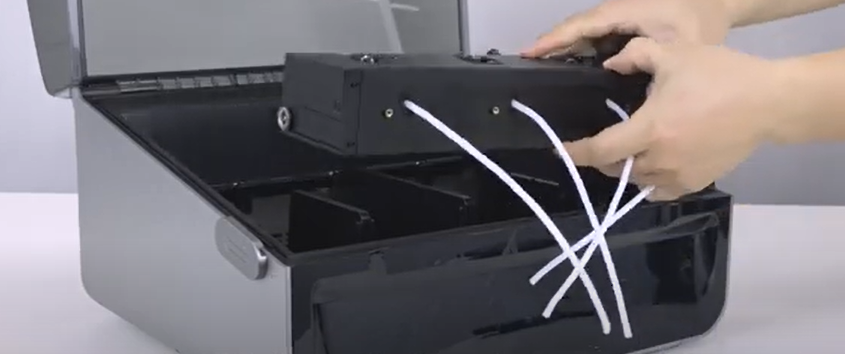
Remove the filament tube.

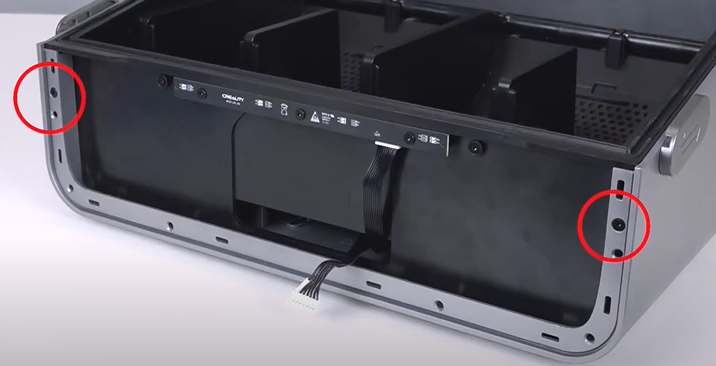
Unscrew three screws.
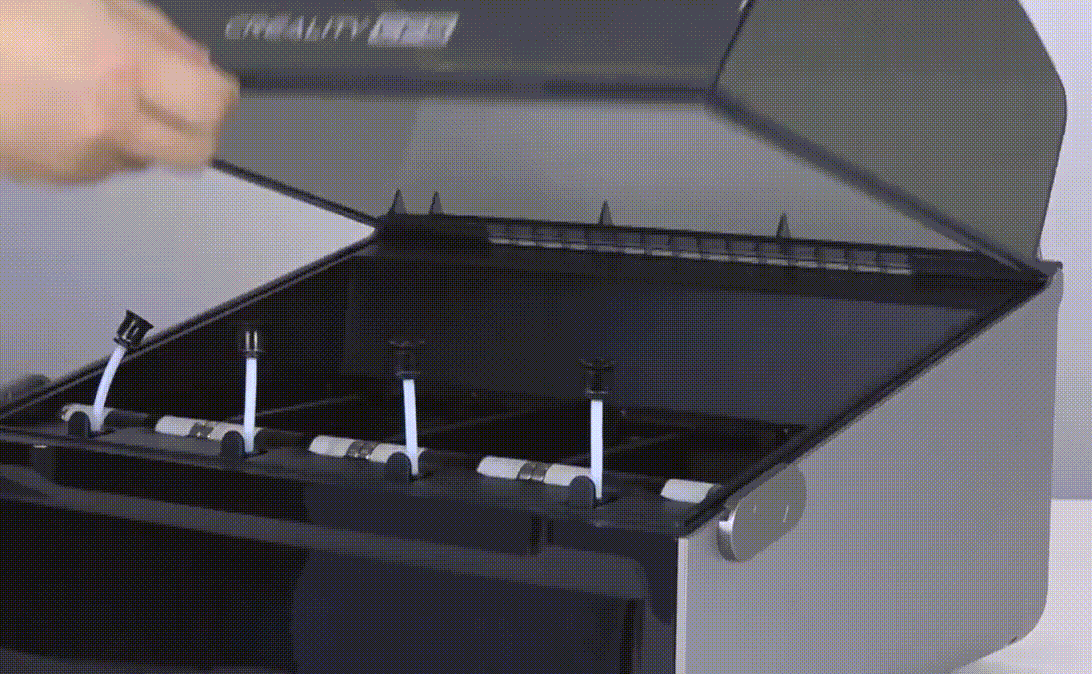
Position the CFS correctly and open the top cover.
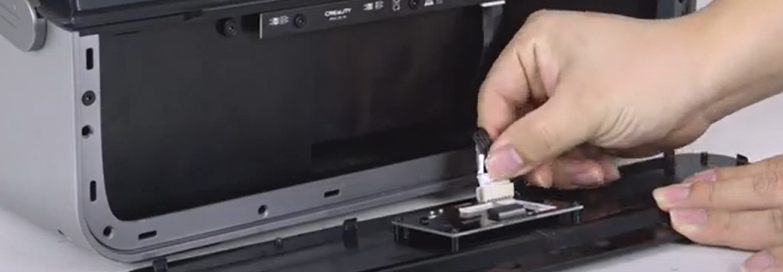
Remove the independent filament intlet.

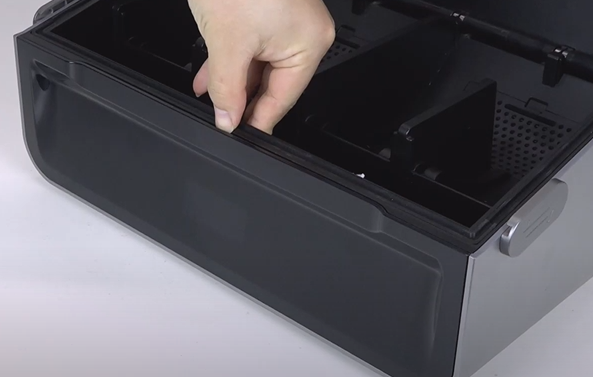
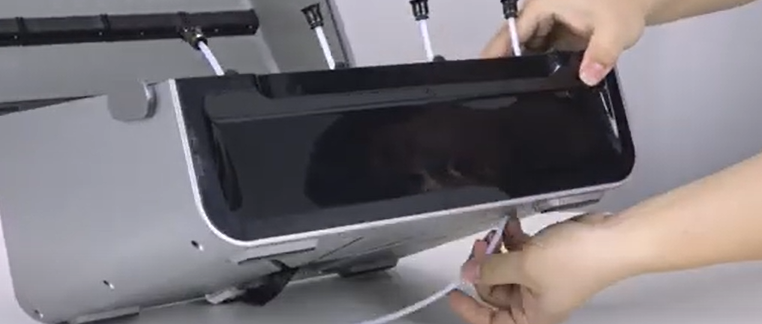
Remove the front cover.

Unscrew two screws from the front cover.
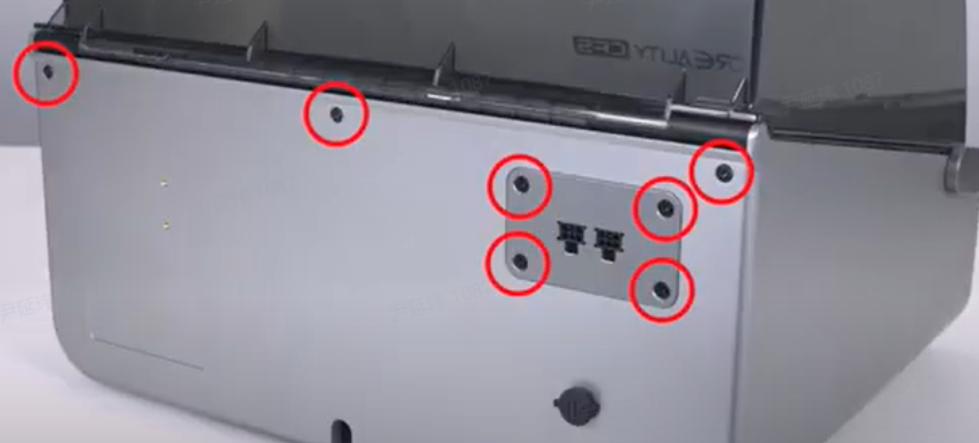
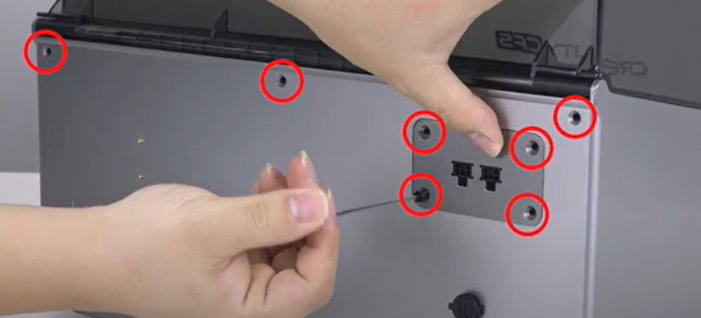
Remove 7 screws.
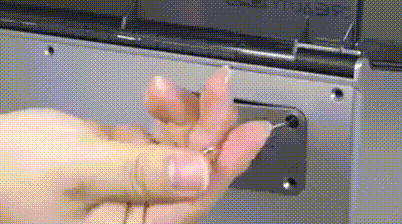
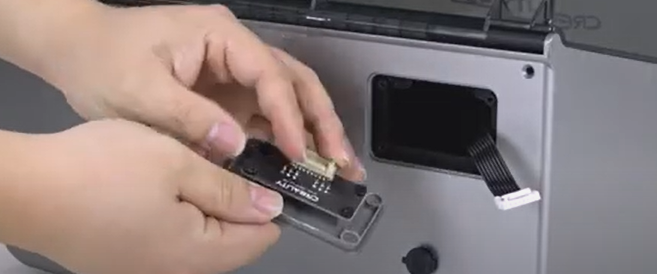
Remove the adapter board.
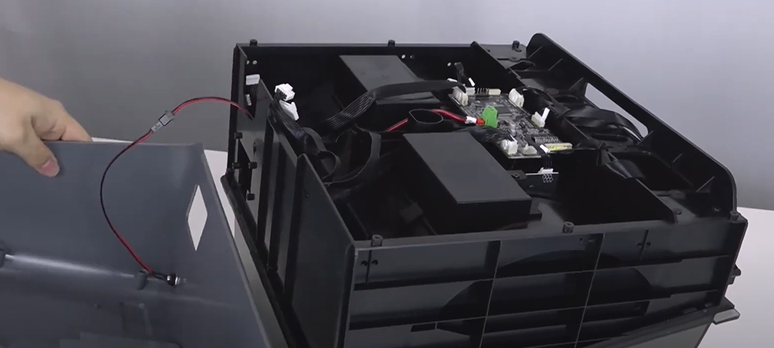
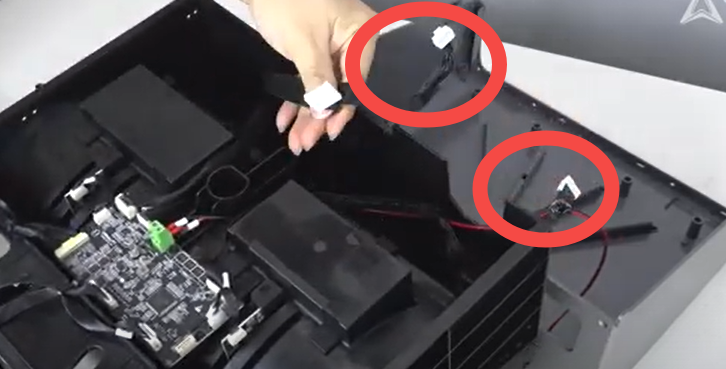
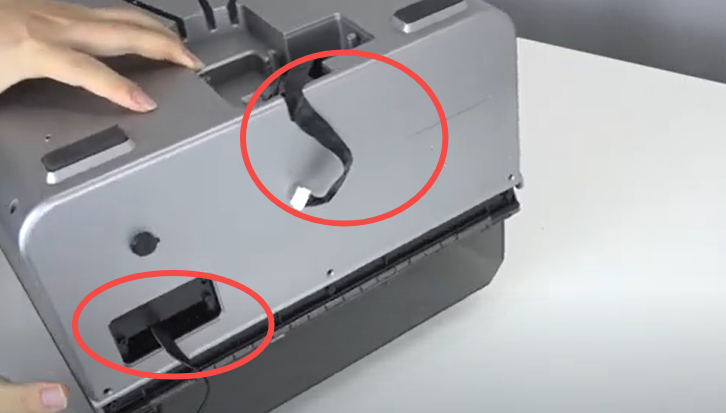
Remove the bottom shell.

¶ 2.2 Disconnect
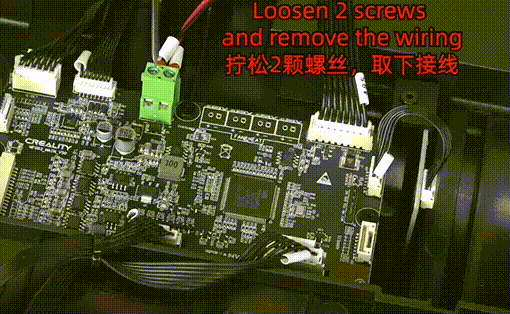
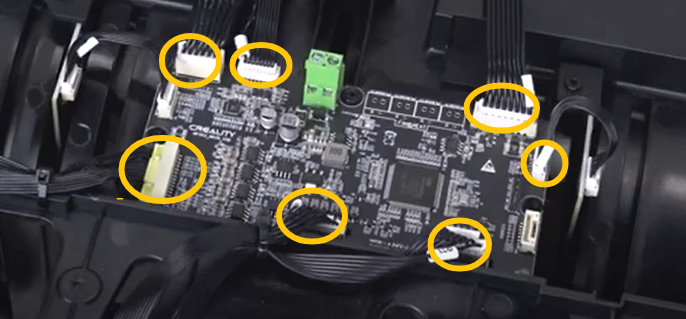
Disconnect the mainboard wiring
Note: Be careful not to damage the wires or ports

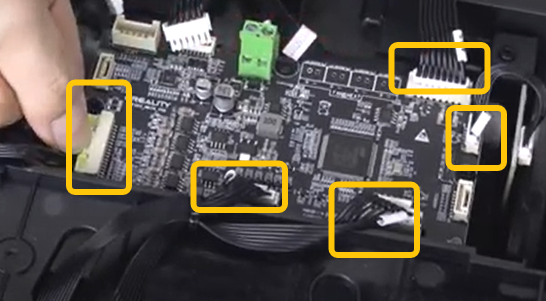
Disconnect the wiring from the mainboard
Note: When cutting the yellow glue with cutting pliers, be careful not to cut the wires
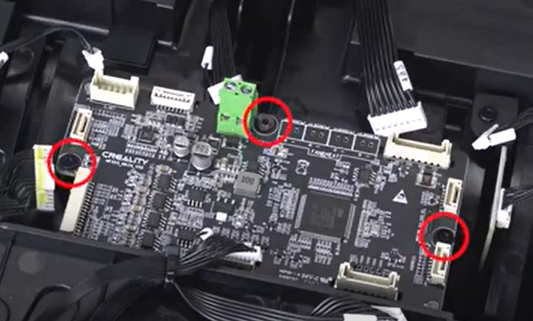
Remove the mainboard by unscrewing three screws
¶ 2.3 Install
Install the new mainboard and tighten the screws
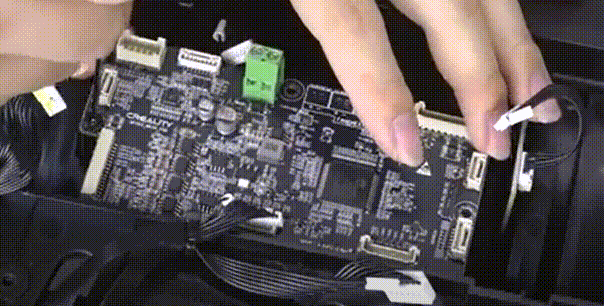
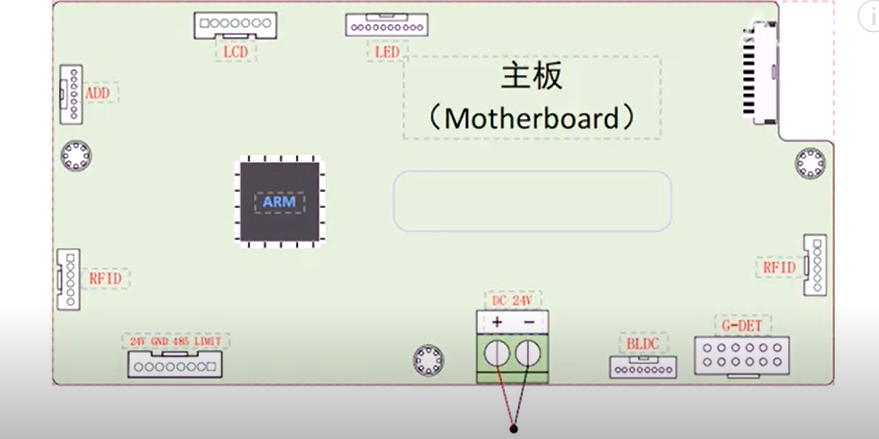
Connect the mainboard wiring, make sure not to plug wires into wrong ports
Plug in the wires and tighten the screws

Install the bottom shell, pay attention to exposed wiring
Tighten two screws on the front cover

Install the front cover
Install the filament intlet, place the filament tube properly, and plug in the wires
Install the adapter board
Install 7 screws
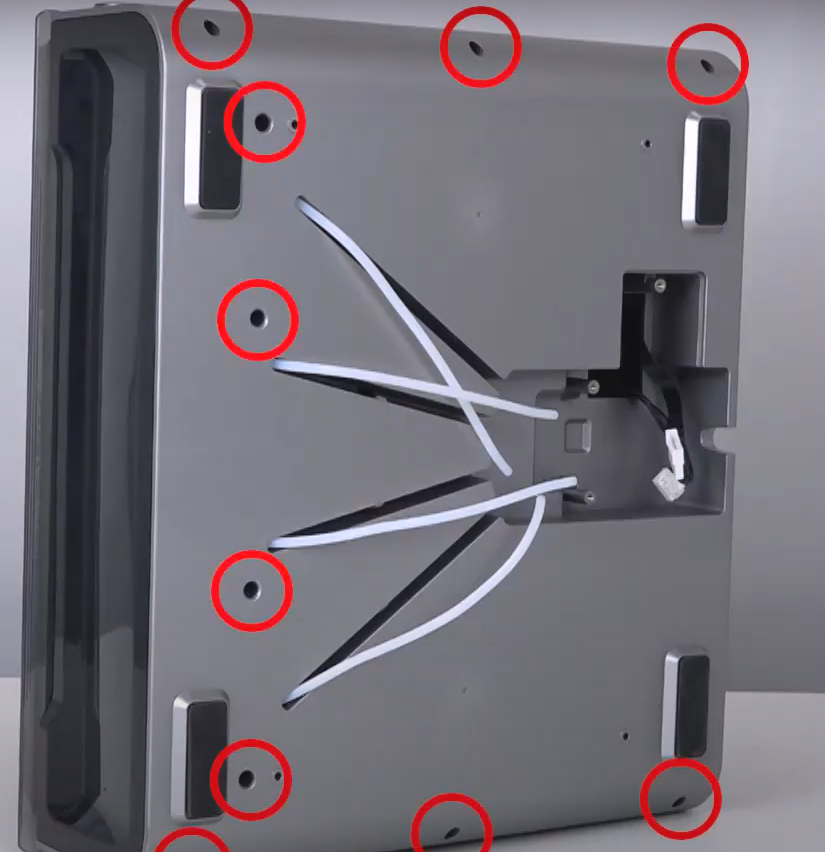
Turn the machine upside down and tighten 10 screws

Install the hub outlet assembly
Tighten three screws and organize the filament tube
¶ 3. Video Tutorial
Replace CFS Mainboard
https://youtu.be/L7RsgGiJlEQ