¶ 1. How Does Creality Print Aid Speedy 3D Printing while Keeping the Quality
¶ 1.1 Value of requirements and key breakthroughs
Slicing software is the copilot for 3D printers, and an ideal slicer is crucial to delivering excellent 3D prints. So we have developed Creality Print, a powerful FDM slicer that stands out among its peers.
Recently, we have seen a growing number of quality, high-speed FDM 3D printers such as Creality K1 hit the market. But the slicers have failed to catch up. In fact, by cranking up the speed in those slicers will get you neither speed nor quality, but a complete failure.
To fit in the era of speed, Creality has re-engineered the functions related to speed comprehensively and launched the ground-breaking Creality Print 4.3. Now users can fully tap into the speed potential of their 3D printers and also enjoy decent print quality.
Choosing high-speed printing comes with challenges like increased vibrations in machines, stronger nozzle-to-printed-part contact, and the need for quicker cooling to maintain print quality. Achieving this balance between speed and quality requires meticulous adjustments, not just in the 3D printer, but also in the slicing software.
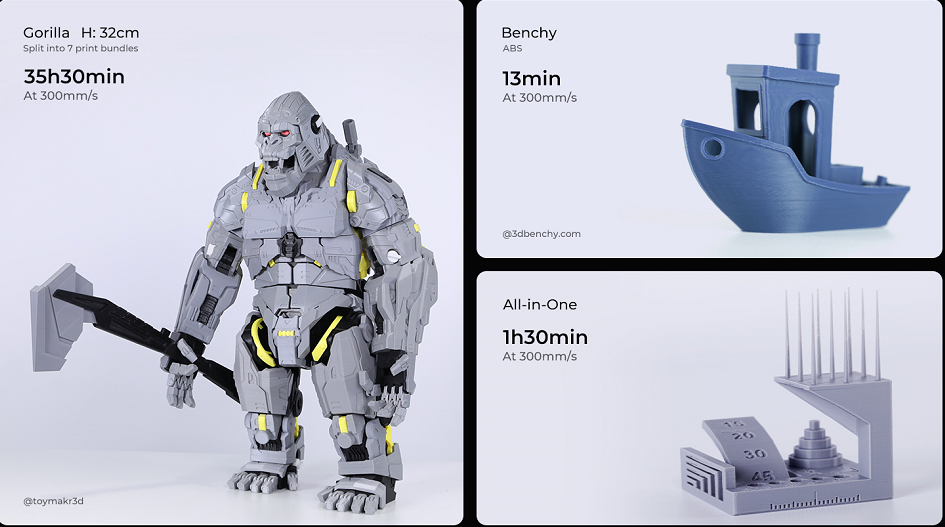
The impact of printing speeds (low speed/high speed) on printing time
¶ 2. Verified ways to improve printing experience and quality:
¶ 2.1.Graded speed reduction for overhang
¶ 2.1.1 Concept description
The overhang refers to a shape of a 3D model that extends outward, so it hangs in the middle of the air without support. A common way to deal with overhangs is by adding support structures. But this is troublesome and may cause damage to the model during post-processing.
When printing large overhangs, a significant proportion of unsupported printing paths can lead to sagging, resulting in collapsed outer walls and concave features along the contours.
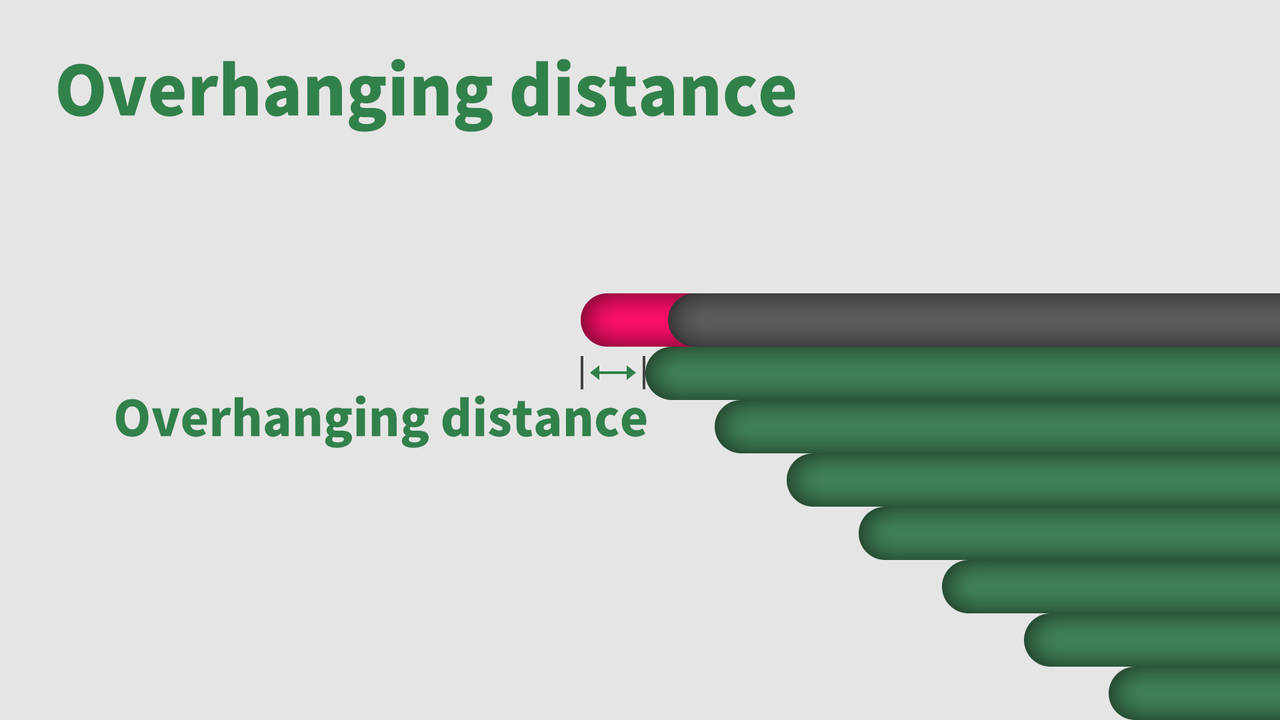
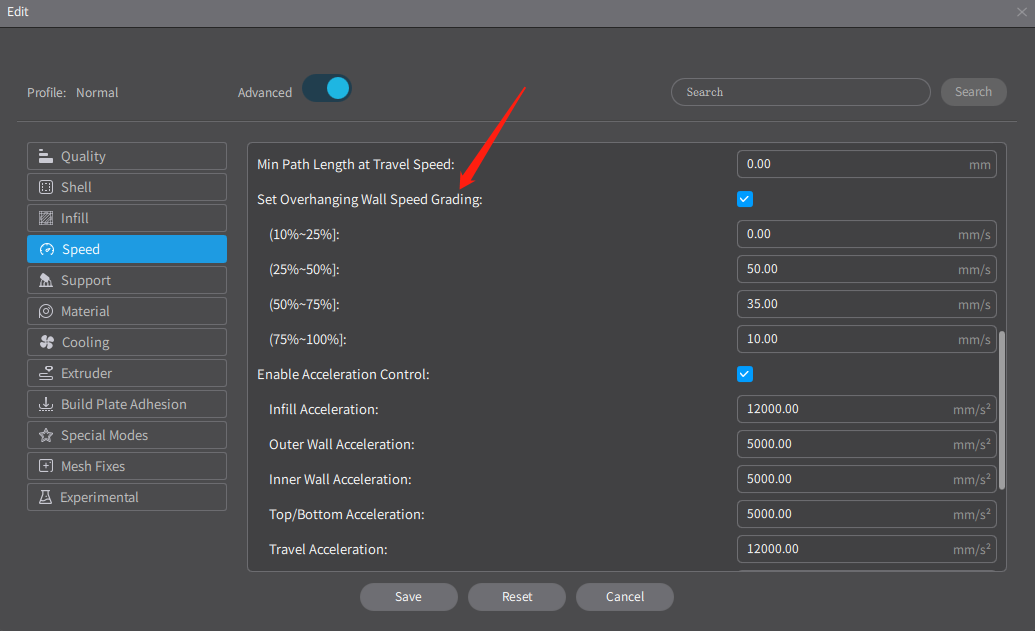
The principle of graded speed reduction for the overhanging involves using slower print speeds and increasing cooling airflow in regions with larger overhang angles. This approach ensures that the extruded lines have sufficient time to cool and solidify while printing of outer contours, effectively preventing sagging and collapse.
¶ 2.1.2 Result Comparison
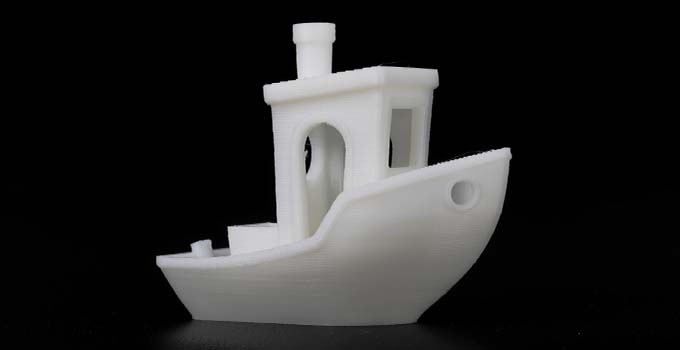
¶ 2.1.2.1 Without reducing the speed of the overhanging wall, the front of the hull sags, resulting in poor printing quality for the hull.
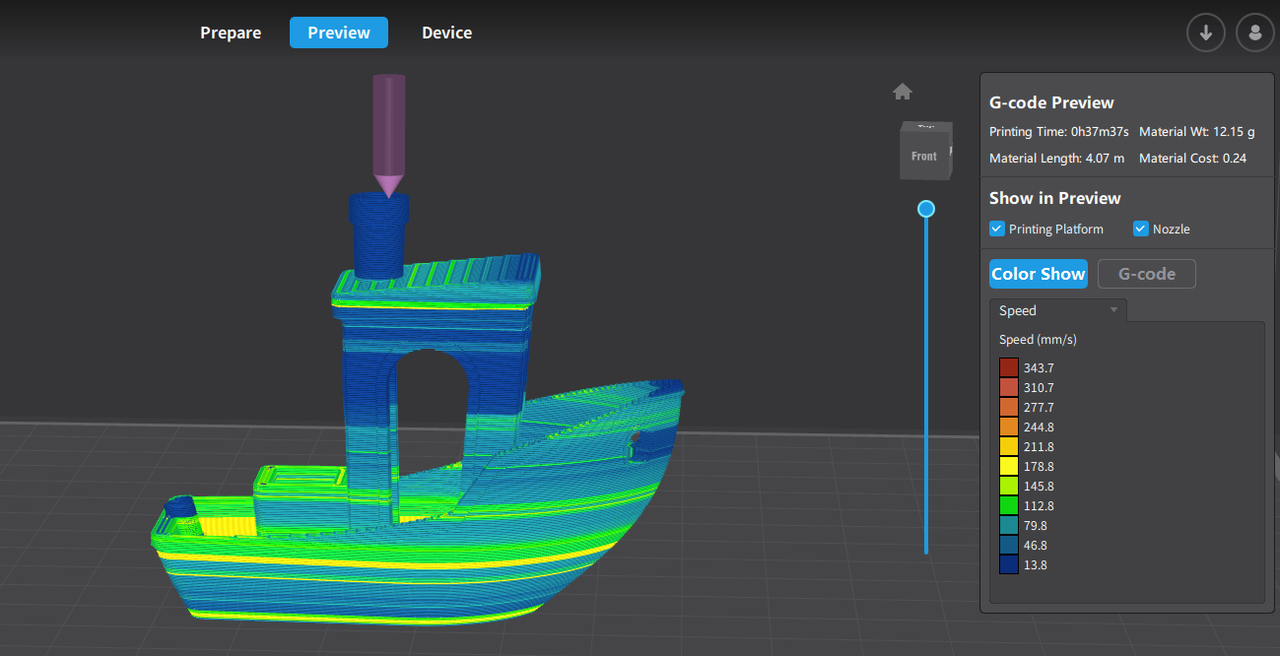
Slice Details (1)
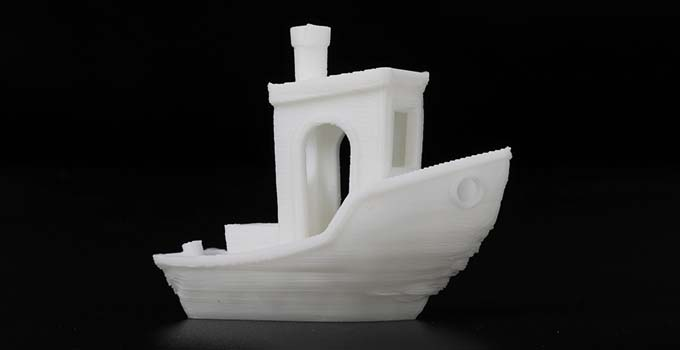
Print Details (1)
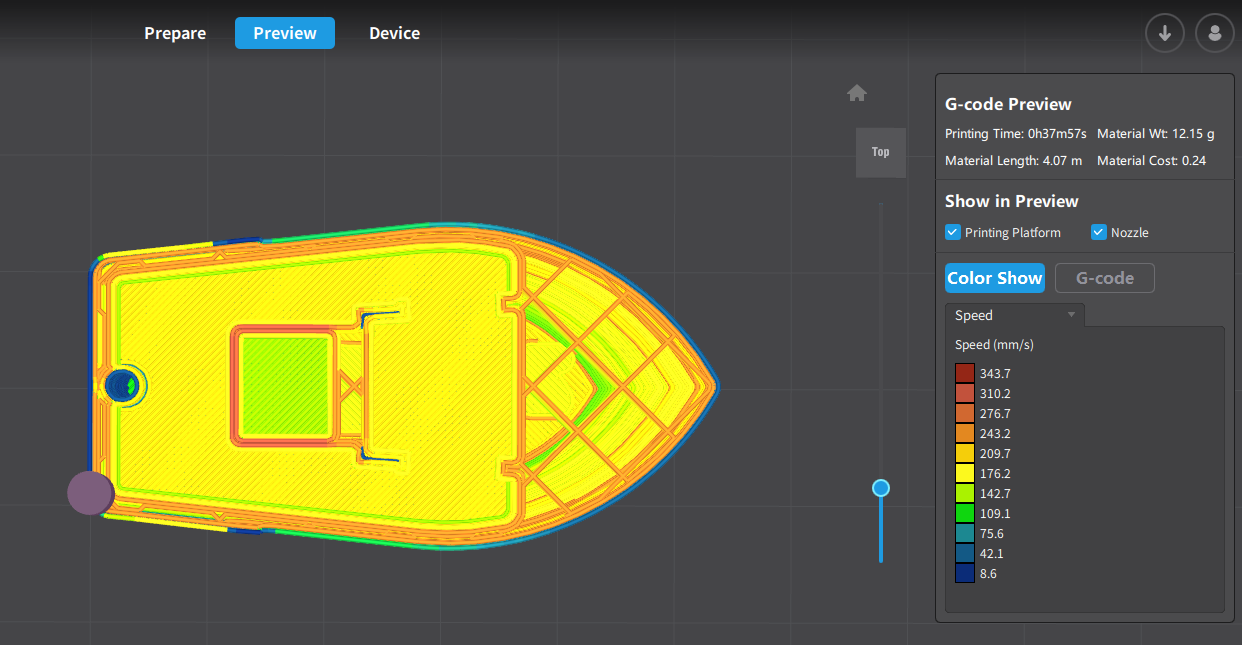
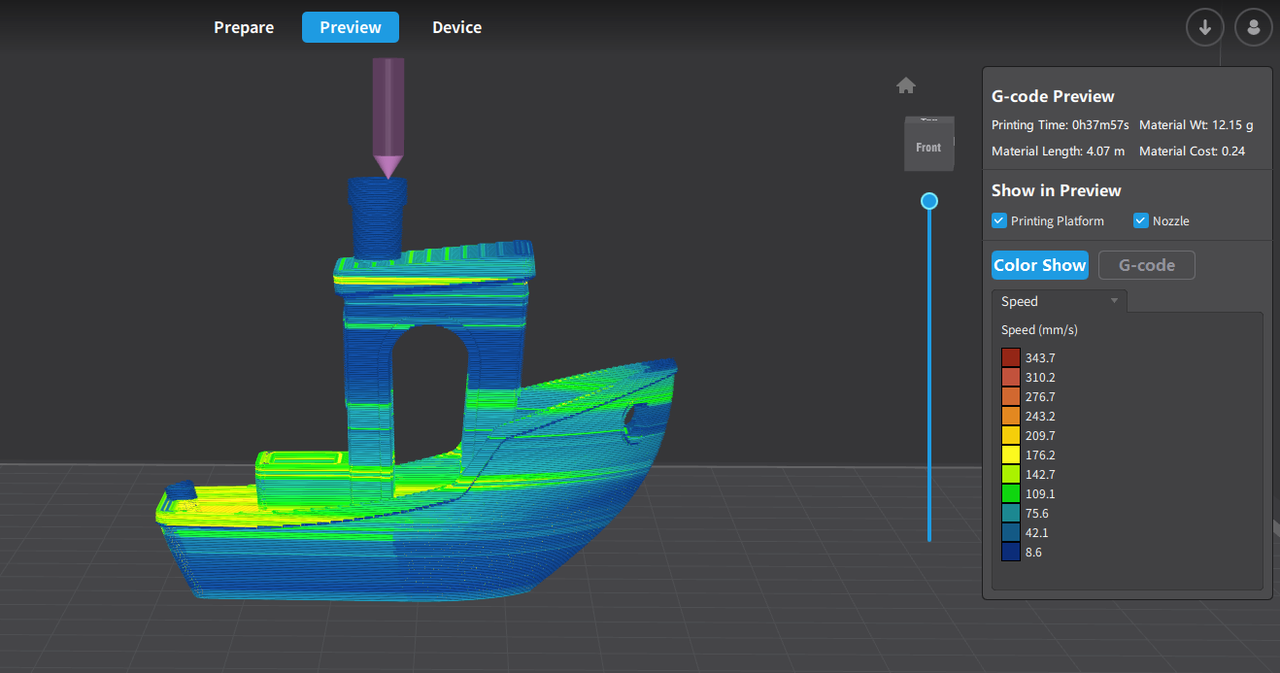
Slice Details (2)
Print Details (2
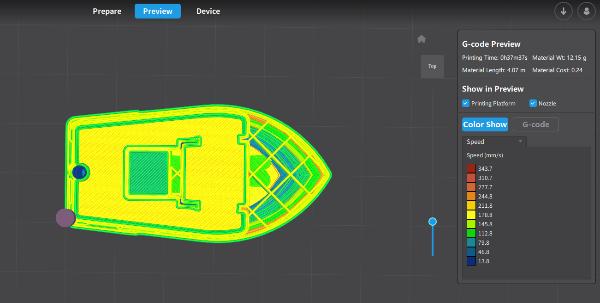
¶ 2.1.2.2 With graded speed reduction for the overhanging wall, the front of the hull sags less, and the optimal printing speed is automatically selected based on the degree of overhang. As a result, the printing quality for the hull is better.
¶ 2.1.3 Parameter setting and principle analysis (Based on overhang structure)
¶ 2.1.3.1 What is overhanging structure (Principle analysis)
When the printing speed becomes fast, the support-free overhangs suffer serious degradation in quality. The reason is simple. The material flowing out to build the overhangs just does not have enough time to harden up and settle in place.
That’s why the graded speed reduction comes in handy. To achieve it, Creality Print analyzes each overhang and divides one overhang into several sections according to the slanting angles ( % = L1/L2). Then, it assigns different speeds to different overhang sections.
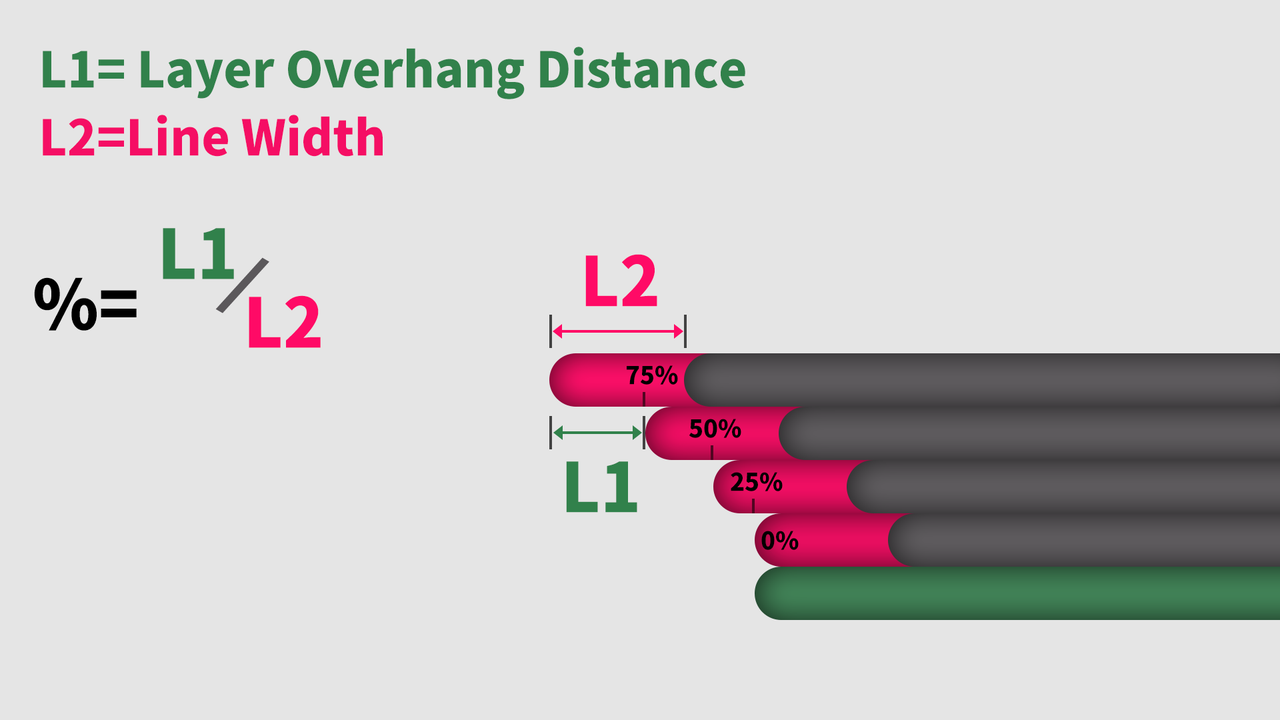
¶ 2.1.3.2 The function can be set up as shown in the picture
¶ 2.2. Variable line width
¶ 2.2.1 Concept description
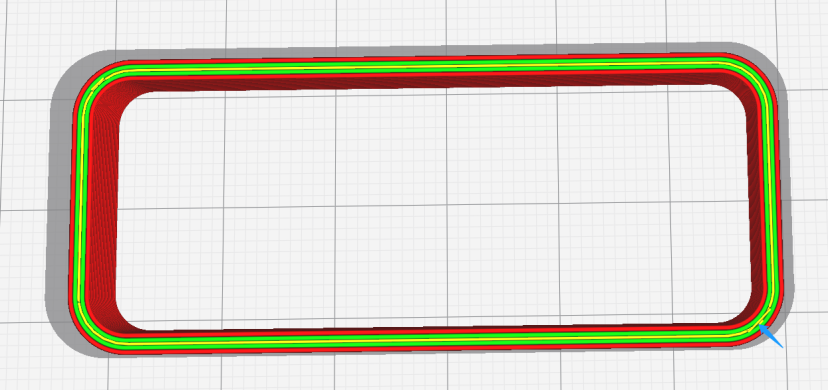
Normally, when slicing a file, the width of a line is dependent on the width of your nozzle. Once the line width is set, it will be the same throughout your print. This is a big problem if the actual line to be printed is thinner than two lines but thicker than one line. Normally, this sort of non-standard line is printed as plural lines together, distributed among several lines, or simply left not printed. Either way, it results in poor print quality and sometimes funny vibrations of the printer.
¶ 2.2.2 Result comparison
¶ 2.2.2.1 Creality Slicer 4.8 (No variable line width)
Creality Slicer 4.8 (no variable line width)
¶ 2.2.2.2 Creality Print 4.3.5 (With variable line width)
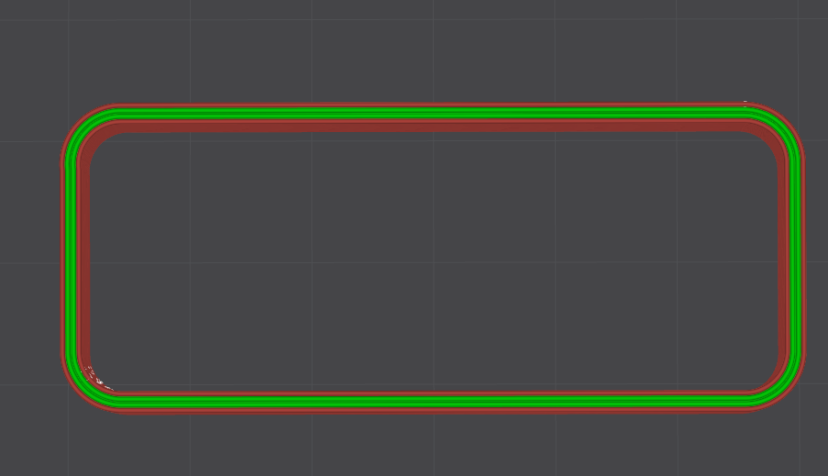
If the thickness of part of the print was two-and-a-half times the chosen line thickness, two equally thick lines would be generated, with a small gap left in between. This gap would weaken the final print. Similar behavior could be seen at corners or sharp points where the thickness of a part changes, but the internal lines of the print are unable to fit uniformly into the resulting geometry. With the new variable line width feature, the number of internal holes in the part is greatly reduced as lines can increase and decrease in thickness to occupy the space more completely. The result is stronger parts with fewer unintentional internal imperfections.
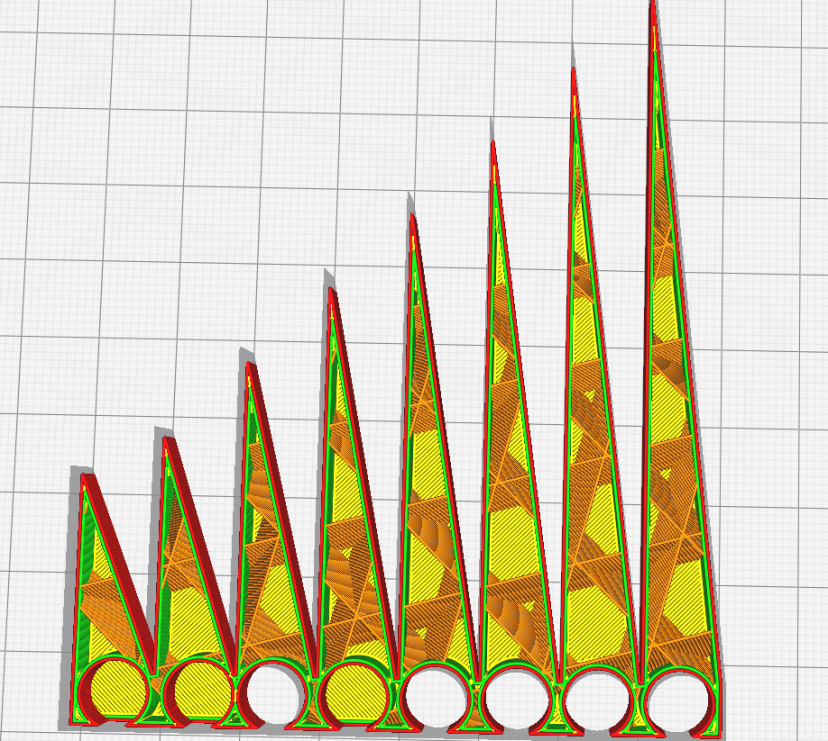
¶ 2.2.2.3 Creality Slicer 4.8 (No variable line width)
¶ 2.2.2.4 Creality Print 4.3.5 (With variable line width)
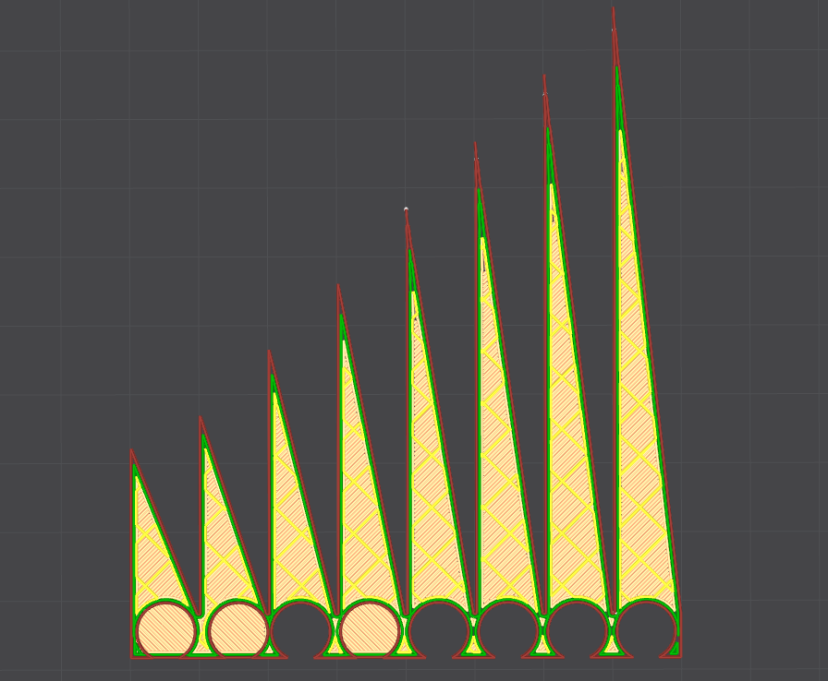
It is apparent in the above pictures that, with the variable line width applied, the printing path planned by Creality Print is much neater than that planned by Creality Slicer 4.8. This means much better quality and higher speed.
¶ 2.3.Smart cooling
¶ 2.3.1 Concept description
Proper cooling promises ideal overhangs and bridges as well as better success with complex 3D prints. And it is vital to high-speed printing.
Most FDM 3D printers use cooling fans to ensure that the melted filament hardens enough to lay a solid foundation for the next layer to deposit.
But there is a caveat. For filament like PLA, strong cooling is required. However, for other materials, too much cooling can cause layer-bonding issues and excessive shrinkage. Creality provides cooling presets for a wide range of filaments, but the cooling settings can still be adjusted as you preferred.
¶ 2.3.2 Result comparison
¶ 2.3.2.1 Results of insufficient cooling
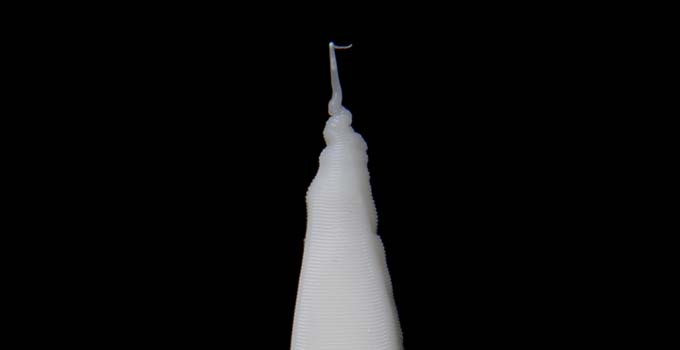
¶ 2.3.2.2 Results of insufficient overhang cooling
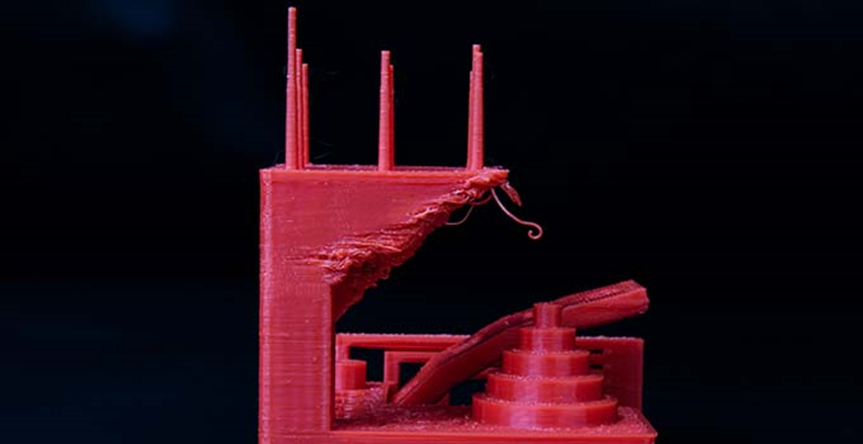
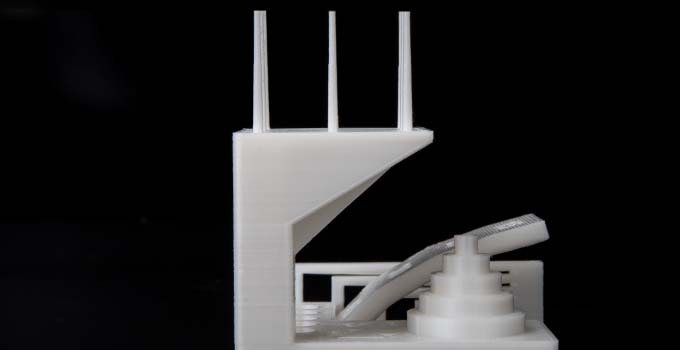
¶ 2.3.2.3 Results of smart cooling
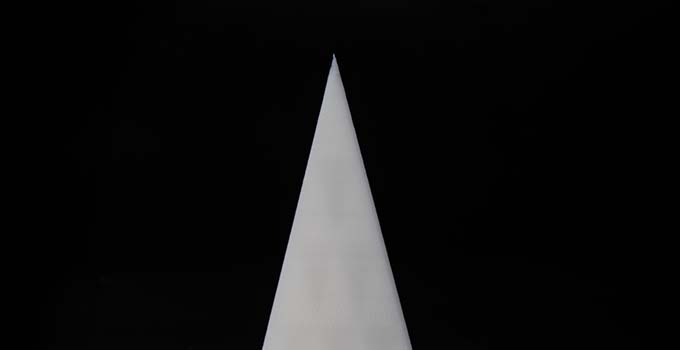
¶ 2.3.2.4 Results of smart overhang cooling
¶ 2.3.3 Parameter setting and principle analysis
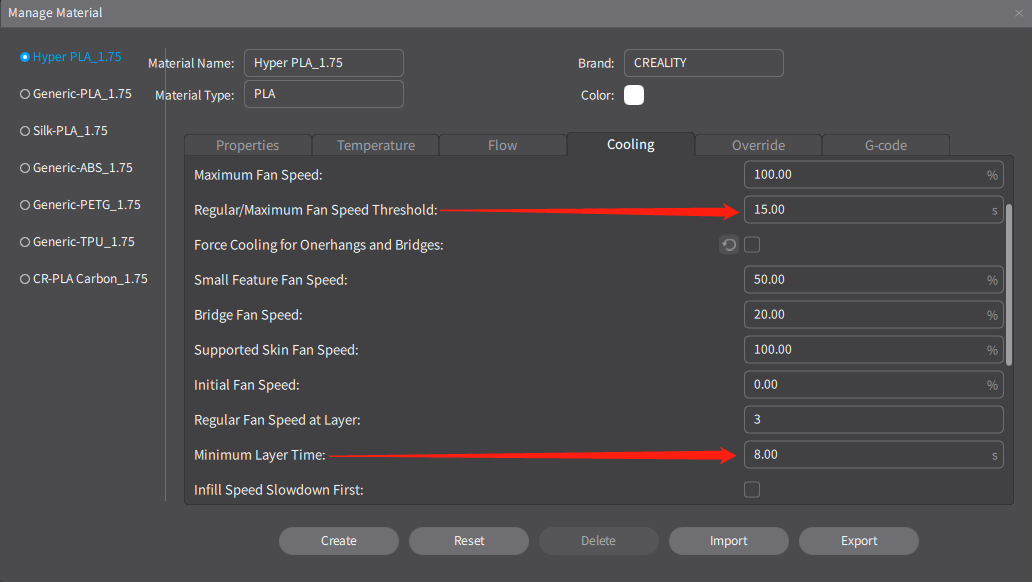
¶ 2.3.3.1 Cooling settings
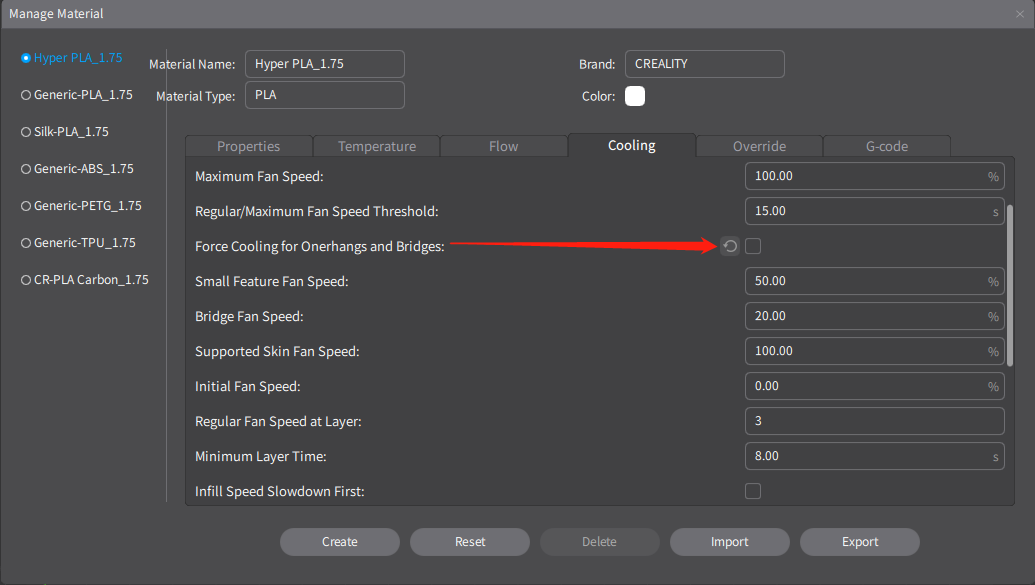
The cooling setting page is in the filament manager of Creality Print. It allows you to control the cooling by adjusting the fan speed in many aspects, such as regular fan speed, maximum/minimum fan speed, force cooling for overhangs and bridges, small feature fan speed, bridge fan speed, etc, All these settings are helpful to optimize the print quality. There is also an option to enable or disable the chamber fan.
¶ 2.3.3.2 Relationship between cooling fan speed and layer printing time.
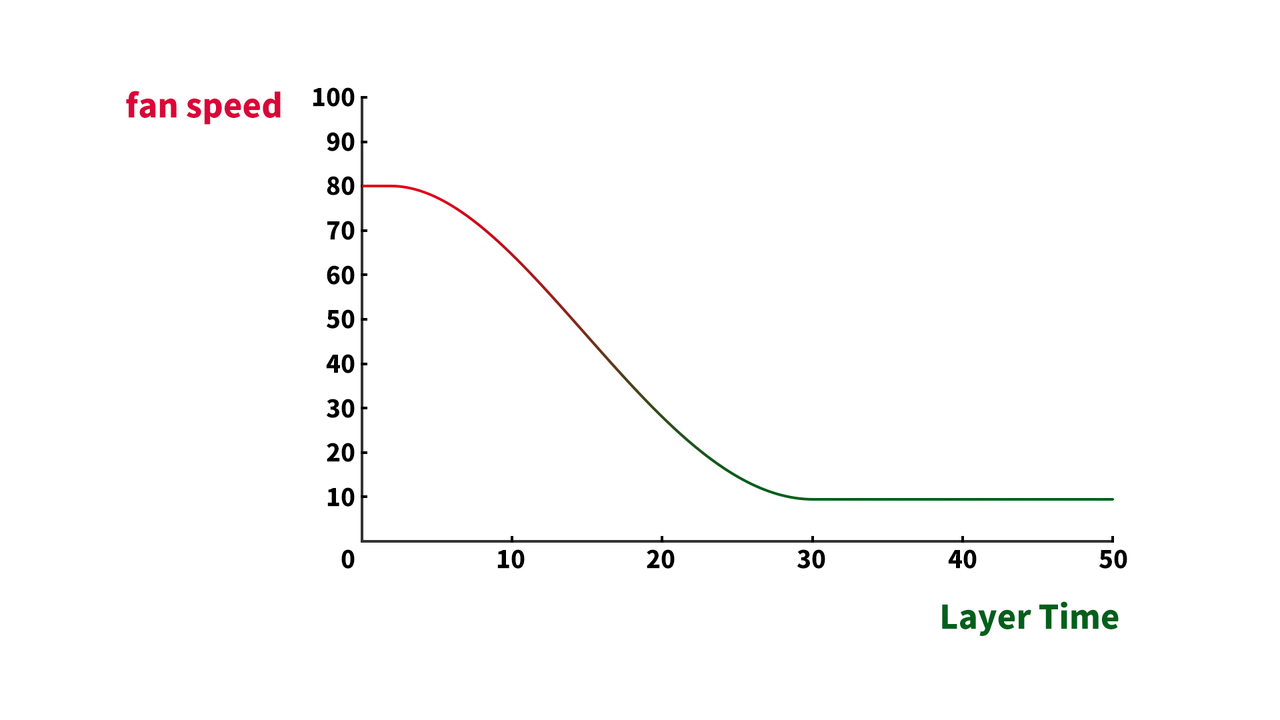
Generally, the fan speed is controlled based on the layer time, which is illustrated in the chart below. If the layer time is shorter than the low threshold (say 5s), the fan runs at 100% speed; if the layer time is longer than a high threshold (say 30s), the fan runs at the minimal speed allowed (say 10%). But if the layer time is between the two thresholds, the fan speed is interpolated between 100% and the minimum speed allowed. This guarantees the print quality and also reduces the fan noise.
¶ 2.3.3.3 Parameter settings for partial overhangs and bridging scenarios
As to overhangs and bridges, the fan speed is controlled separately. not according to the above ( 2.3.3.2 ) curve of the layer printing time is controlled).
Creality Print has included the optimal fan speeds for different overhang angles and bridge lengths as default. To take advantage of them, just tick the "Forced Cooling for Overhangs and Bridges" option. It is advised to keep this function enabled all the time.
¶ 2.4. Arc fitting (G2/G3).
¶ 2.4.1 Concept description
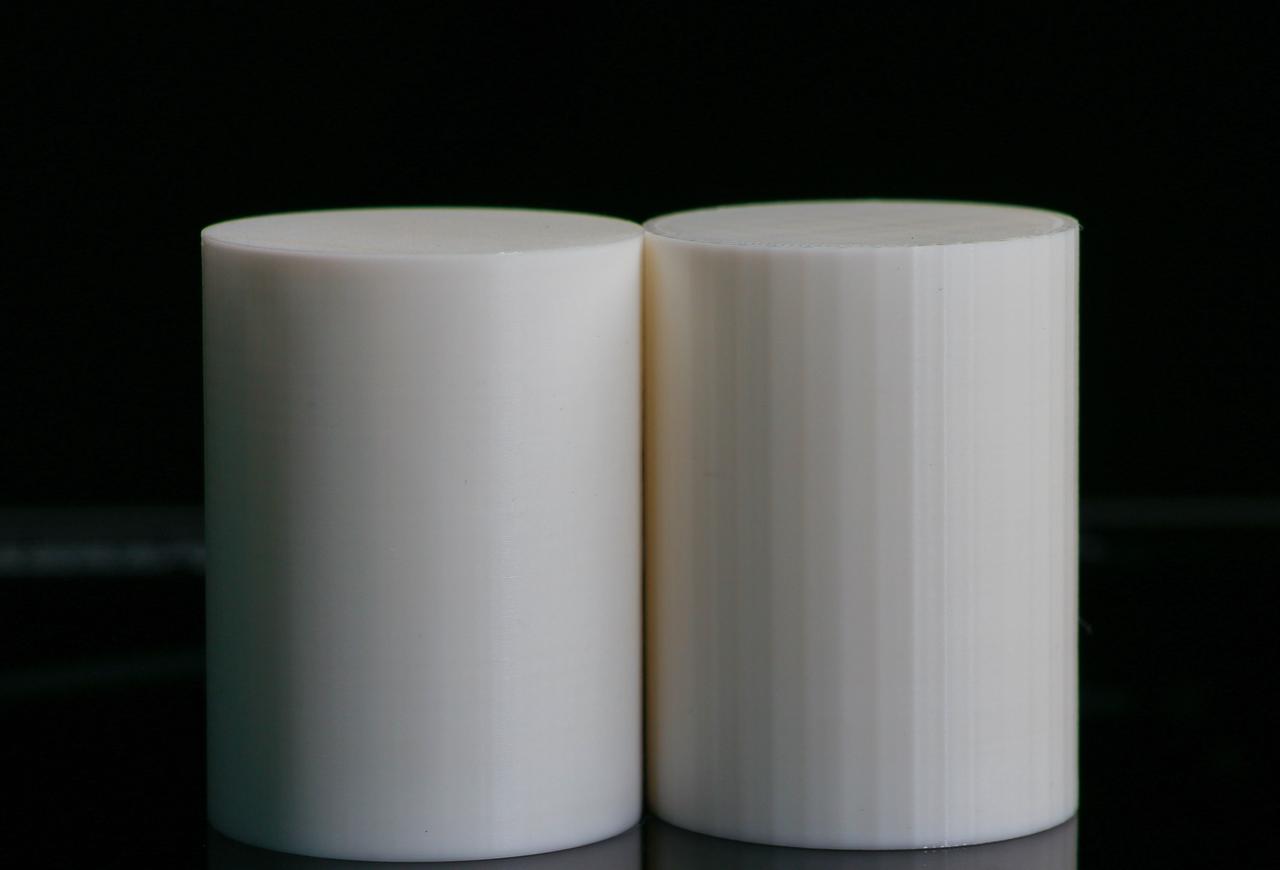
FDM 3D printers have been very bad at printing curves. They usually translate curves into a proliferation of teeny straight segments. This is a struggle when the printing speed is high, because the processor cannot recalculate the velocities of so many segments fast enough. So, to fulfill the task, most printers simply slow down. For printers able to do the task at a high speed, they often vibrate scarily and loudly, given that the acceleration and direction between two segments change too violently.
Creality Print solves this problem by introducing curve paths.
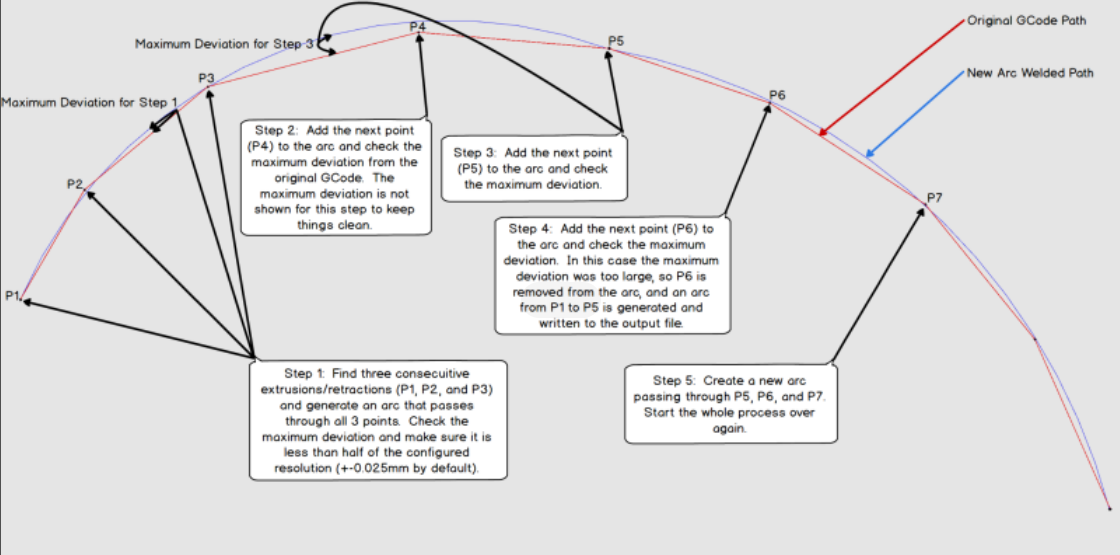
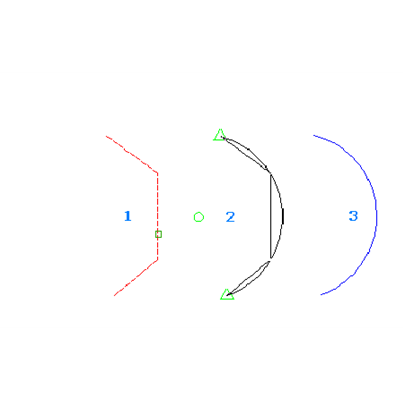
It replaces the teeny straight segments with a smaller number of curve segments. As a result, the printer can calculate the velocities more easily and print smoothly even when the speed is ultra-fast. Also, the G-code file gets downsized significantly.
As illustrated in the picture below, the four straight segments from P1 to P5 are replaced by one single smooth curve.
¶ 2.4.2 Precautions for arc fitting printing
The computation workload for arcs increases significantly under high-speed conditions as calculations are required for the arcsin and arccos functions at each step.
If the printer's processor can not calculate line segment speeds quickly, the print quality may be comprised and the printing time may be much longer than expected.
This function places specific demands on the printer's performance. The printing of arcs with very small radii greatly contributes to smooth and quiet printing.
The length of arc segments is determined by the printer's processor performance and print speed. Enhanced hardware allows for higher print speeds, thereby significantly reducing the size of Gcode files.
Arc printing was not popular in previous years; however, with advancements in printer processor performance, an increasing number of firmware now supports this function, including Marlin, Smoothieware, Prusa, RepRap, and more.
Compared to high-speed printing, G2/G3 commands significantly reduce the minor defects caused by micropauses in the printer's motion.
¶ 2.4.3 Arc moto response graphs
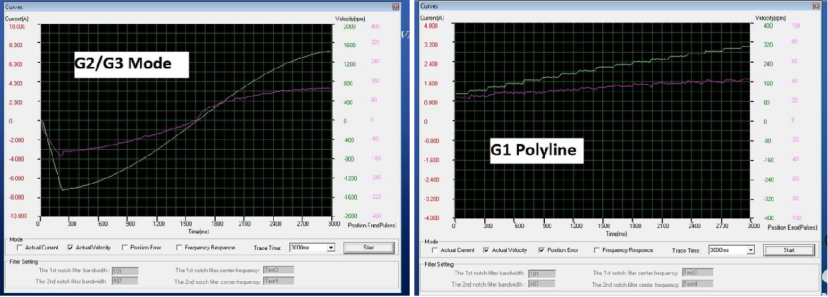
In the above motor response graphs, the green line represents the velocity, whereas the pink line represents the current pulses. The left graph is the motor response for arc fitting (G2/G3 command); the right graph is the motor response for non-arc fitting (G1 command).
With arc fitting, the lines of velocity and current are smoother and cross each other, which means the motor is mobilizing the printhead to draw a smooth curve in one stroke. Without arc fitting, the motor always tries to exert a similar current and velocity to create straight segments and therefore bumps heavily.
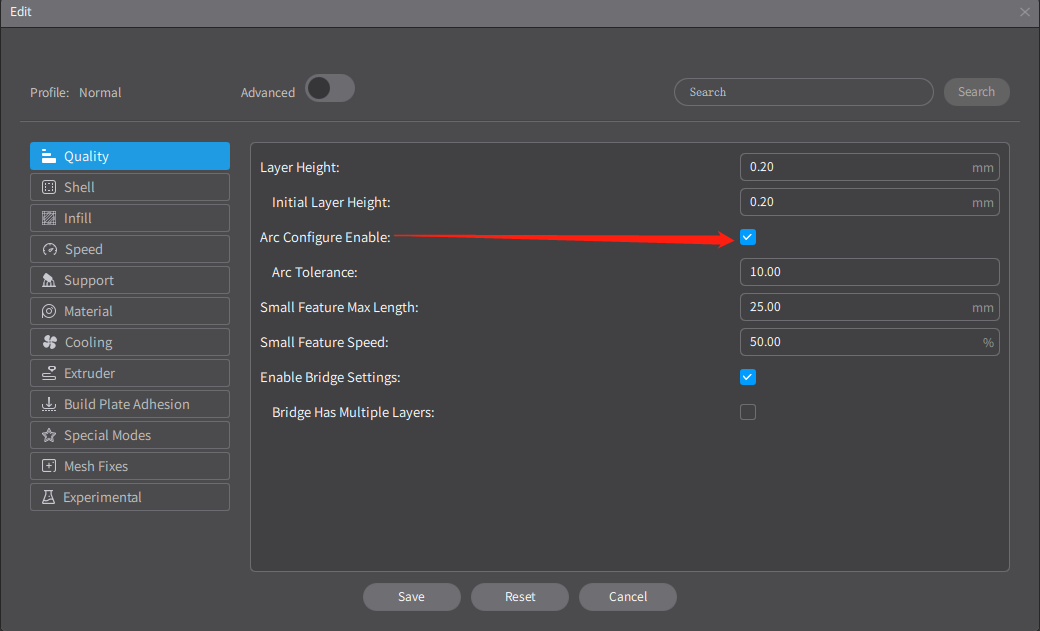
¶ 2.4.4 The function can be set up as shown in the following picture.
¶ 2.5. Vibration avoidance
¶ 2.5.1 Concept description
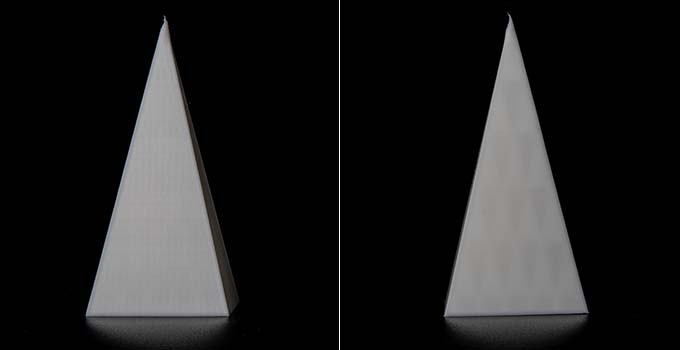
Vibration is a big ghost in 3D printing. When it occurs, the nozzle is shaken slightly out of the planned path at certain intervals, causing ringing or rippling on the 3D print.
Why does a 3D printer vibrate? Well, everything is prone to vibrating when subject to repeated external forces at certain frequencies. This is called “resonance”. A perfect example is how a singer can shatter glass by just singing a prolonged high note.
The printhead also vibrates terribly at certain frequencies as it shuttles to and forth rapidly to deposit materials. To make it worse, a high-speed printer often uses high-torque stepper motors with a lower resonance range. In other words, the vibration is easier to occur and intensify during high-speed printing.
Surely, the vibration can be mitigated by enabling the input shaping feature in a 3D printer’s firmware. But it is complicated and hardware-demanding.
This time, we factor vibration reduction into slicing. The new Creality Print can retain the model surface, the most quality-concerned area, out of the resonance range (usually corresponding to 100-300mm/s printing speed). To be exact, it avoids the resonance-happy speed as much as possible in path planning. Where the speed range is unavoidable (such as overhang cooling), such speed range only applies to the fill, but not the outer wall. This way, the surface looks smooth despite of the vibration.
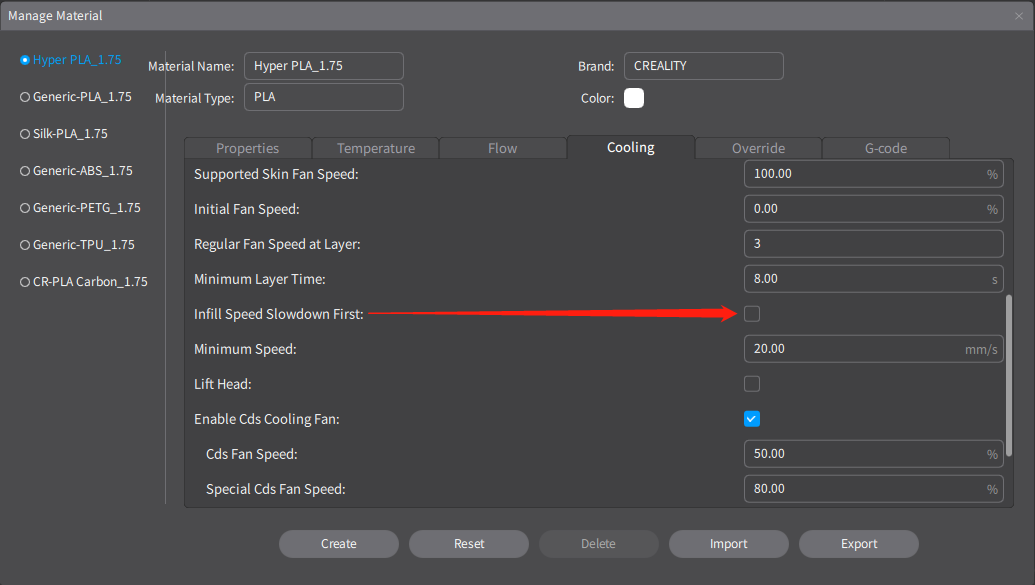
¶ 2.5.2 The function can be set up as shown in the following picture.
¶ 2.6. Retraction with nozzle wiping
¶ 2.6.1 Concept description
Stringing is a pestering issue for FDM 3D printing because the molten filament tends to ooze out of the nozzle unnecessarily due to the residual pressure inside the hot end, especially when the printhead travels over open spaces.
The retraction has long been adopted to reduce stringing. By pulling some material out of the printer’s hot end before it travels, the pressure in the molten plastic is reduced, decreasing the odds of stringing over open spaces. But that is not enough if the printing speed is fast.
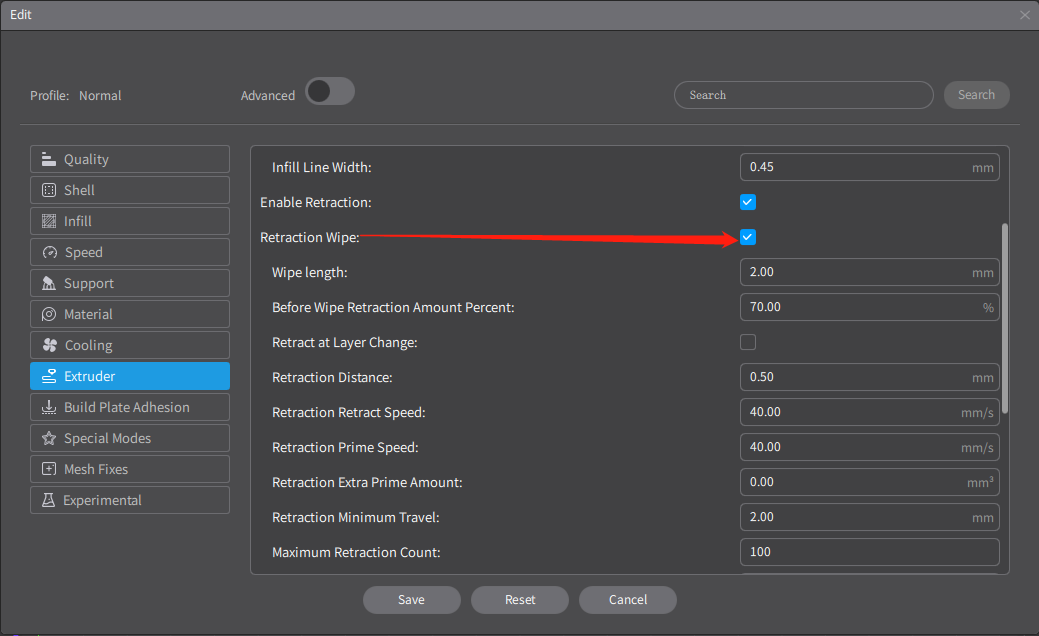
So the new Creality print combines retraction with nozzle wiping. It is useful whenever there are two independent contours to print continually. Upon finishing one contour, it will command the printer to retract the filament by a certain length and wipe clean the nozzle against the already printed contour, before traveling to the next contour to print, thus getting rid of stringing effectively.


¶ 2.6.2 Result comparison
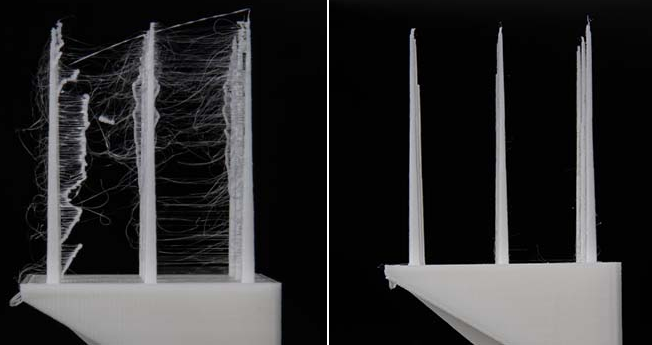
Regular retraction vs Retraction with nozzle wiping
¶ 2.6.3 The function can be set up as shown in the following picture.
