Download Path: Creality Sermoon P1S Scanner User Manual.pdf
¶ FOREWORD
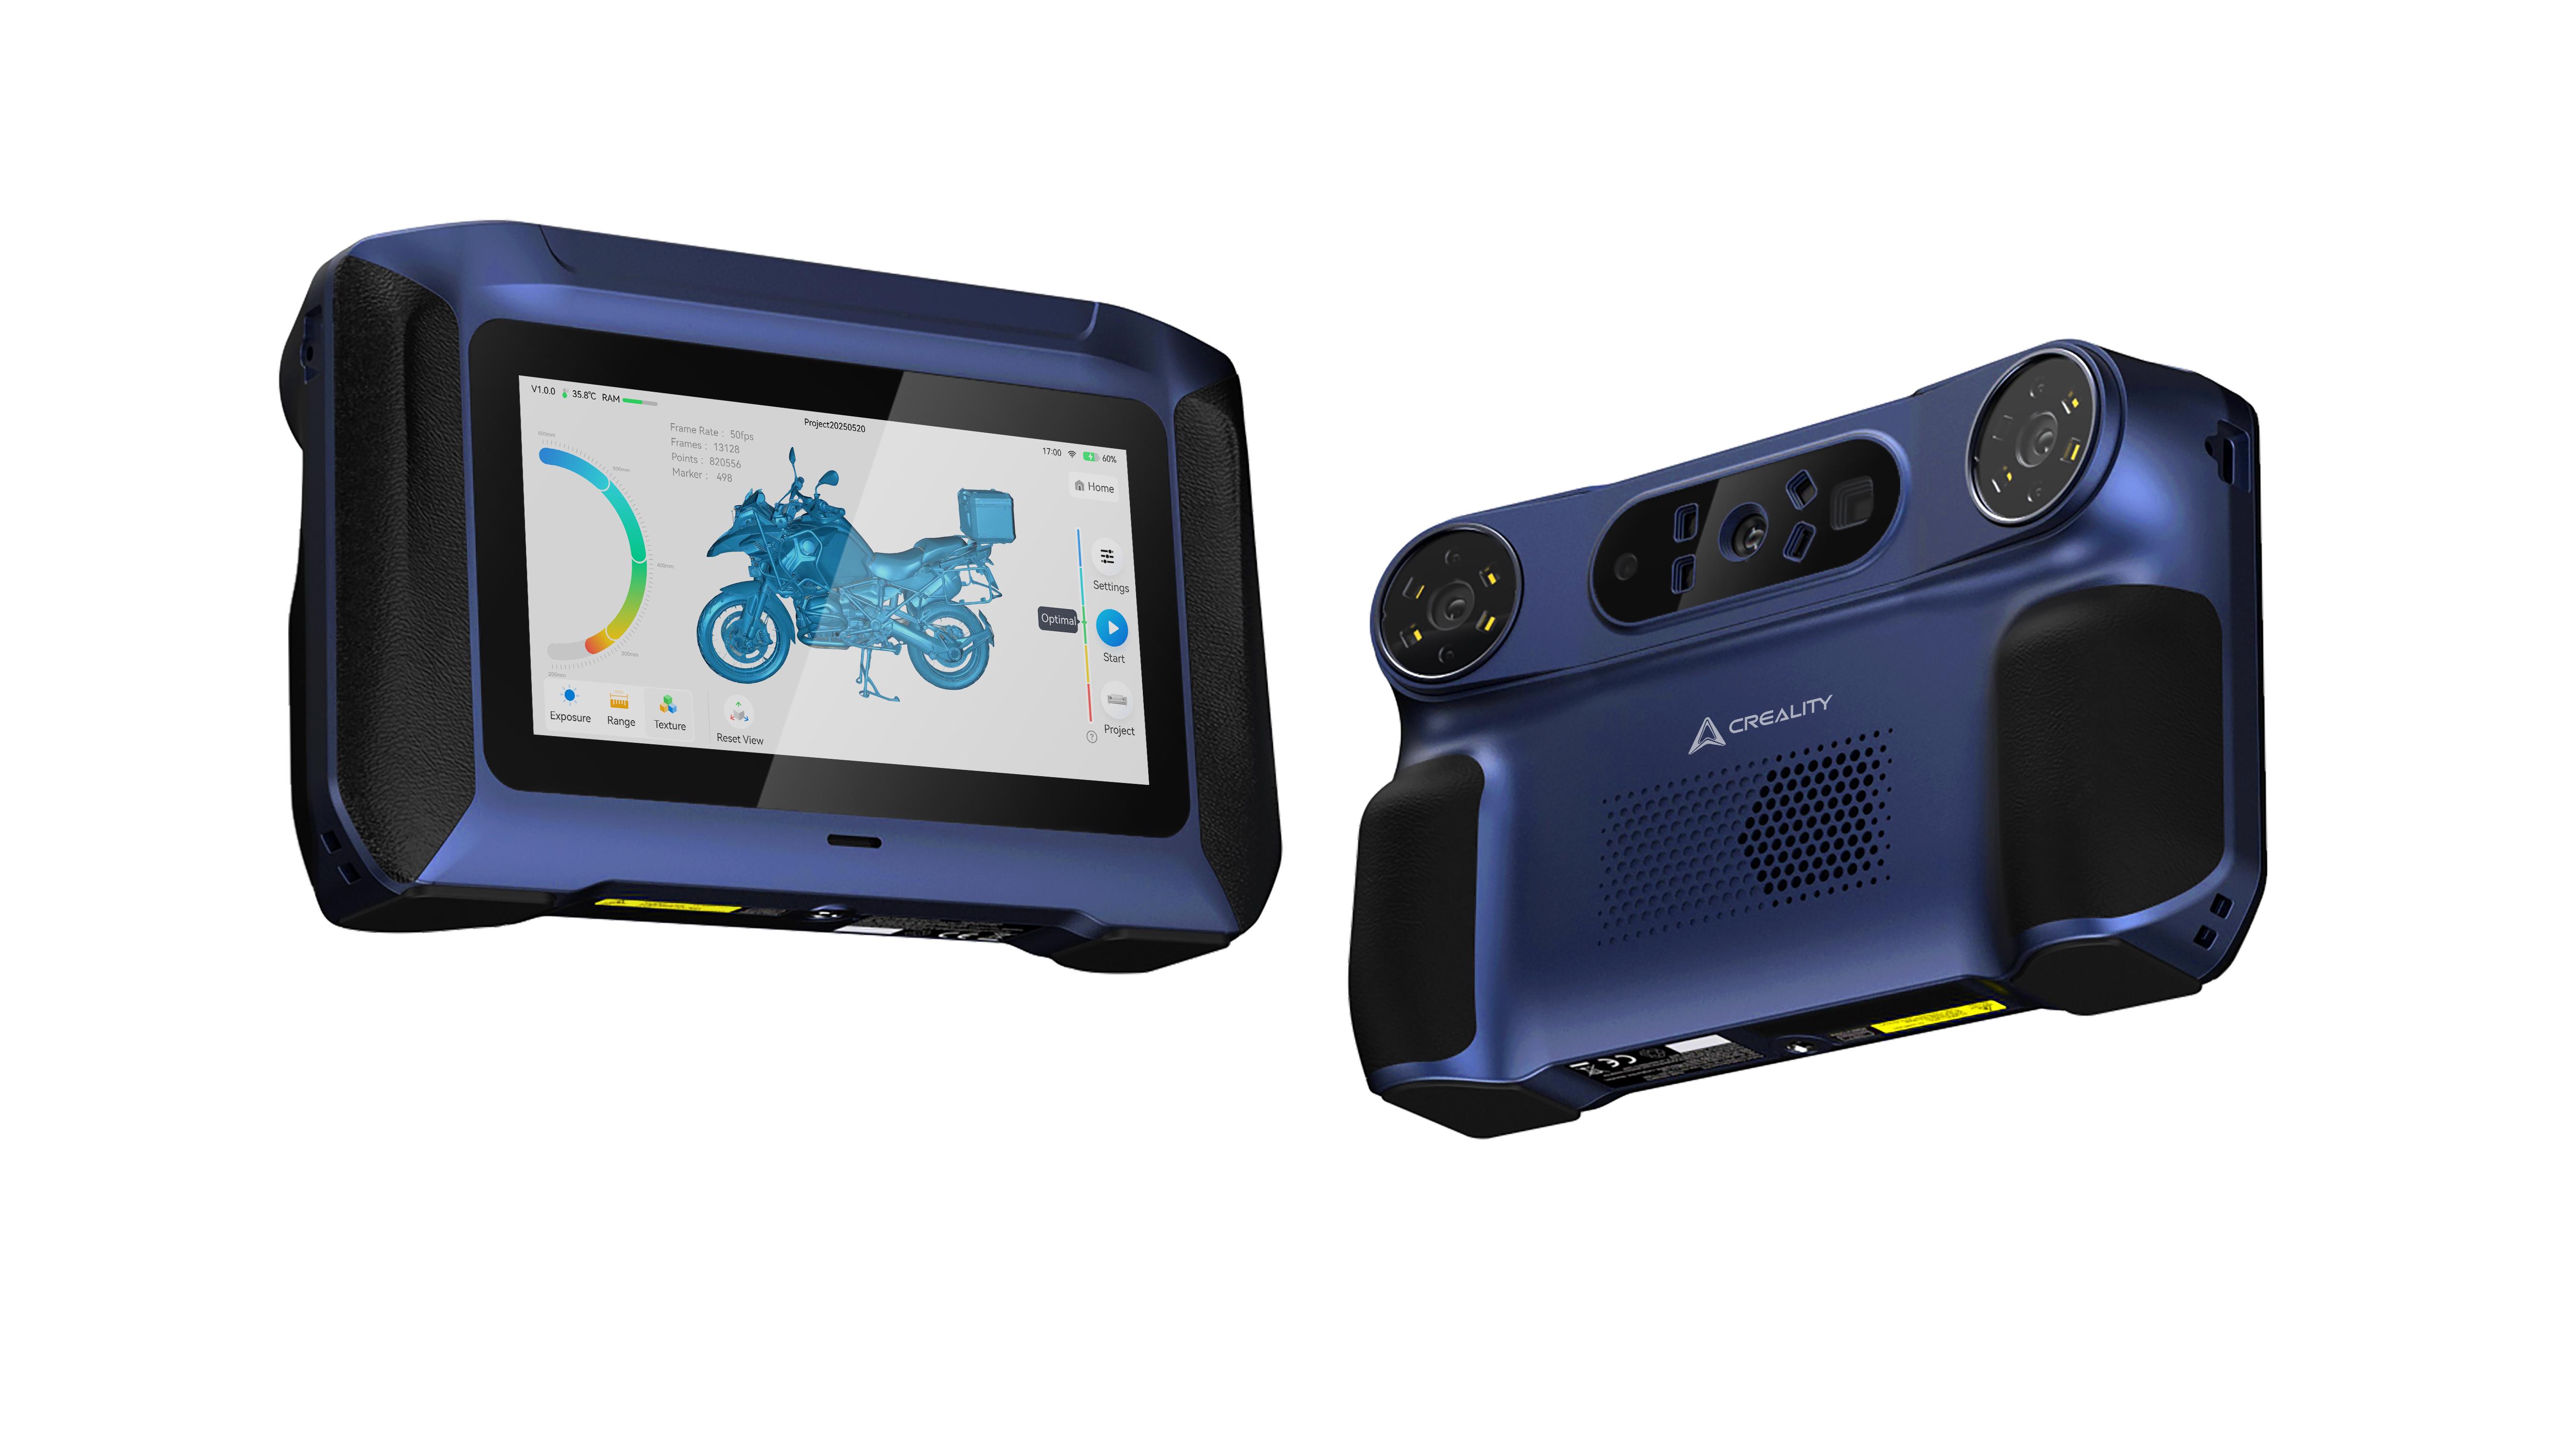
Thank you for choosing the Creality Sermoon P1S 3D scanner. This manual aims to help you quickly understand the basic information and scanning process of this scanner, opening up a whole new 3D scanning experience.
You can visit the Creality official Wiki: https://wiki.creality.com/3d-scanner to get the latest "Creality Sermoon P1S 3D Scanner User Manual", detailed tutorials and videos.
This manual will be continuously updated; please refer to the latest version for the most up-to-date information.
Important Notes
- Do not allow the scanner to come into contact with water or other liquids. Avoid bumping or impact during use.
- To ensure optimal performance, please operate in a suitable working environment.
¶ TABLE OF CONTENTS
- Product Introduction
- 1.1 Scanner Components
- 1.2 Part List
- First-Time Use
- 2.1 Standalone Mode (No computer connection required)
- 2.2 PC Connection Mode (Connect to Computer)
- Detailed Explanation of Scanning Modes
- 3.1 Blue Laser Mode
- 3.2 Infrared Mode
- Other Functions
- 4.1 Calibration
- 4.2 System Upgrade
- 4.3 File Transfer
- Specifications
- 5.1 Hardware Parameters
- Precautions
- 6.1 Usage Instructions
- 6.2 Maintenance Instructions
¶ 1. Product Introduction
¶ 1.1 Scanner Components
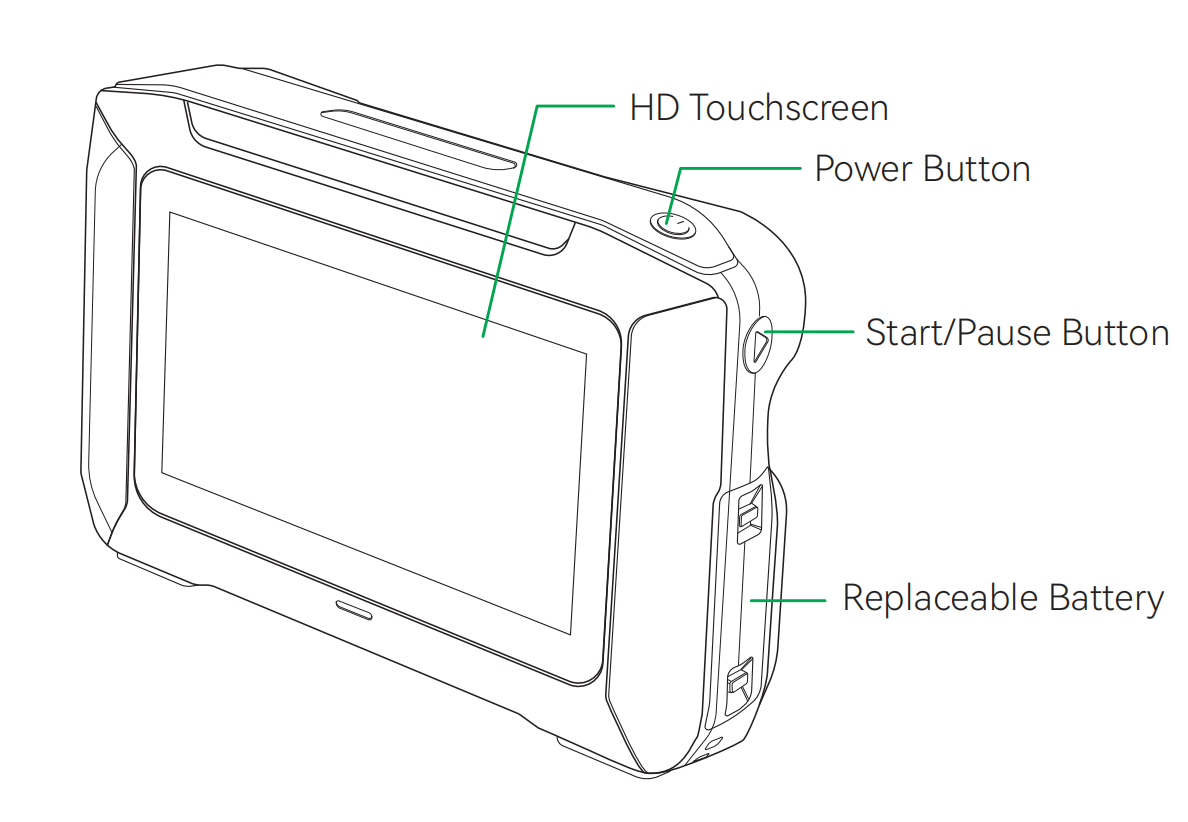
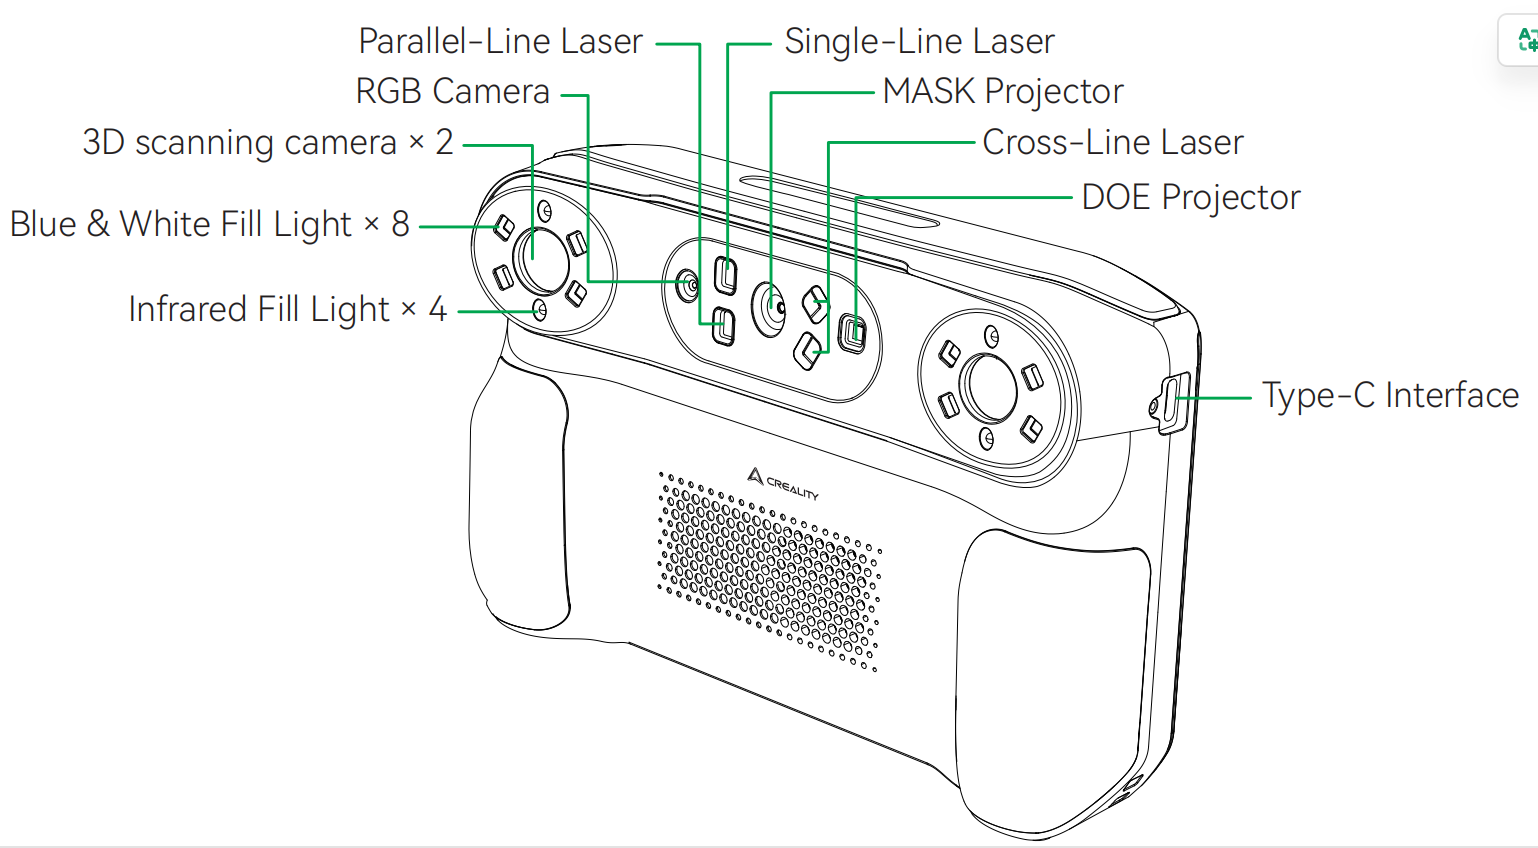
¶ 1.2 Packing List
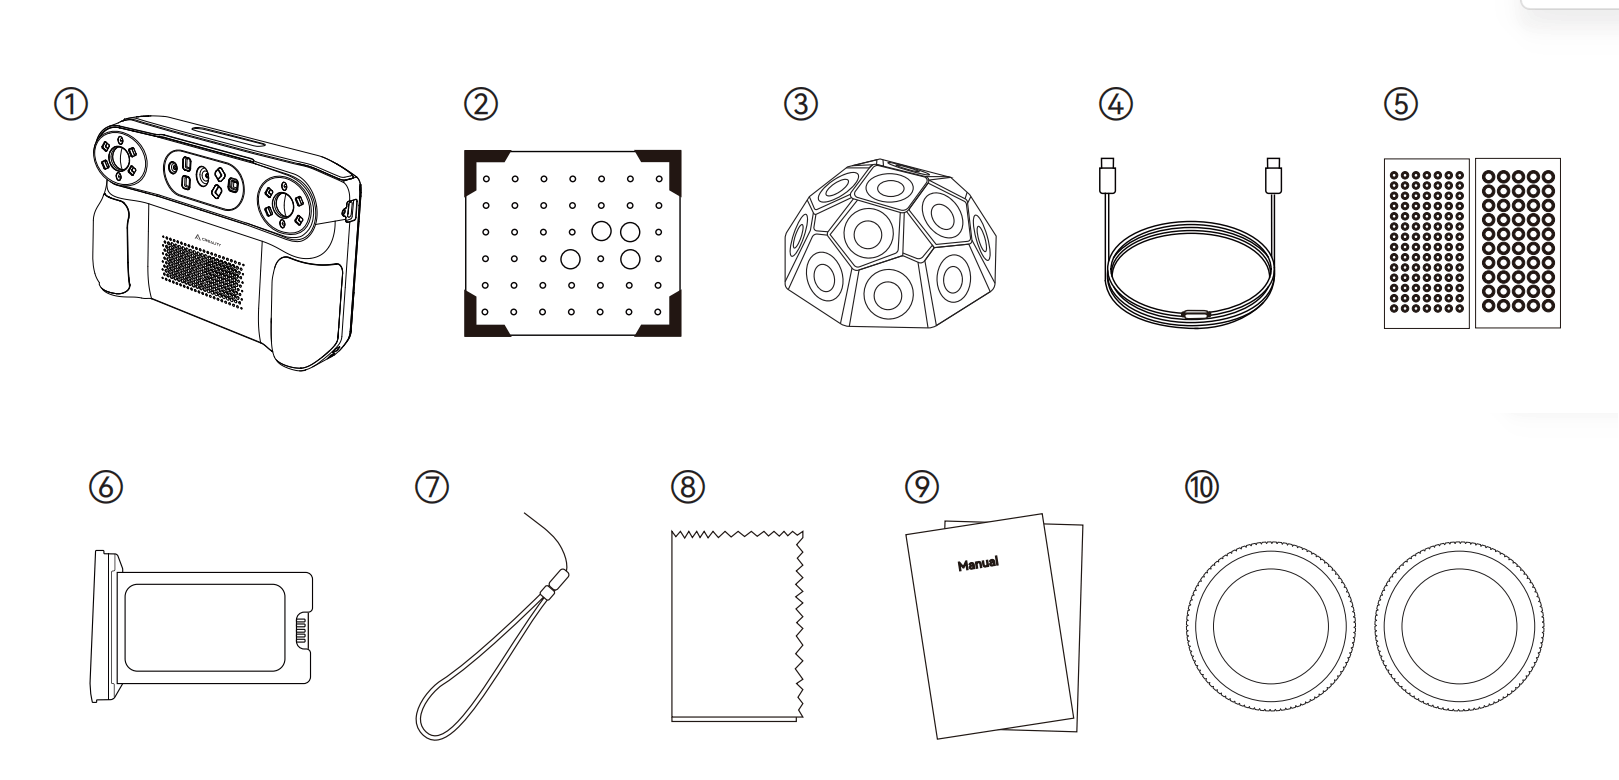
| No. | Name | Quantity |
|---|---|---|
| ① | Creality Sermoon P1S 3D Scanner | 1 |
| ② | High-Precision Glass Calibration Board | 1 |
| ③ | Marker Block | 6 |
| ④ | USB 3.0 Type-C Data Cable (2m) | 1 |
| ⑤ | Reflective Markers (D6mm, D3mm) | 20 |
| ⑥ | Backup Battery | 1 |
| ⑦ | Lanyard | 1 |
| ⑧ | Cleaning Cloth | 1 |
| ⑨ | Quick Start Guide, Certificate of Conformity & Warranty Card | 1 |
| ⑩ | NIR Filter | 2 |
¶ 2. First-Time Use
Creality Sermoon P1S supports two working modes: standalone mode and PC connection mode. You can choose the appropriate mode to operate according to your needs.
Important Note for First Use
Due to transportation safety regulations, the battery has a low charge at the factory. Combined with natural wear and tear during transportation, the device may not power on upon first use due to insufficient charge. Please charge the battery for at least 30 minutes before first use to activate it.
Note: The battery of this device supports separate charging (by directly connecting the charging cable to the battery charging port) or it can be inserted into the back of the device and connected to the main unit for charging.
Before first use, please be sure to remove all protective films from the scanner (lens, filter, laser) and touchscreen to ensure optimal scanning accuracy and image display.
¶ 2.1 Standalone Mode (No computer connection required)
The Creality Sermoon P1S scanner has a built-in operating system and screen, allowing it to perform scanning and basic processing independently.
¶ Step 1: Power-on Preparation
Make sure the scanner has sufficient power. Press and hold the power button for 3 seconds to turn on the device, and it will enter the main interface.
¶ Complete First-Time Setup
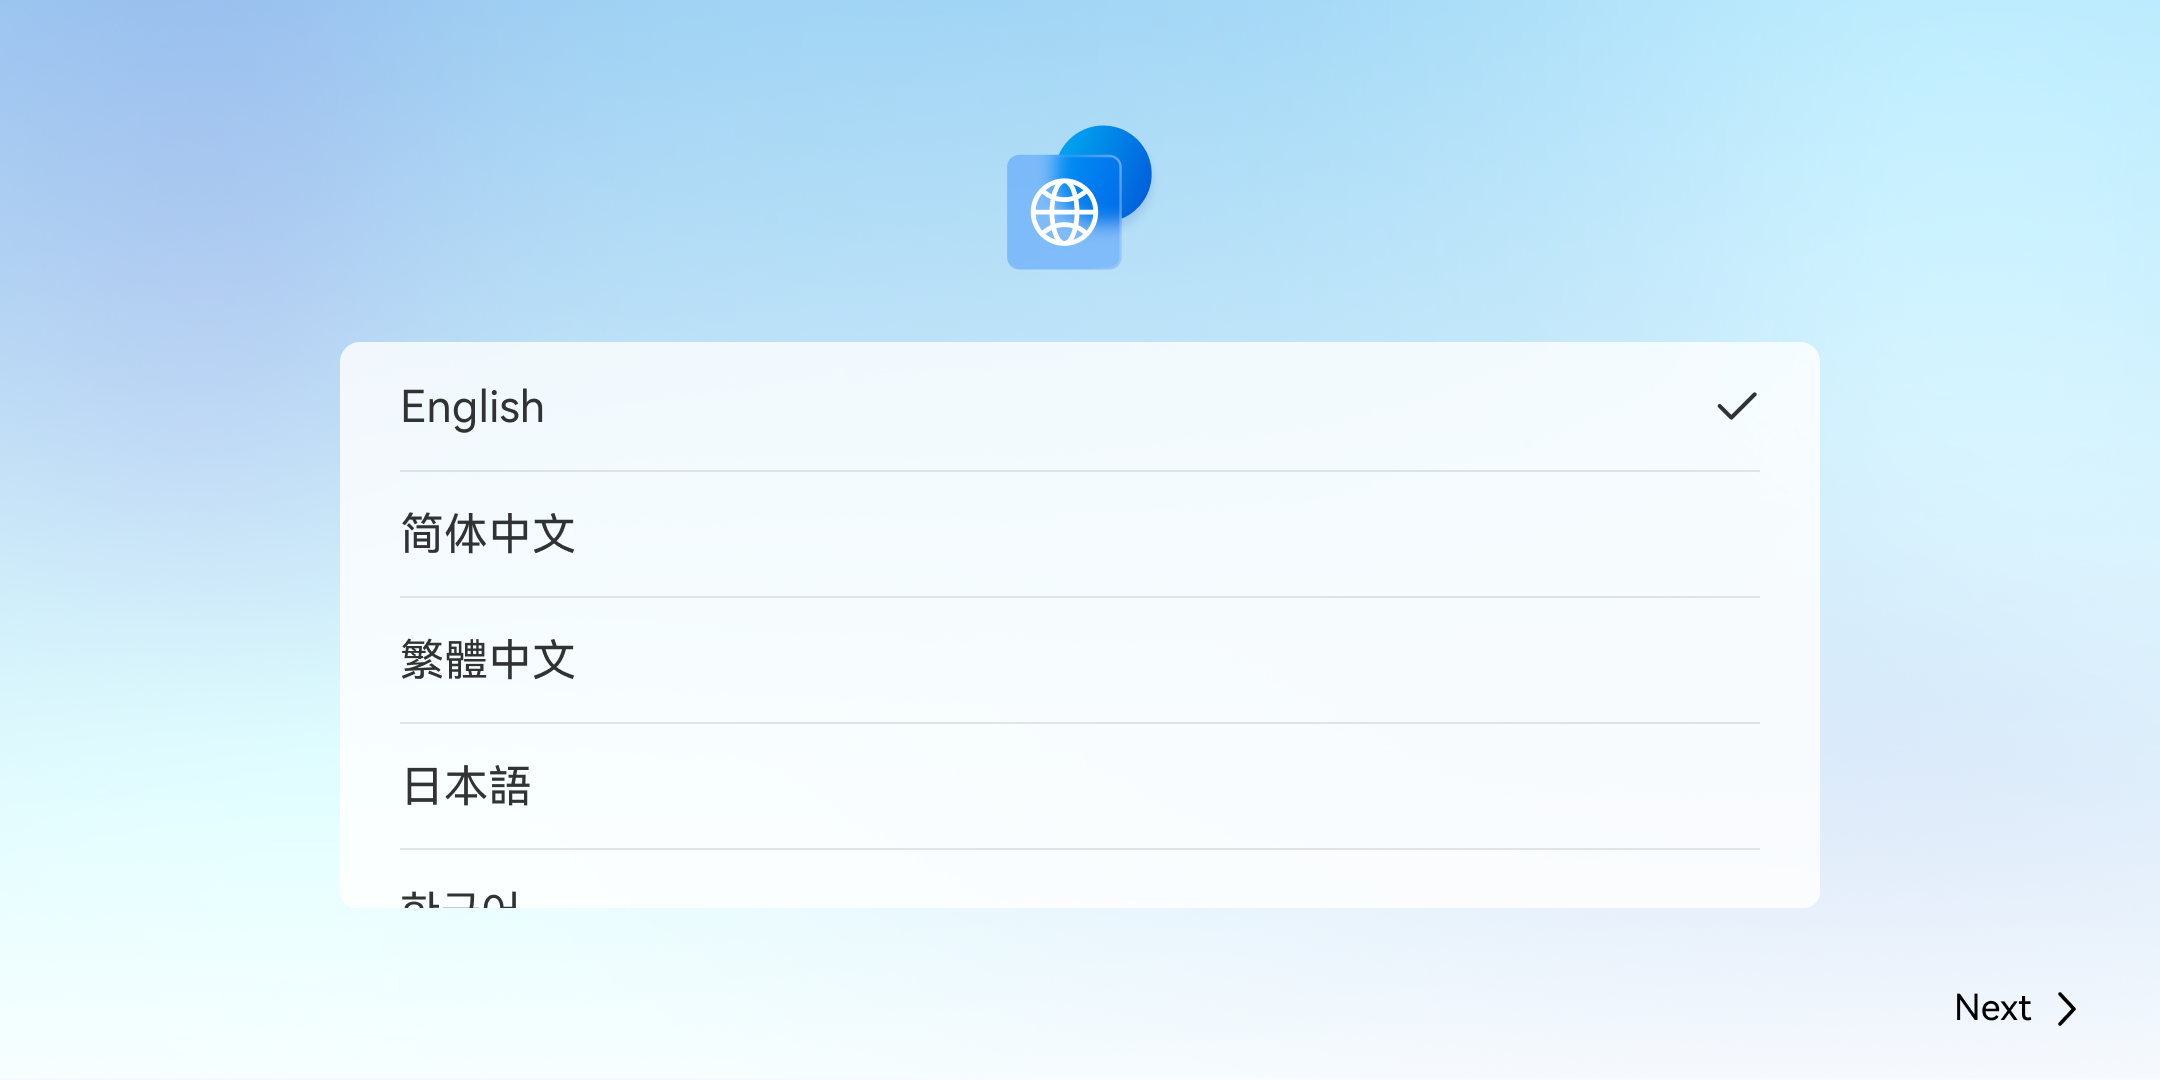
- Language Selection: Select your language and click [Next].
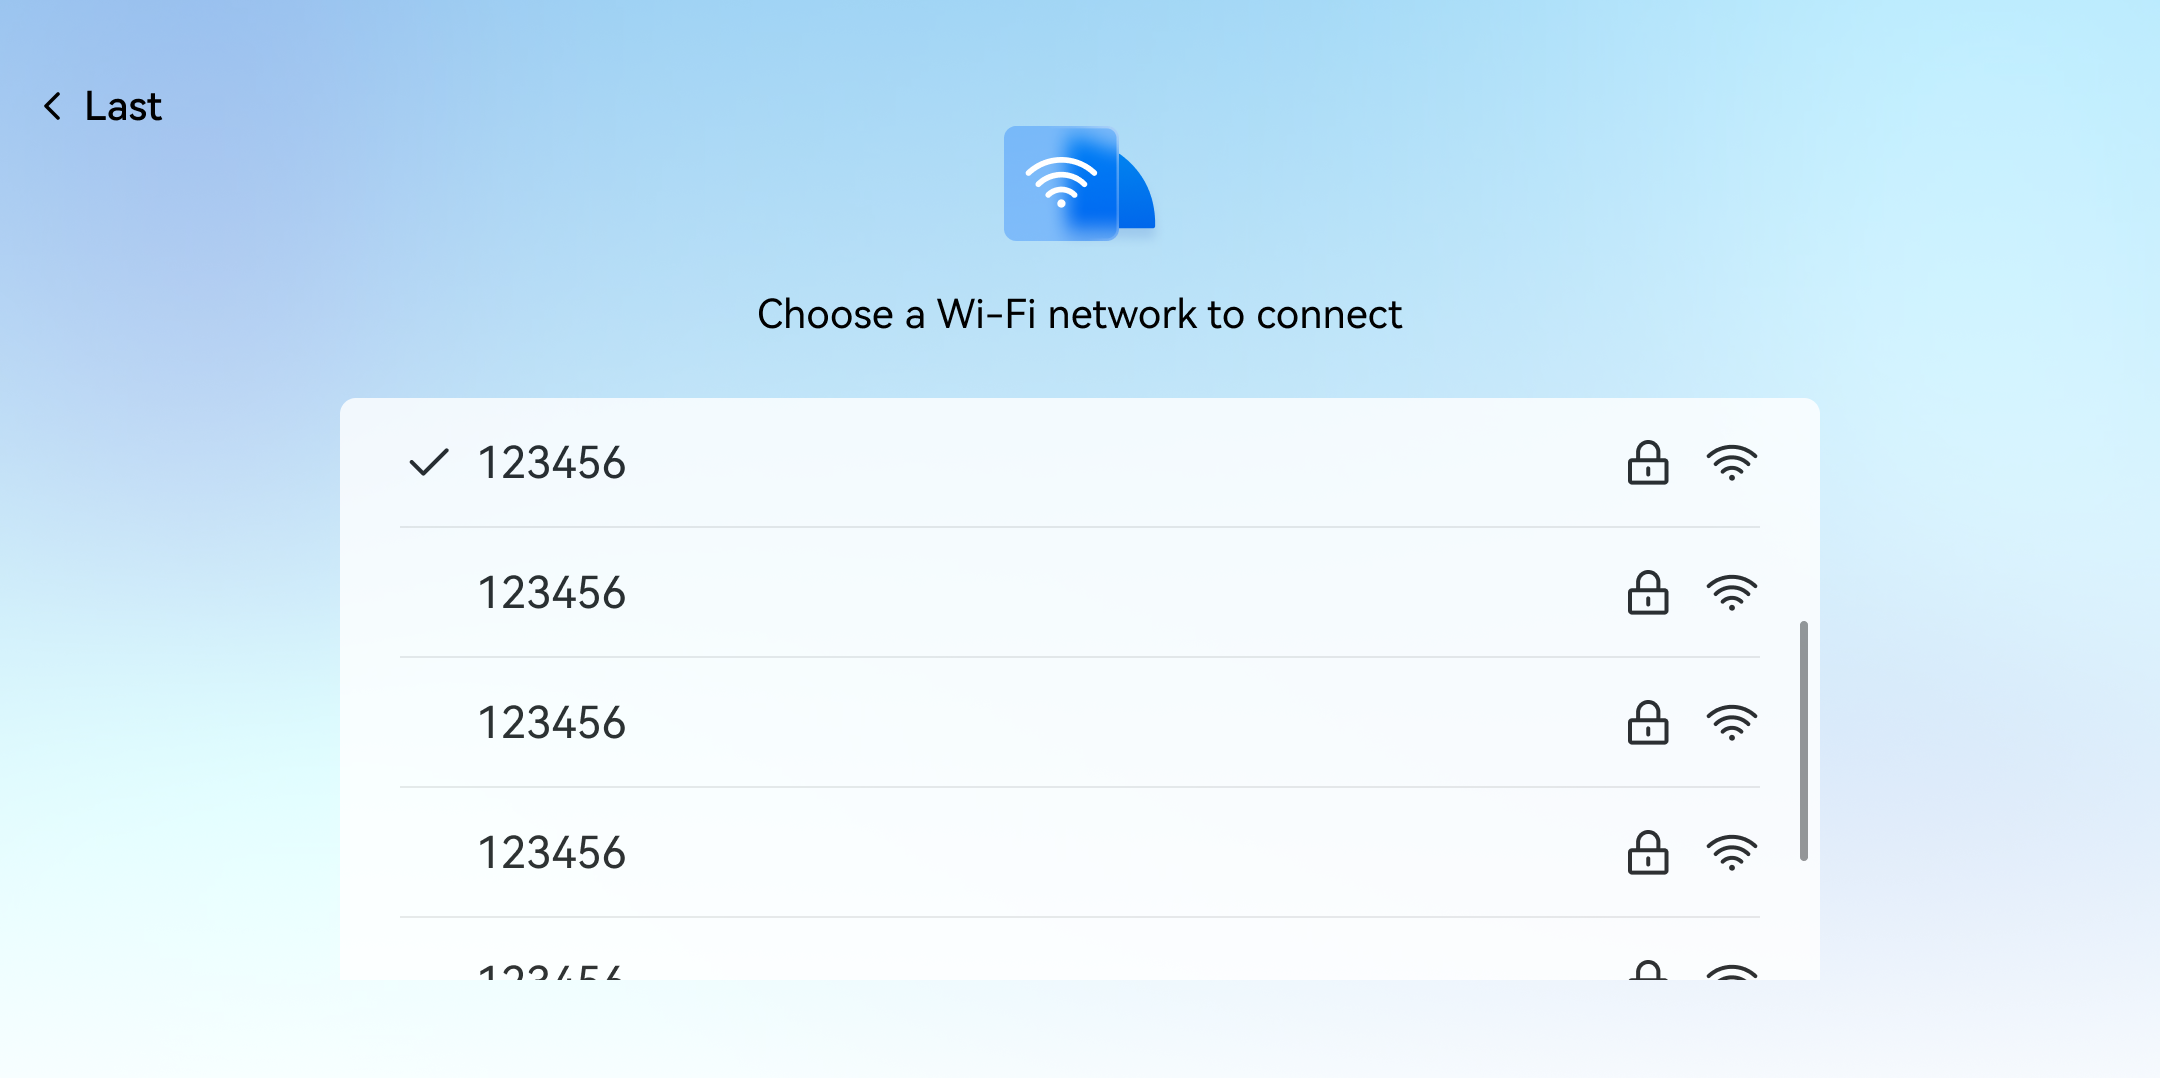
- Network connection: Select an available local area network. After the connection is established, the system will automatically proceed to the next step.
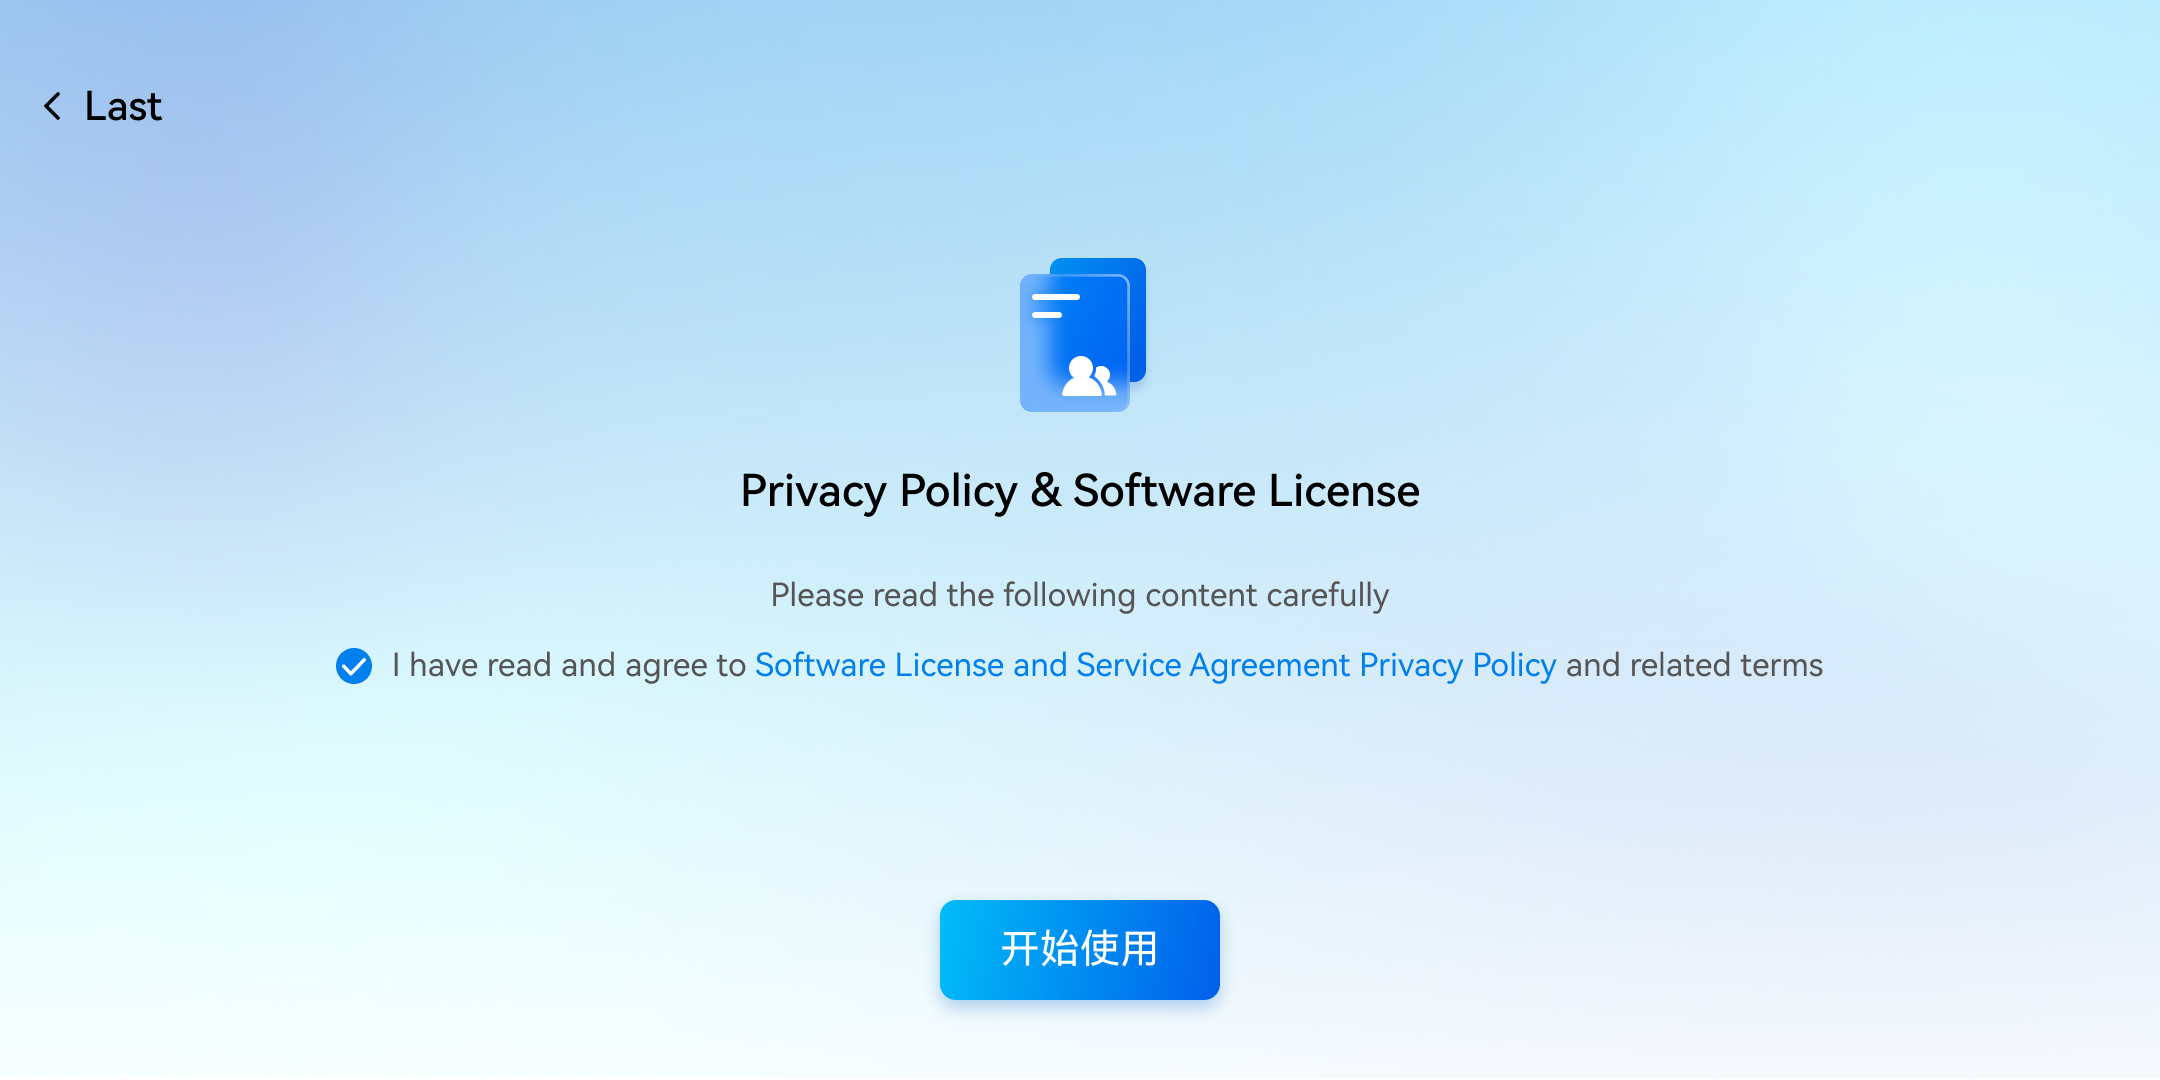
- Privacy Policy: Please read and agree to our Privacy Policy and User Agreement before using the device.
- Activation: Device activation takes a while, please be patient.
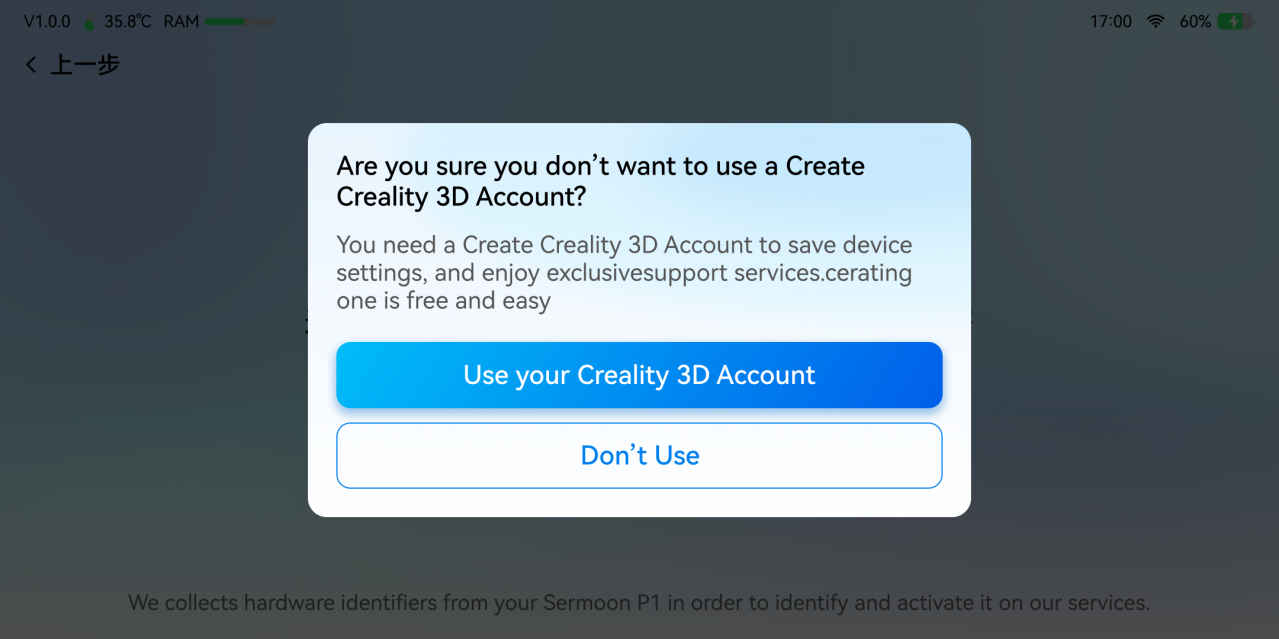
- Account Login: Supports login with Creality Cloud account. You can skip the login without affecting the normal use of the device.
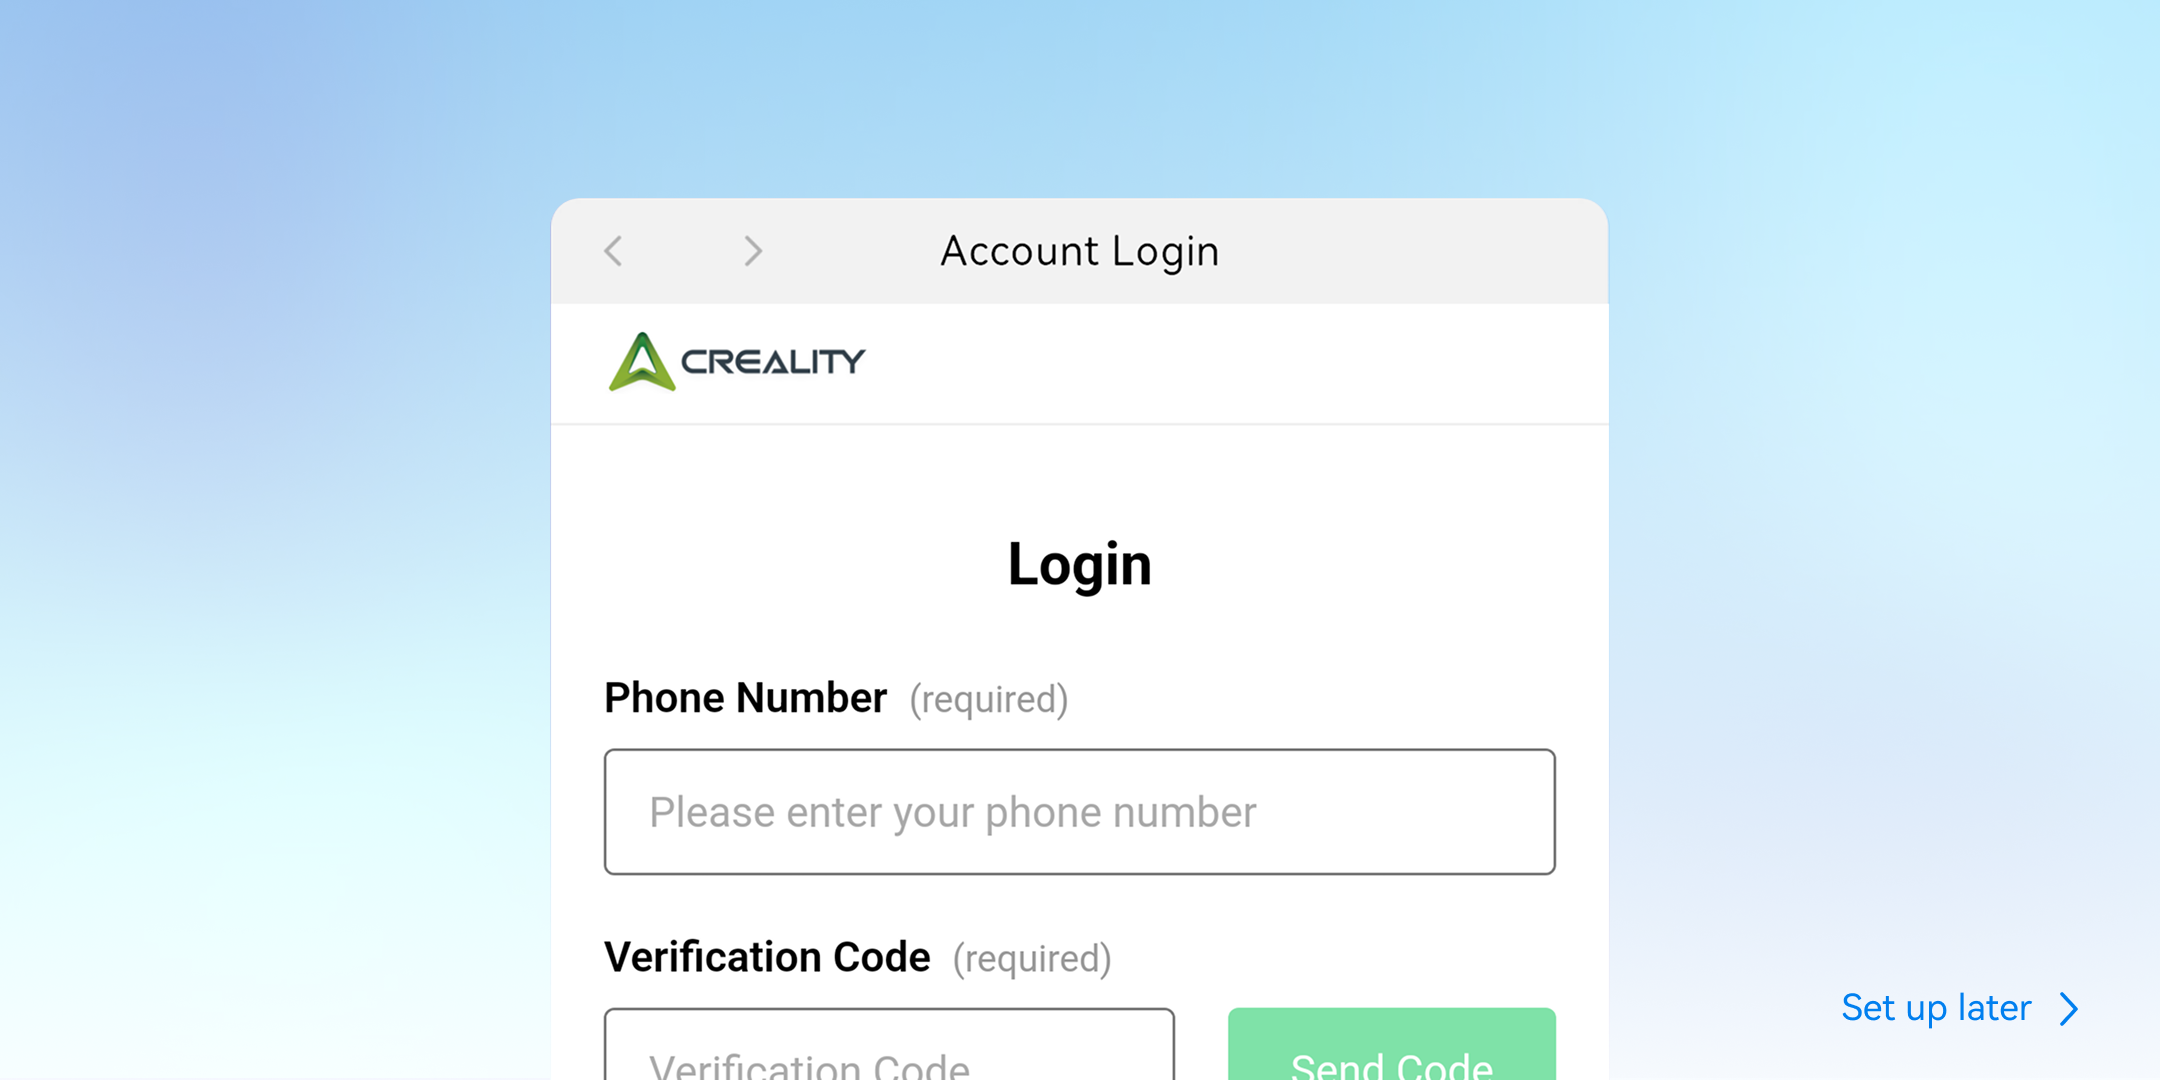
Skipping login will trigger a confirmation pop-up. If you still do not log in, select "Do Not Use" to proceed to the next page.
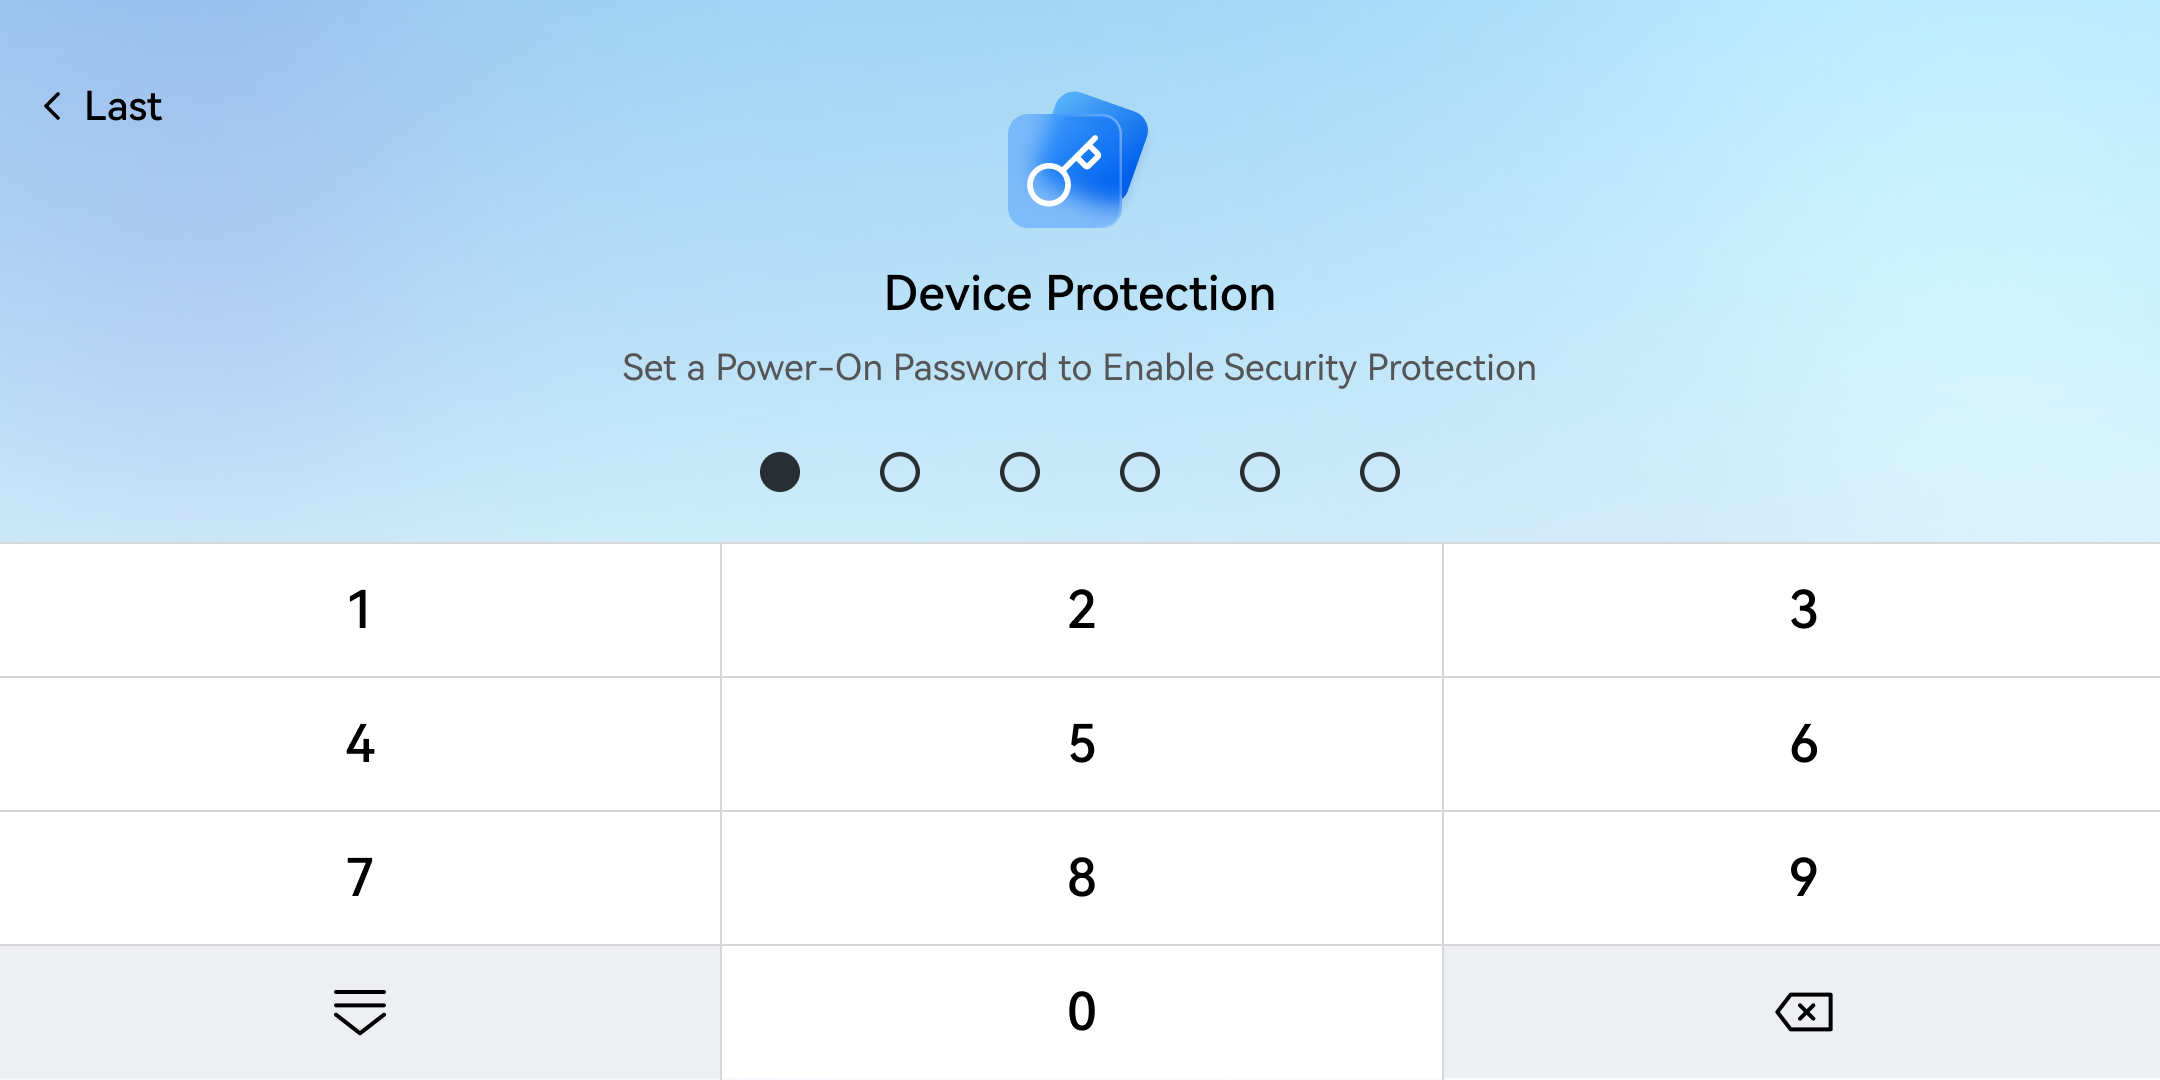
- Device Protection: On this page, you can set a device power-on password to prevent unauthorized users from using the device.
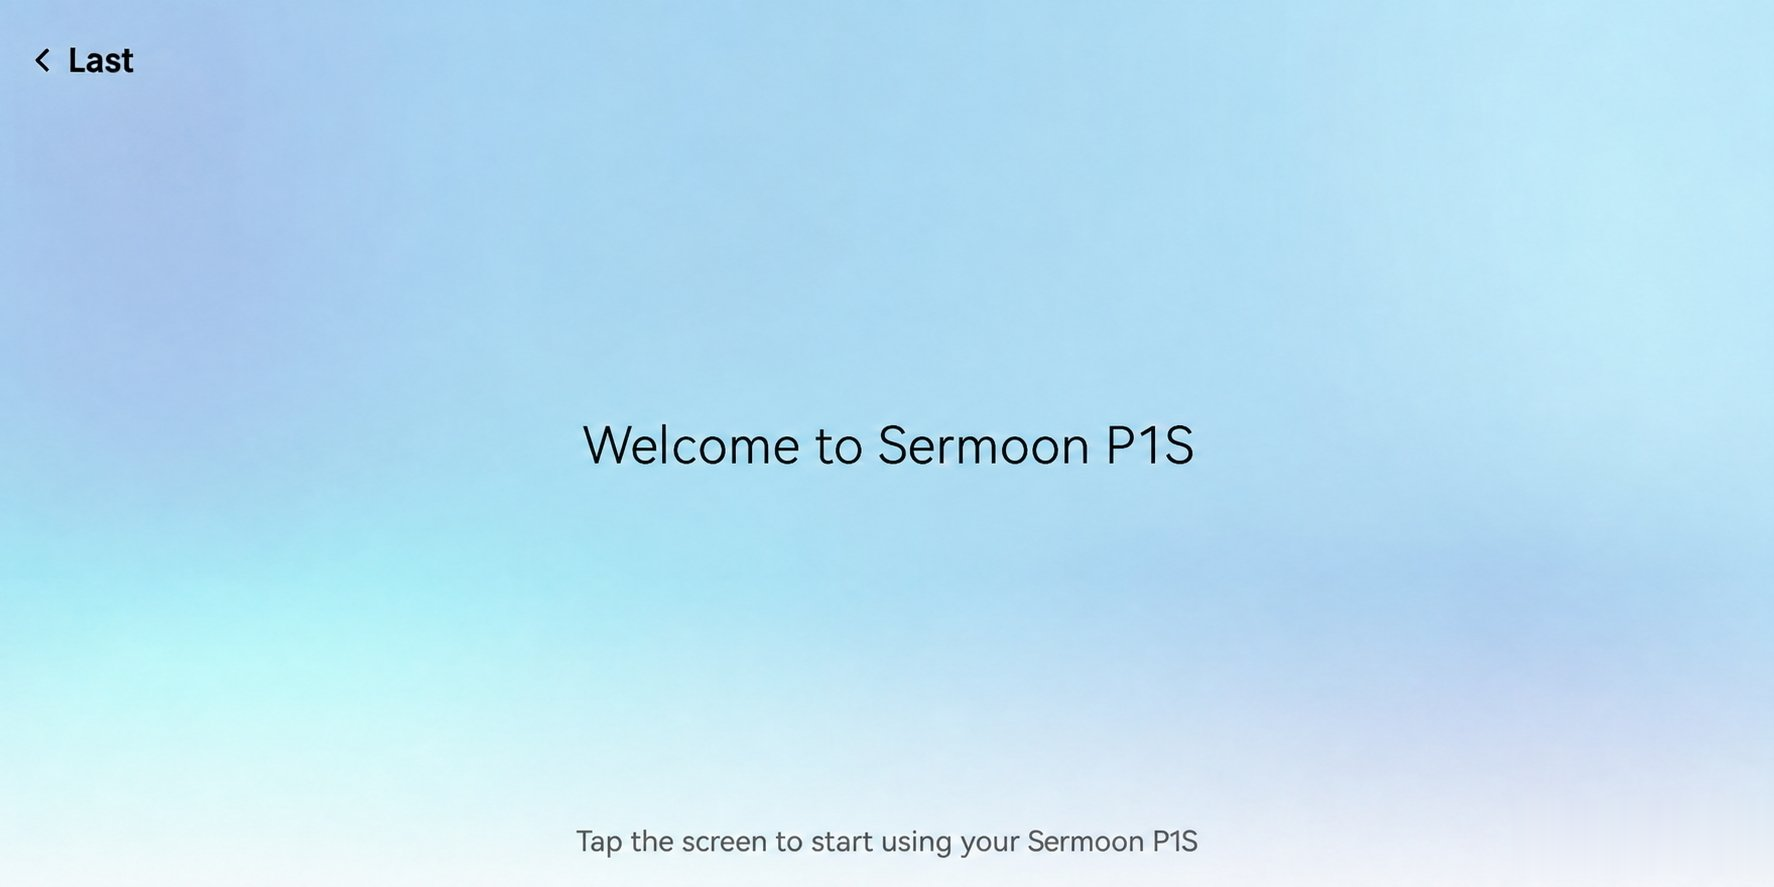
- Welcome page: Tap anywhere on the screen to start using the device.
- Beginner tutorial video: You can choose whether to skip it. After watching/skipping, you will be taken directly to the device scanning page to start your first scanning experience.
¶ Step 2: Start Scanning
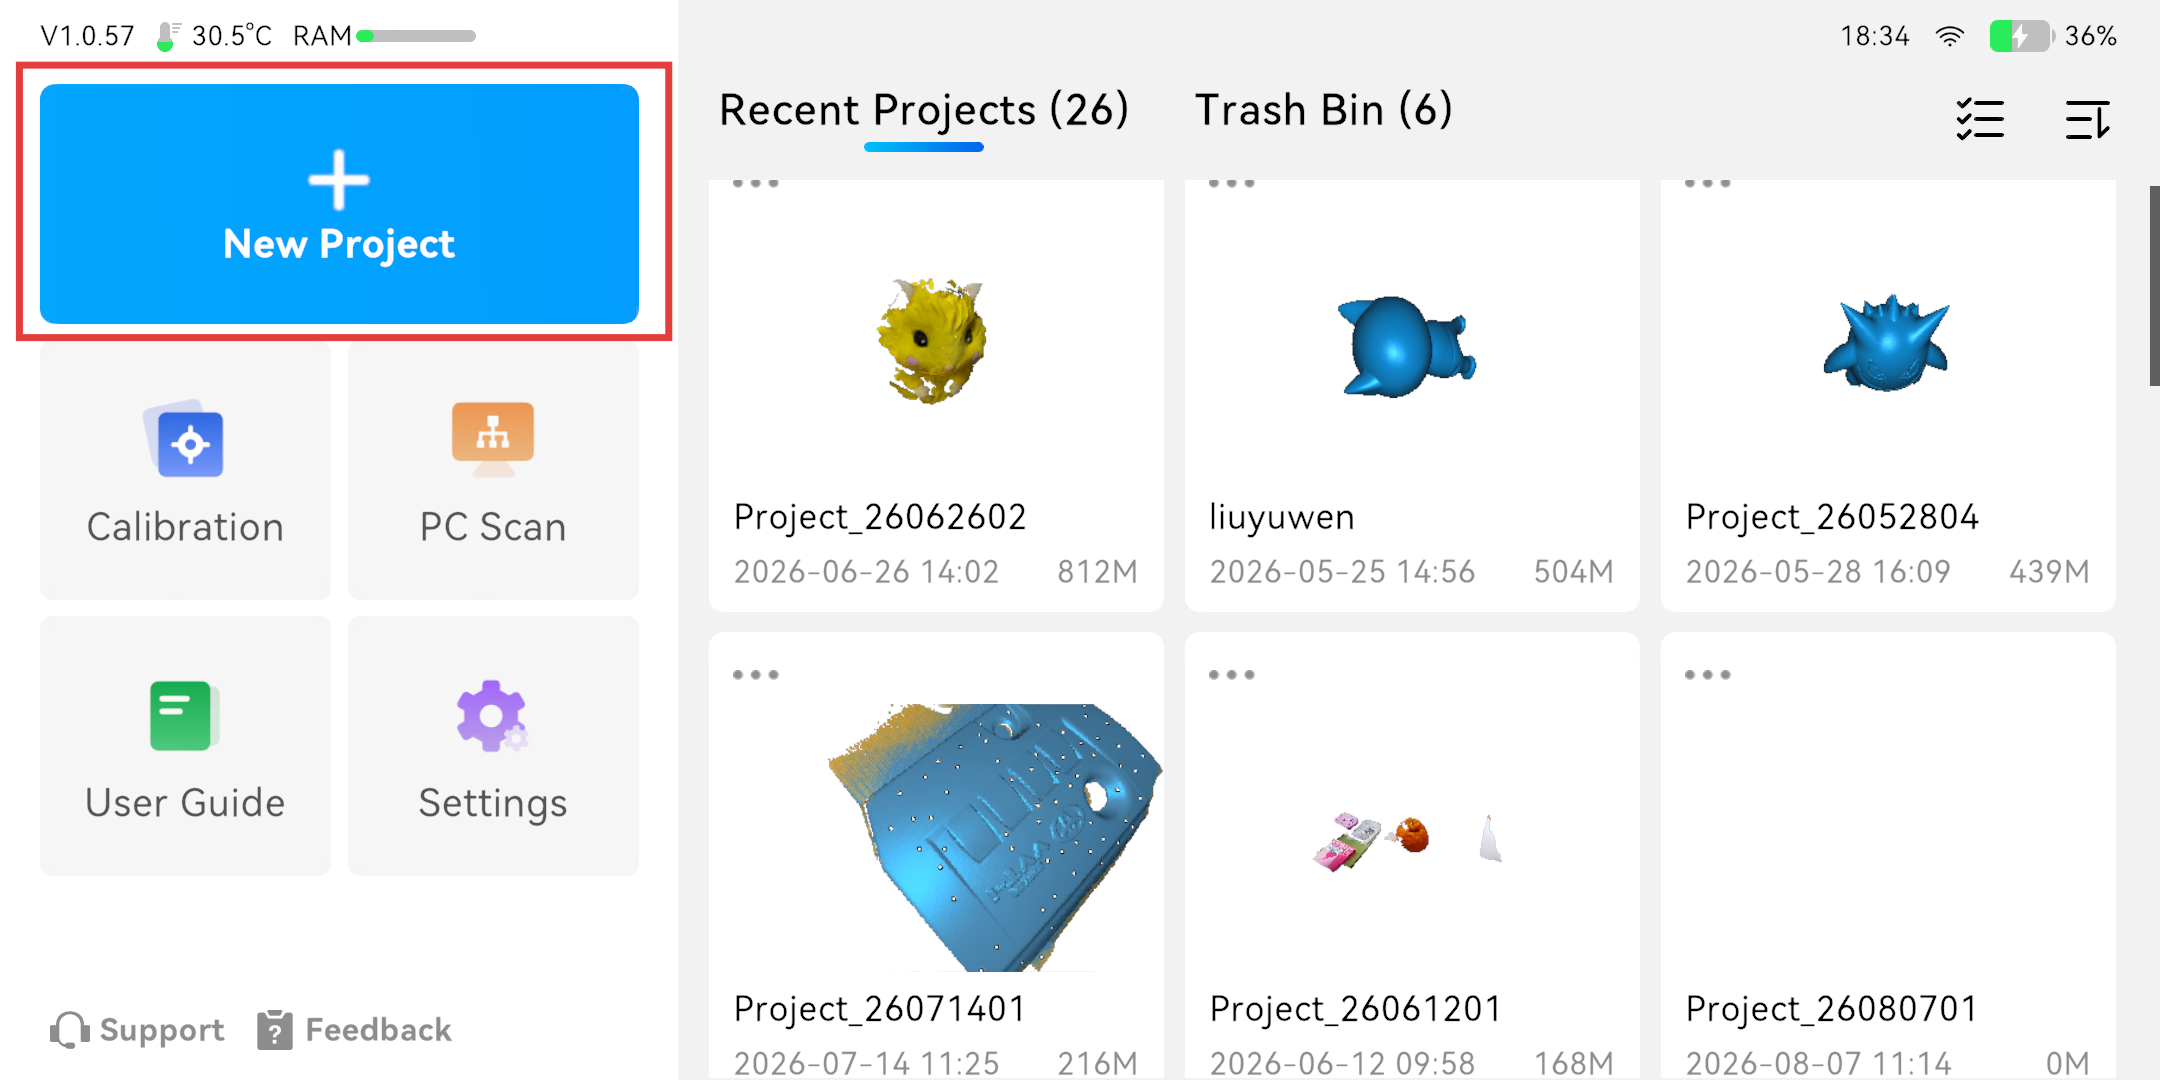
- Click "New Project" on the device screen to enter the scan preview page.
-
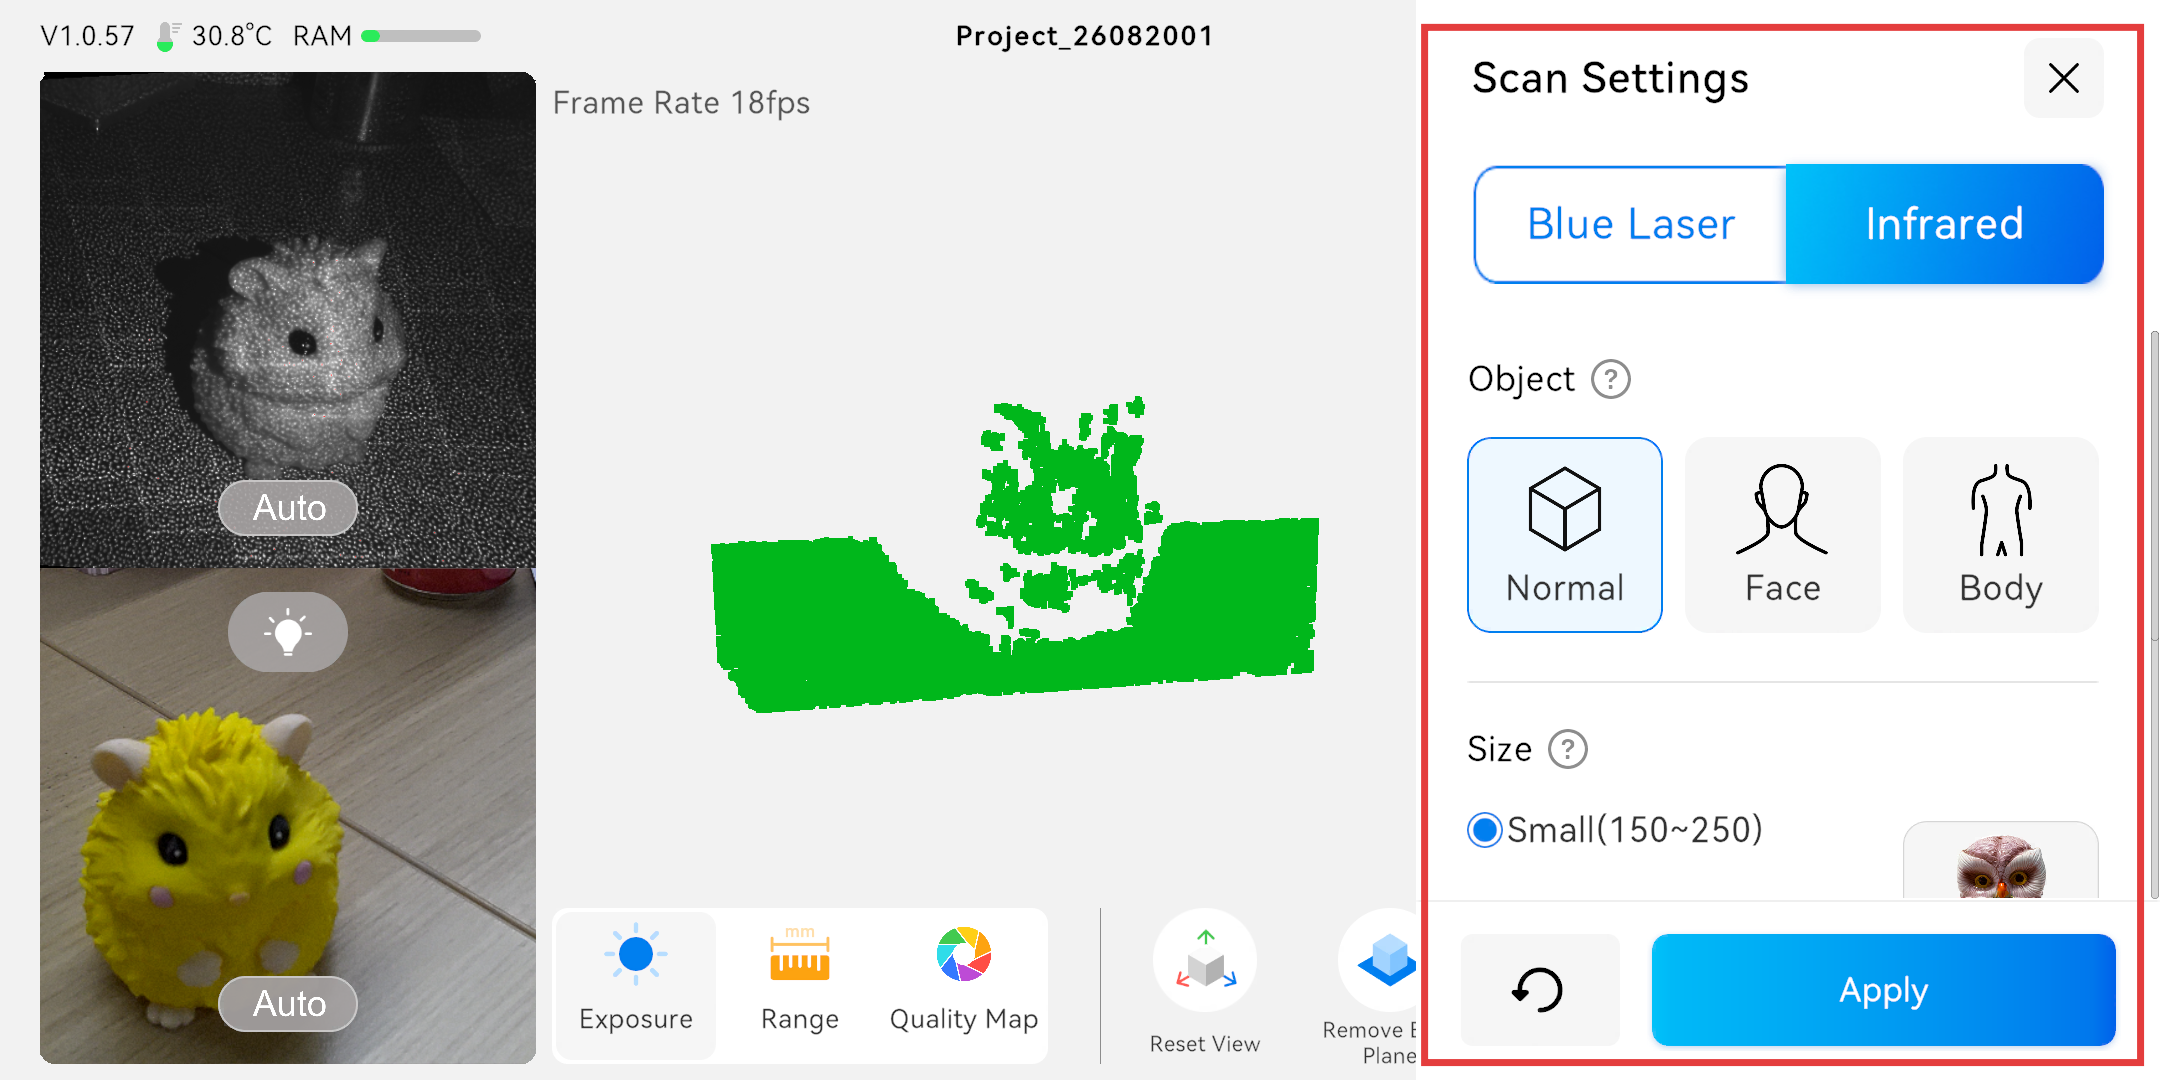
Select appropriate scanning settings (blue line laser/infrared) and related parameters based on the characteristics of the object being scanned.
-
Select the appropriate scanning mode and click "Apply" to scan according to the selected mode.
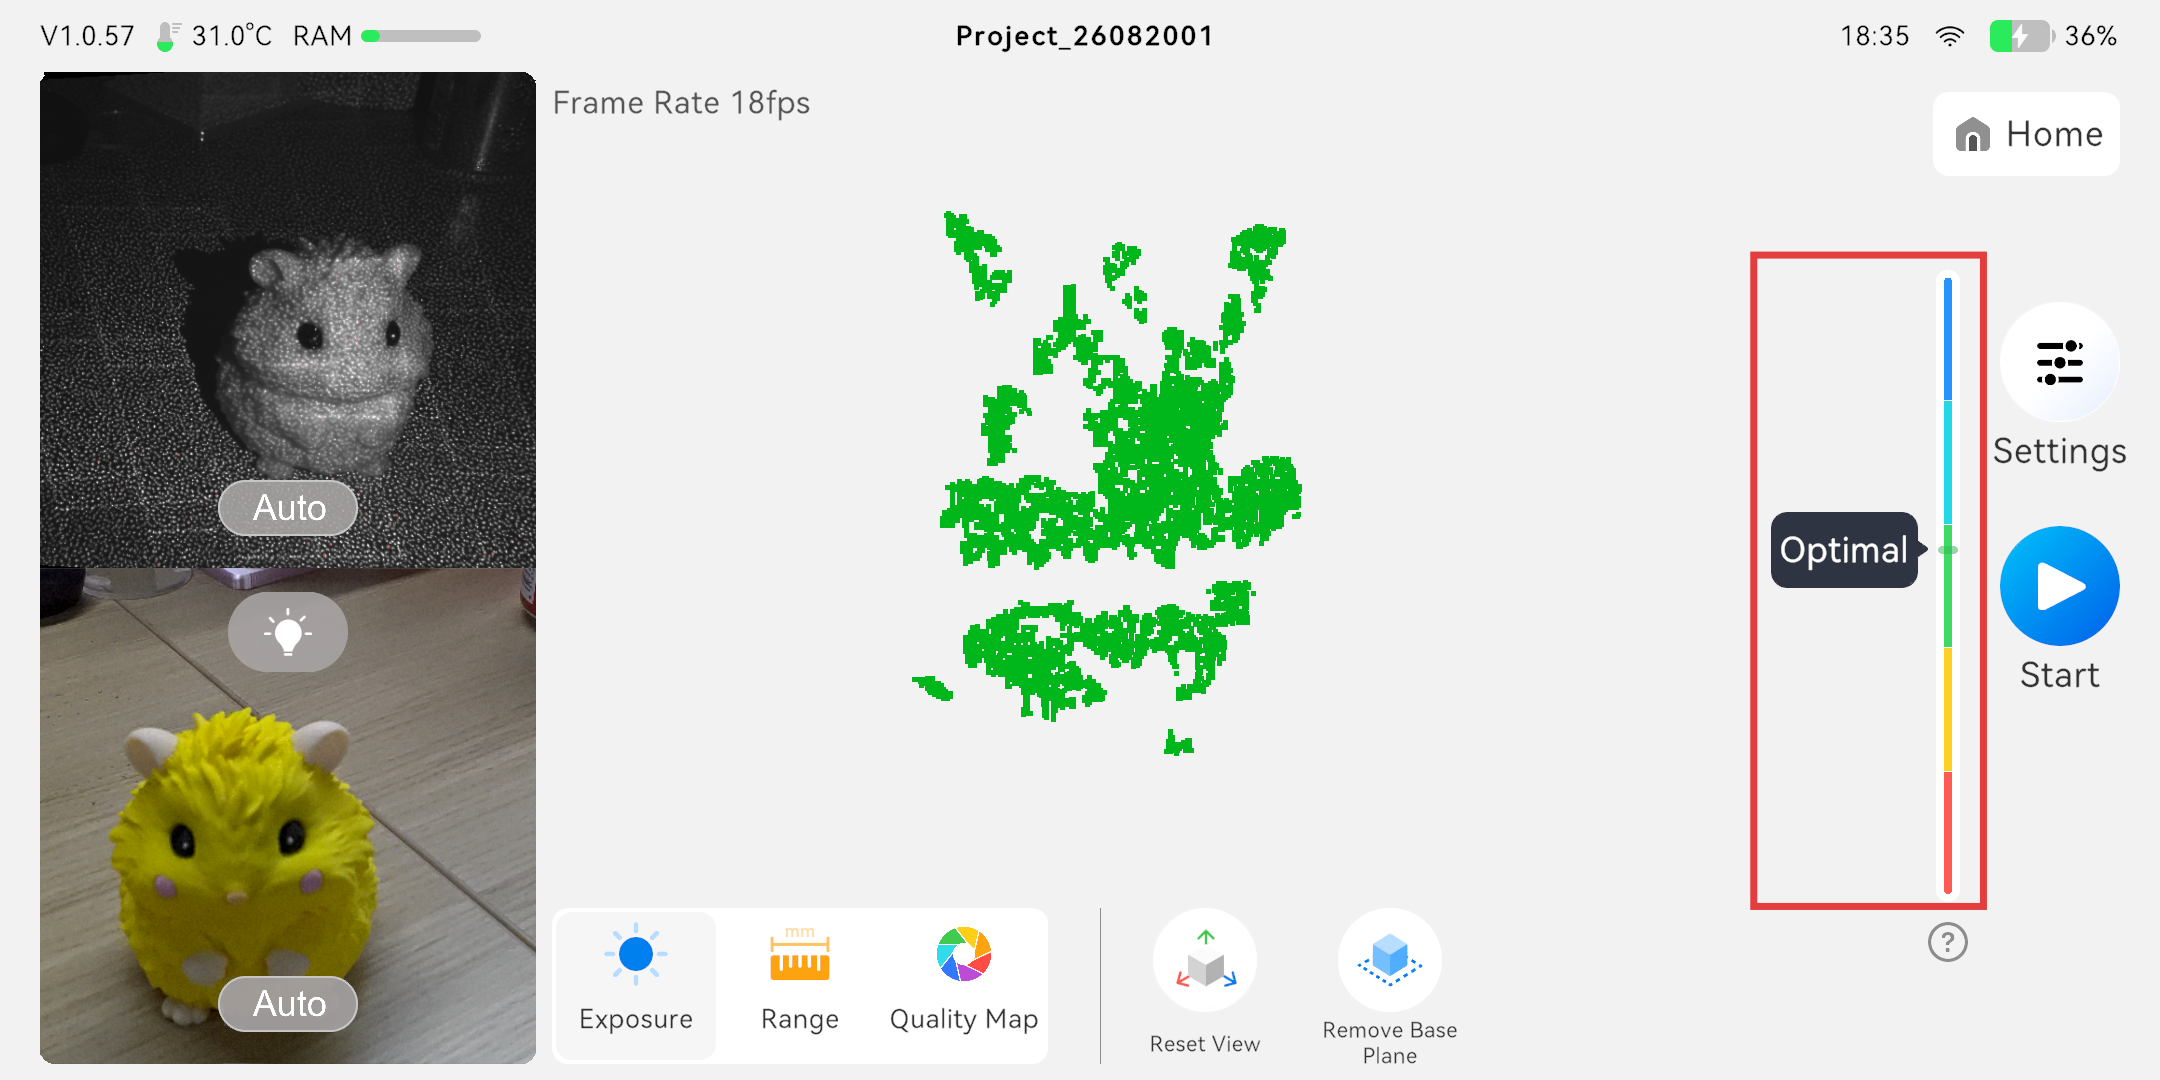
- Adjust the scanning distance: Move the scanner to adjust its distance from the scanned object. When the distance indicator bar on the right side of the screen is within the green "Optimal" range, it means the current distance is ideal for scanning.
-
Start scanning: Briefly press the start/pause button on the scanner, or tap the [Start] button on the device screen. Keep the scanner pointed at the object and move it smoothly and slowly to scan the object from all angles (360°).
-
Complete Scan: Once the data acquisition is complete, press and hold the start/pause button on the scanner for more than 2 seconds, or tap "Finish" on the device screen. The scanned point cloud data will be automatically displayed on the device screen.
¶ Step 3: Model Processing
After the scanning is complete, you can use the processing function built into the Creality Sermoon P1 device to generate the final 3D model from the point cloud data.
Processing Flow (Operate on the screen):
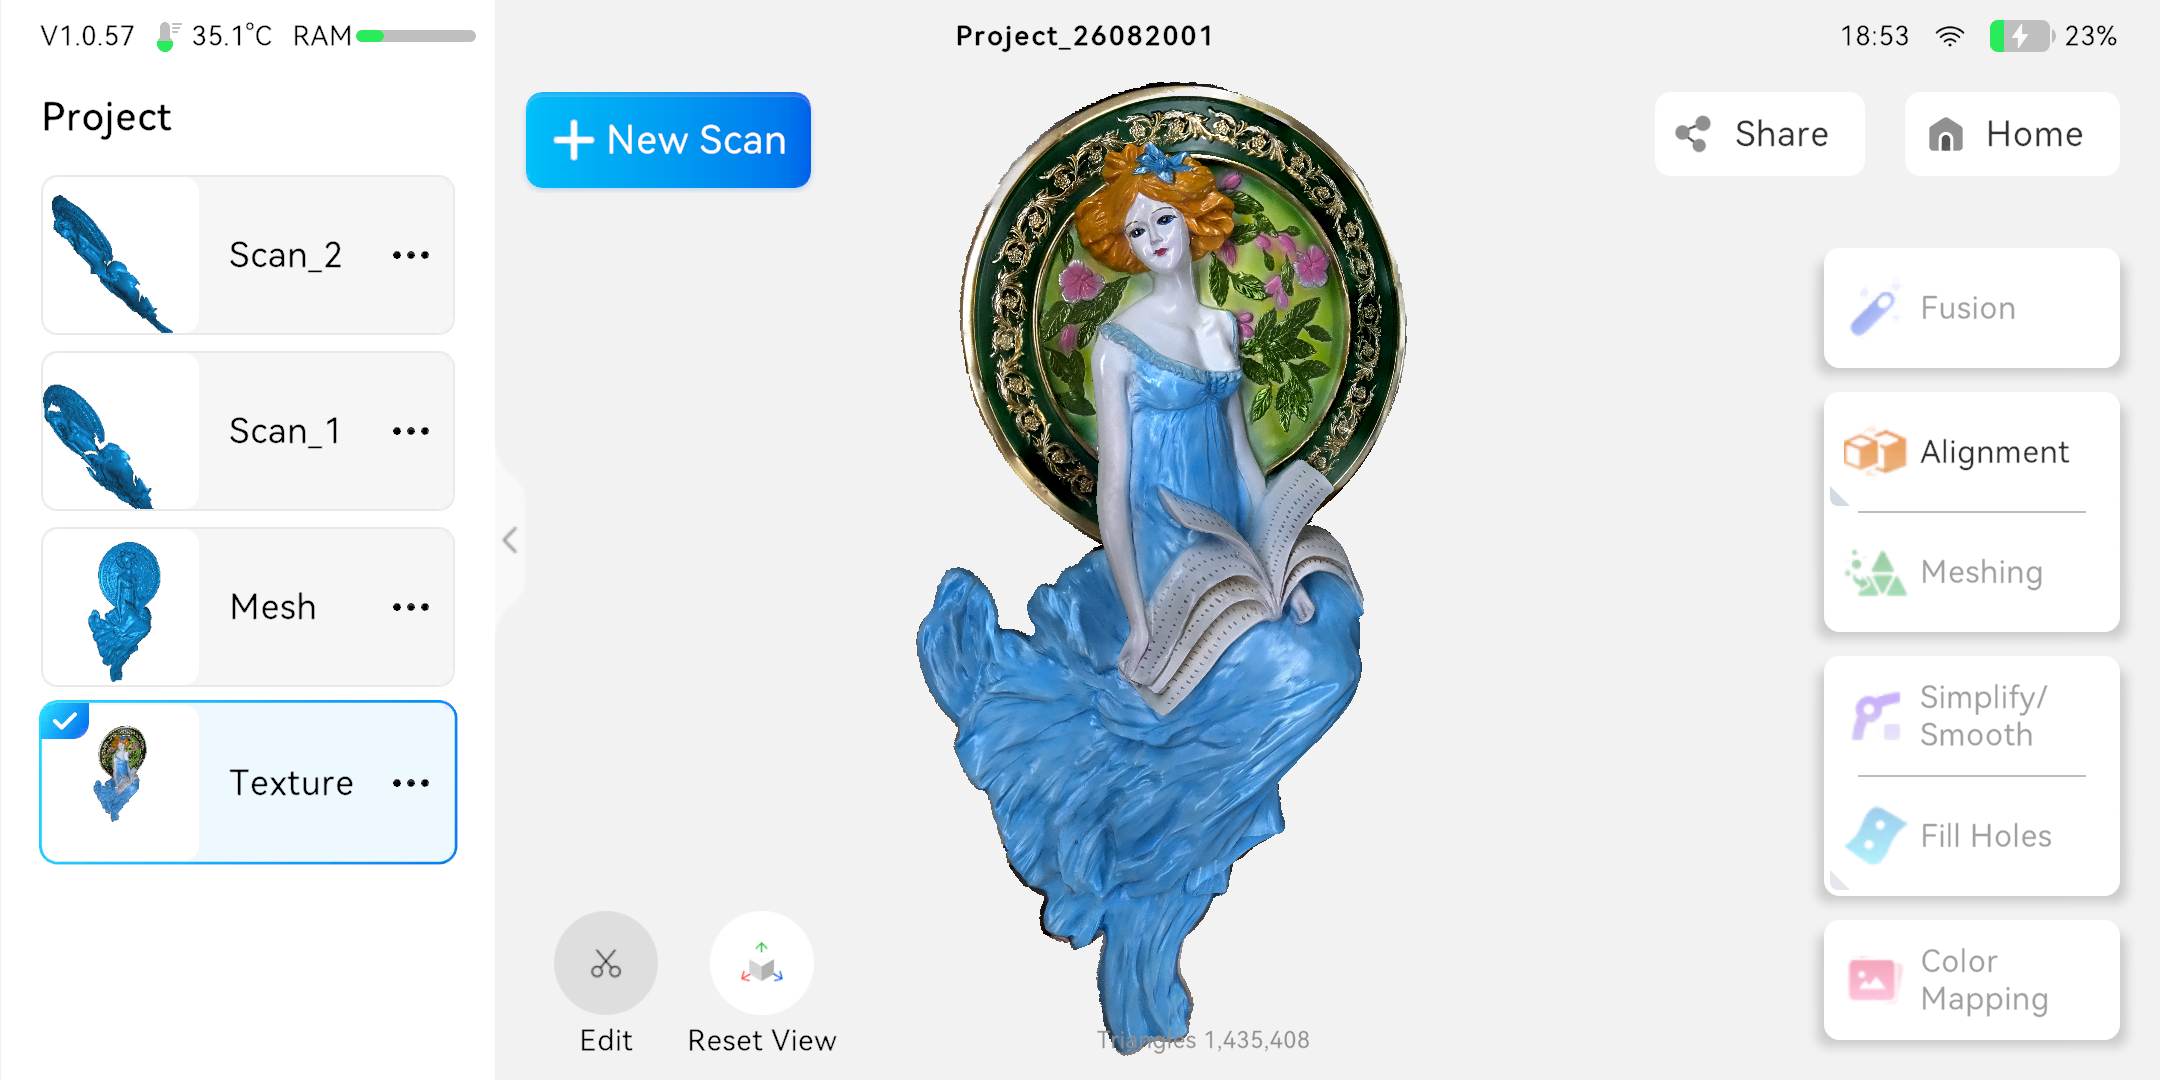
- Fusion: Fuse multiple frames of point cloud data collected during the scanning process into a complete point cloud.
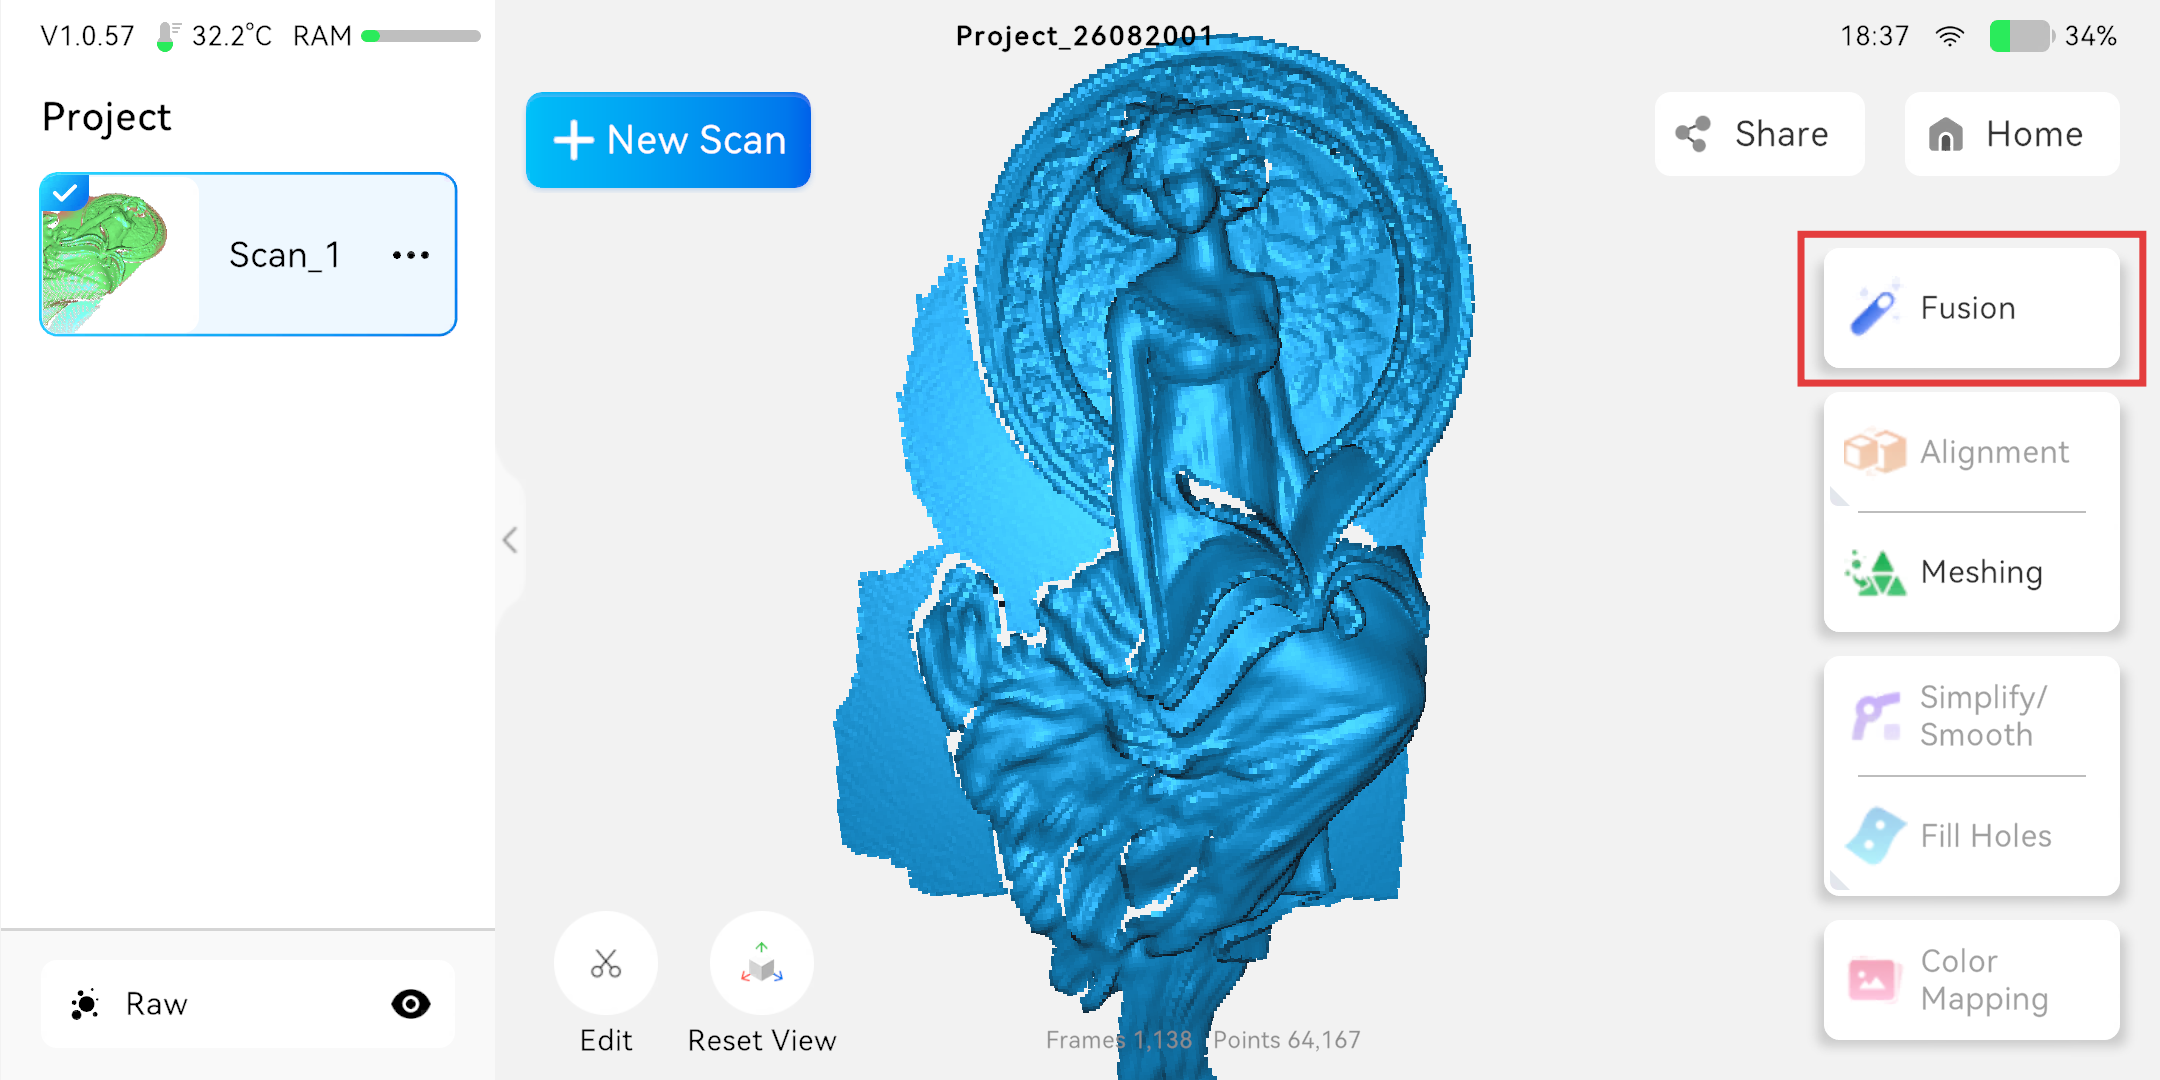
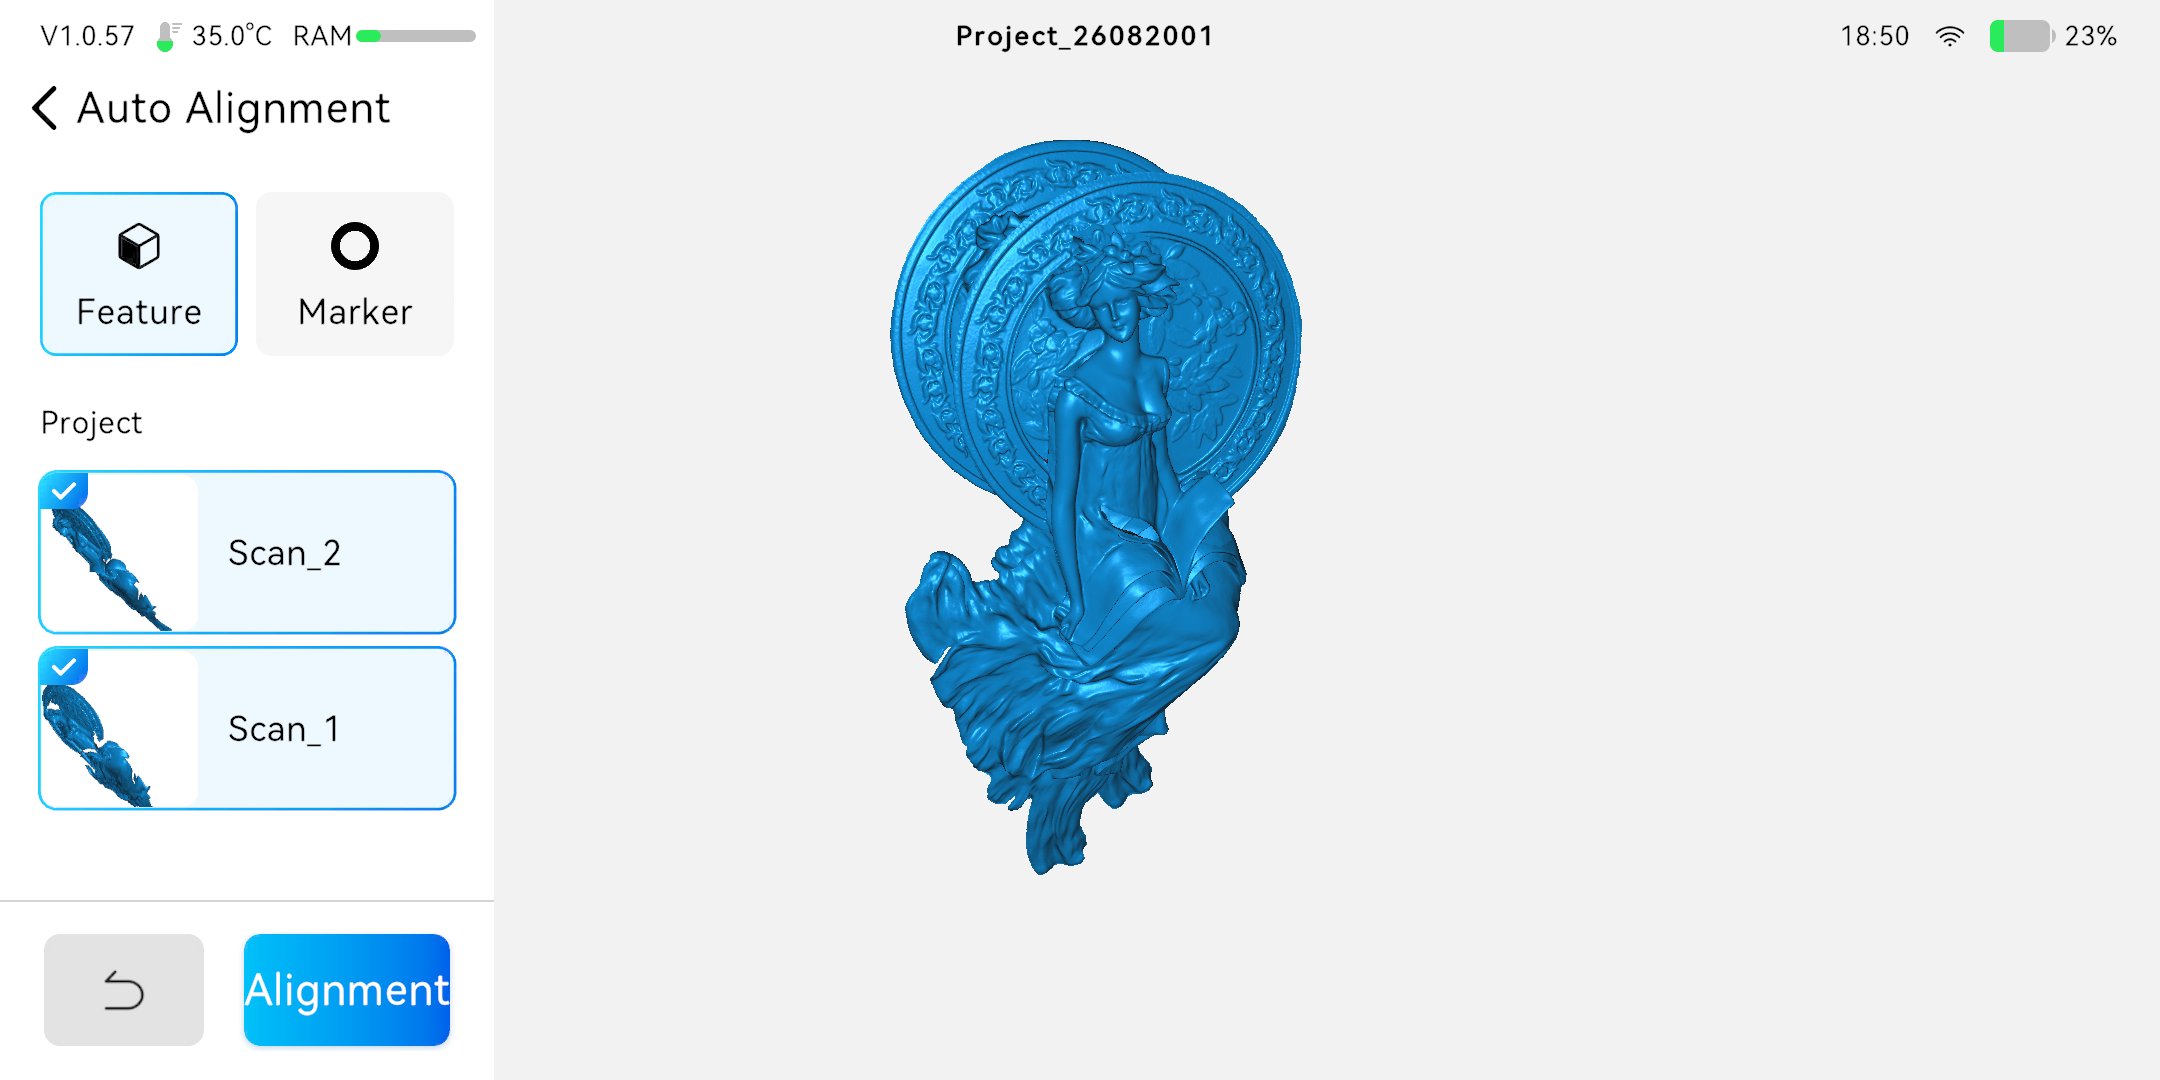
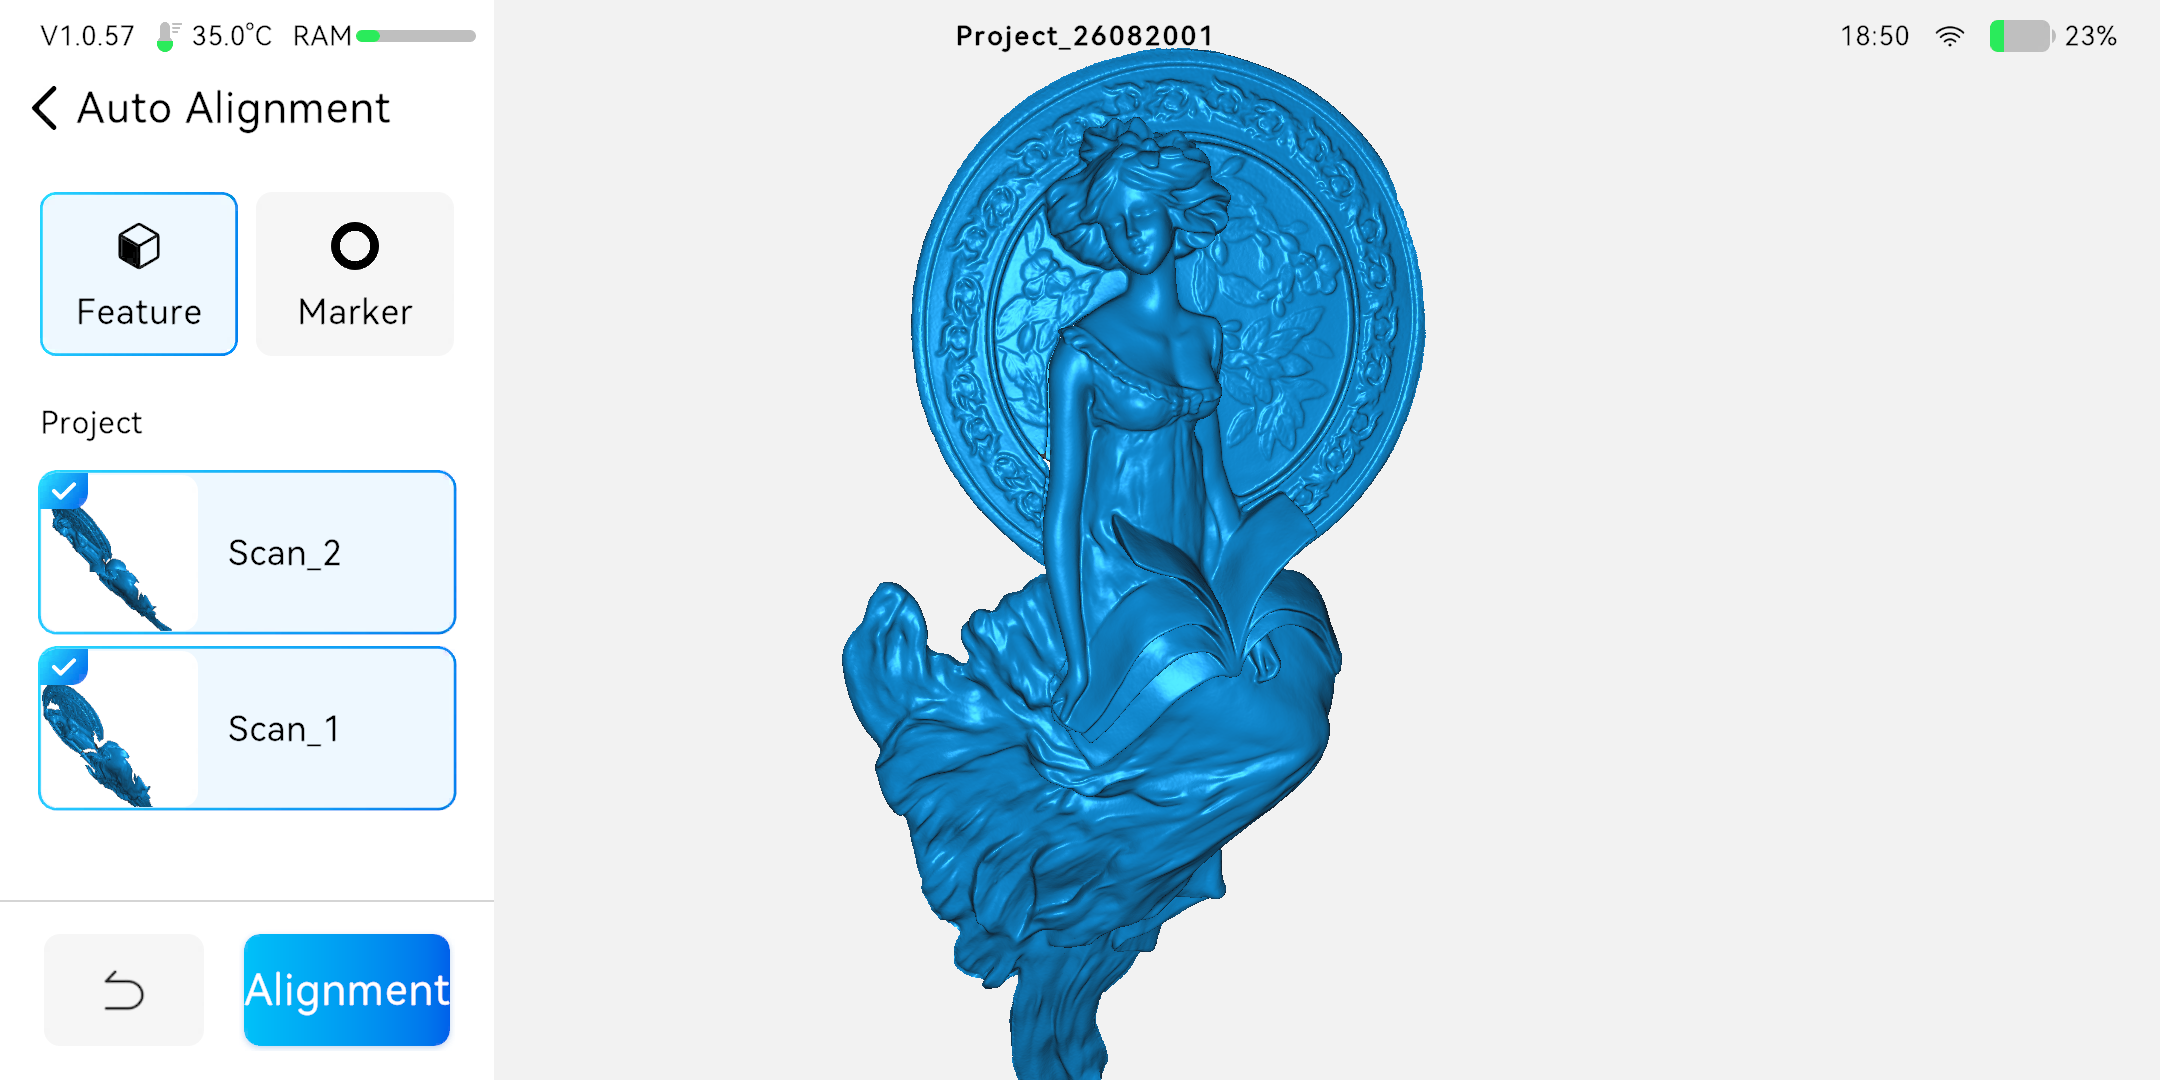
- Alignment (if applicable): Multiple merged Scans can be aligned together into a complete model to view the effect.
 |
 |
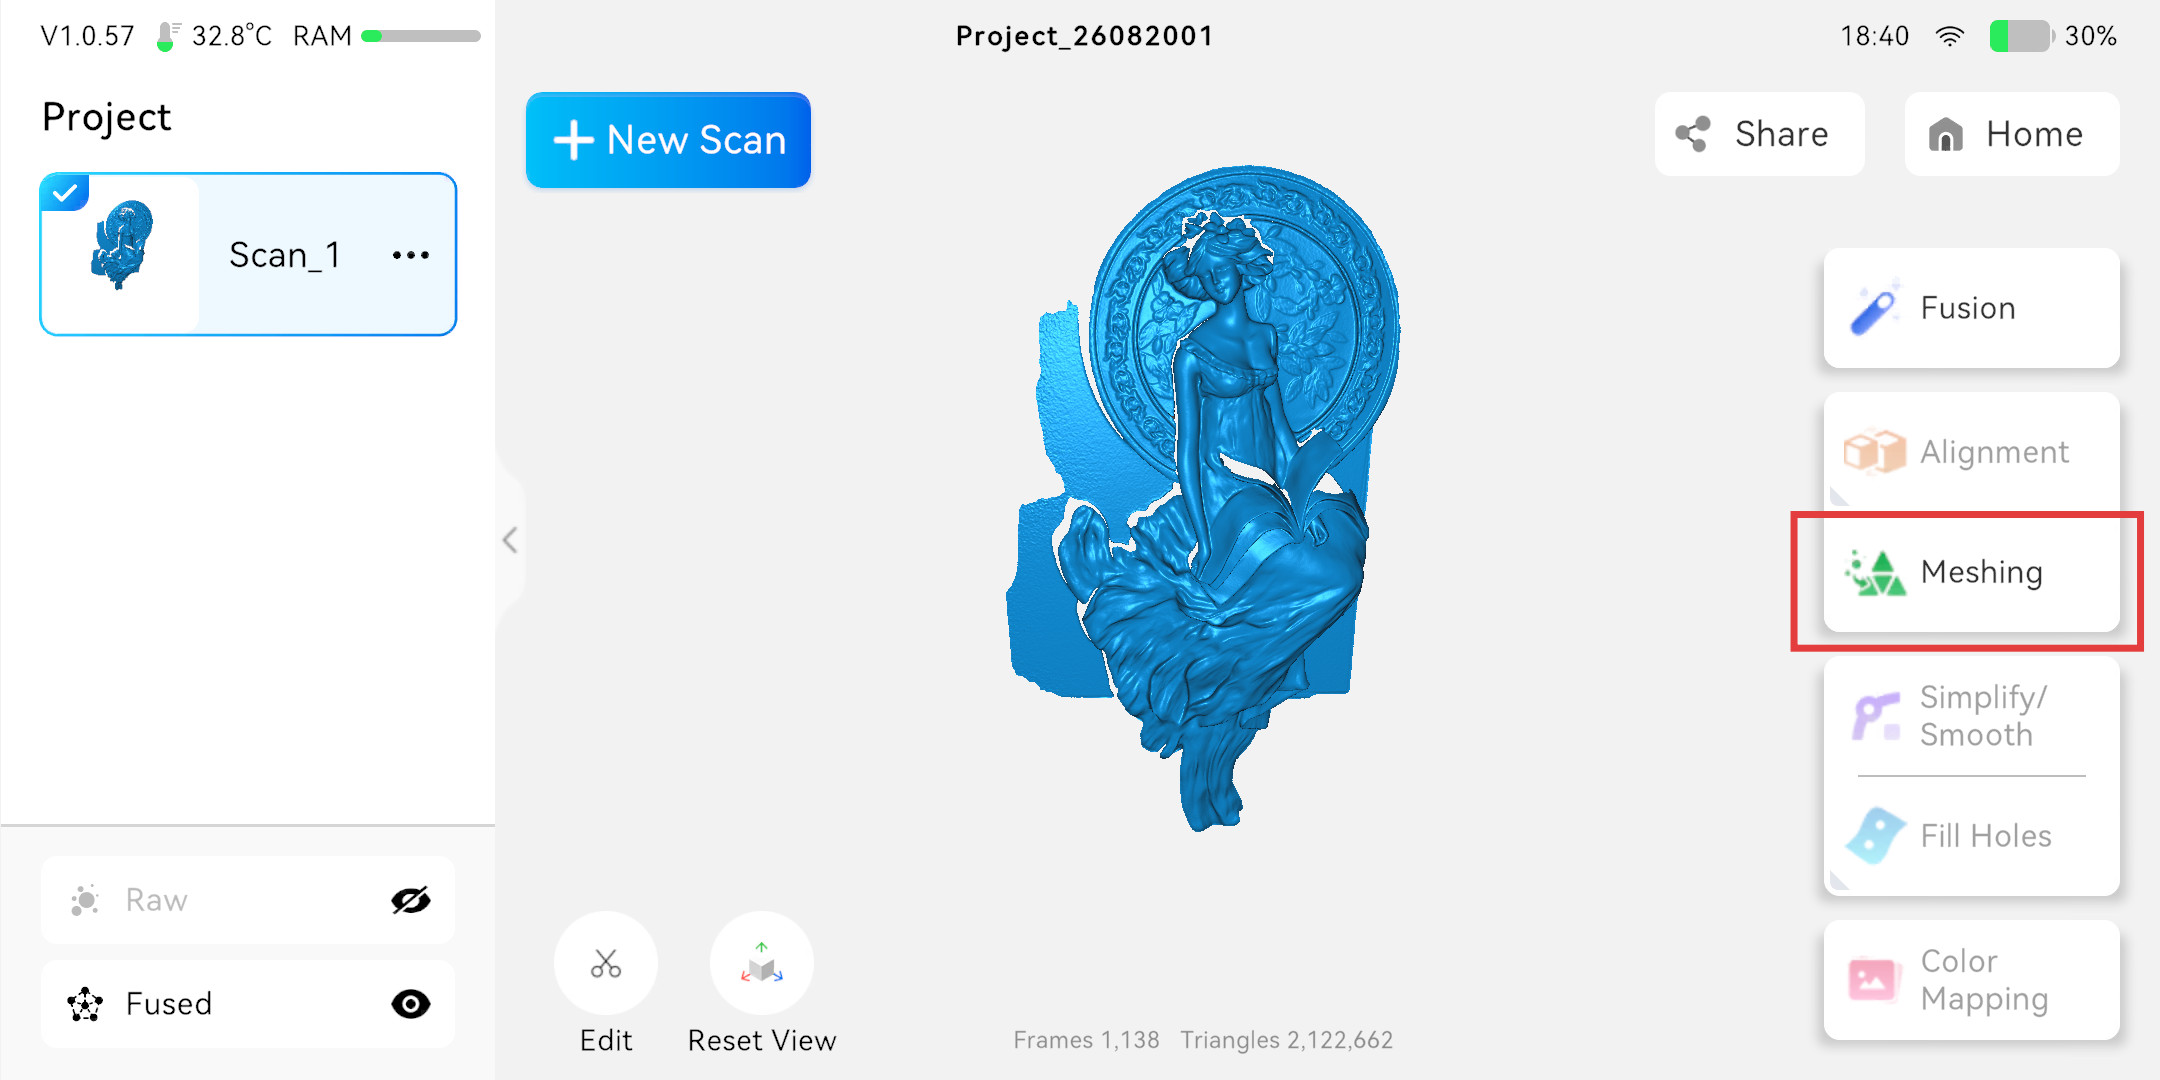
- Meshing: Perform comprehensive optimization on the fused mesh data to make it more complete and smooth.
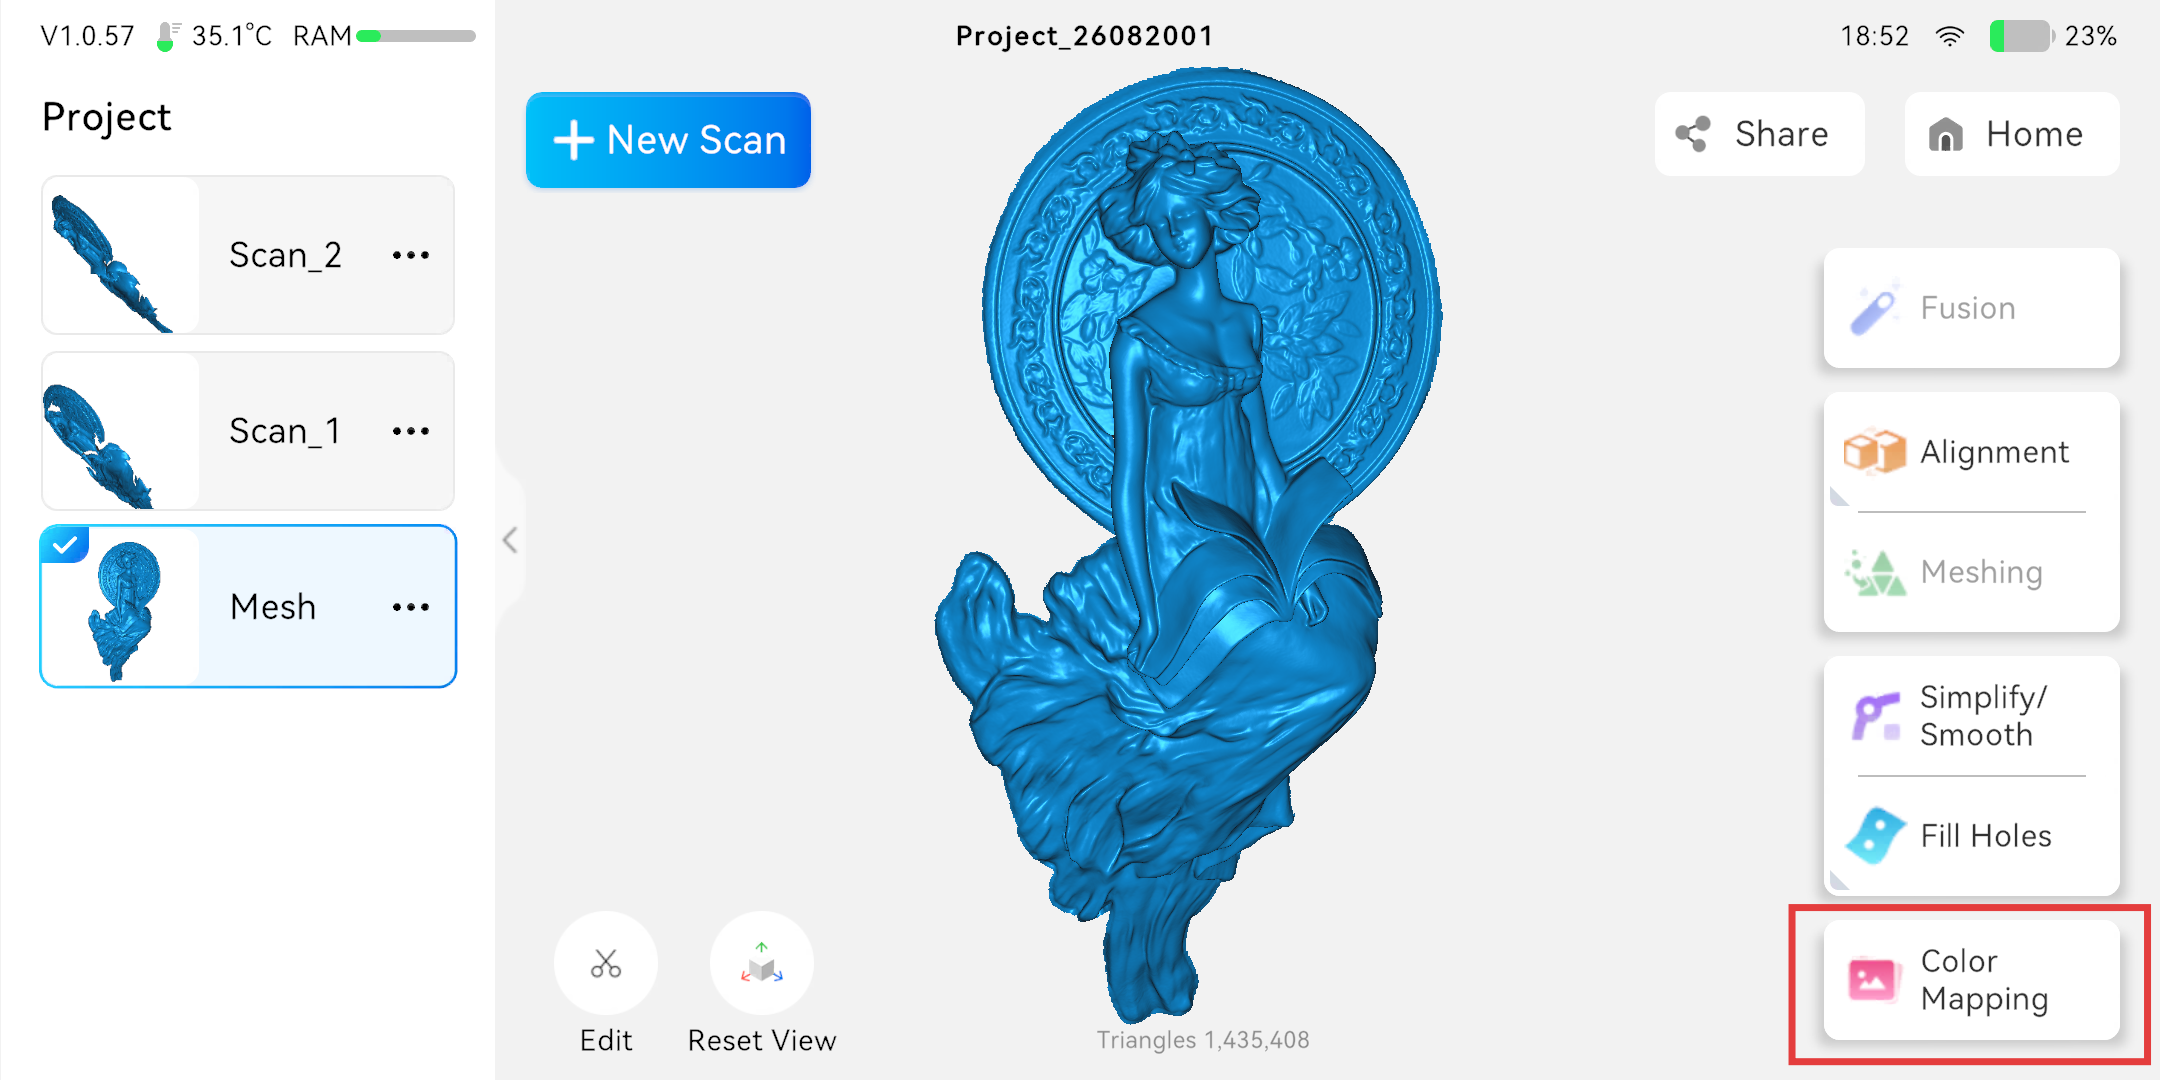
- Color Mapping (if applicable): If color information is captured during scanning, this step applies colors and textures to the model surface.
 |
 |
Note: For more detailed tutorials on model processing, please visit the Creality official Wiki: https://wiki.creality.com/3d-scanner
¶ 2.2 PC Connection Mode (Connect to Computer)
Connect to a computer via USB 3.0 or Wi-Fi and use the CrealityScan software for advanced scanning control and model processing.
Note: PC connection mode has specific requirements for computer specifications; please refer to "System Requirements" in section 5.1 for details.
¶ 2.2.1 Software Preparation
- Download the Software: Visit the Creality official Wiki software download page: https://wiki.creality.com/en/software, find the CrealityScan software and download it.

Note: CrealityScan software has specific operating system requirements; please refer to section 5.1 "System Requirements" for details.
Install software:
- Windows: Double-click the installer and follow the prompts to complete the installation.
- macOS: After installation, please grant the 3D scanner read and write permissions to optimize point clouds and generate models when using the software.
¶ 2.2.2 Connecting the Scanner
¶ Wired Connection (USB)
- Insert the Type-C connector of the data cable into the scanner and tighten the screws.
- Insert the other end of the data cable (Type-C) into a USB 3.0 or higher port on your computer to ensure stable data transfer.
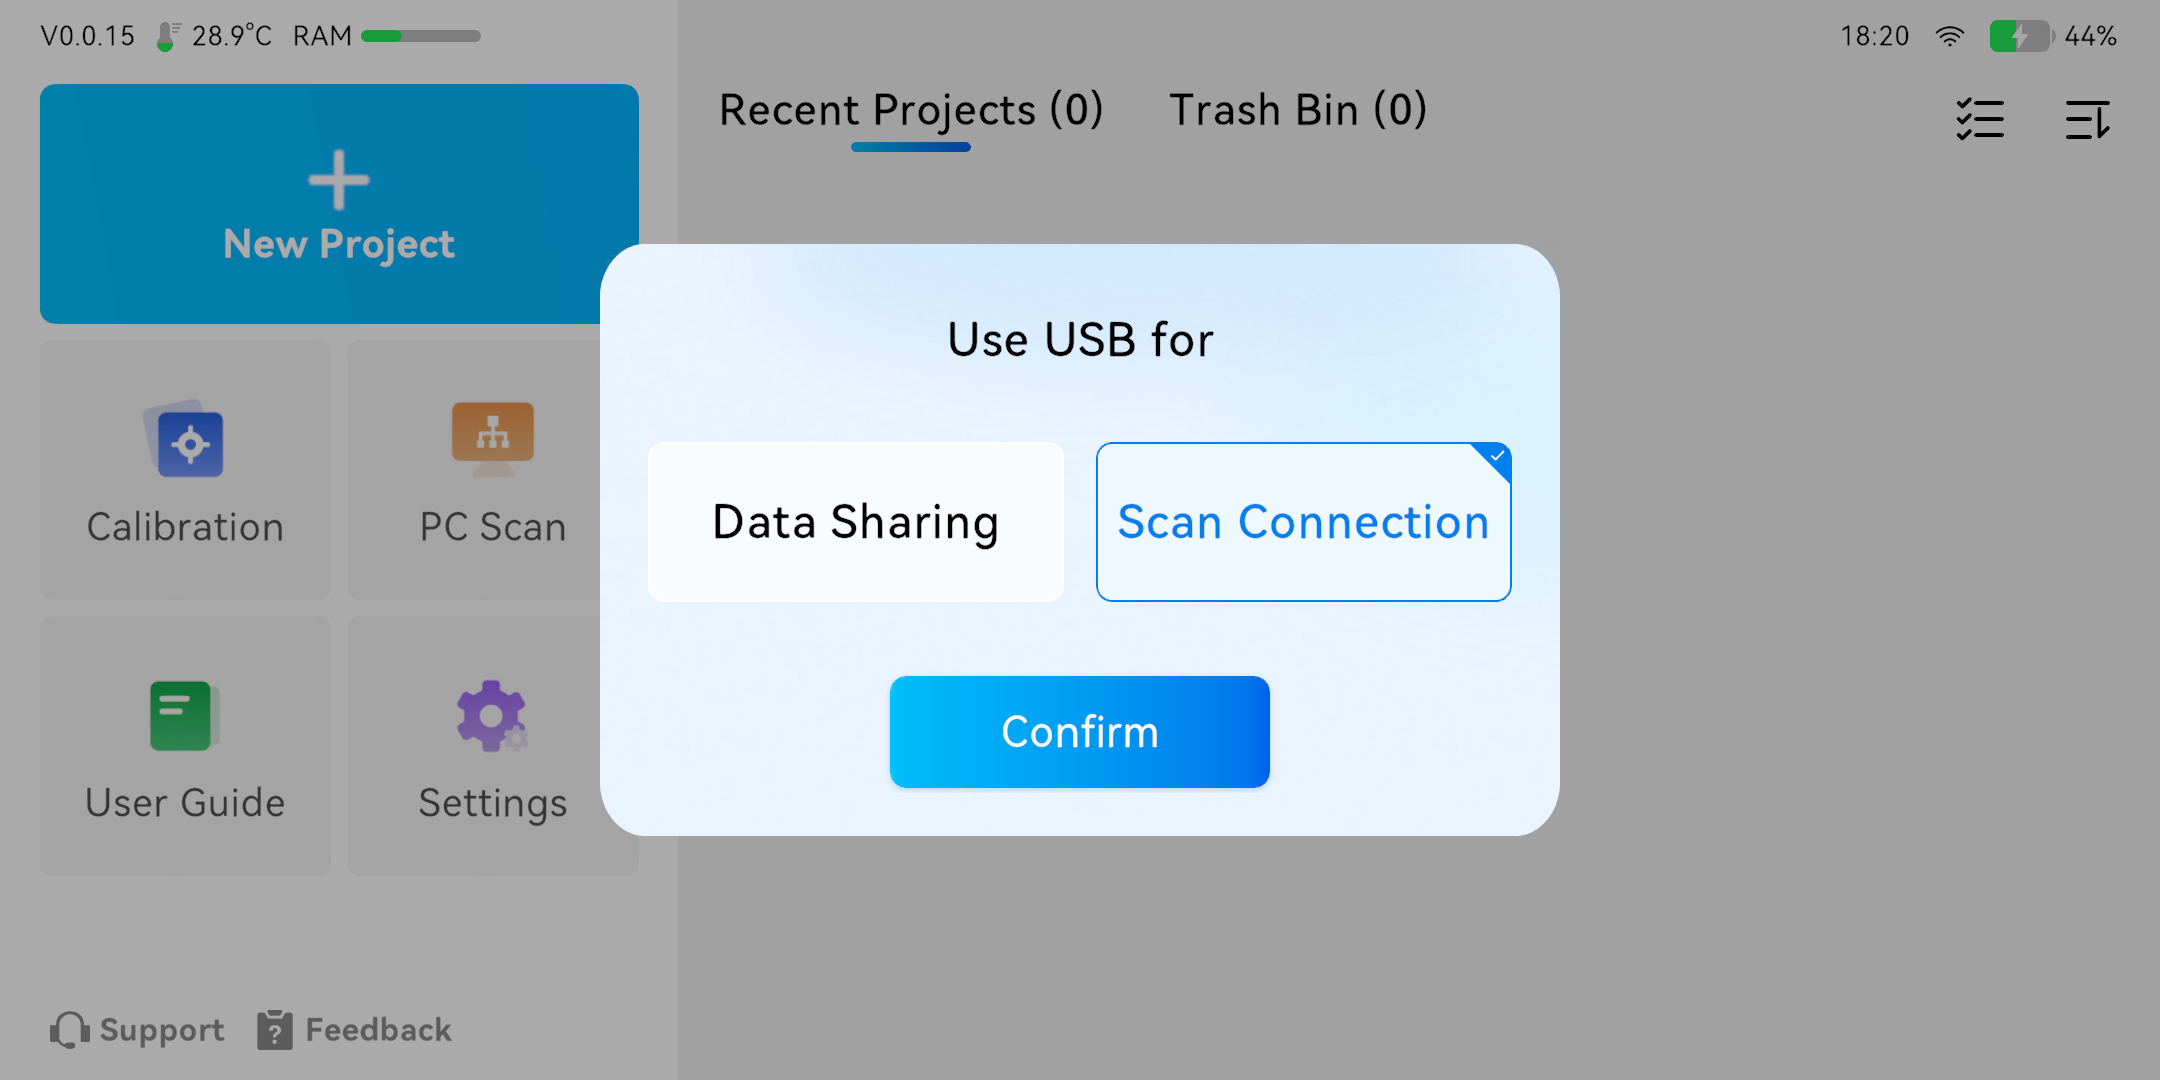
- In the pop-up window of Creality Sermoon P1S, select "Scan Connection".
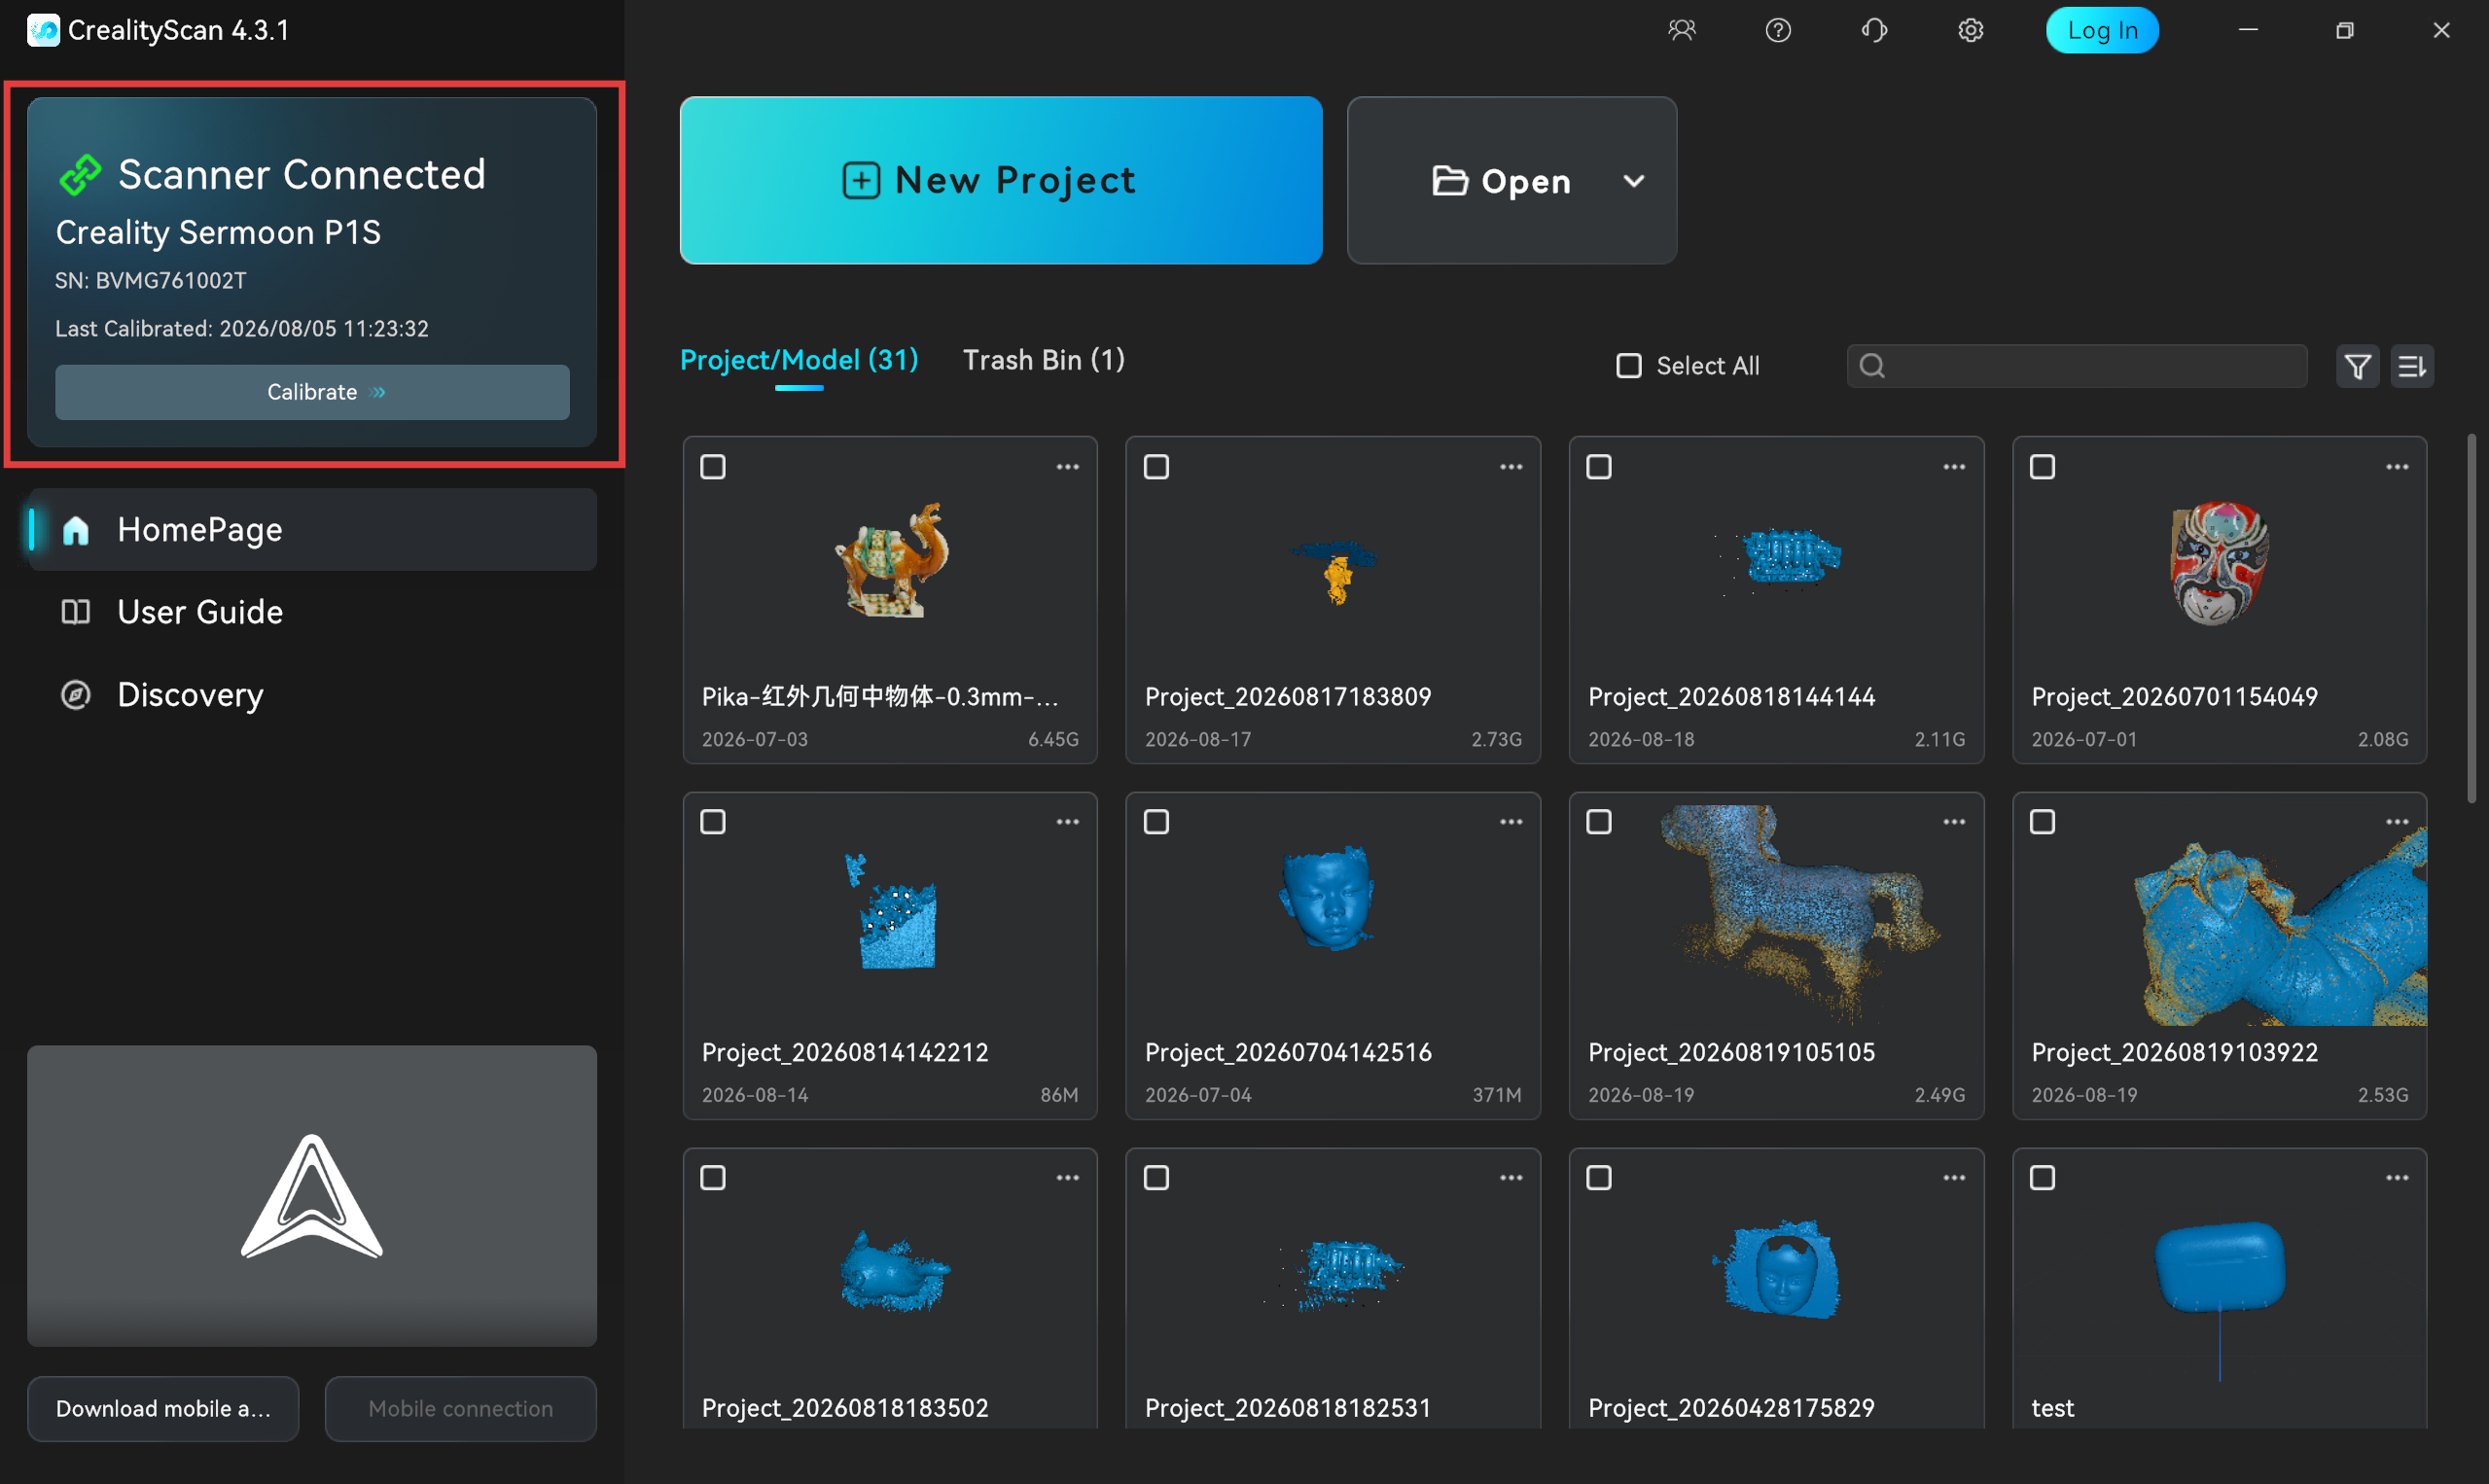
- Open the CrealityScan software on your computer; the software will automatically detect and connect to the scanner.
¶ Wireless Connection (Wi-Fi)
Step 1: Enable Sermoon P1S hotspot
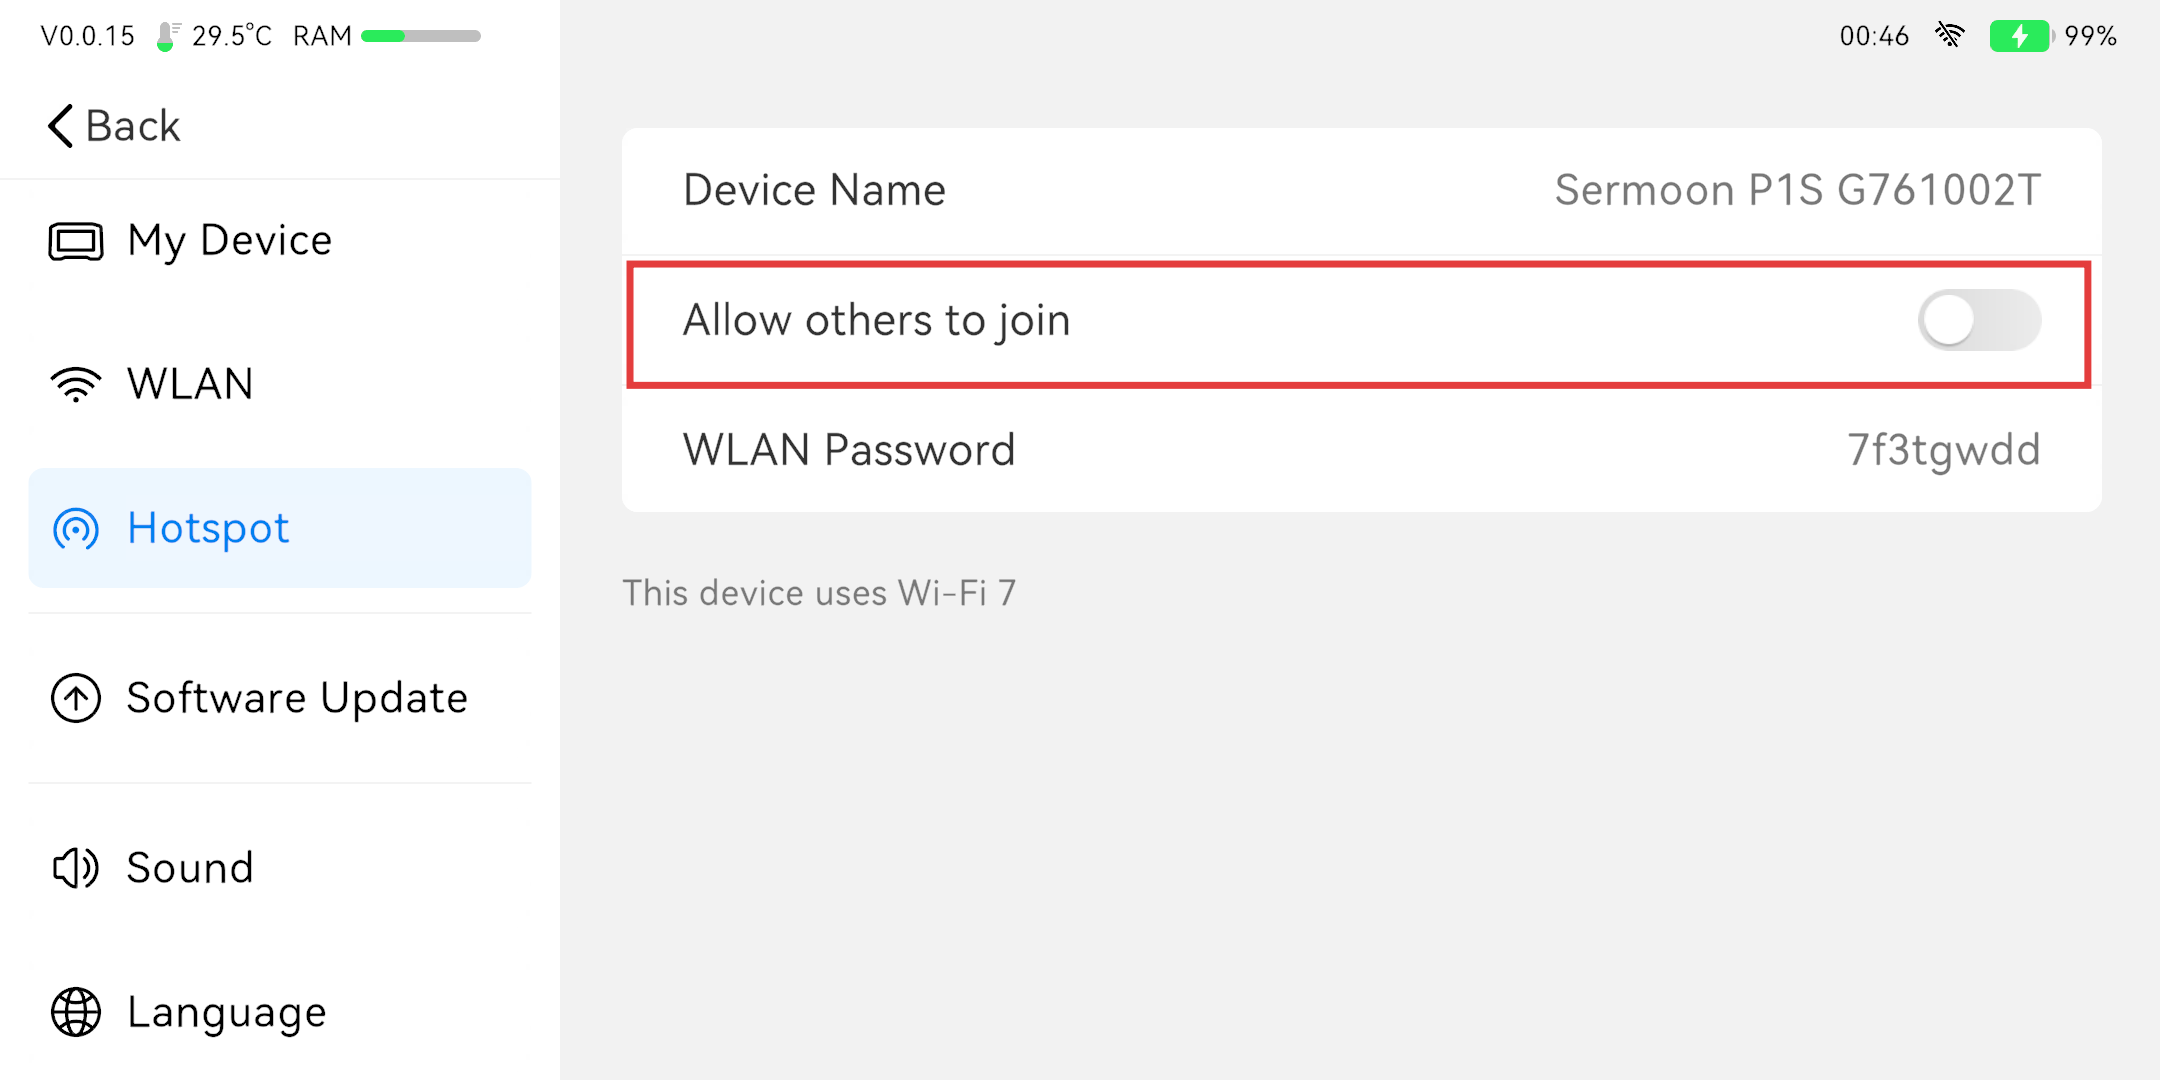
- On the Creality Sermoon P1S screen, access the "Settings" menu, select the "Hotspot", and enable "Allows Others to Join".
- Record the hotspot name and password.
Step 2: Connect your computer to the Sermoon P1S hotspot
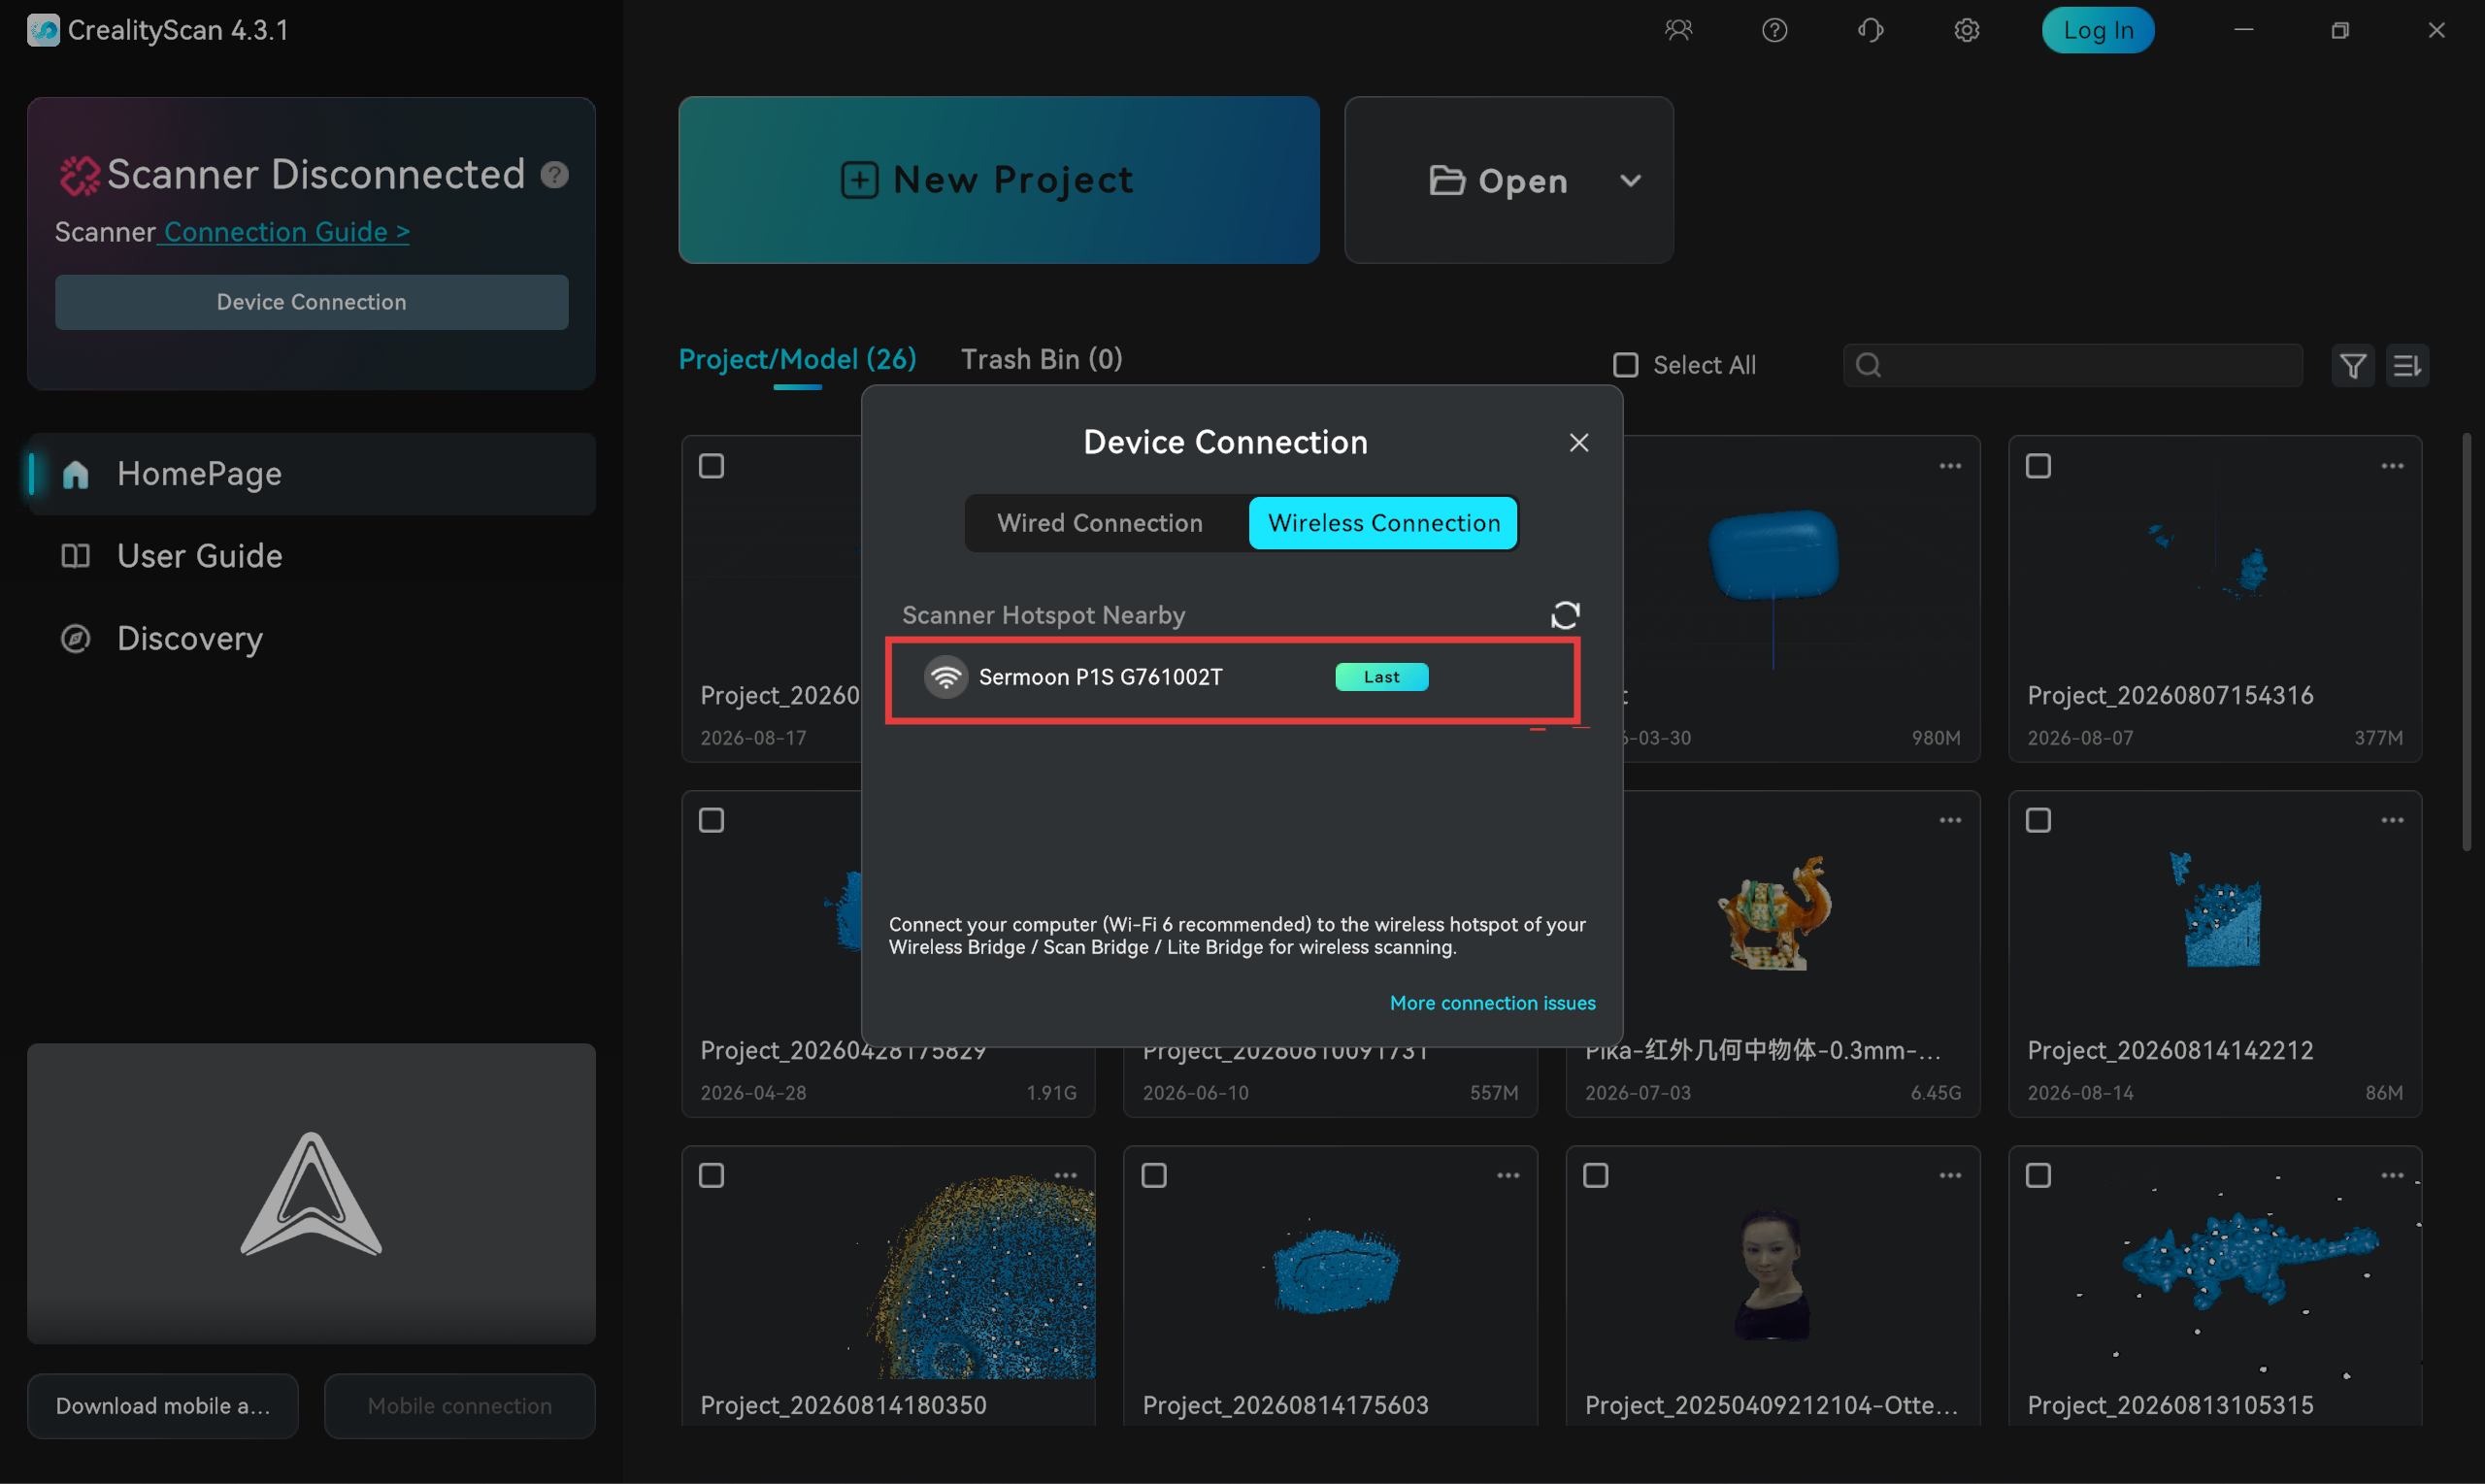
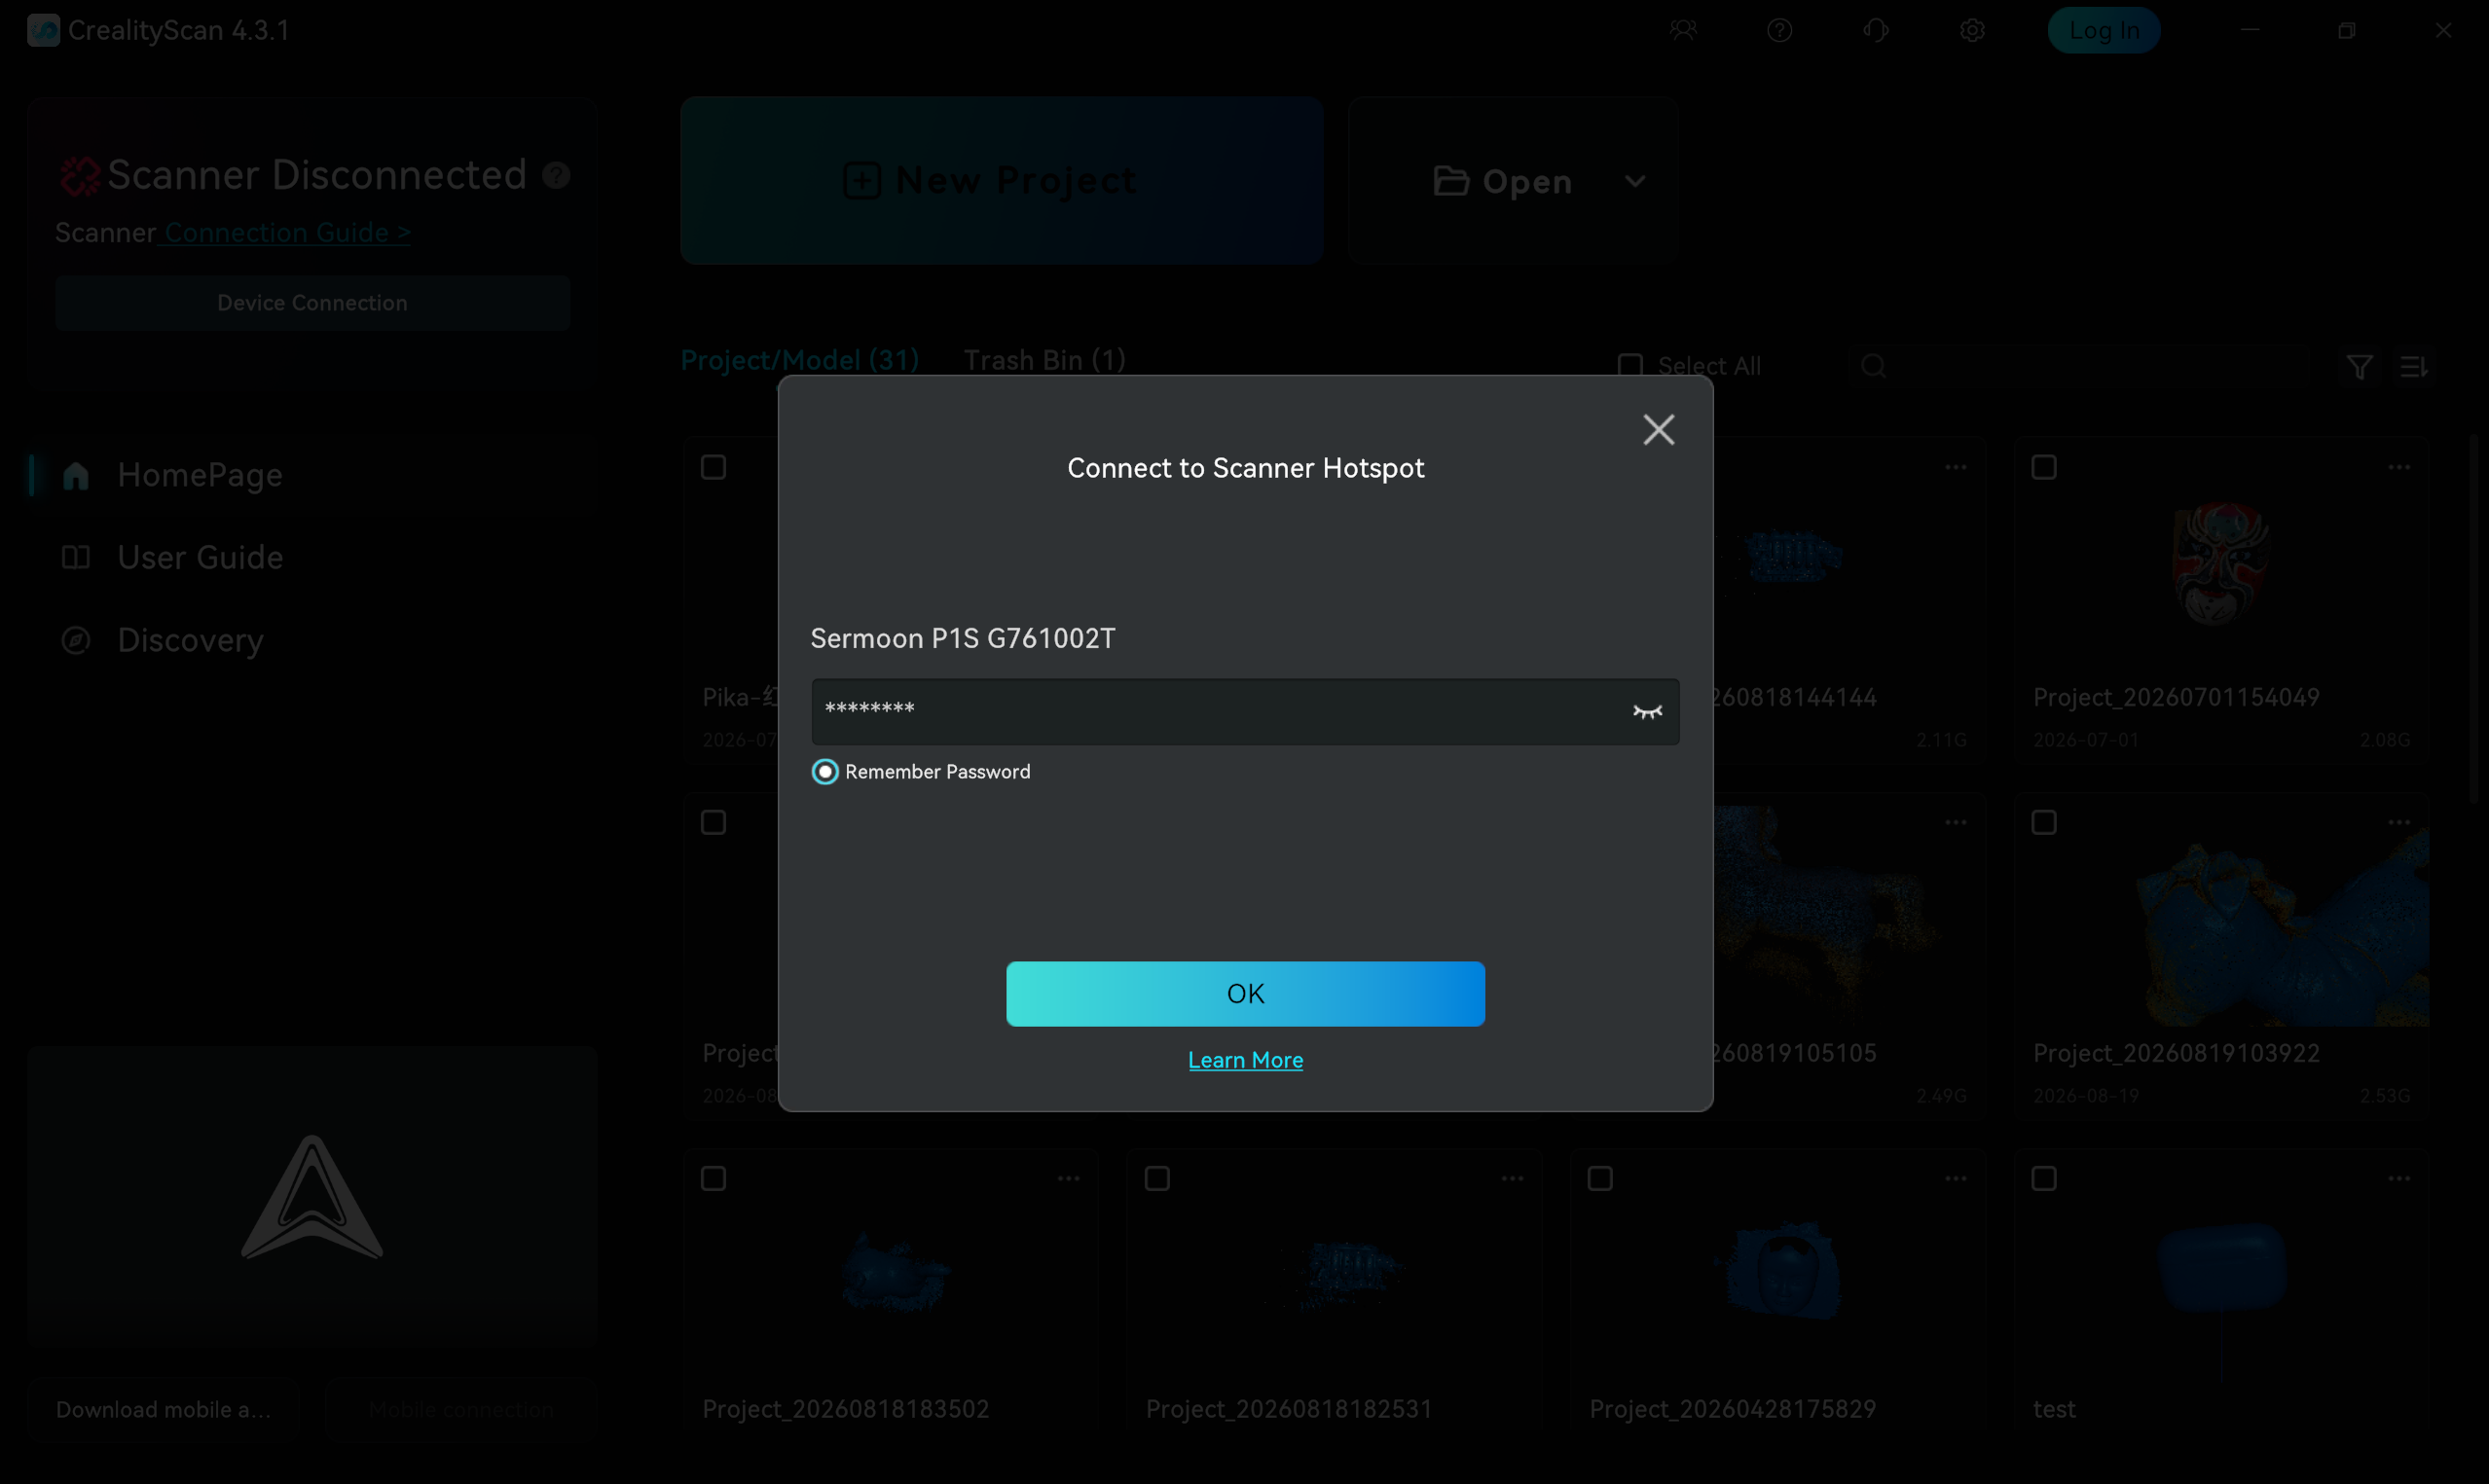
Click "Device Connection" in the upper left corner of the CrealityScan software. In "Device Connection", find the hotspot network name emitted by Creality Sermoon P1S, click to connect and enter the password.
 |
 |
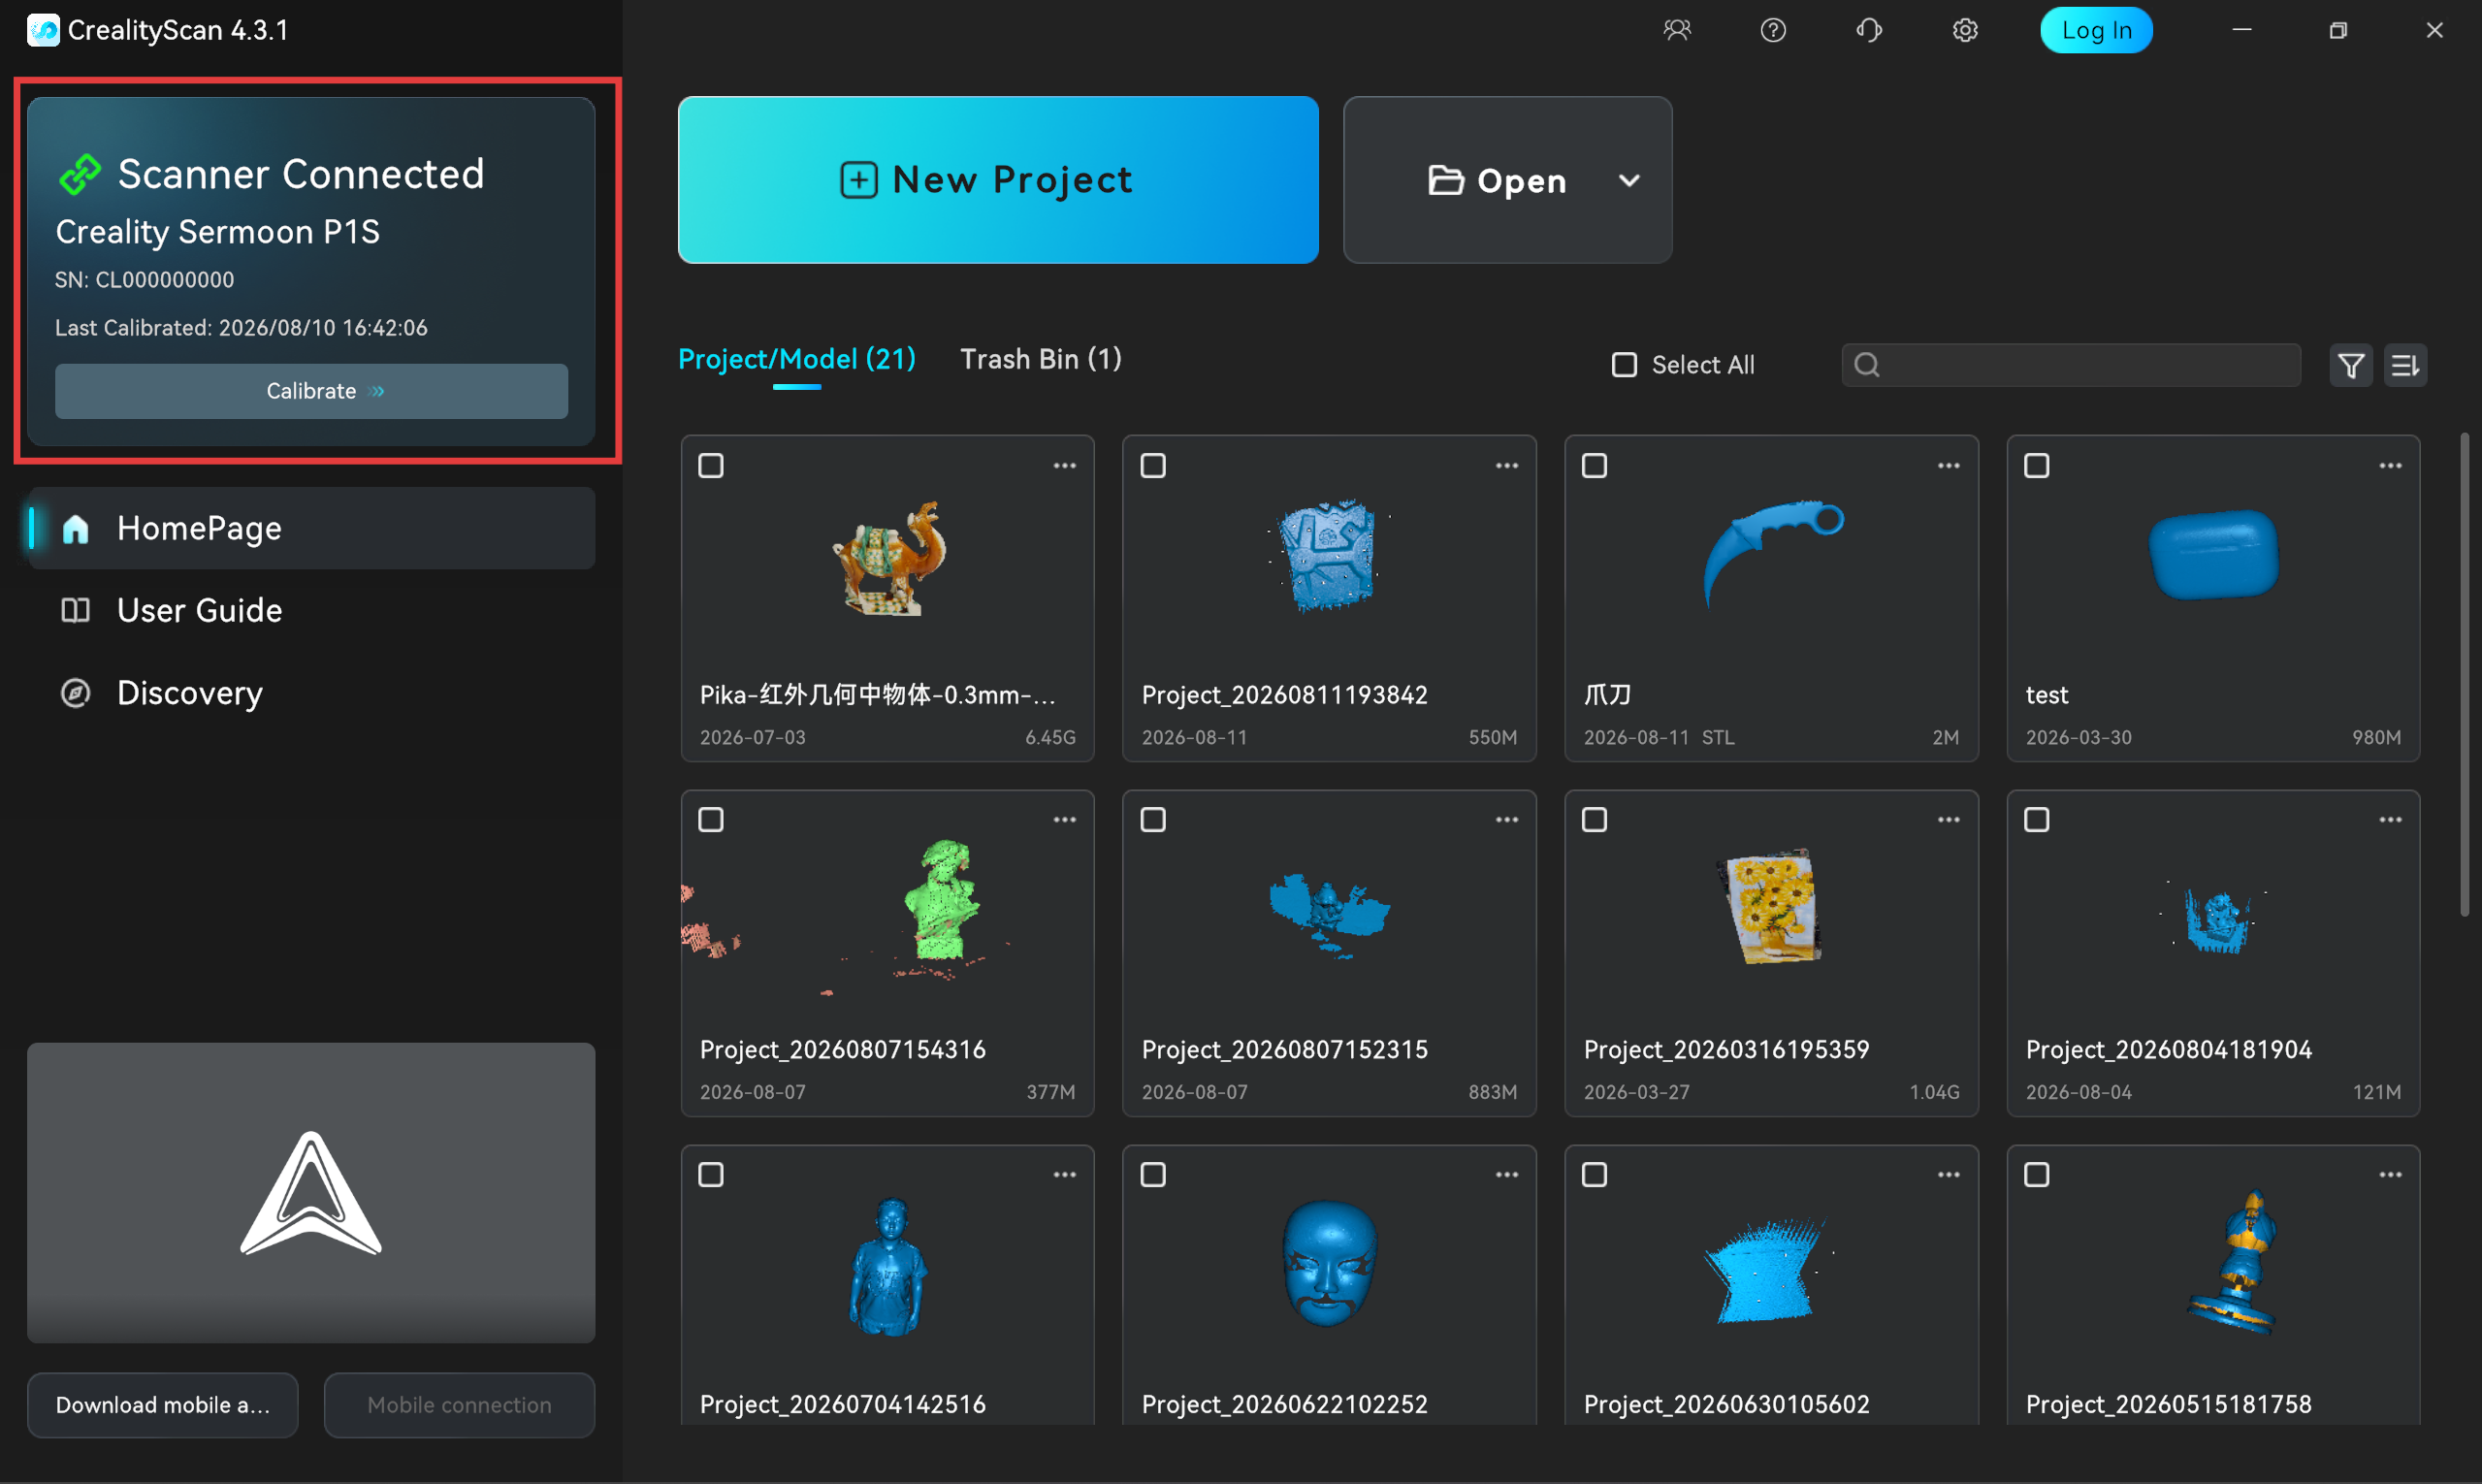
Step 3: Software Connection
- Open the CrealityScan software on your computer.
- In the software interface, the software will automatically identify and display the connected Creality Sermoon P1S device.
¶ 2.2.3 Start Scanning
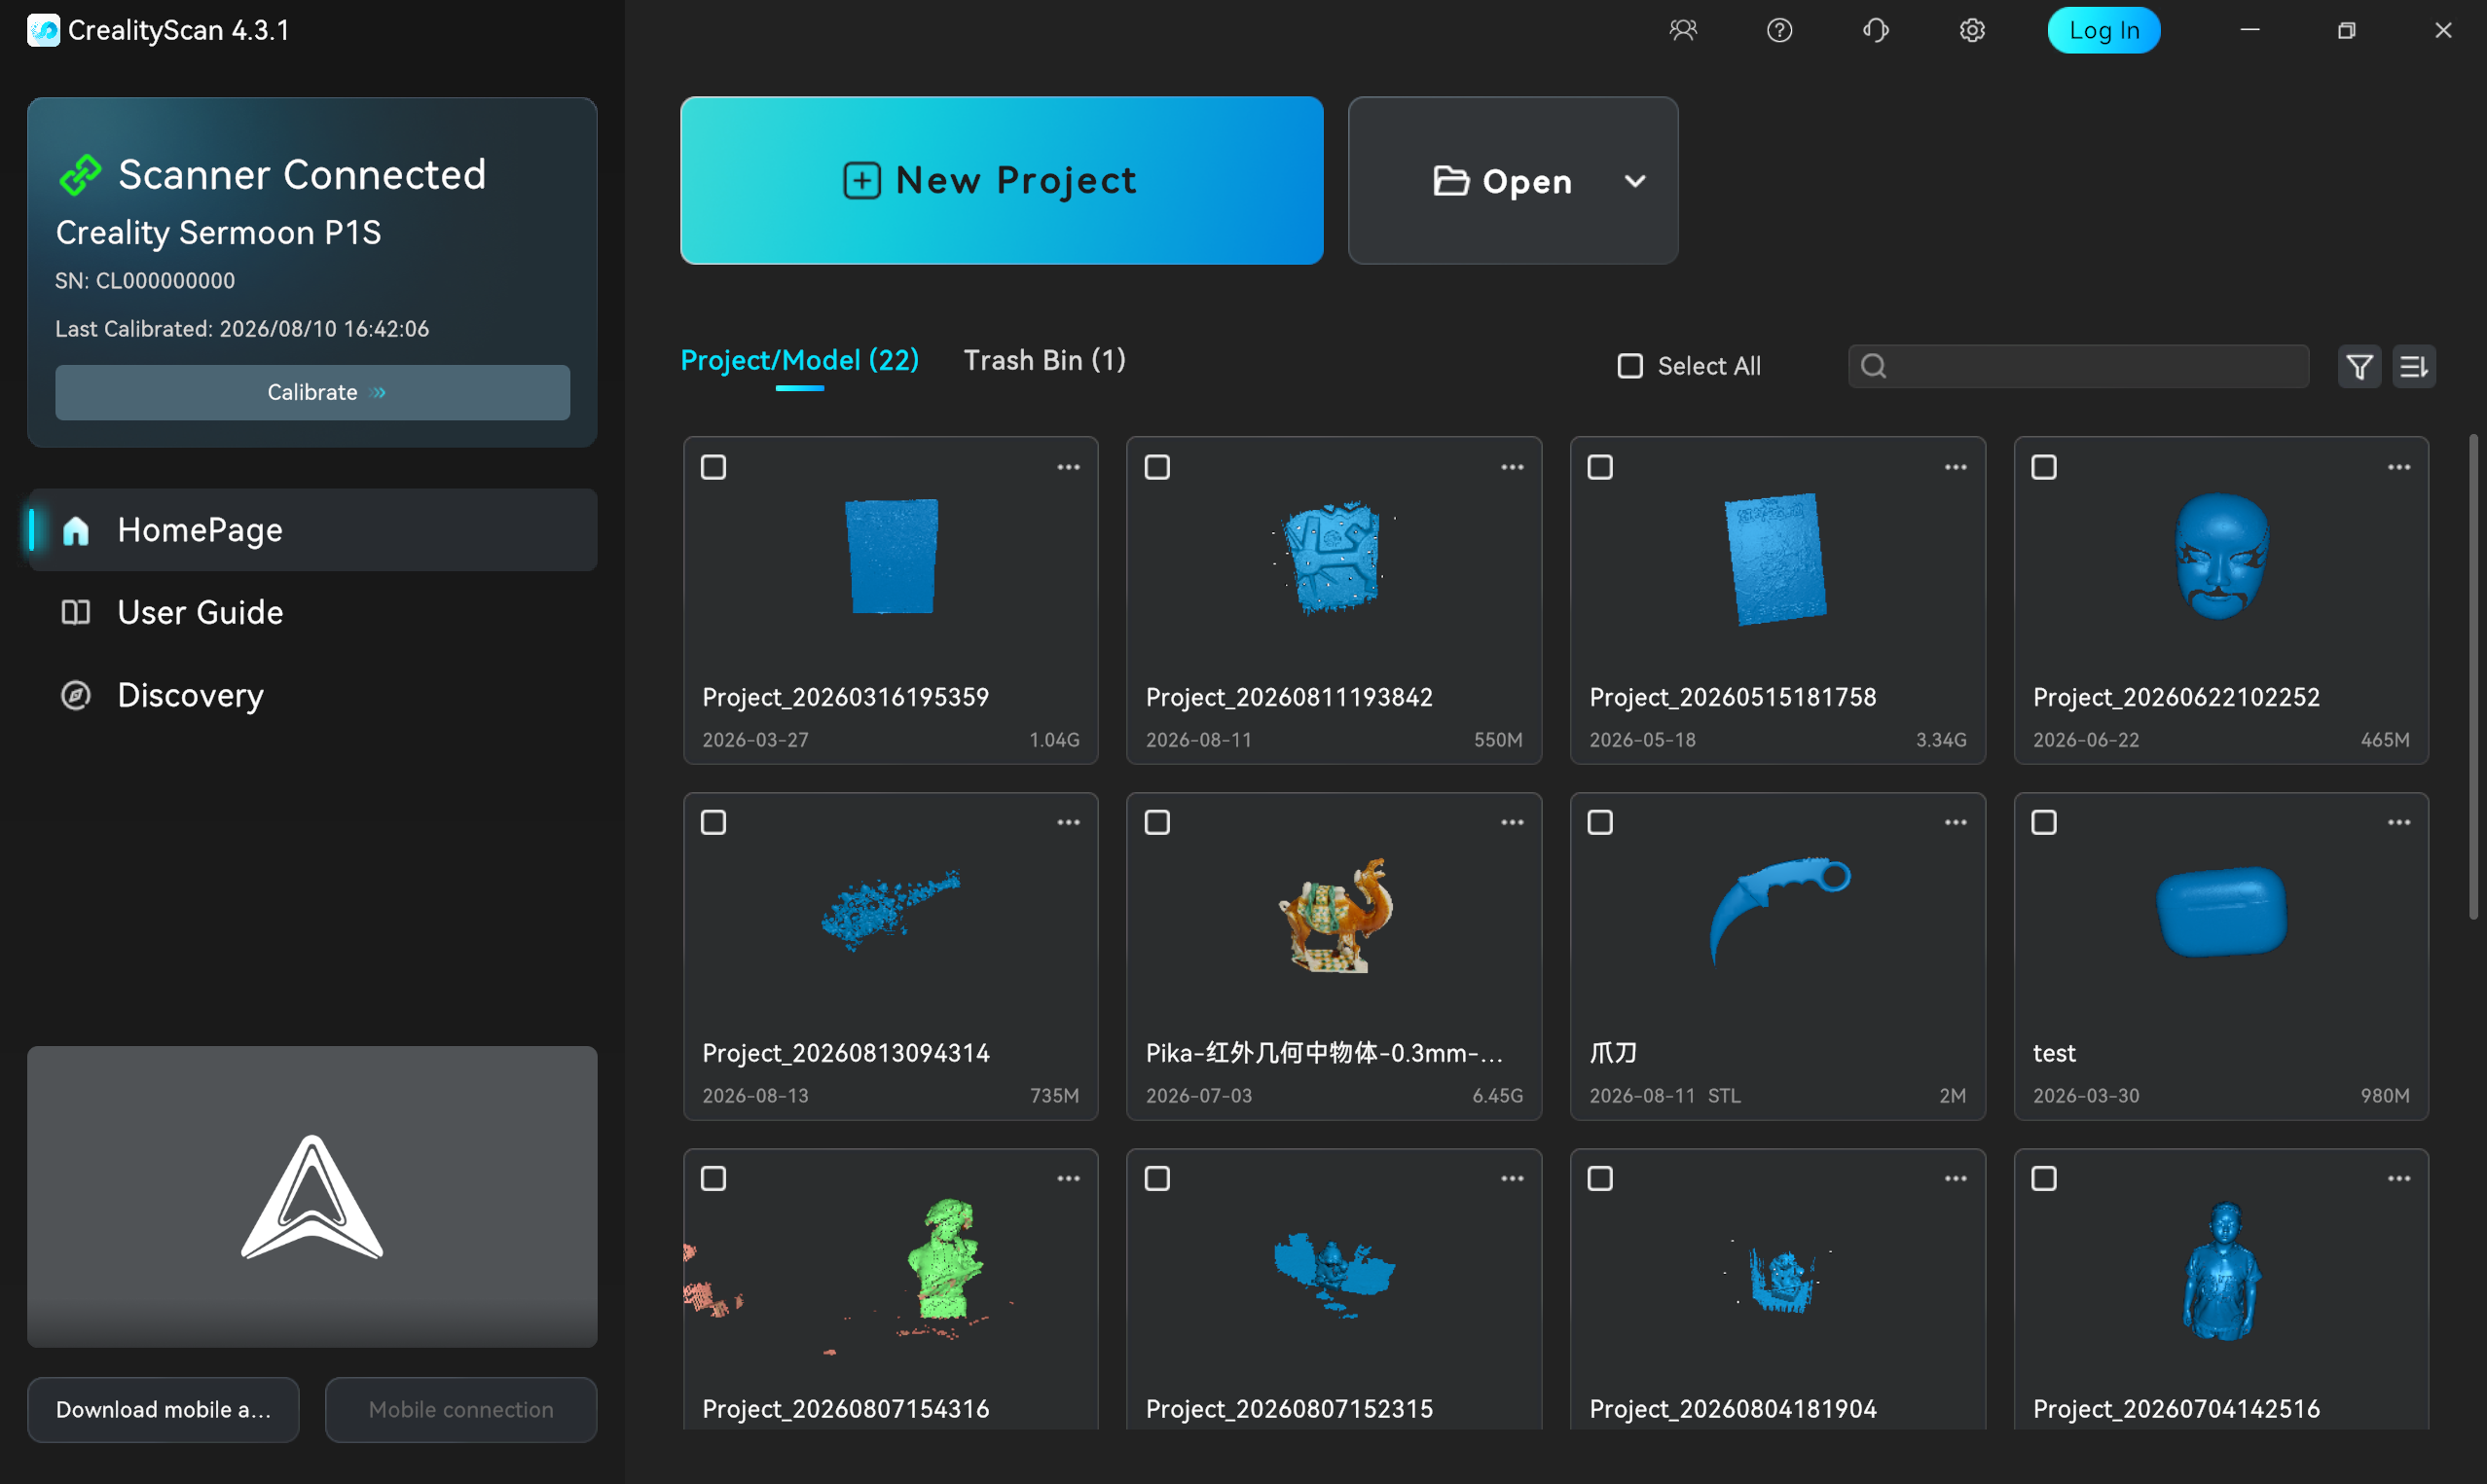
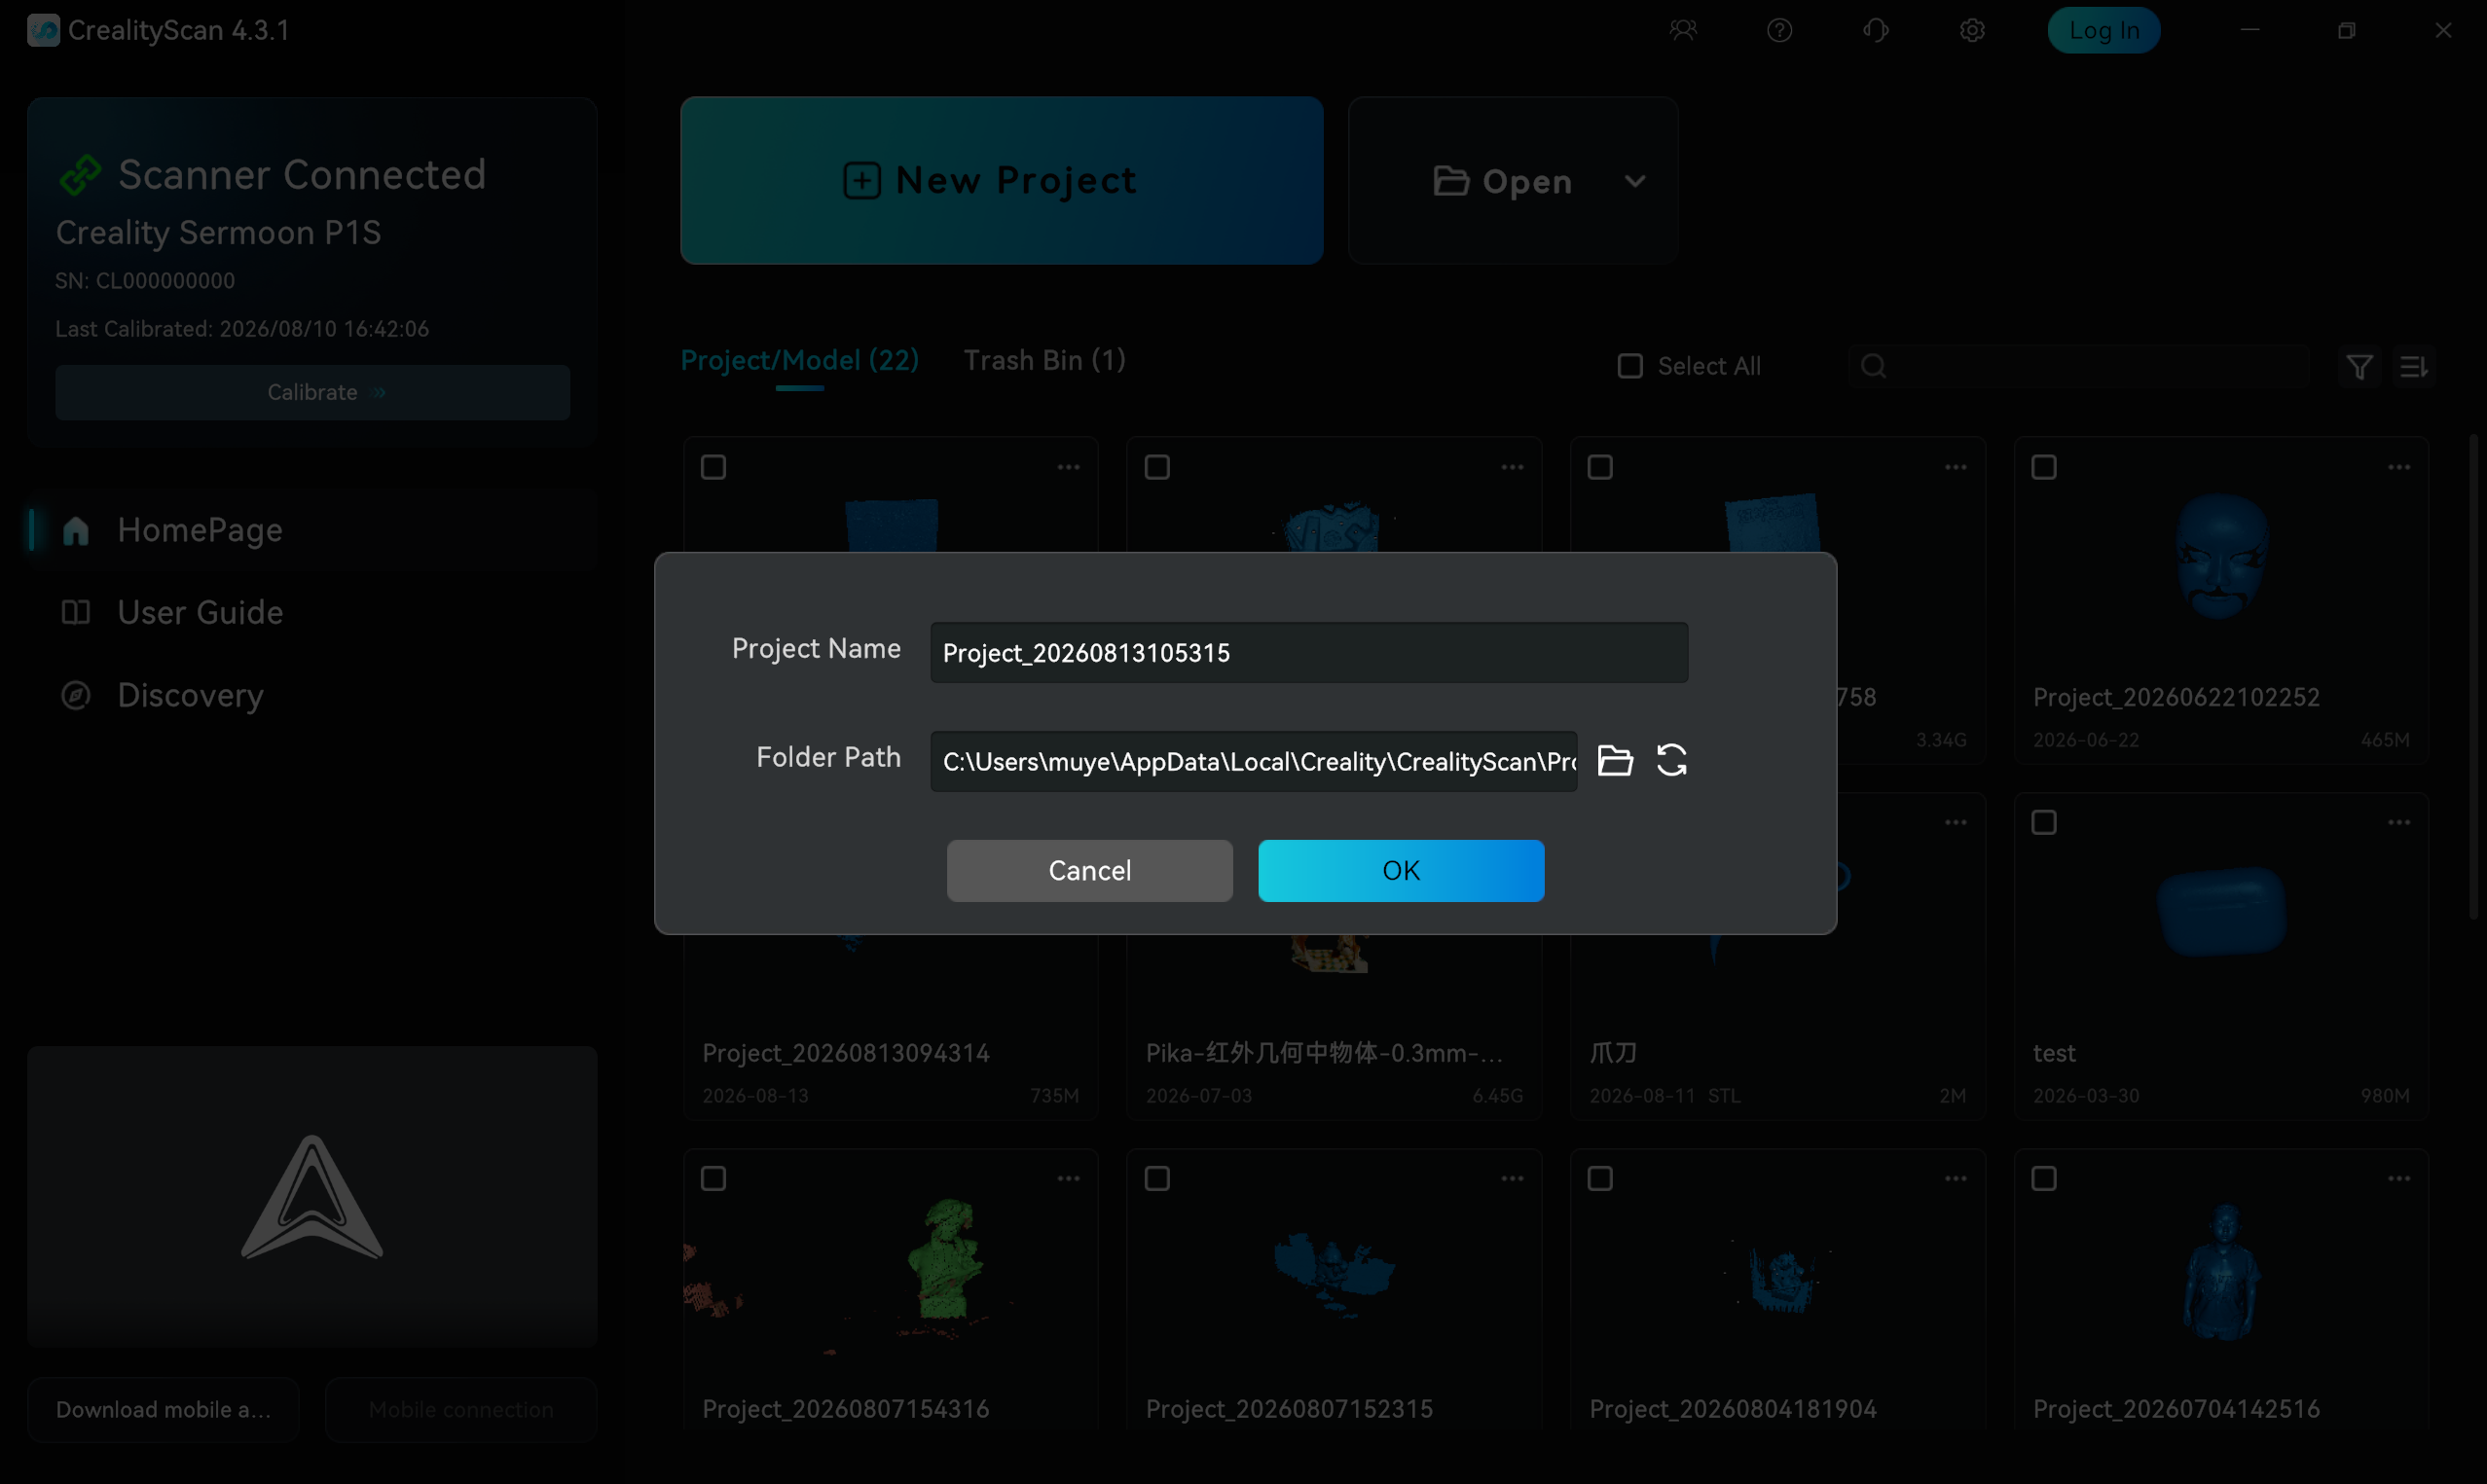
- In the CrealityScan software, click 【New Project】, enter the "Project Name" in the pop-up window, select the "Folder Path", and then click 【OK】.
 |
 |
- Select the appropriate scan mode and related parameters based on the type and characteristics of the object being scanned.
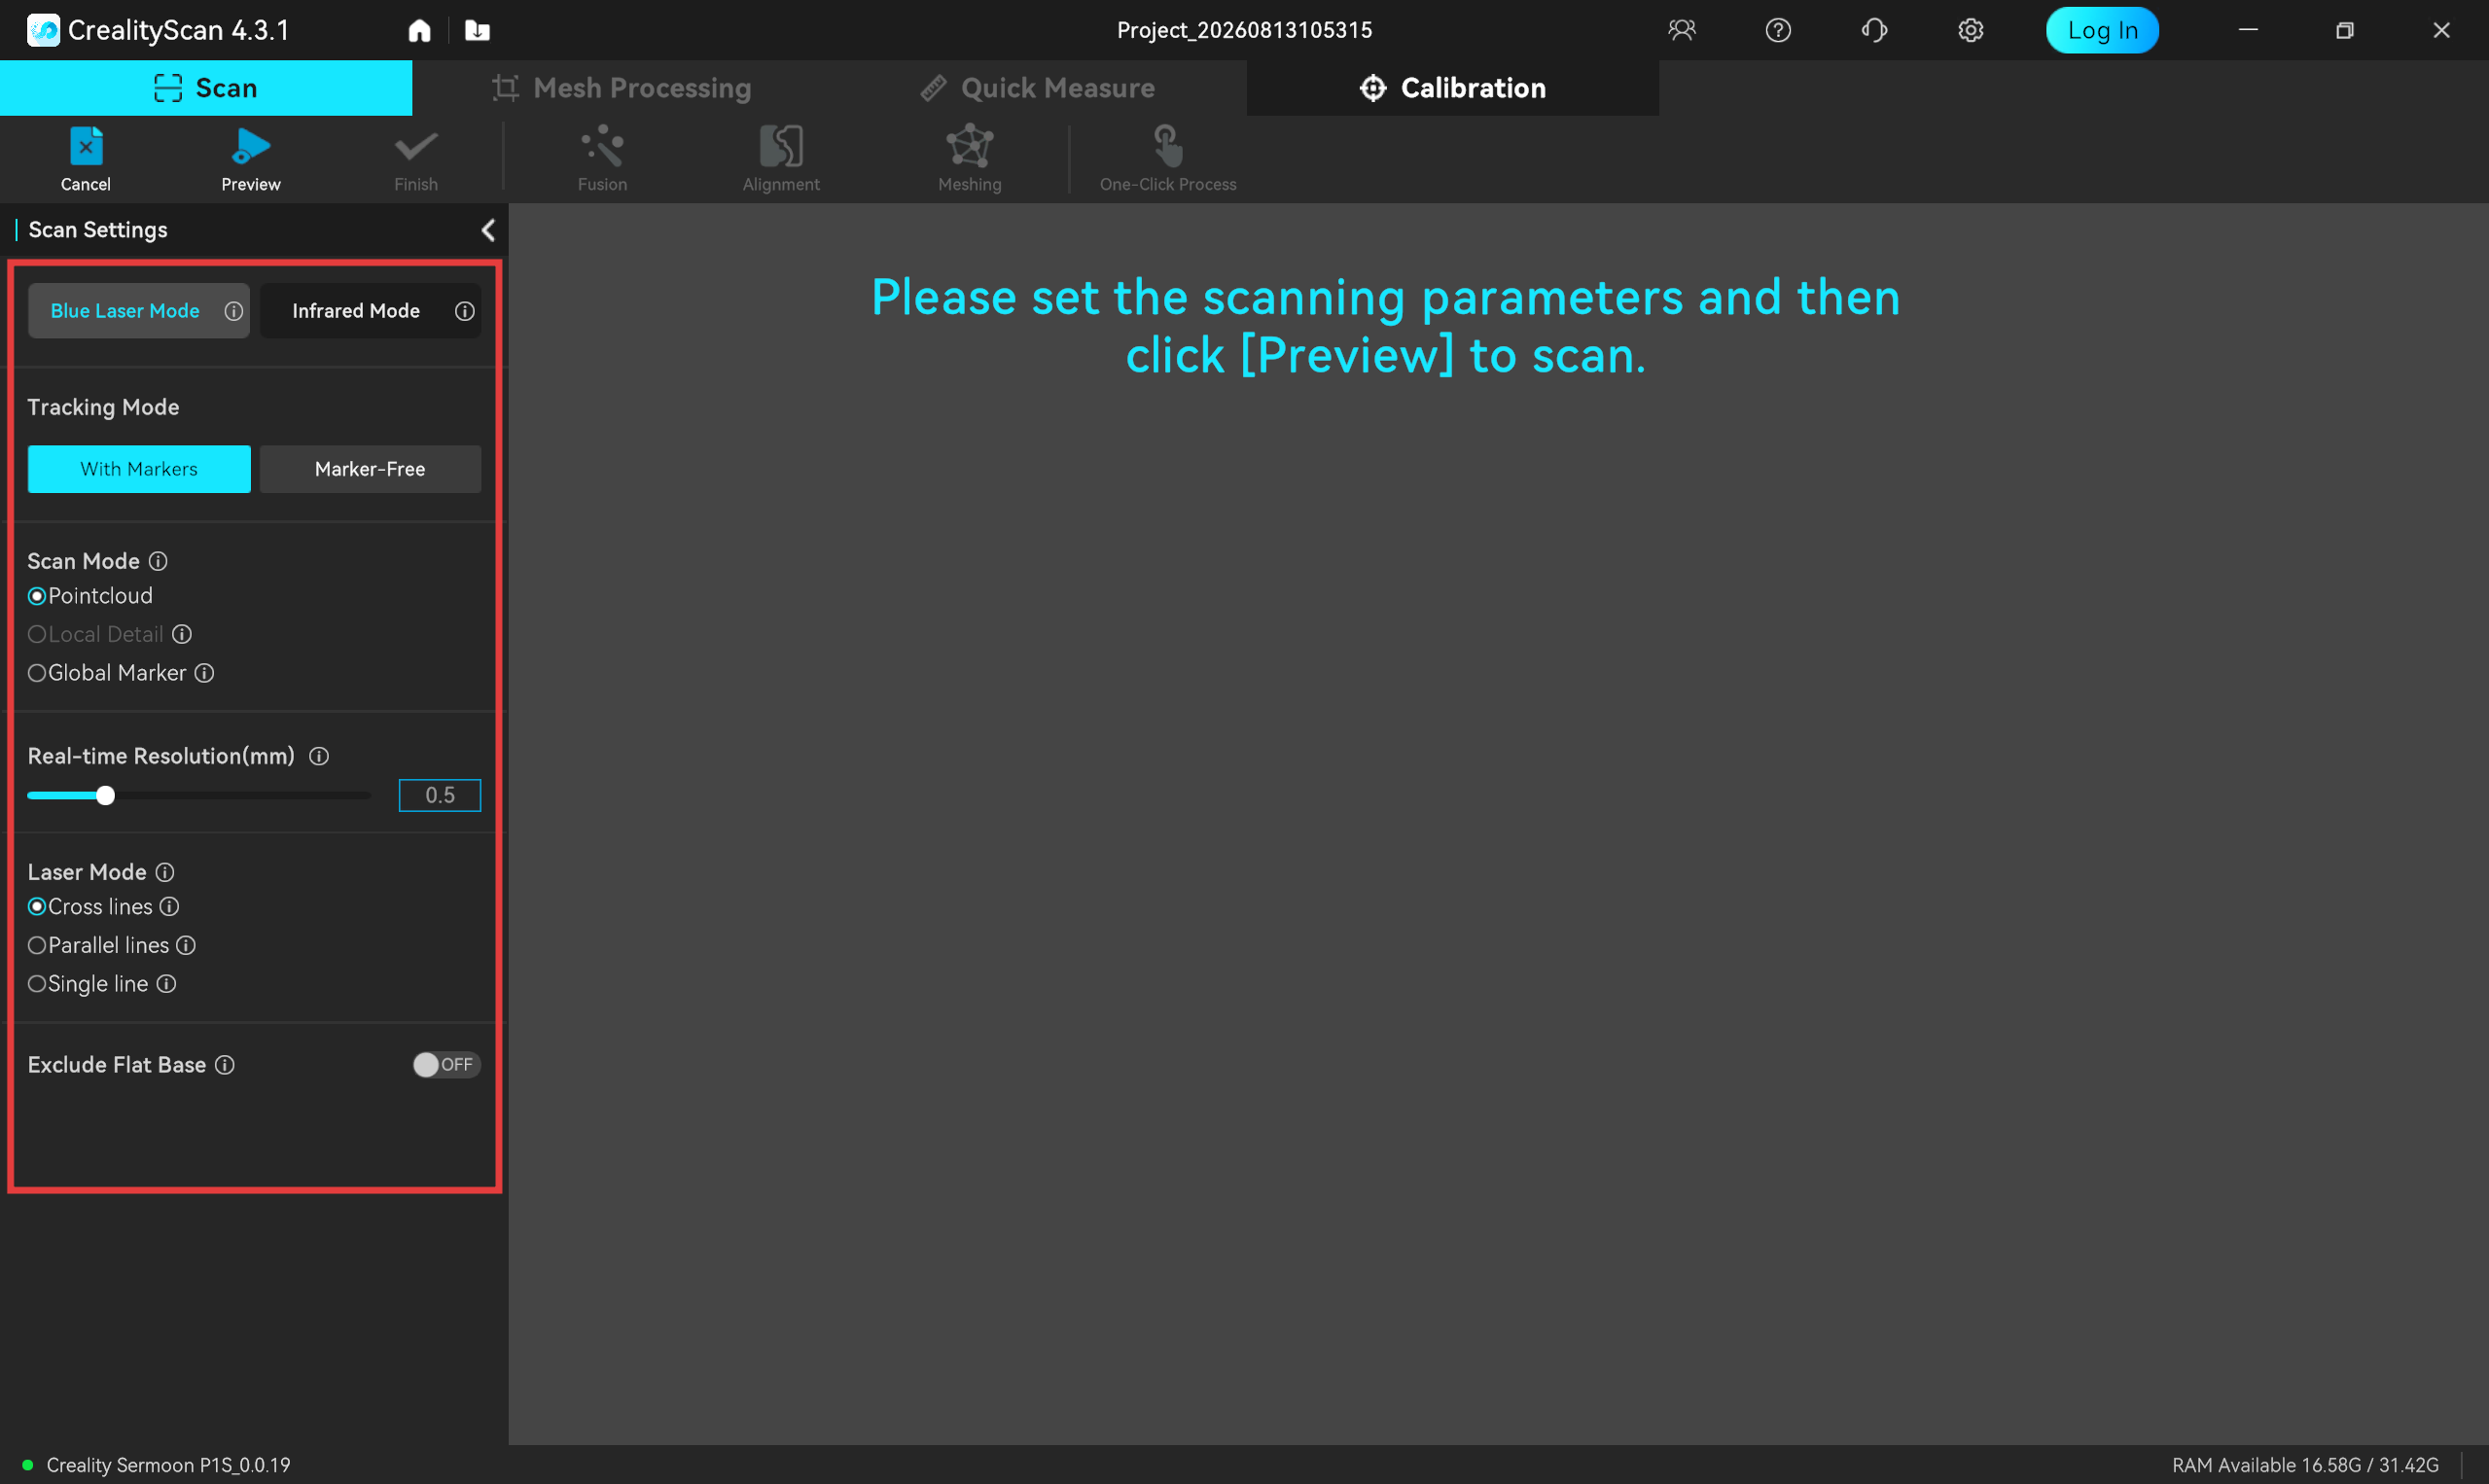
Note: Please refer to Chapter 3, "Detailed Explanation of Scan Modes," for instructions on selecting the scan mode.
-
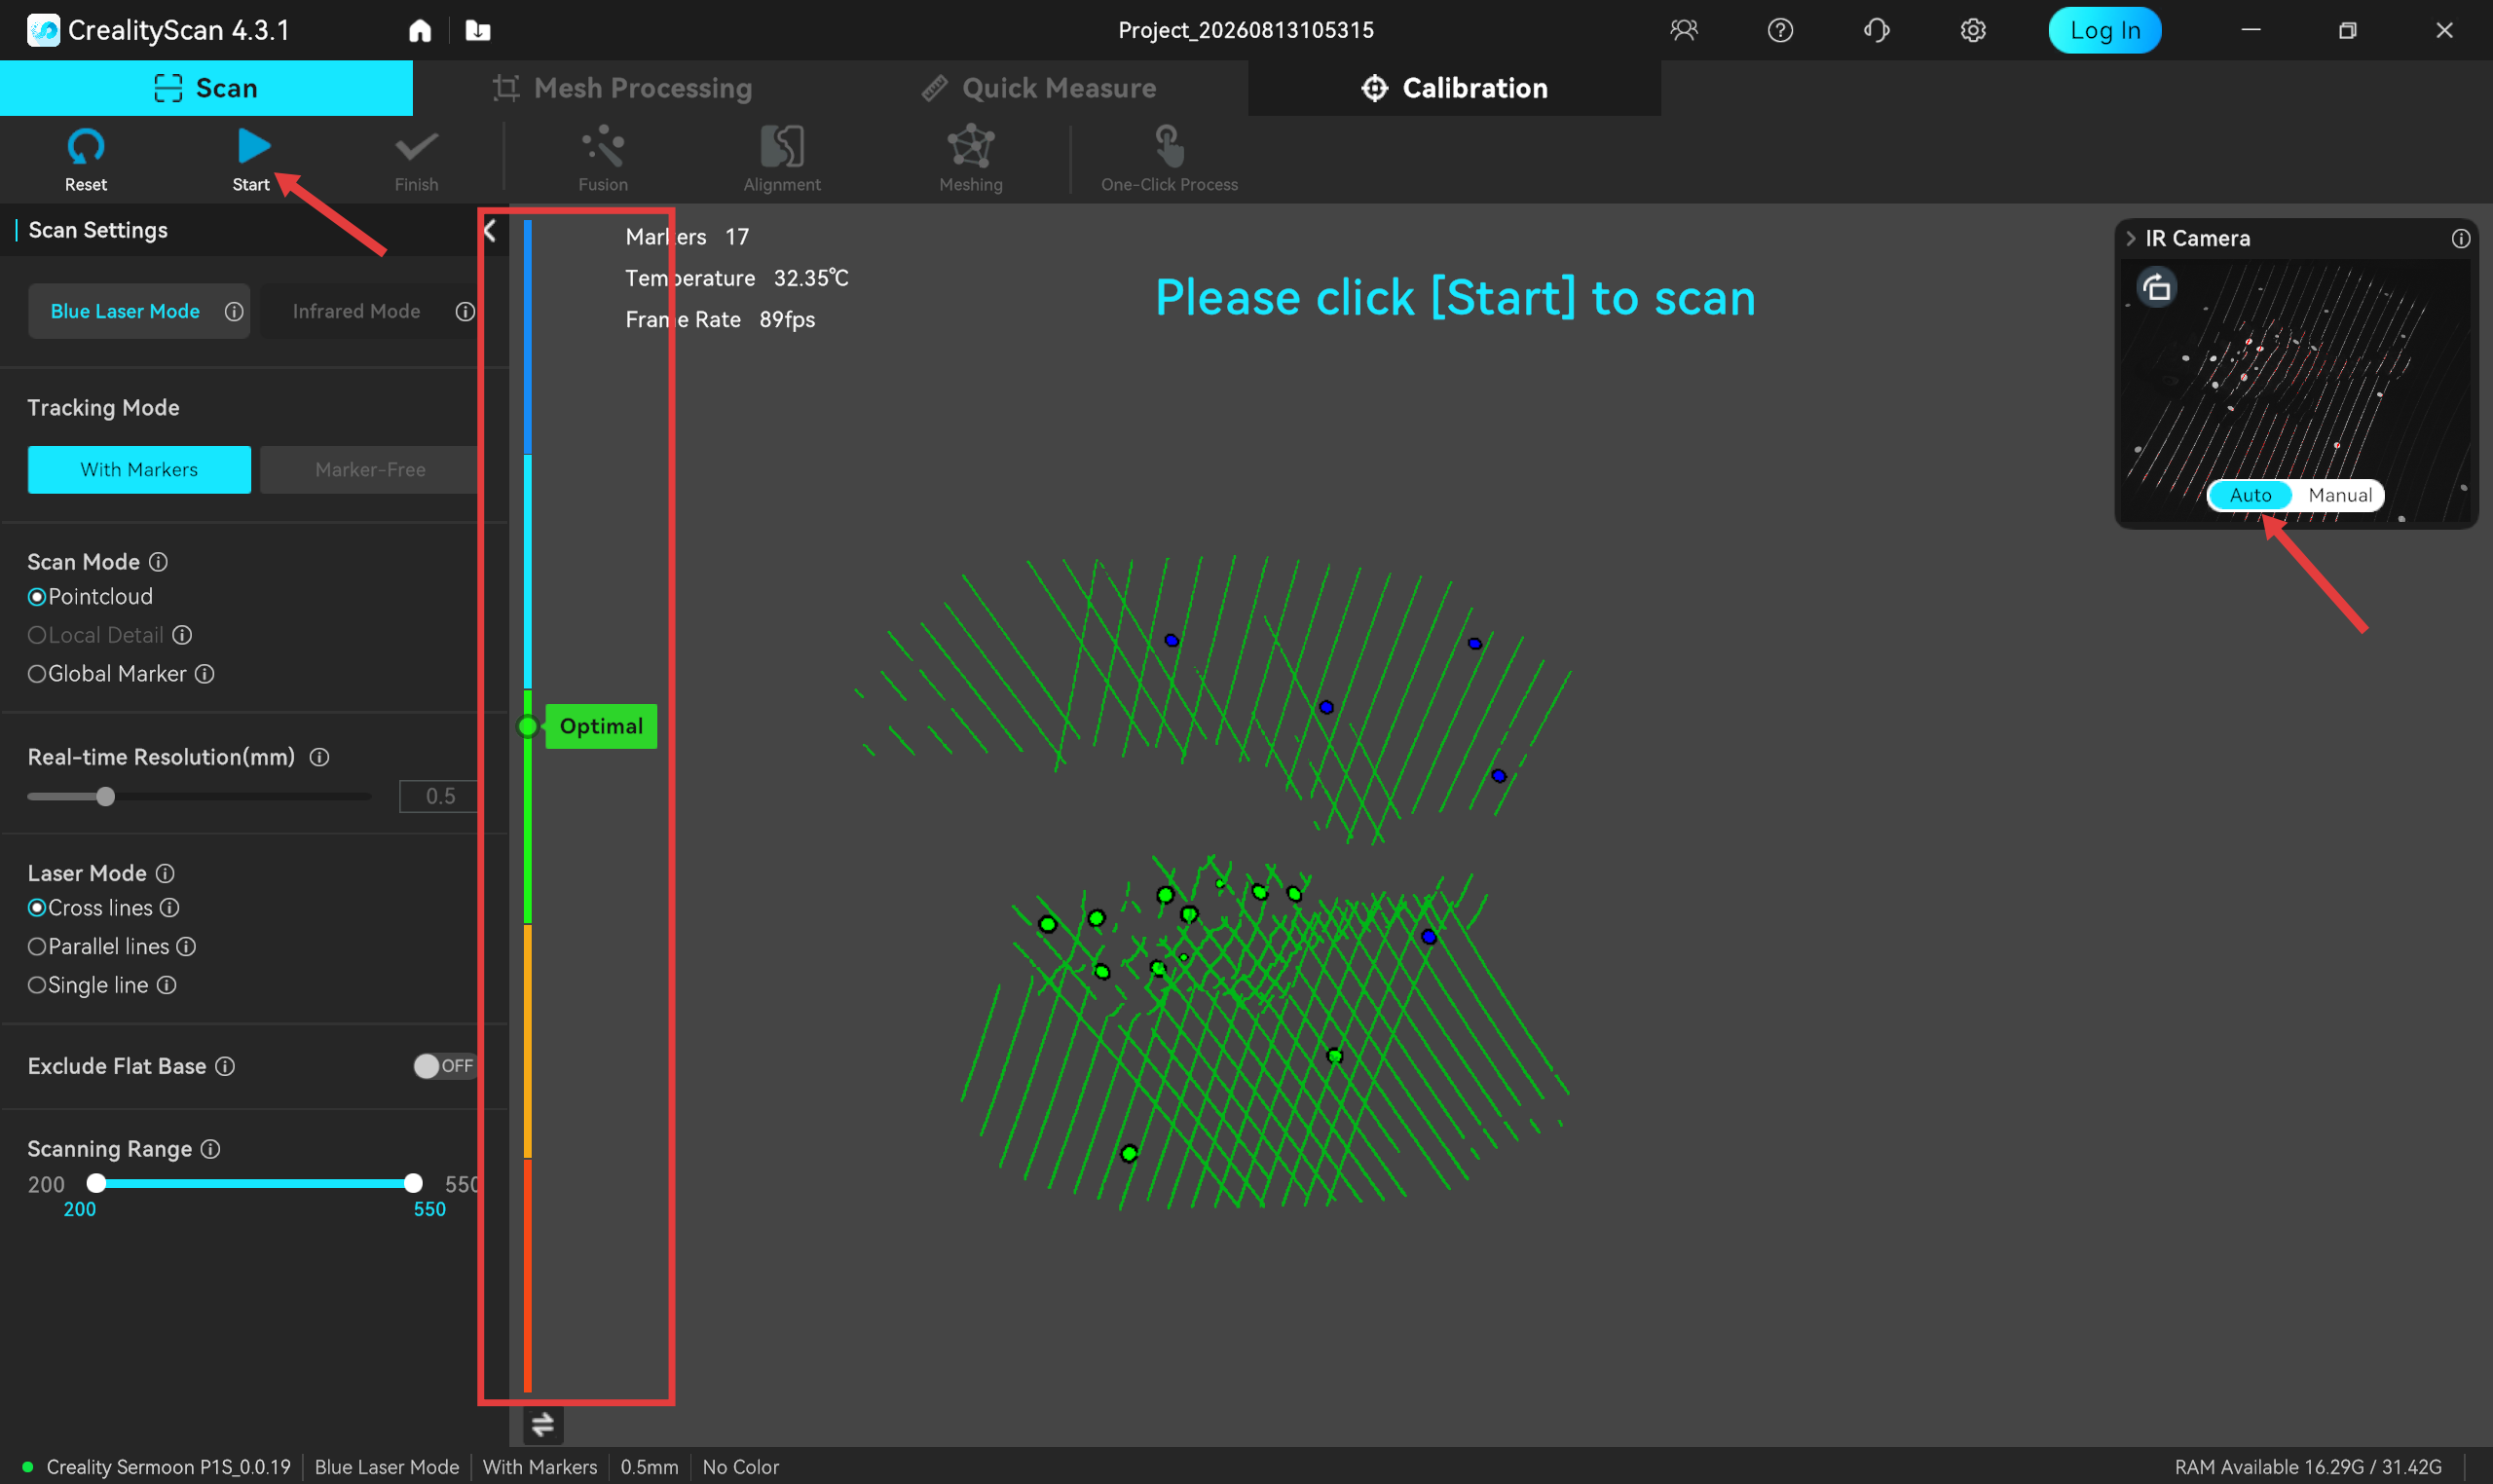
Click the "Preview" button to enter the scan preview interface.
-
Adjust scanning distance: Move the scanner to adjust its distance from the object being scanned. When the distance indicator on the software interface is in the green "optimal" range, it indicates that the current scanning distance is optimal.
-
Adjust camera exposure: Automatic exposure is used by default during scanning. If unable to image, please manually adjust the IR camera exposure; gray indicates optimal exposure, red indicates overexposure, and blue indicates underexposure.
-
Start scanning: Short press the Start/Pause button on the scanner, or click the [Start] button in the software interface. Keep the scanner pointed at the object and move it smoothly and slowly to perform a 360° all-around scan.
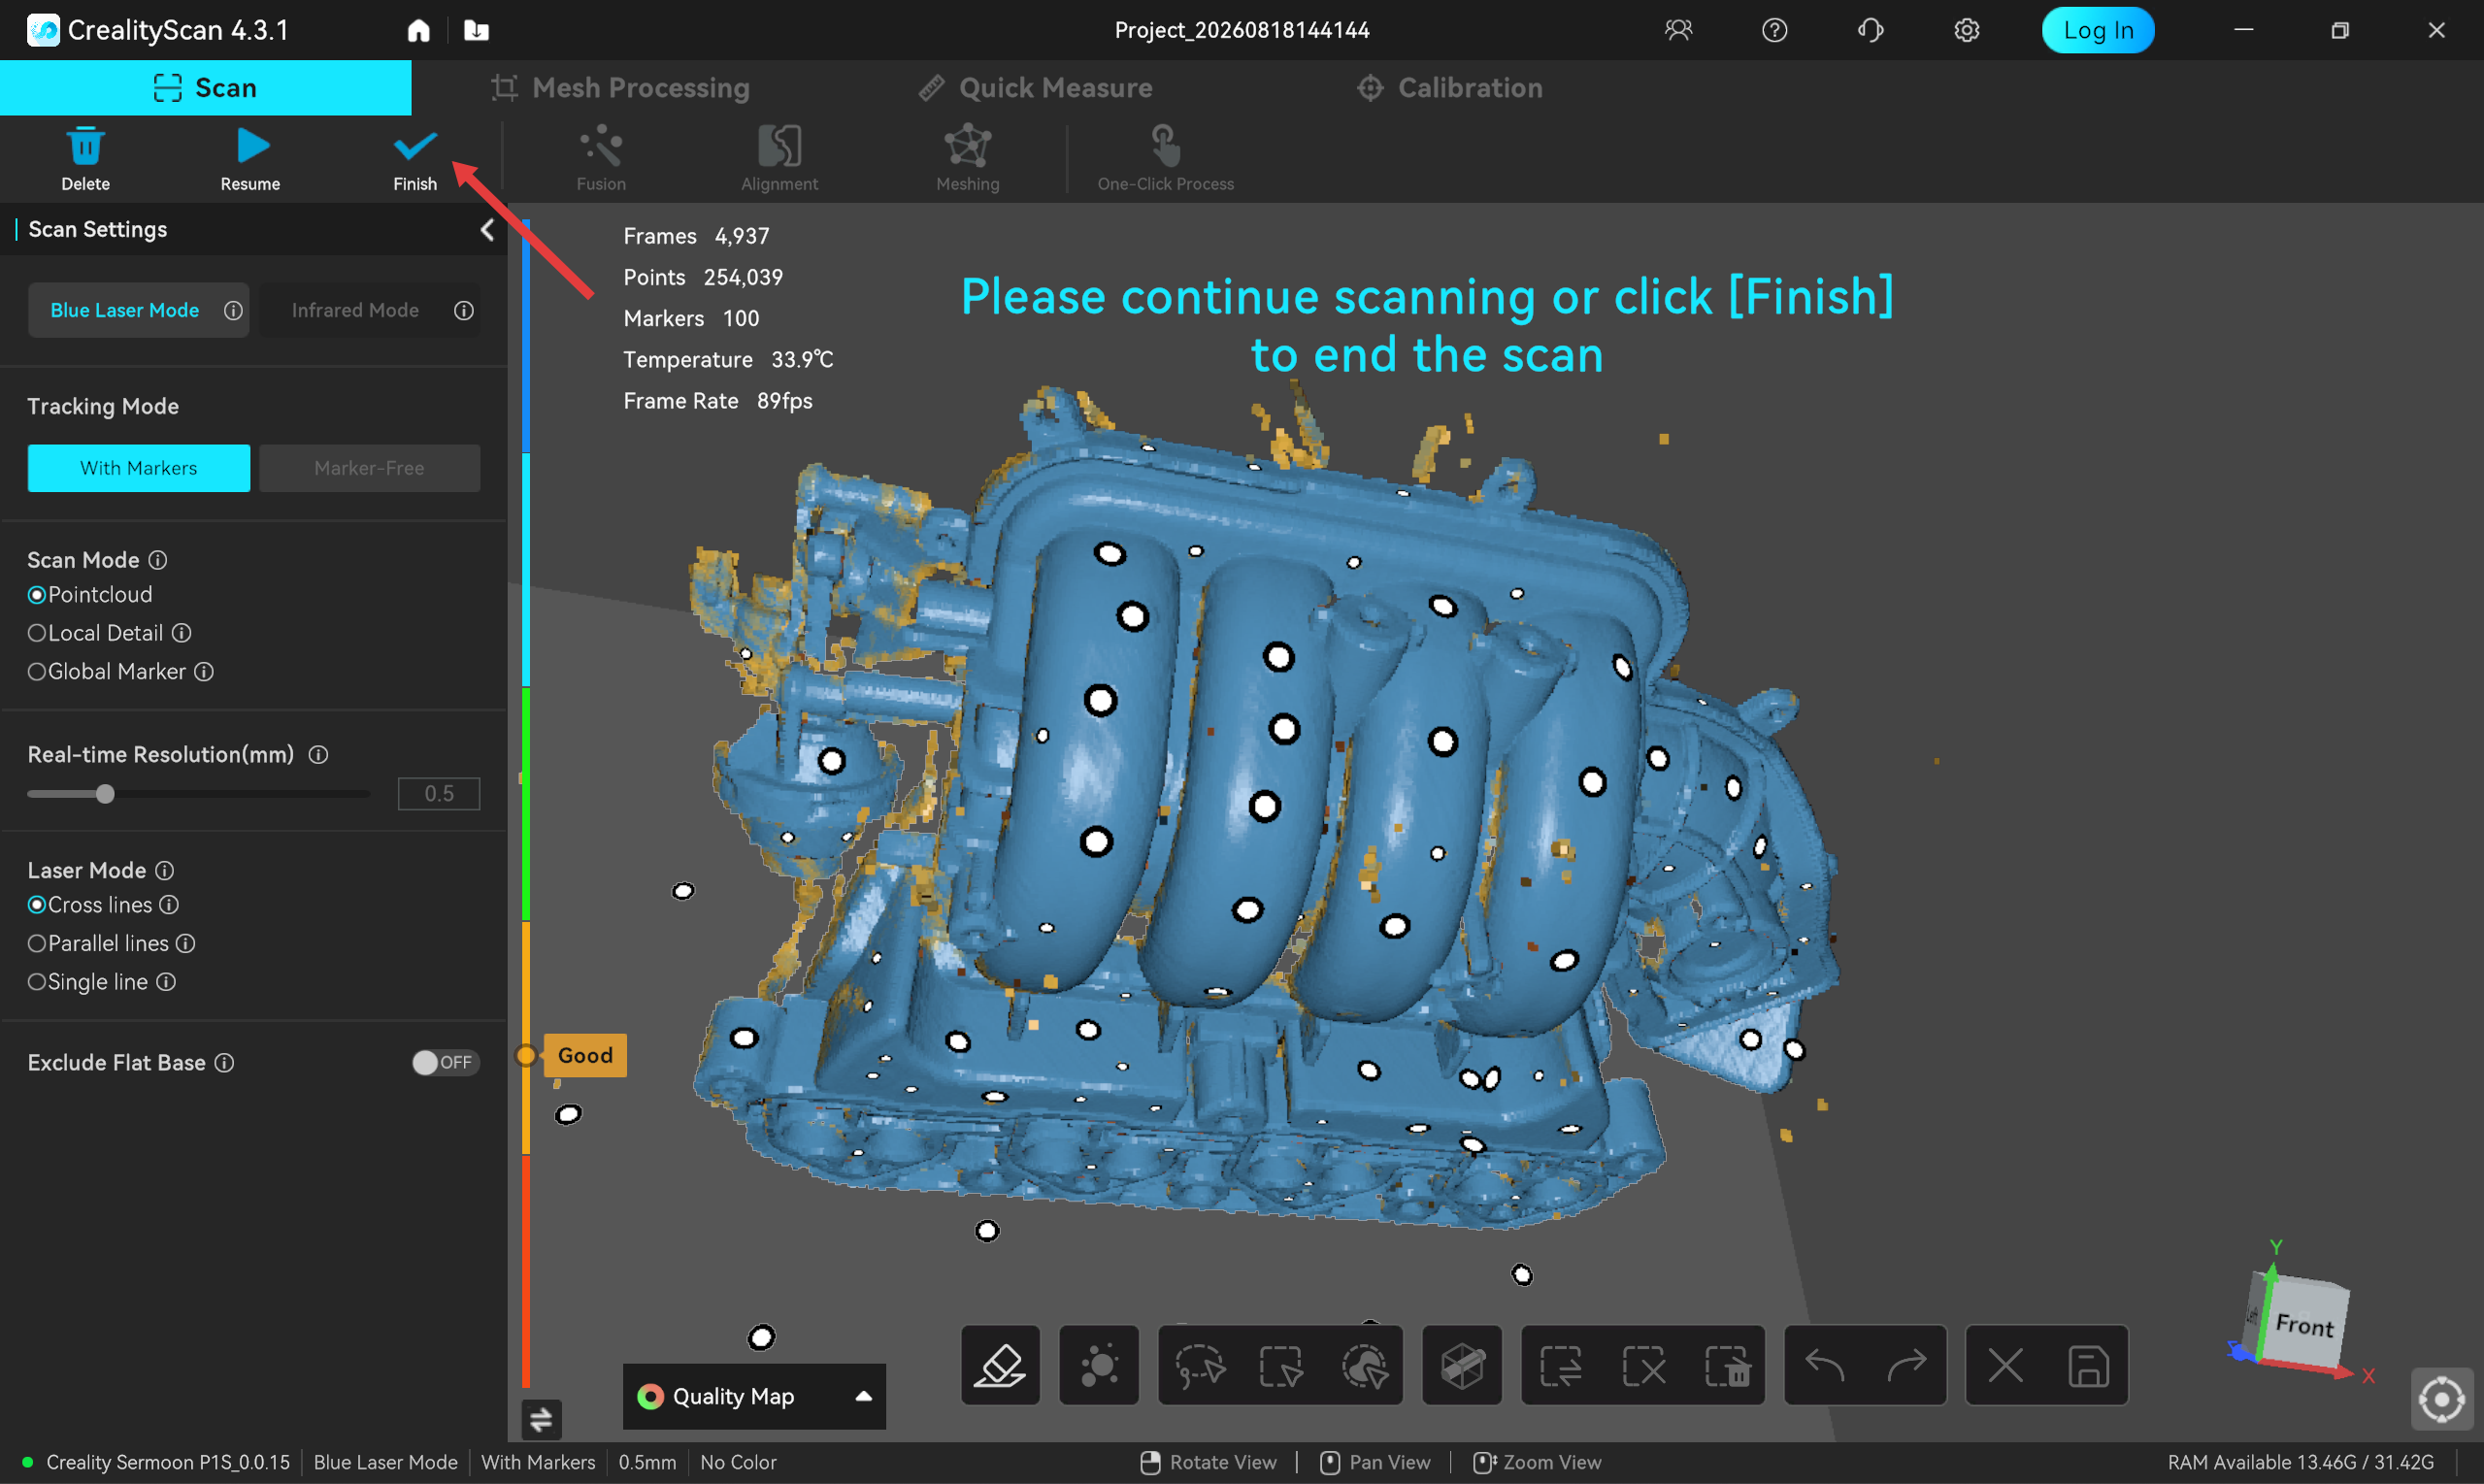
- Complete Scan: Once the data acquisition is complete, press and hold the Start/Pause button on the scanner for more than 2 seconds, or click "Finish" in the software interface. The scanned point cloud data will be automatically displayed in the software.
¶ 2.2.4 Model Processing
After the scan is completed, you need to use the post-processing function of CrealityScan software to generate the final 3D model from the point cloud data.
-
One-click processing: For beginner users, the software's "One-Click Process" function can be used, which will automatically complete fusion, meshing, and color mapping (if applicable).
-
Manual processing procedure (recommended):
- Fusion: Merging multiple frames of point cloud data collected during the scanning process into a complete mesh data.
- Alignment (if applicable): After fusion, multiple Scans can be aligned together into a complete model to view the effect.
- Meshing: Perform comprehensive optimization on the fused mesh data to make it more complete and smooth.
- Color Mapping (if applicable): If color information is captured during scanning, this step applies colors and textures to the model surface.
Note: For more detailed model processing tutorials, please visit the official Creality Wiki: https://wiki.creality.com/3d-scanner
¶ 3. Detailed Explanation of Scan Modes
¶ 3.1 Blue Laser Mode
Suitable for scanning objects that require high accuracy and rich detail, it usually needs to be used with markers.
Cross-Line Laser
- Features: Fast scanning speed and high efficiency.
- Applicable scenarios: Scanning large objects. It is necessary to attach markers directly to the object's surface.
Parallel-Line Laser
- Features: Best details.
- Applicable scenarios: For detailed scanning of objects, resulting in richer model details. If the object is small, markers can be placed on the table around the object.
Single-Line Laser
- Features: Excellent at capturing hard-to-reach areas such as deep holes and grooves.
- Applicable scenarios: Supplemental scanning of objects with deep hole features.
Tips:
- Real-Time Resolution: A smaller resolution results in a more detailed model, but it will consume more computer memory and may affect scanning smoothness. Please select according to your computer performance and model requirements.
- Alignment: If you need to scan multiple sides of an object (such as the front and back), you can scan them in multiple steps and then use the software's "Alignment" function to combine them into a complete model.
¶ 3.2 Infrared Mode
It is suitable for scanning faces, bodies, sculptures or other objects with rich features, and usually does not require the application of markers.
- Features: Safe, fast, invisible light, and harmless to human eyes.
- Applicable scenarios: Face scanning, cultural relic protection, medical rehabilitation, etc.
- The infrared mode also supports "Texture" tracking to meet different needs.
Outdoor Scanning Tips (NIR Filter Usage): When performing infrared scanning in strong outdoor light or high ambient brightness, please install the two "NIR Filters" included in the accessories in front of the two "3D Scanning Camera" lenses on the back of the device. The filters effectively filter out strong light interference and prevent overexposure, thus significantly optimizing outdoor scanning results.
¶ 4. Other Functions
¶ 4.1 Calibration
If you notice a decrease in scanning accuracy or if the scanner has not been used for an extended period, calibration is recommended. Please use the included "High-Precision Glass Calibration Board" and follow the on-screen instructions on your Creality Sermoon P1S device to restore the scanner's factory accuracy.
¶ 4.2 System Upgrade
Creality releases system updates periodically to optimize performance and add new features. Please keep your Creality Sermoon P1S device up to the latest system version and upgrade as prompted for the best user experience.
Note: System upgrades require a Wi-Fi connection to check for and download update packages.
¶ 4.3 File Transfer
Select the project you want to share from the "Recent Projects" list, tap the "Share" button in the "..." icon at the top left corner, and follow the on-screen instructions to complete the file transfer.
¶ 5. Specifications
¶ 5.1 Hardware Parameters
| Creality Sermoon P1S | ||||
| Parameter | Single Blue Laser Line | 7 Parallel Blue Laser Lines | 34 Cross Blue Laser Lines | NIR Structured Light |
| Accuracy [1] | Up to 0.02mm | Up to 0.075mm | ||
| Volumetric Accuracy | 0.02mm + 0.08mm/m | 0.075mm + 0.1mm/m | ||
| Scanning Rate (Standalone) | 72,000 points/s | 504,000 points/s | 1,224,000 points/s | 4,587,000 points/s |
| Scanning Rate (PC Connection) | 108,000 points/s | 756,000 points/s | 1,836,000 points/s | 6,881,000 points/s |
| 3D Resolution | 0.05-2mm | 0.1-2mm | ||
| Scanning Speed (Standalone) | Up to 60fps | Up to 20fps | ||
| Scanning Speed (PC Connection) | Up to 100fps | Up to 30fps | ||
| Min. Scan Volume | 5mm x 5mm x 5mm | 150mm x 150mm x 150mm | ||
| Single Capture Range | 100mm*128mm at 160mm / 500mm*400mm at 550mm | 160mm*130mm at 170mm / 975mm*725mm at 1000mm | ||
| Working Distance | 200-550mm | 160mm-400mm | 200-550mm | 170mm-1200mm |
| Color Mapping | Yes | |||
| Alignment Mode | Marker / Global Marker / Marker-Free | Geometry / Texture | ||
| Color Supplemental Light | 8 White LEDs | |||
| NIR Filter | / | Yes | ||
| Outdoor Scanning | Below 110,000 lux | Below 80,000 lux (with filter) / Below 50,000 lux (without filter) | ||
| Supplemental Light | 8 Blue LEDs (marker recognition enhancement) | 4 Infrared LEDs | ||
| Laser Safety | Class II (eye safe) | Class I (eye safe) | ||
| Device Weight | 807g (batteries included) | |||
| Dimensions | 209mm × 129 mm × 53 mm | |||
| Calibration Board | High-Precision Glass Calibration Board | |||
| Processor | Qualcomm CPU, 8-core 3.36 GHz / GPU, Adreno 740 / FPGA | |||
| Built-in RAM | 16GB LPDDR5X | |||
| Built-in Storage | 256GB UFS 4.0 | |||
| Display | 6-inch HD Touchscreen | |||
| Battery | 3300mAh*2 (comes with a backup battery) | |||
| Interface | Type-C / USB 3.0 | |||
| Charging | PD3.0 Fast Charging | |||
| Wireless PC Scan | Yes | |||
| Work Mode | Standalone Mode / Wireless PC Mode / Wired PC Mode | |||
| Wi-Fi | Wi-Fi 7 | |||
| PC System Support | Windows / macOS | |||
| Recommended System Requirements | Windows: Windows 10/11 (64-bit), Intel Core i7 13th Gen or later, NVIDIA GeForce RTX 4060 (8 GB VRAM) or higher, Memory: 32 GB or more | |||
| macOS: macOS 14 or later, Apple M3 or later, Memory: 32 GB or more | ||||
| Minimum System Requirements | Windows: Windows 10/11 (64-bit), Intel Core i7-Gen7, NVIDIA graphics card (6 GB VRAM), Memory: 16 GB or more | |||
| macOS: macOS 12 or later, Apple M2, Memory: 16 GB or more | ||||
| Operating Temperature | -10°C to 40°C | |||
| Operating Humidity | 10-90% RH | |||
[1] Accuracy is evaluated in laboratory conditions and actual results may be affected by operating environments such as vibration, temperature, and other factors.*
¶ 6. Precautions
About the Creality Sermoon P1S 3D Scanner
- Please do not disassemble or assemble the equipment yourself.
- Please use the dedicated accessories included with the product, such as calibration plates.
¶ 6.1 Usage Instructions
Please note the following points, otherwise it may lead to equipment damage or machine malfunction.
- Please avoid significant vibrations and impacts when using this product. The Creality Sermoon P1S 3D scanner is a high-precision device with a delicate internal structure; severe vibrations or impacts may damage the structure and cause damage to the optical components.
- Please use this device at the recommended temperature and humidity.
- Please ensure the usage environment is suitable, and when using a wired connection, ensure the cable connector is intact.
¶ 6.2 Maintenance Instructions
- To clean the equipment, please use a cotton cloth dampened with diluted neutral detergent, wring it out, and wipe it. Do not use a damp cloth, volatile oil, thinner, or other liquids to wipe the equipment, as this may damage the equipment's exterior or, in severe cases, damage the equipment parts.
- Store the equipment in its instrument case in a cool, dry place with a relatively stable temperature. Avoid storing it in the following places:
- Places with excessively high or low temperature and humidity
- Places with a lot of dust
- Places containing corrosive or flammable gases
- Places containing corrosive or flammable liquids
Shenzhen Creality 3D Technology Co., Ltd.
Official website: www.creality.com
Tel: +86 755 3396 5666 Customer Service : cs@creality.com
Company Address: 18F, JinXiuHongDu Building, Meilong Blvd., Longhua Dist. Shenzhen, 518131 China
Your device has been certified by the relevant countries and regions. You can view this electronic certification information on your device: Go to the device's "Settings" menu, select "My Device", tap "Certification Information" to find all applicable electronic certification marks and details.