Download Path: sermoon_p1_scanner_user_manual-20260707.pdf
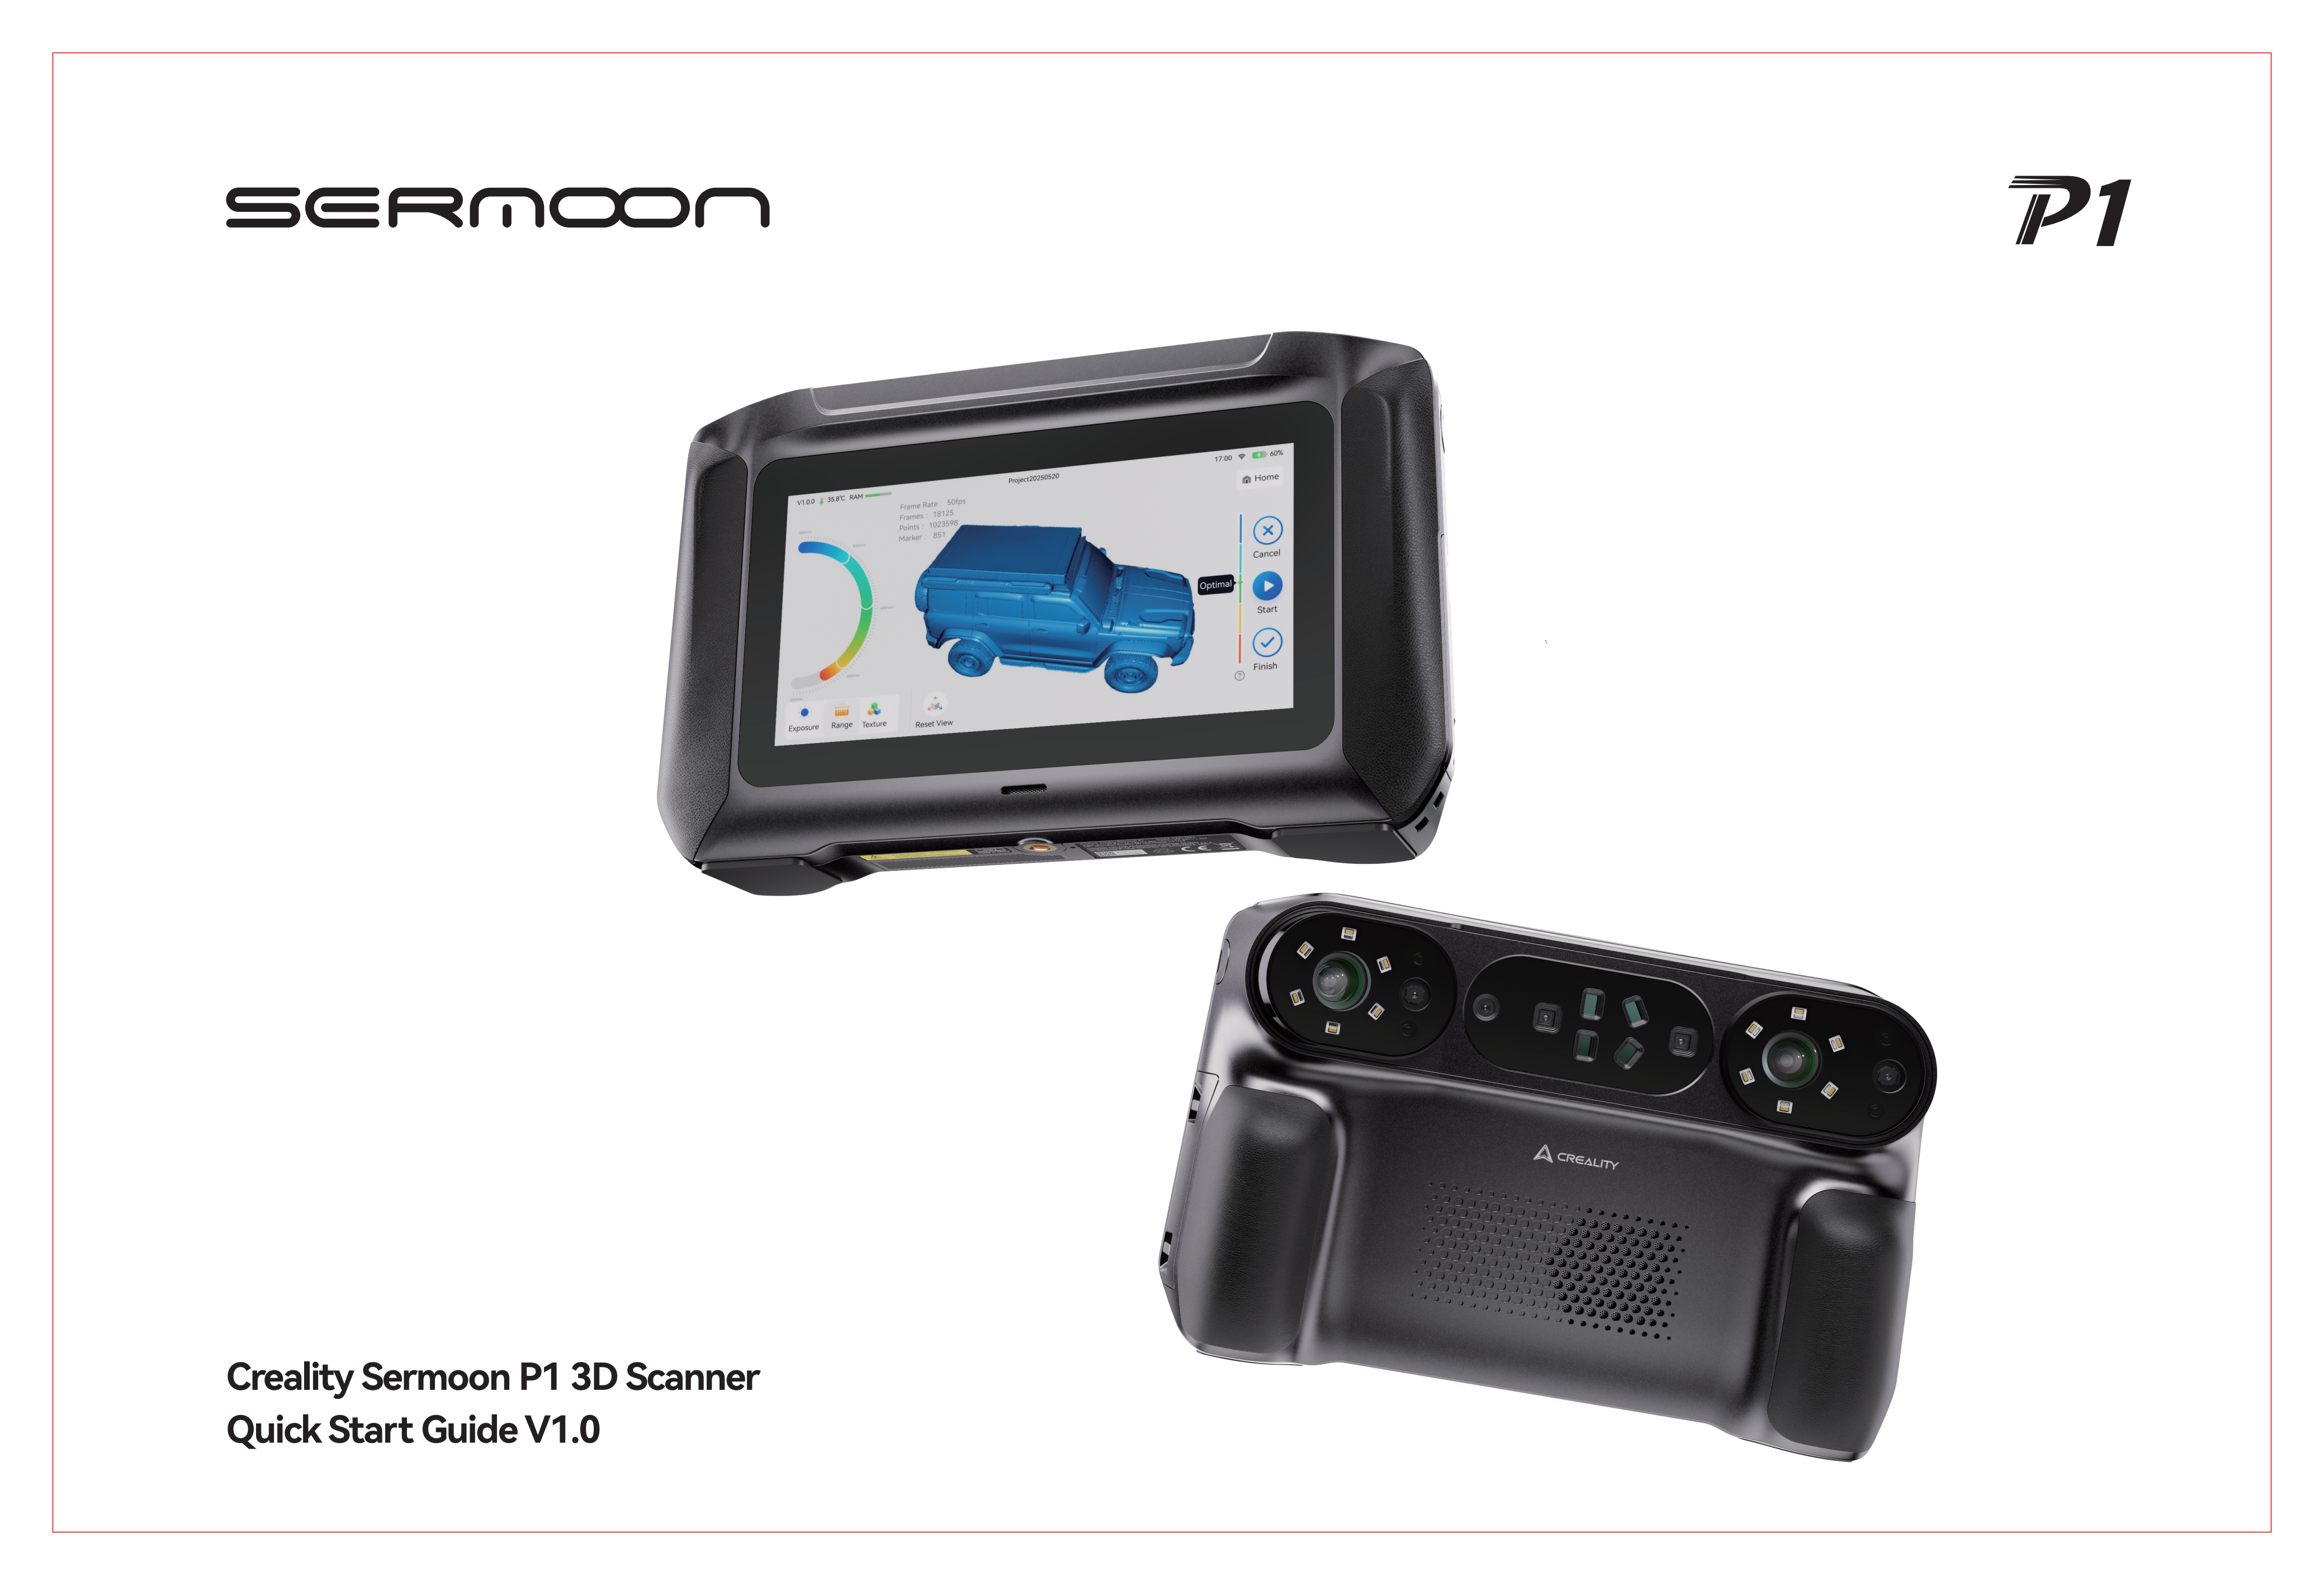
Thank you for choosing the Creality Sermoon P1 3D scanner. This guide aims to help you quickly understand the basic information and scanning process of this scanner, opening up a whole new 3D scanning experience.
You can visit the Creality official Wiki: https://wiki.creality.com/3d-scanner to get the latest "Creality Sermoon P1 Quick Start Guide", detailed tutorials and videos.
This guide will be continuously updated; please refer to the latest version for the most up-to-date information.
⚠️ Important Notes
●Do not allow the scanner to come into contact with water or other liquids. Avoid bumping or impact during use.
●To ensure optimal performance, please operate in a suitable working environment.
Table of Contents
- Product Introduction
1.1 Scanner Components
1.2 Packing List - First-Time Use
2.1 Standalone Mode (No computer connection required)
2.2 PC Connection Mode (Connect to Computer) - Detailed Explanation of Scanning Modes
3.1 Blue Laser Mode
3.2 Infrared Mode - Other Functions
4.1 Calibration
4.2 System Upgrade
4.3 File Transfer - Specifications
5.1 Hardware Parameters - Precautions
6.1 Usage Notes
6.2 Maintenance Notes
¶ 1. Product Introduction
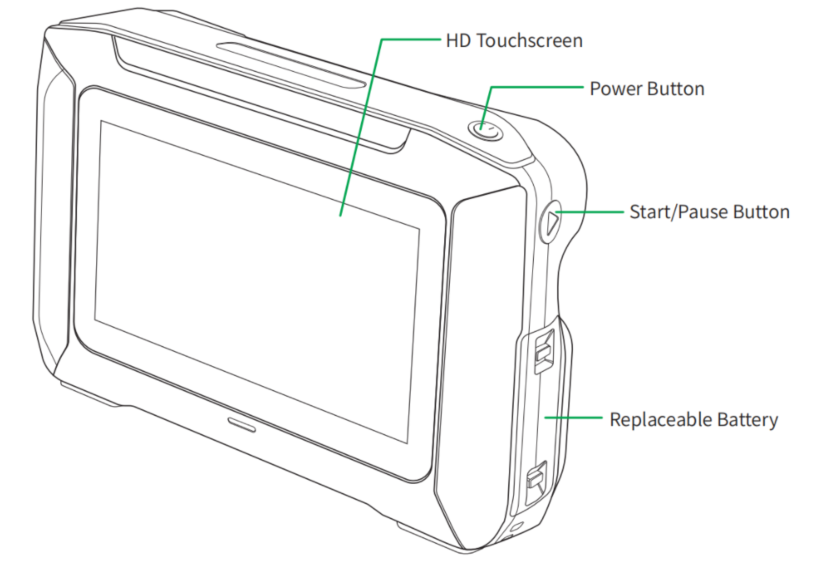
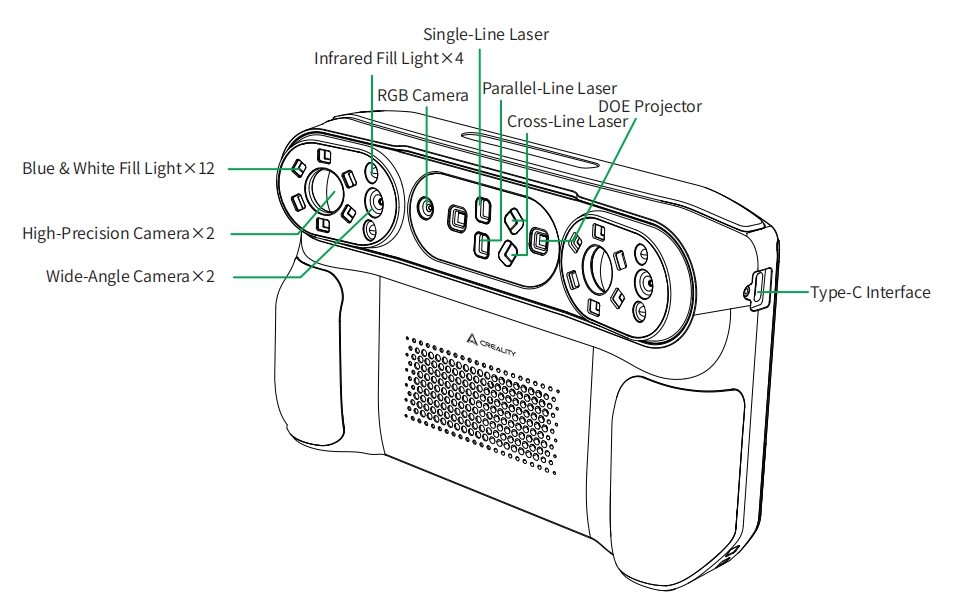
¶ 1.1 Scanner Components
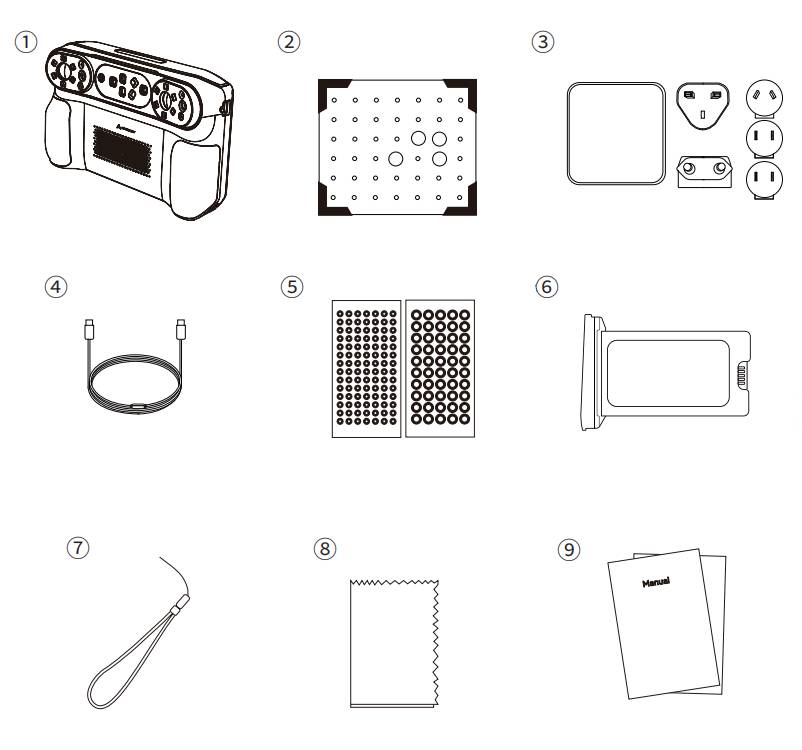
¶ 1.2 Packing List

¶ 2. First-Time Use
Creality Sermoon P1 supports two working modes: standalone mode and PC connection mode. You can choose the appropriate mode to operate according to your needs.
¶ 2.1 Standalone Mode (No computer connection required)
Creality Sermoon P1 has a built-in operating system and screen, allowing it to perform scanning and basic processing independently.
¶ Step 1: Power-on Preparation
Make sure the scanner has sufficient power.
Note: Before charging, users should select the appropriate connector according to their country and push the selected connector into the adapter body (the adapter body prongs are fixed and cannot be lifted directly for use) .
Press and hold the power button for 3 seconds to turn on the device and enter the main interface.
Complete first-time setup
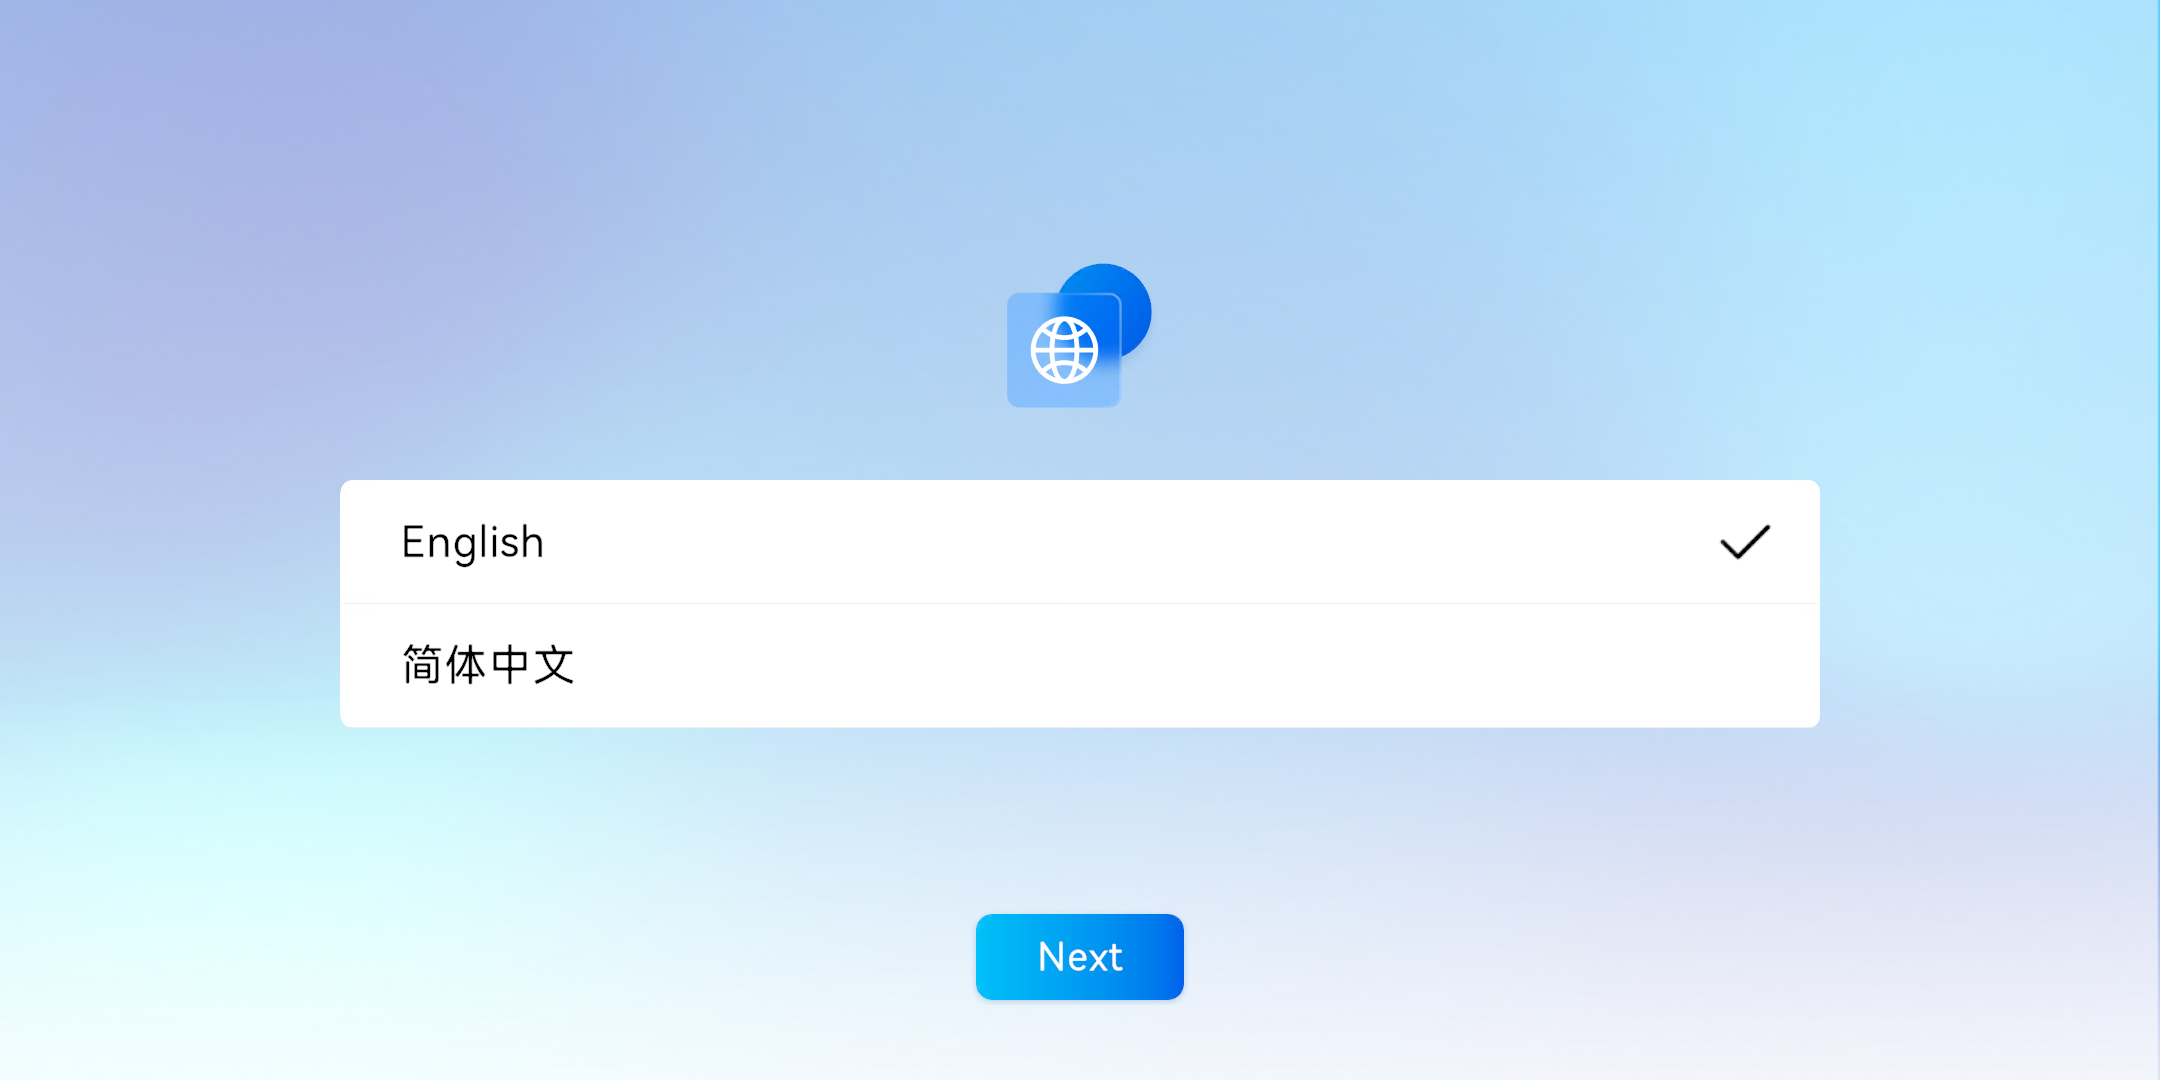
(1) Language Selection : Select your language and click [Next].
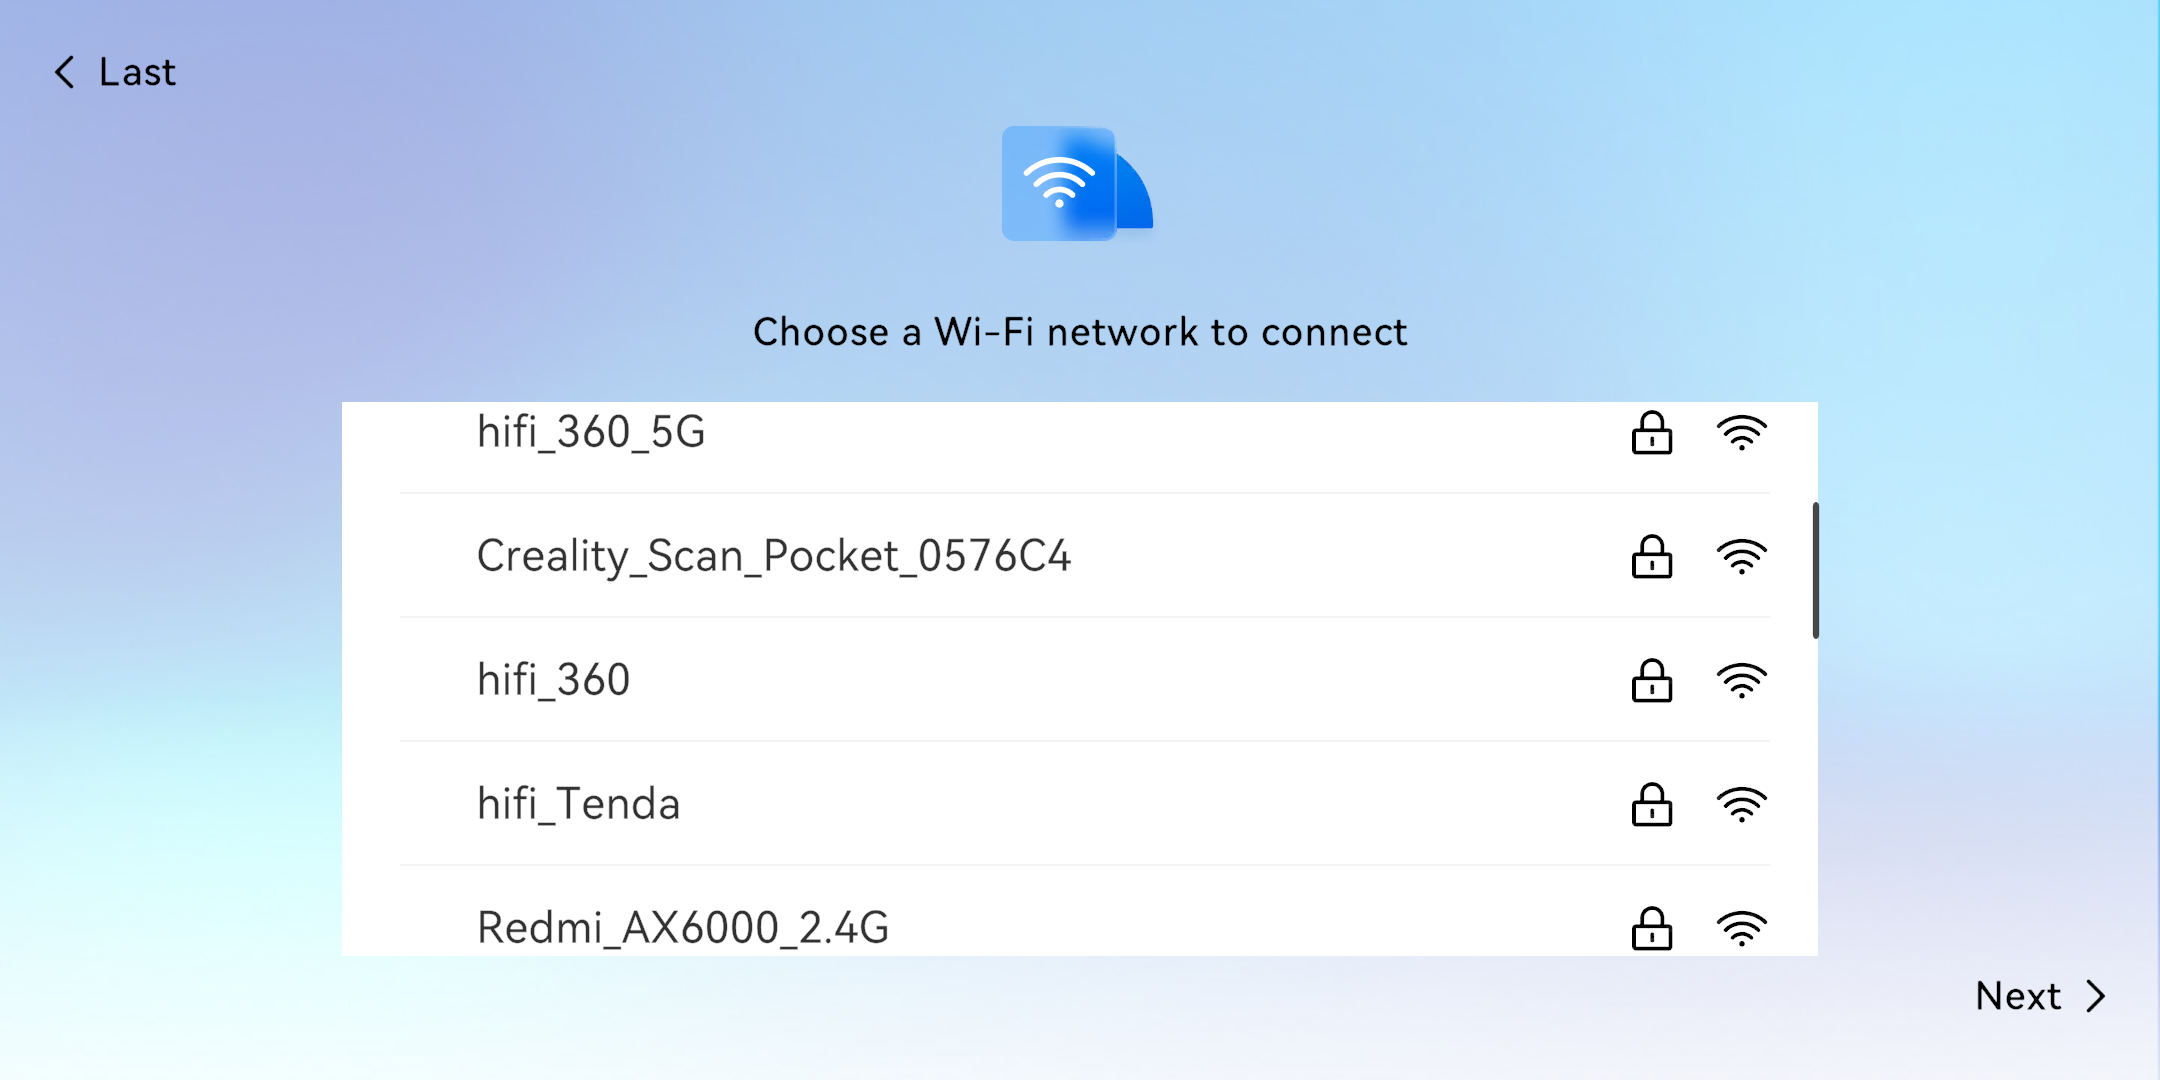
(2) Network Connection: Select an available local area network. Once connected, you will be automatically prompted to proceed to the next step.
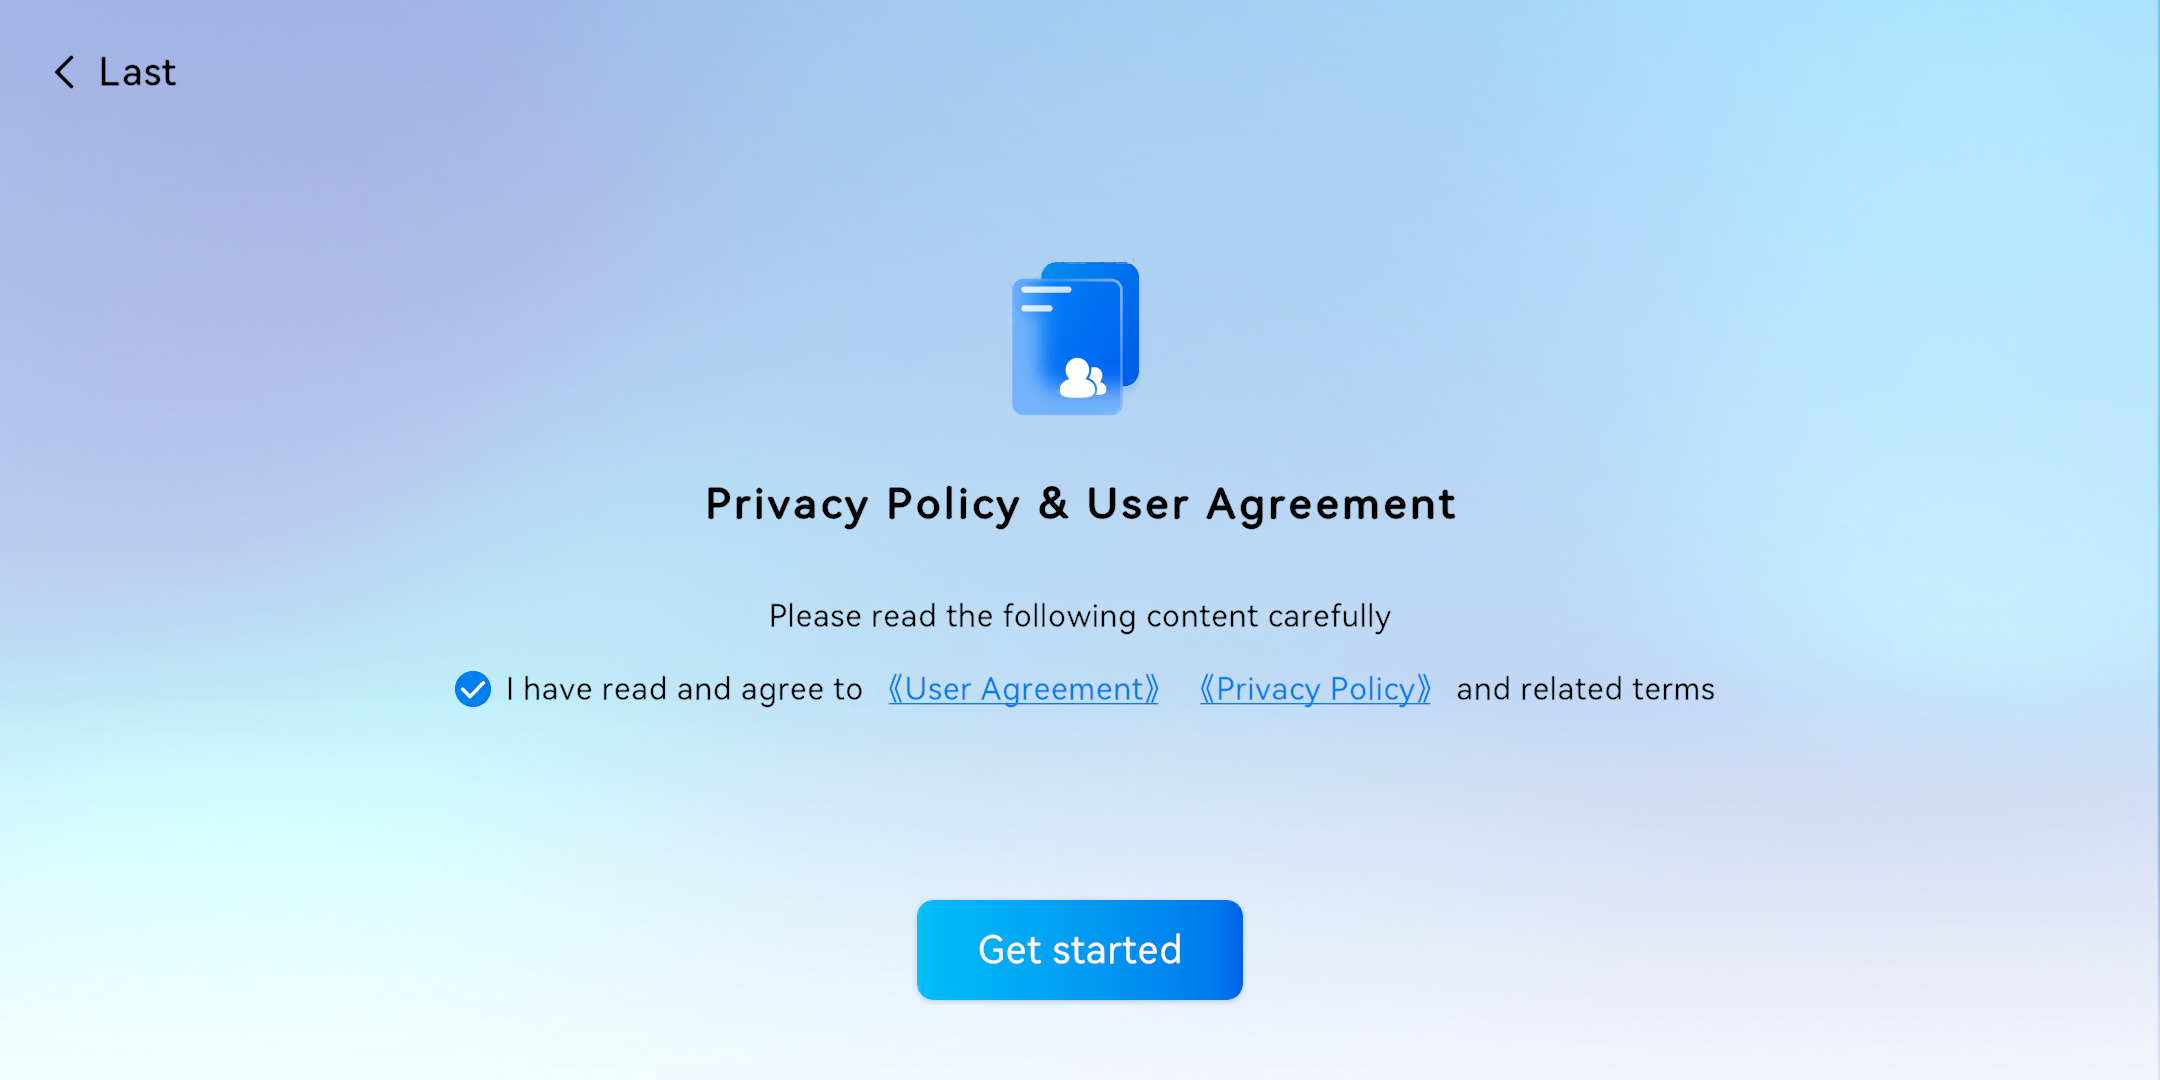
(3) Privacy Policy: Please read and agree to our relevant Privacy Policy and User Agreement before using the device.
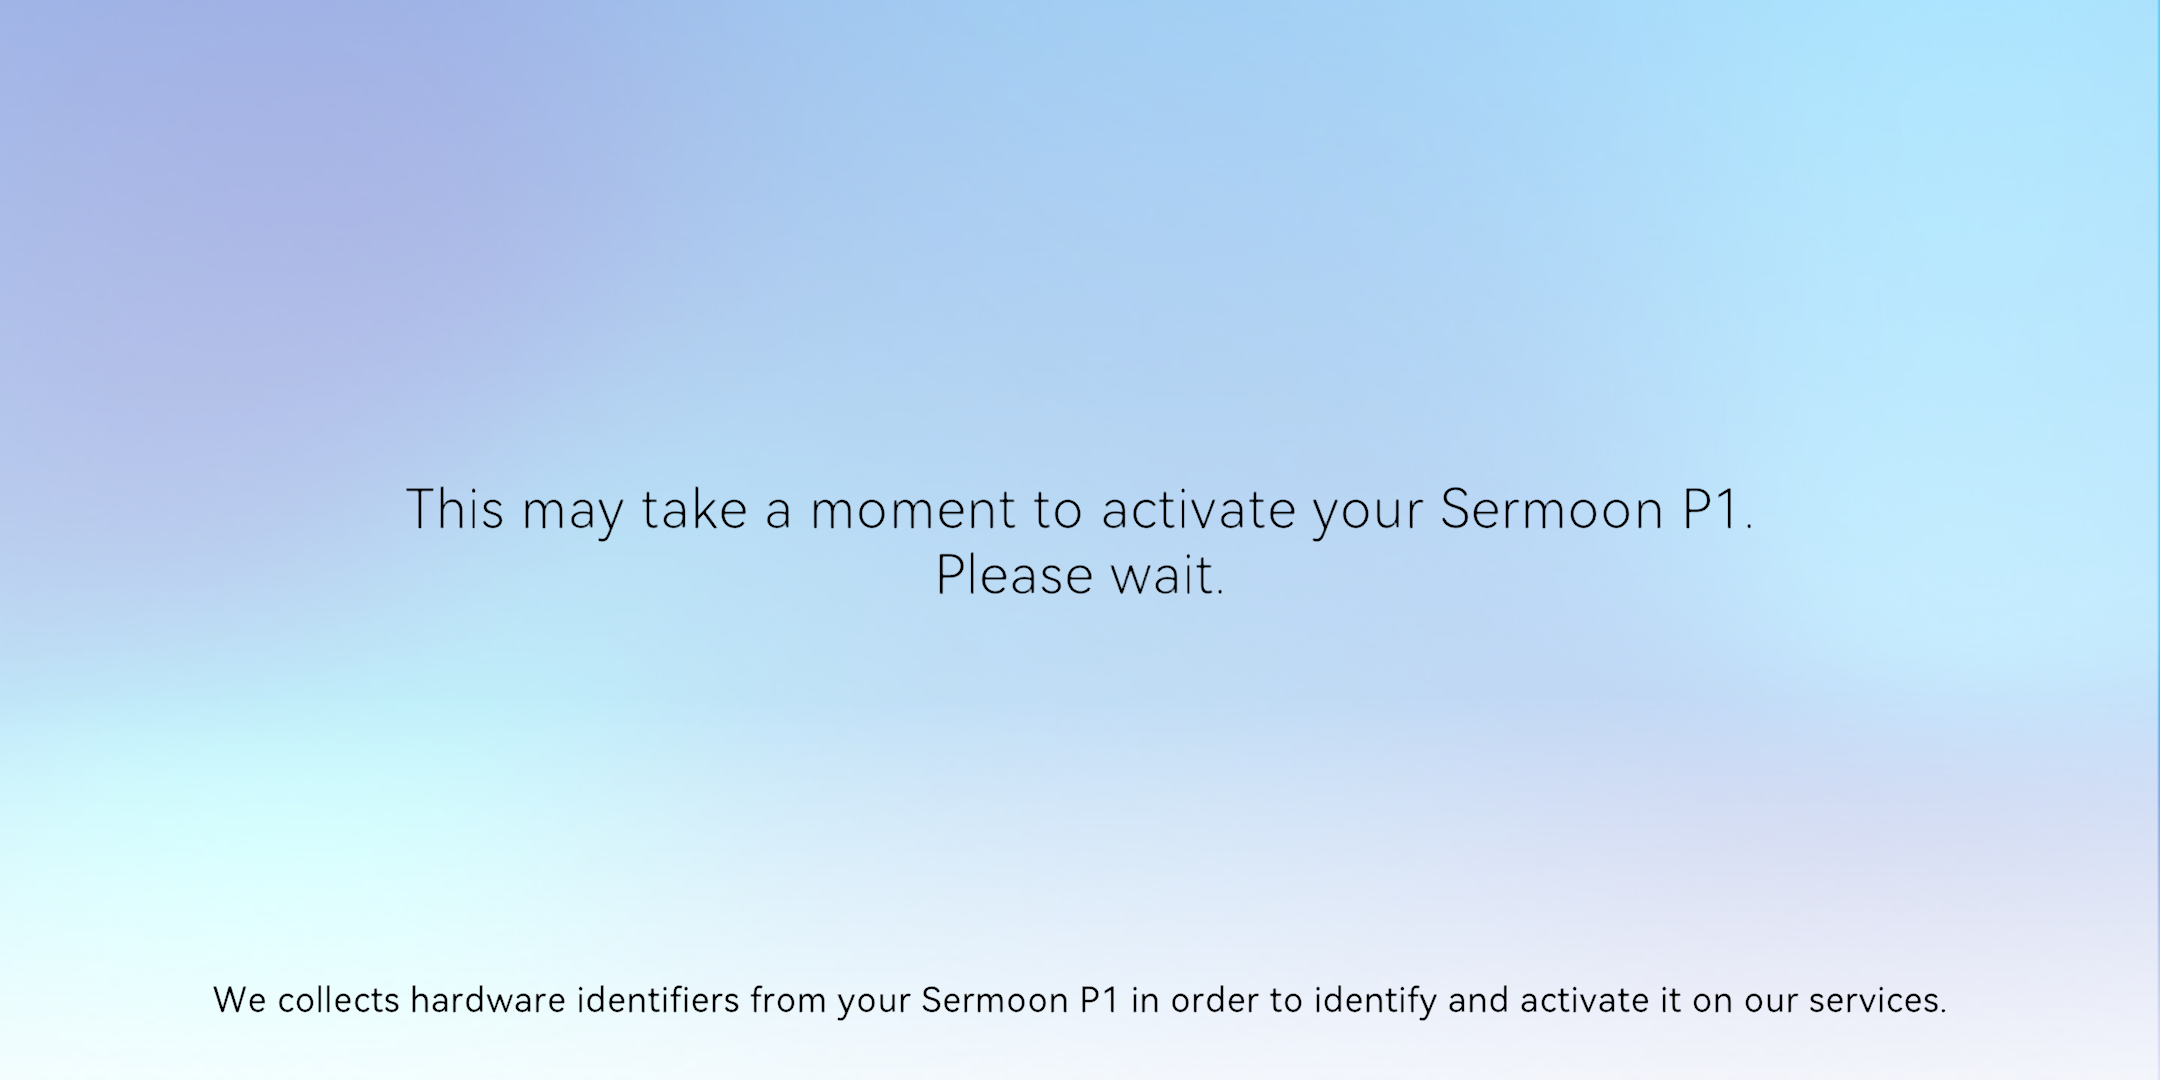
(4) Activation: Device activation takes a while, please be patient.
(5) Account Login: Supports login with Creality Cloud account . Login can be skipped without affecting normal device use.
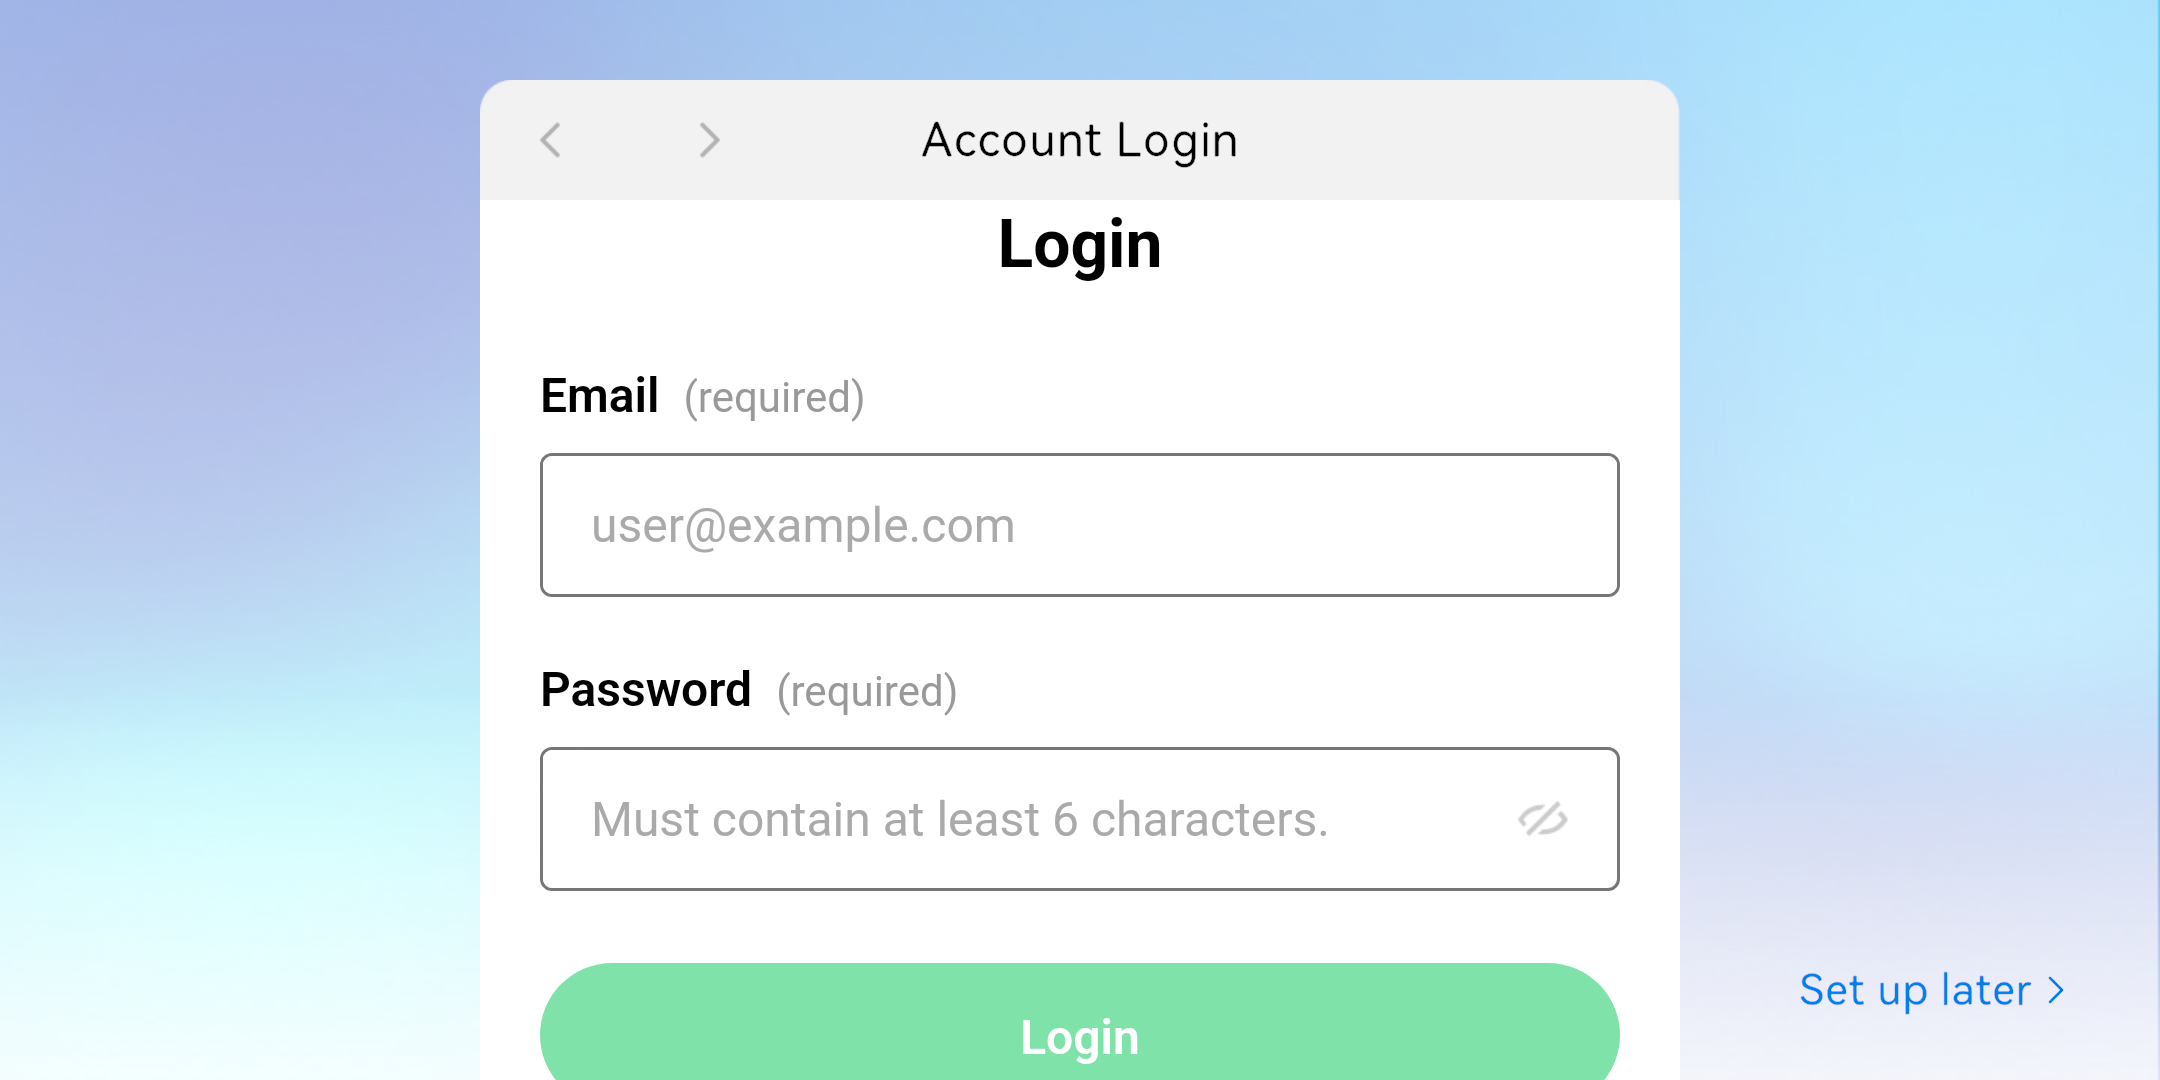
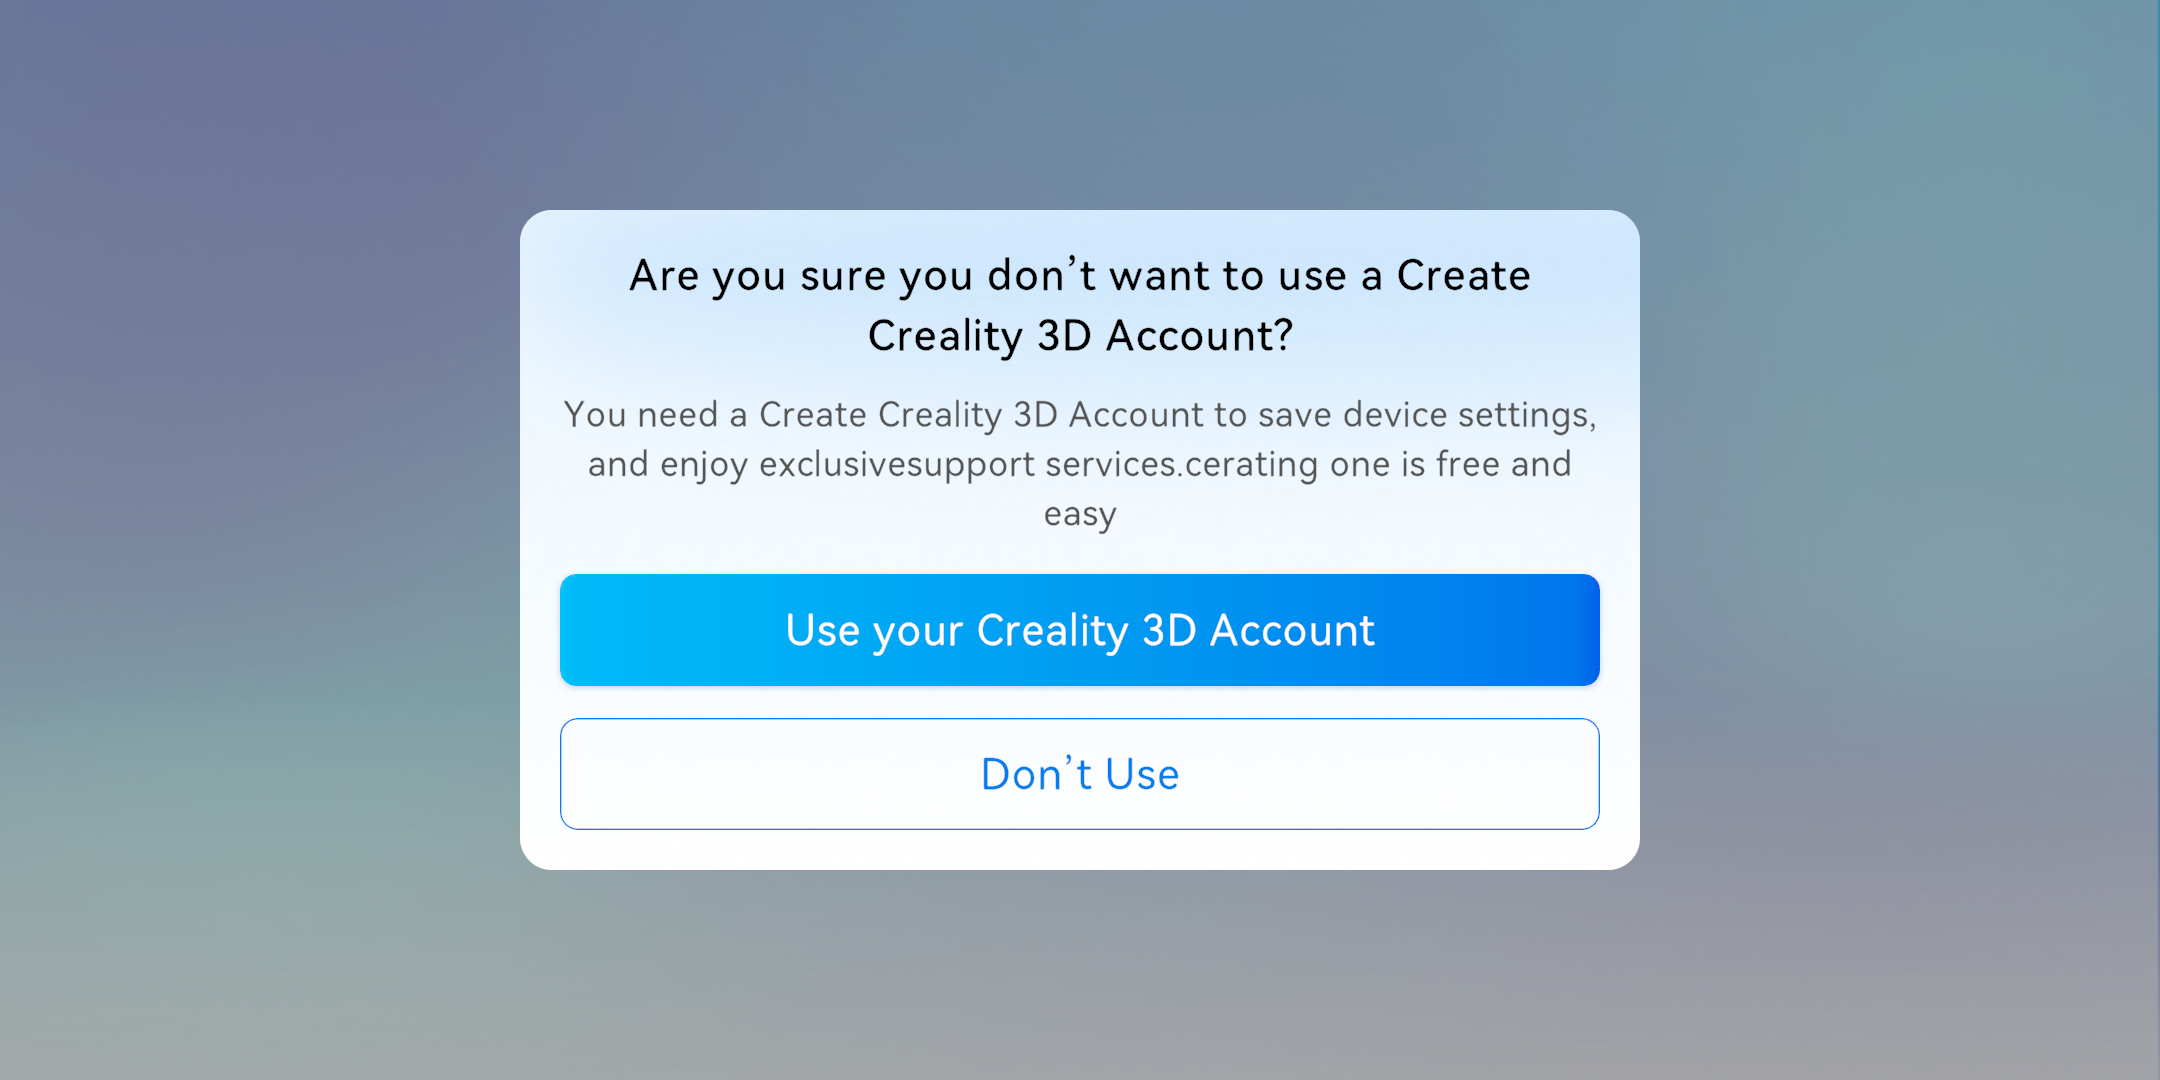
Skipping login will trigger a confirmation pop-up. If you still do not log in, select "Don’t Use" to proceed to the next page.
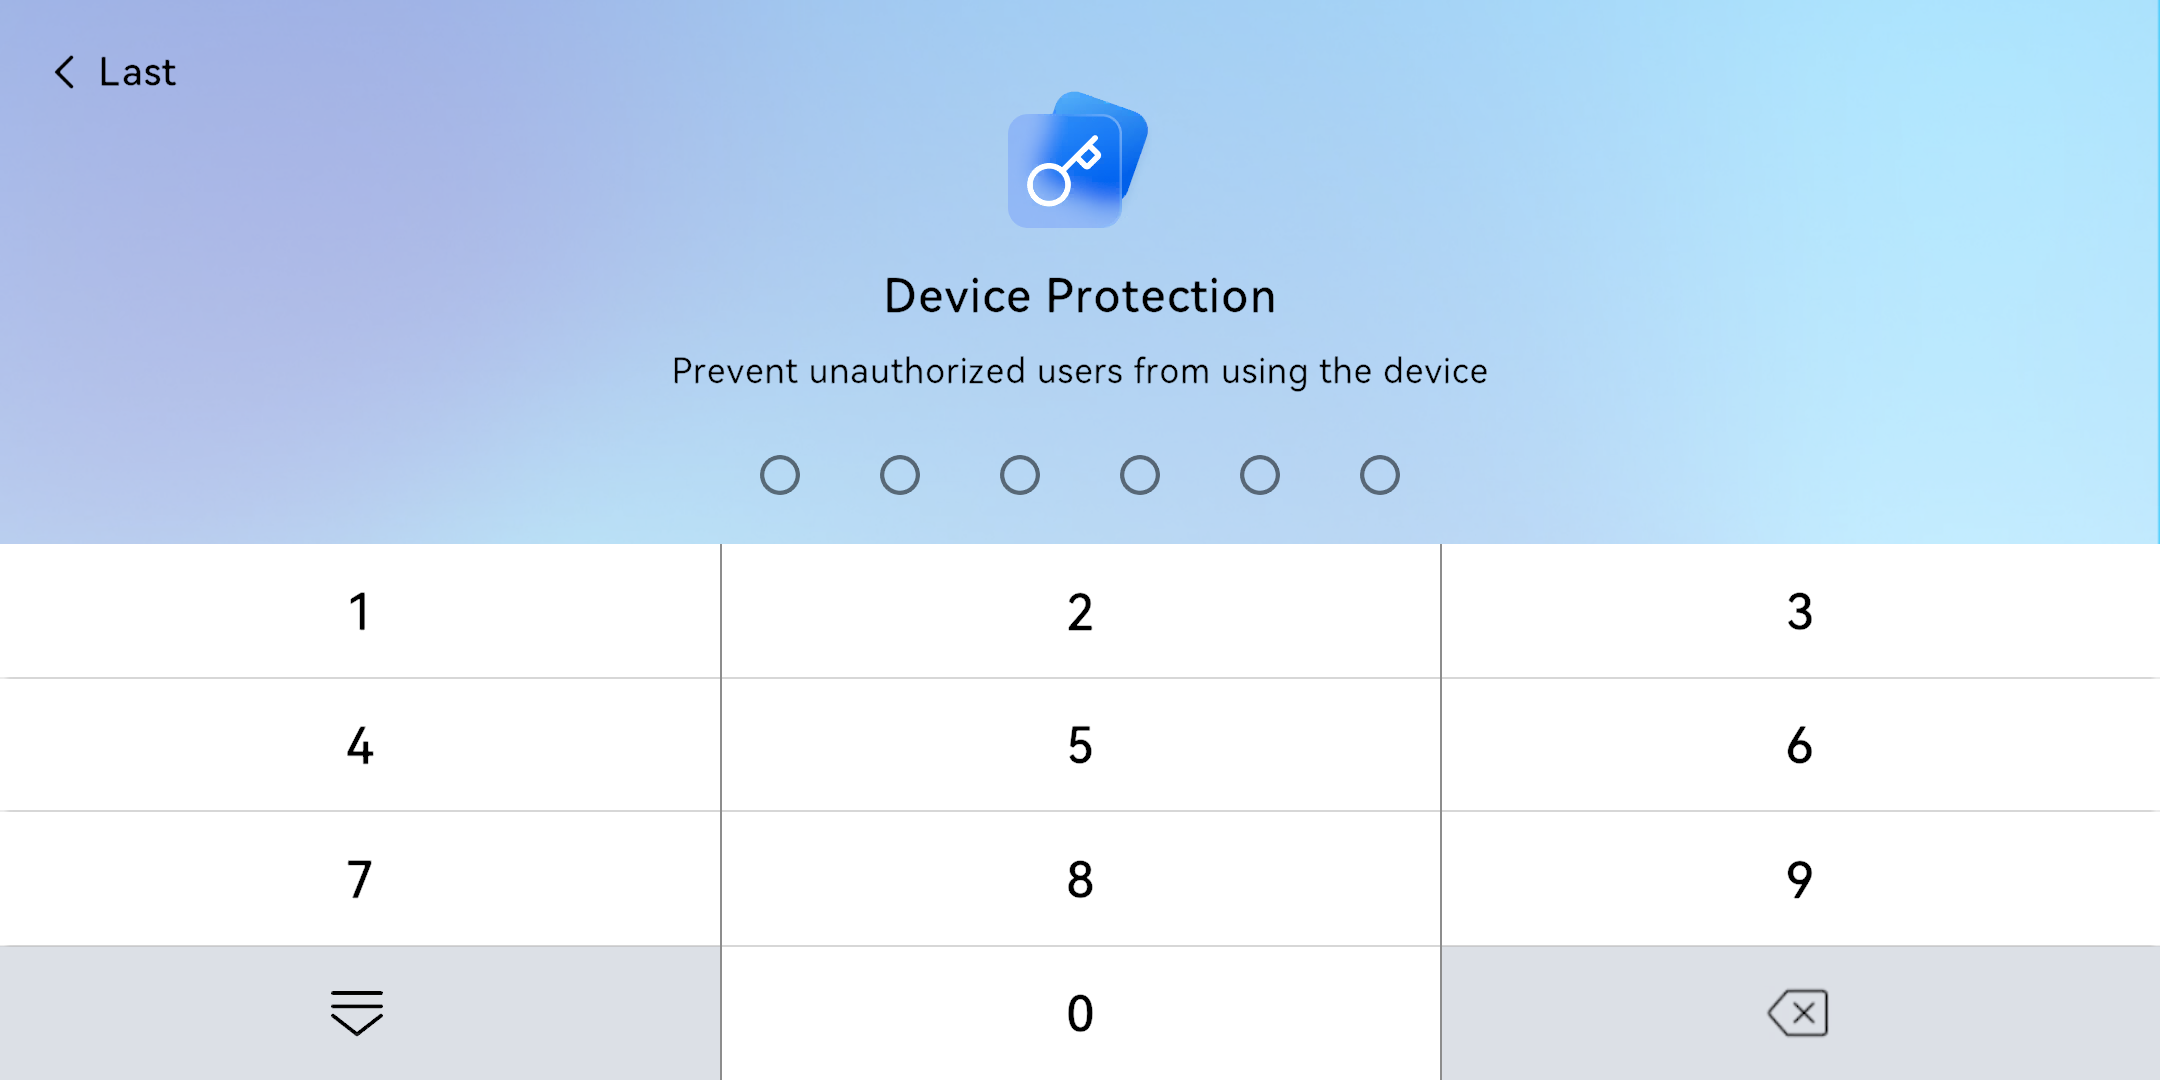
(6) Device Protection: On this page, you can set a device power-on password to prevent unauthorized users from using the device.
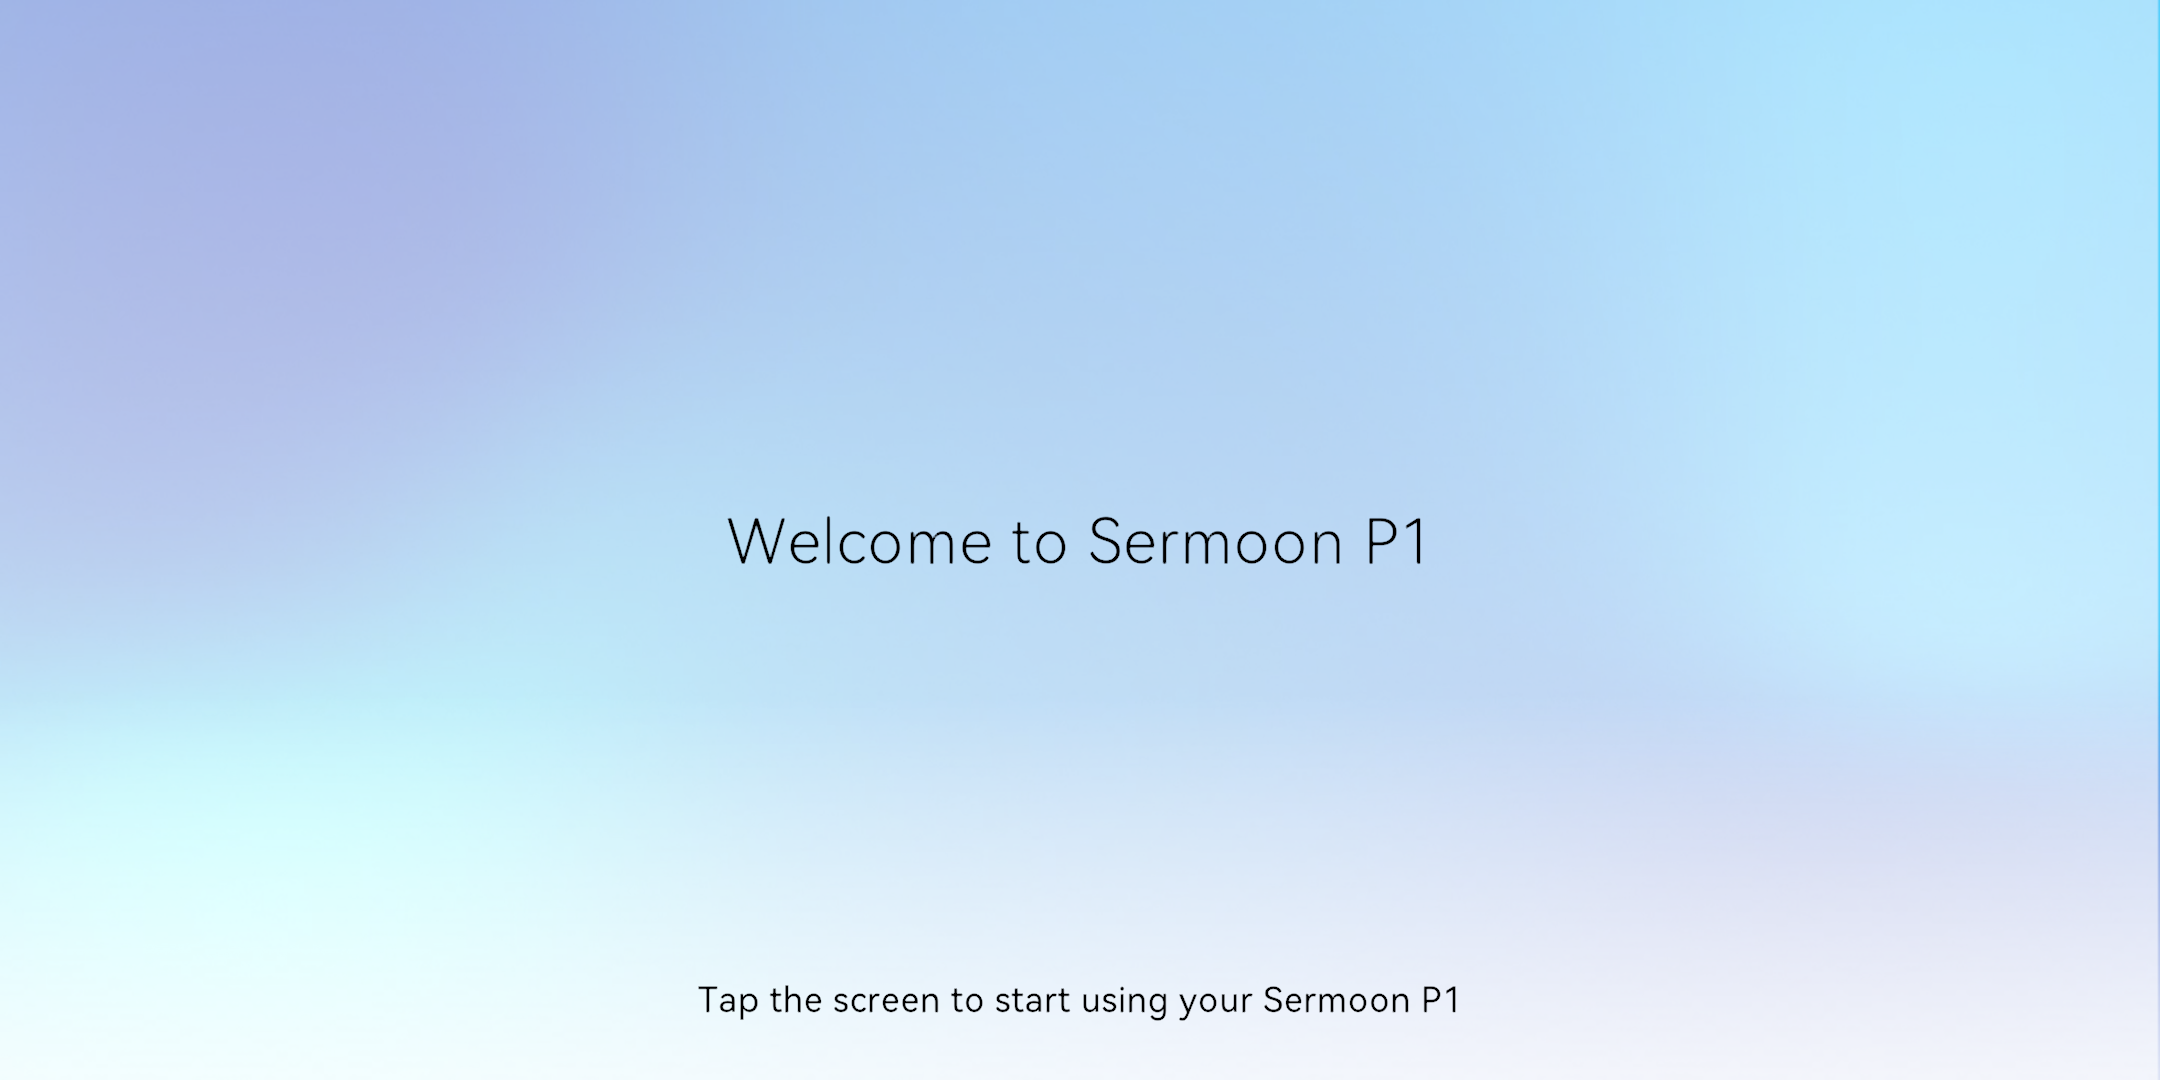
(7) Welcome Page: Tap anywhere on the screen to start using the device.
(8) Beginner Tutorial Video: You can choose whether to skip it. After watching/skipping, you will be taken directly to the device scanning page to start your first scanning experience.
¶ Step 2: Start Scanning
● Tap "New Project" on the screen to enter the scan preview page.
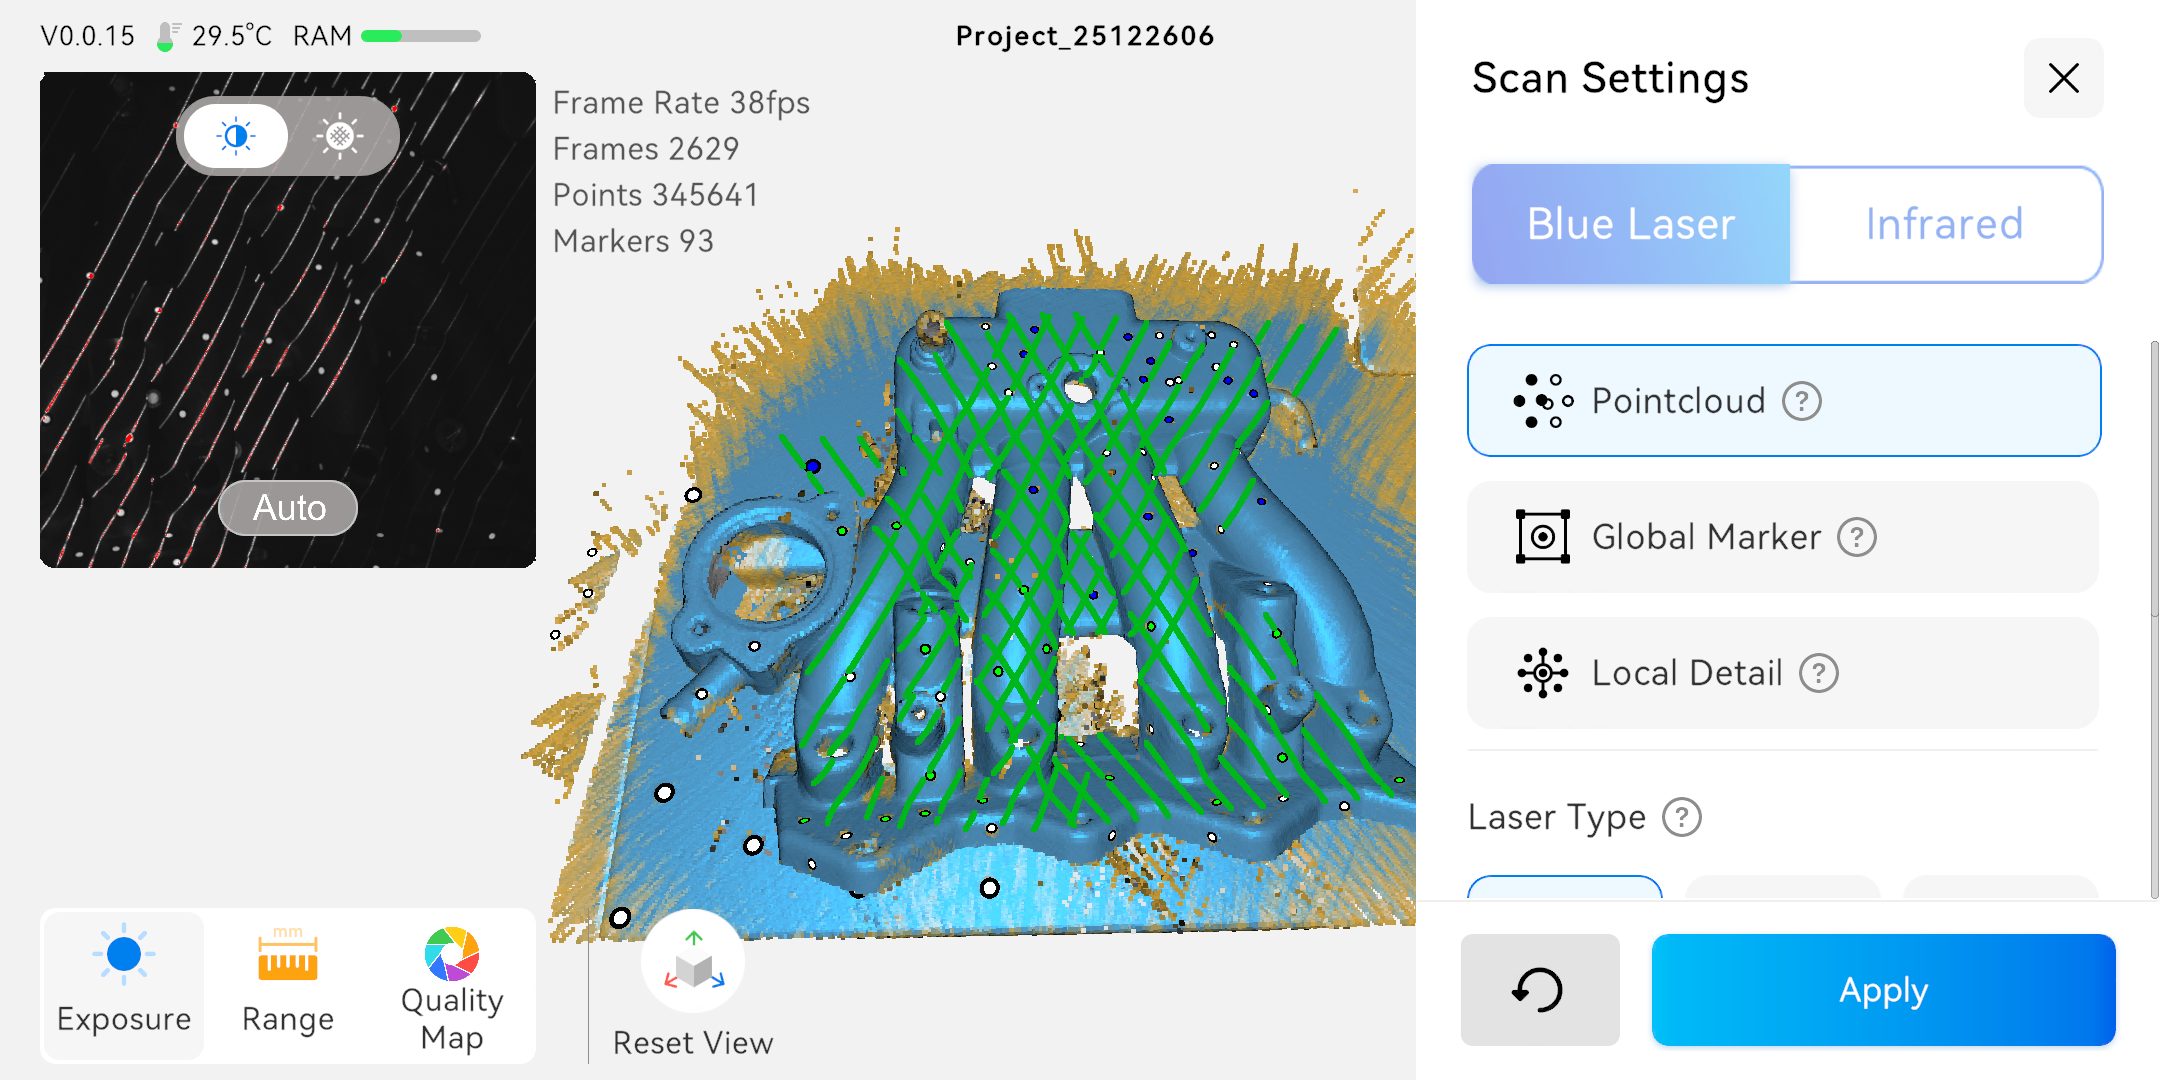
● Select the appropriate scan mode (Blue Laser/Infrared) and related settings based on the features of the object being scanned.
● Select the appropriate scan settings and click "Apply" to scan in the selected settings.
● Adjust the Scanning Distance : Move the scanner to adjust its distance from the scanned object. When the distance indicator bar on the right side of the screen is within the green "Optimal" range, it means the current distance is ideal for scanning.
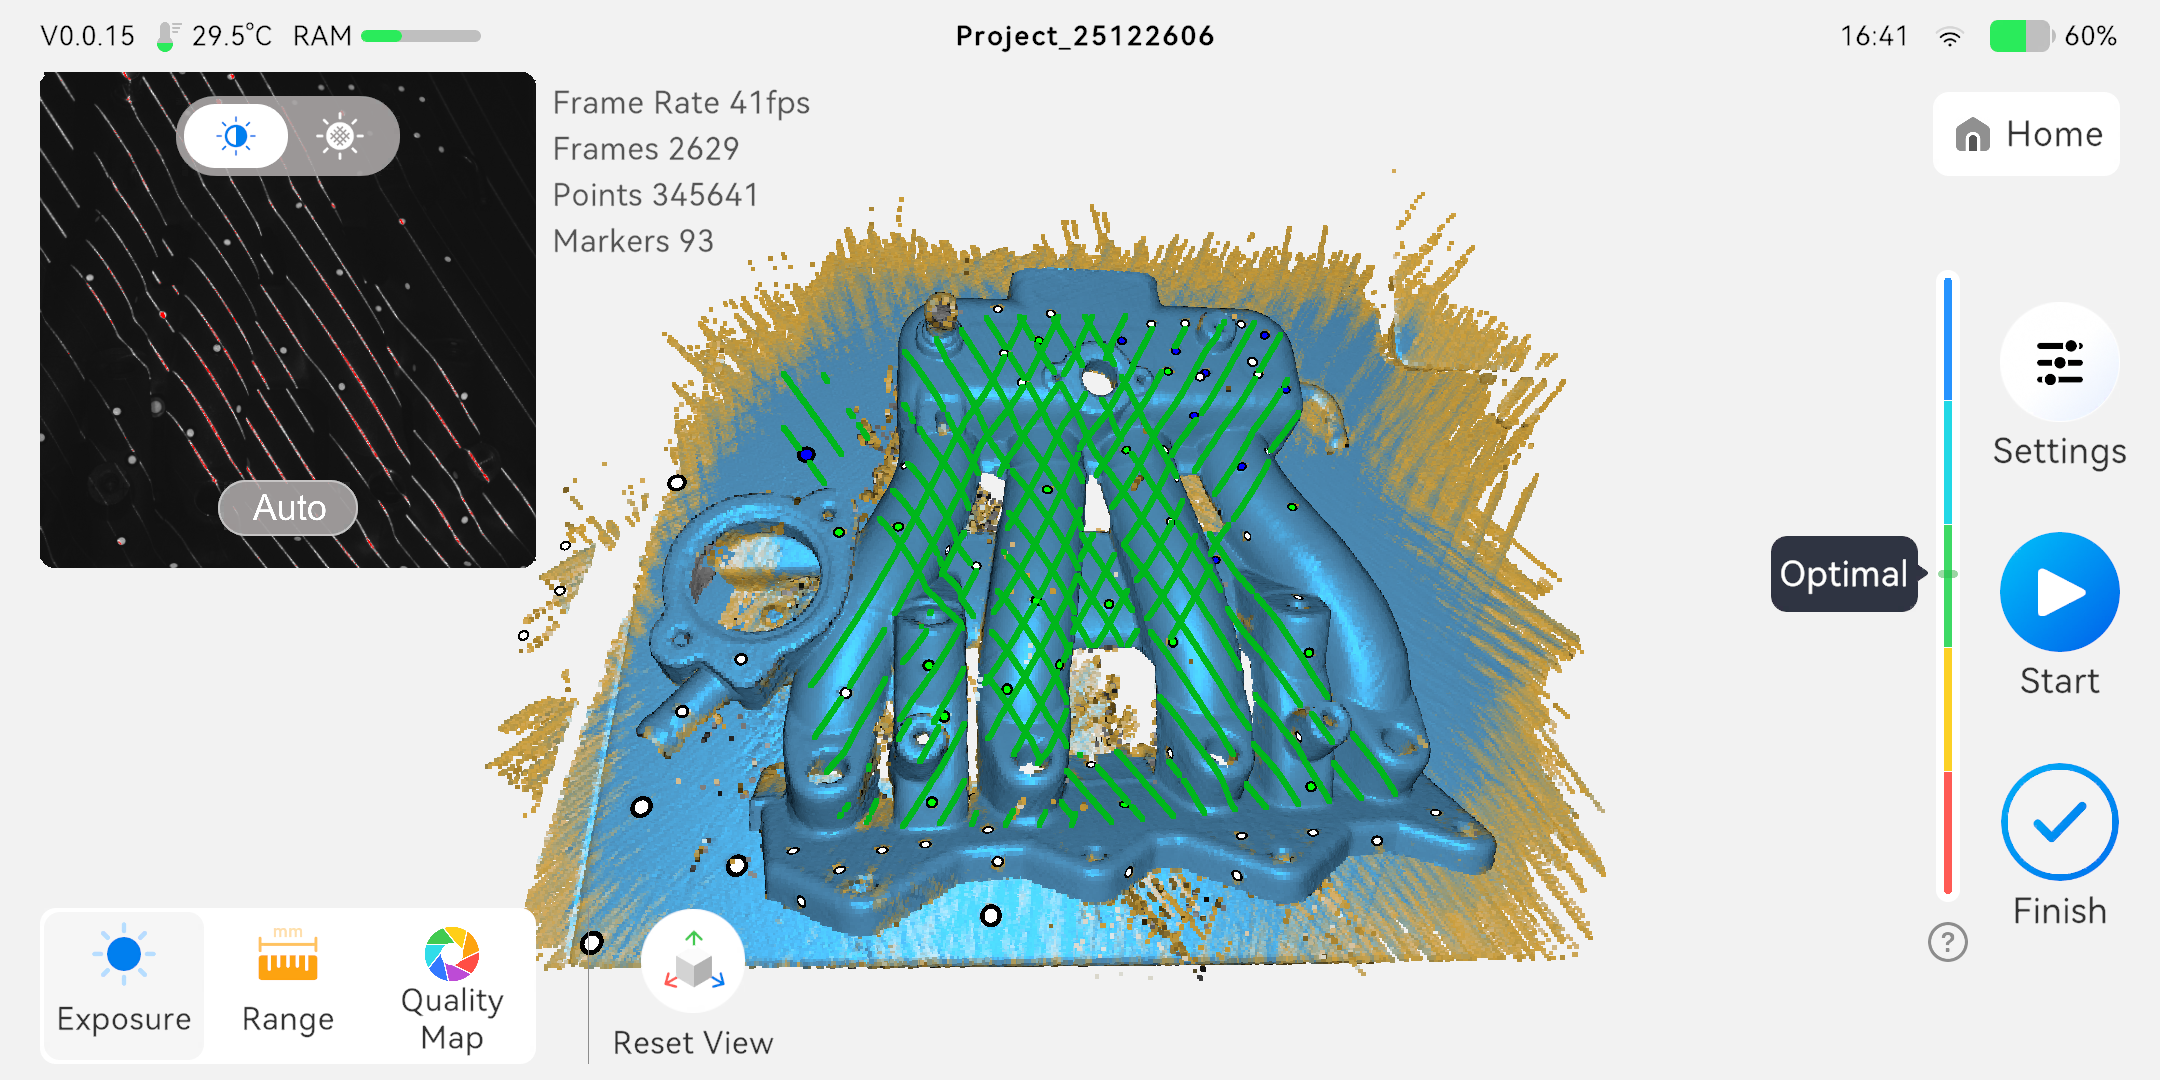
● Start Scanning: Short press the Start/Pause button on the scanner, or tap the [Start] button on the screen. Keep the scanner aimed at the object, move it steadily and slowly, and scan the object from all angles.
● Complete Scanning: Once the data acquisition is complete, press and hold the Start/Pause button on the scanner for more than 2 seconds, or tap "Finish" on the device screen . The scanned point cloud data will be automatically displayed on the screen.
¶ Step 3: Model Processing
After the scanning is complete, you can use the processing function built into the Creality Sermoon P1 device to generate the final 3D model from the point cloud data.
● Processing Flow (Operate on the screen) :
(1) Fusion: Fuse multiple frames of point cloud data collected during the scanning process into a complete point cloud.
(2) Alignment: Multiple scans can be aligned into a complete model for result preview.
(3) Meshing: Convert point cloud data into triangular mesh surfaces to generate the basic shape of the model.
(4) Color Mapping (if applicable): If color information was captured during scanning, this step will map the color and texture onto the model surface.
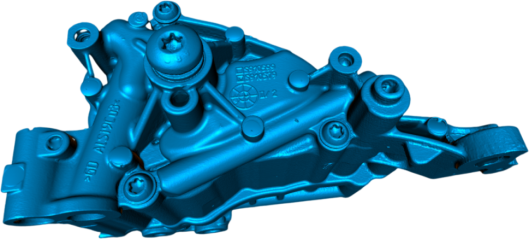
For more detailed tutorials on model processing, please visit the Creality official Wiki.
https://wiki.creality.com/3d-scanner
¶ 2.2 PC Connection Mode (Connect to Computer)
Connect to your computer via USB or Wi-Fi and use CrealityScan 4 software for more advanced scan control and model processing.
¶ 2.2.1 Software Preparation
● Download the Software: Visit the Creality official Wiki software download page: https://wiki.creality.com/en/software/scan-software, find CrealityScan 4 software and download it.
● Install the Software:
○ Windows: Double-click the installer and follow the prompts to complete the installation.
○ macOS: After installation, please grant the 3D scanner read and write permissions to optimize point clouds and generate models when using the software .
¶ 2.2.2 Connecting the Scanner
¶ Method 1: Wired Connection (USB)
● Insert the Type-C connector of the data cable into the scanner and tighten the screw.
● Insert the other end of the data cable (Type-C) into a USB 3.0 or higher port on your computer to ensure stable data transfer.
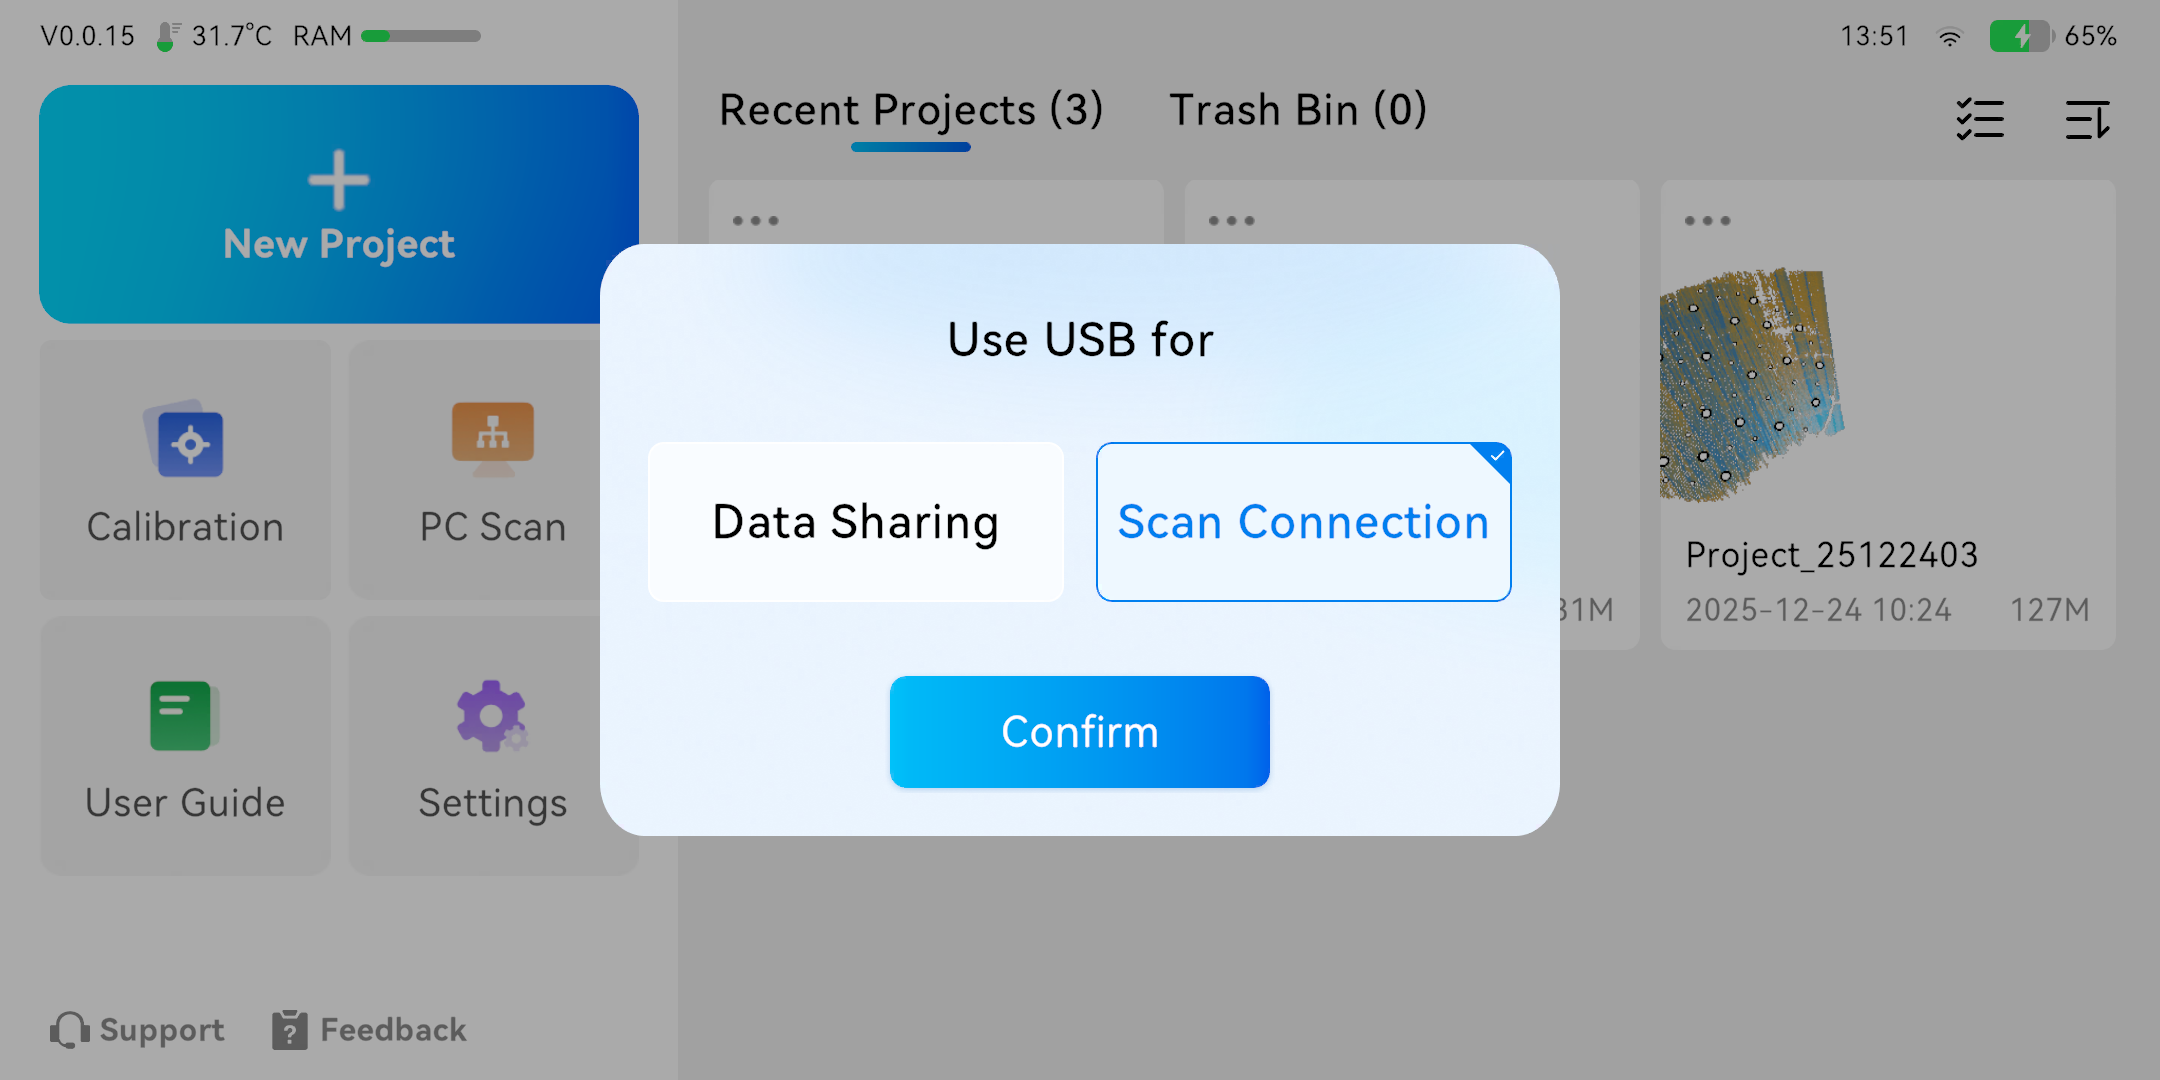
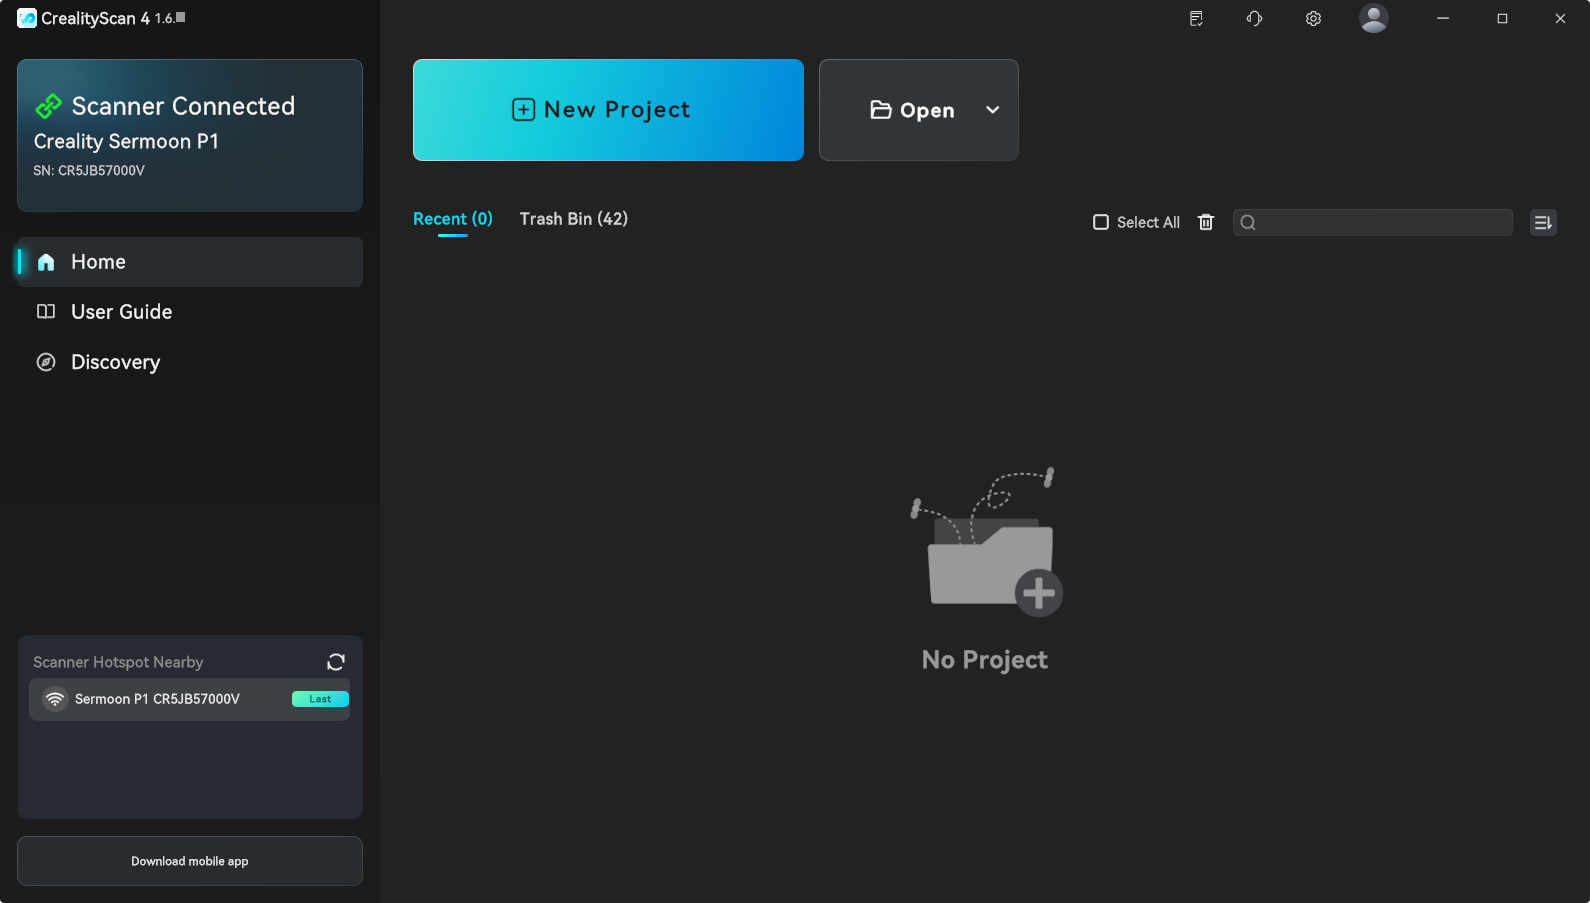
● In the pop-up window of Creality Sermoon P1, select "Scan Connection".
¶ Method 2:Wireless Connection (Wi-Fi)
● Step 1: Enable P1 Hotspot
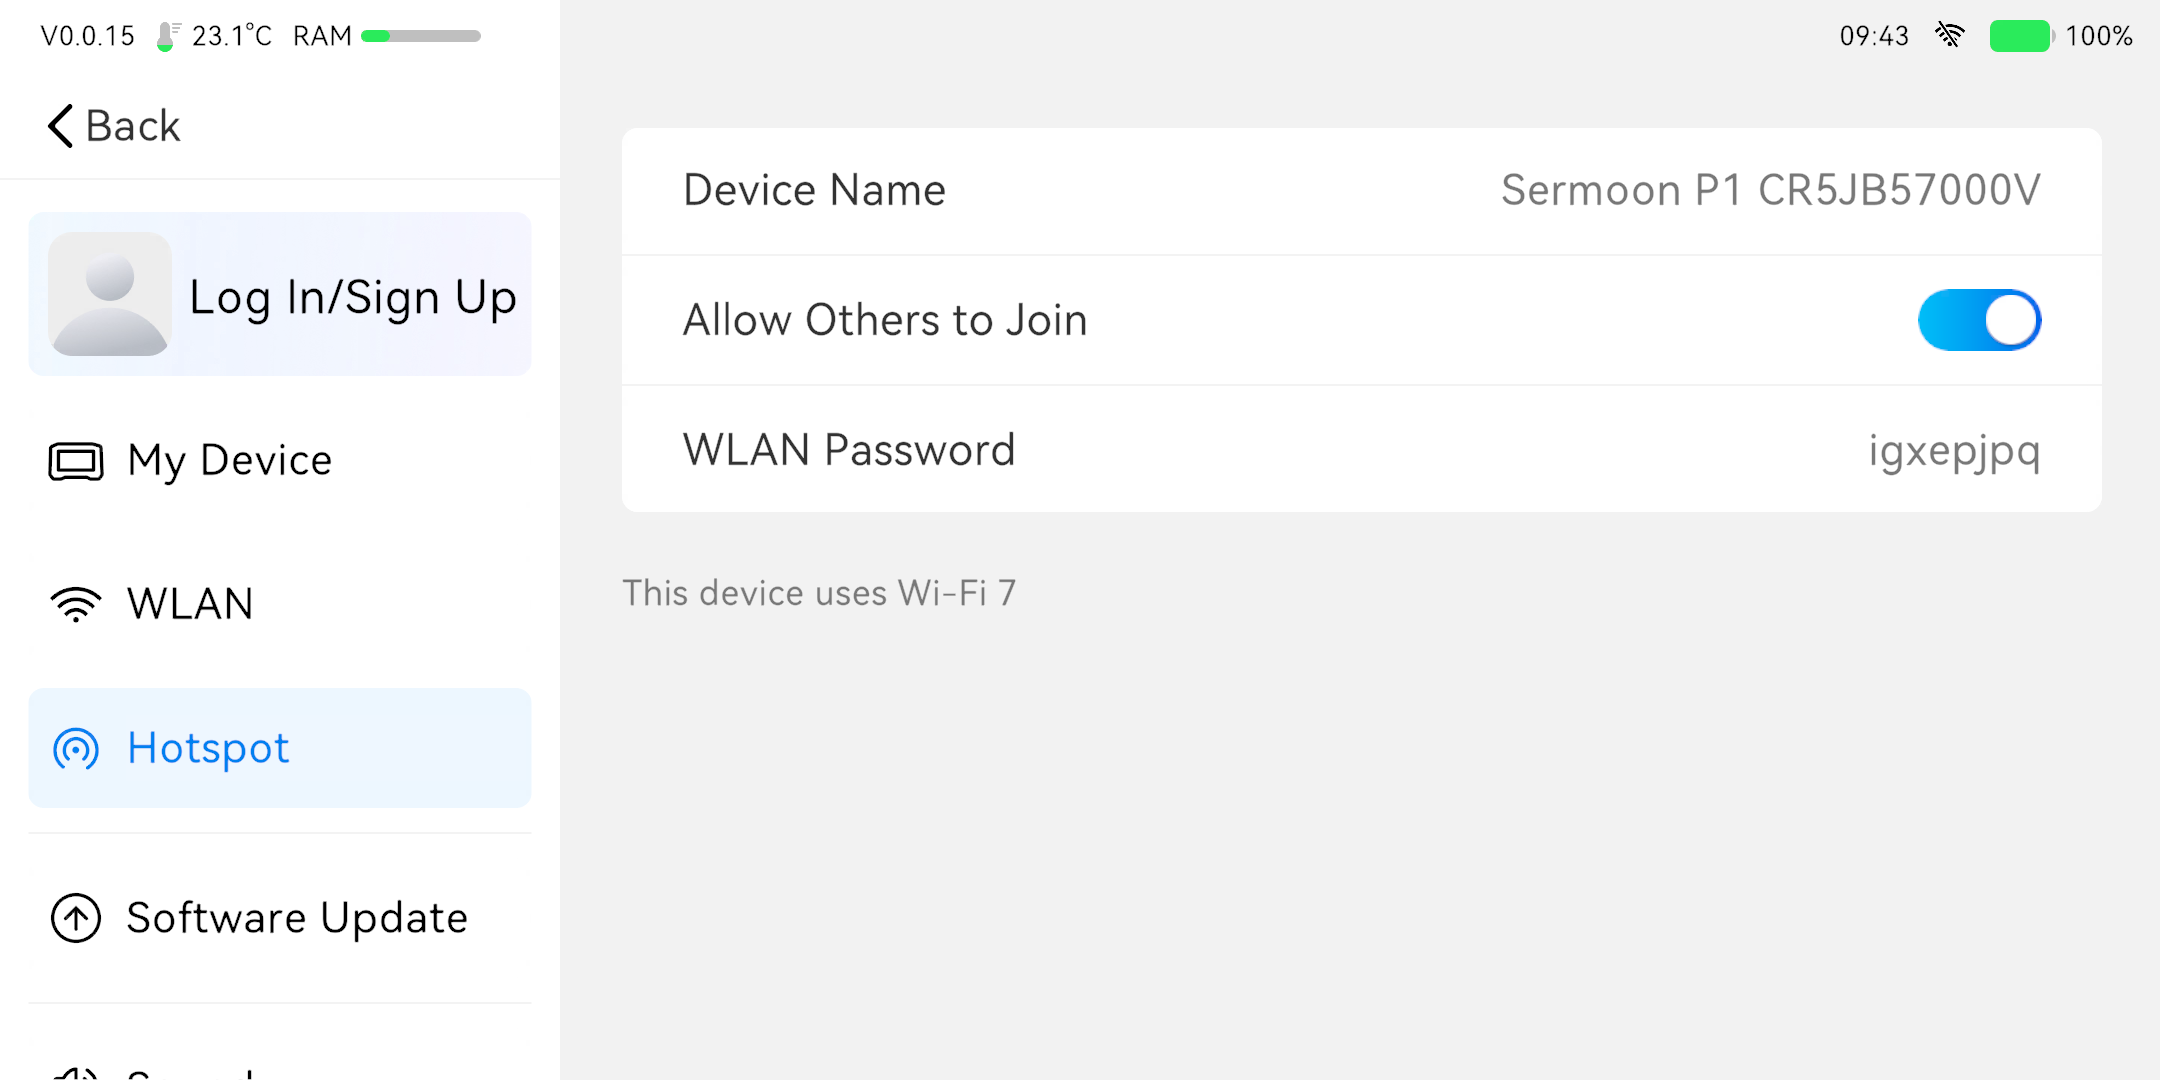
○On the Creality Sermoon P1 device screen, access the "Settings" menu, tap "Hotspot", and enable "Allow Others to Join" .
Record the hotspot name and password.
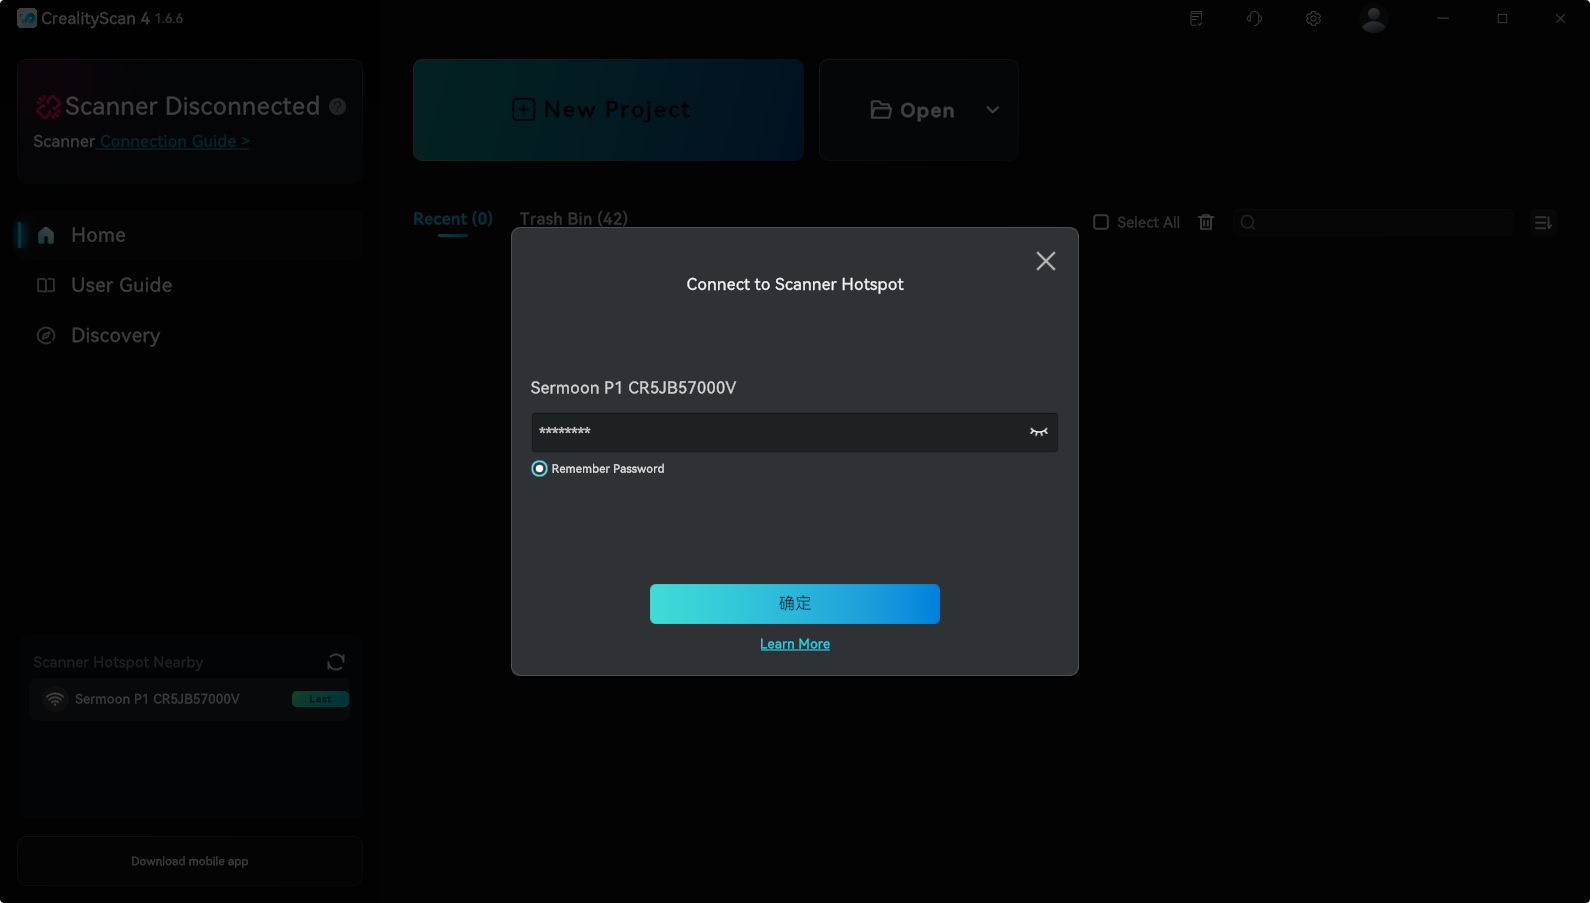
● Step 2: Connect Your Computer to the P1 Hotspot
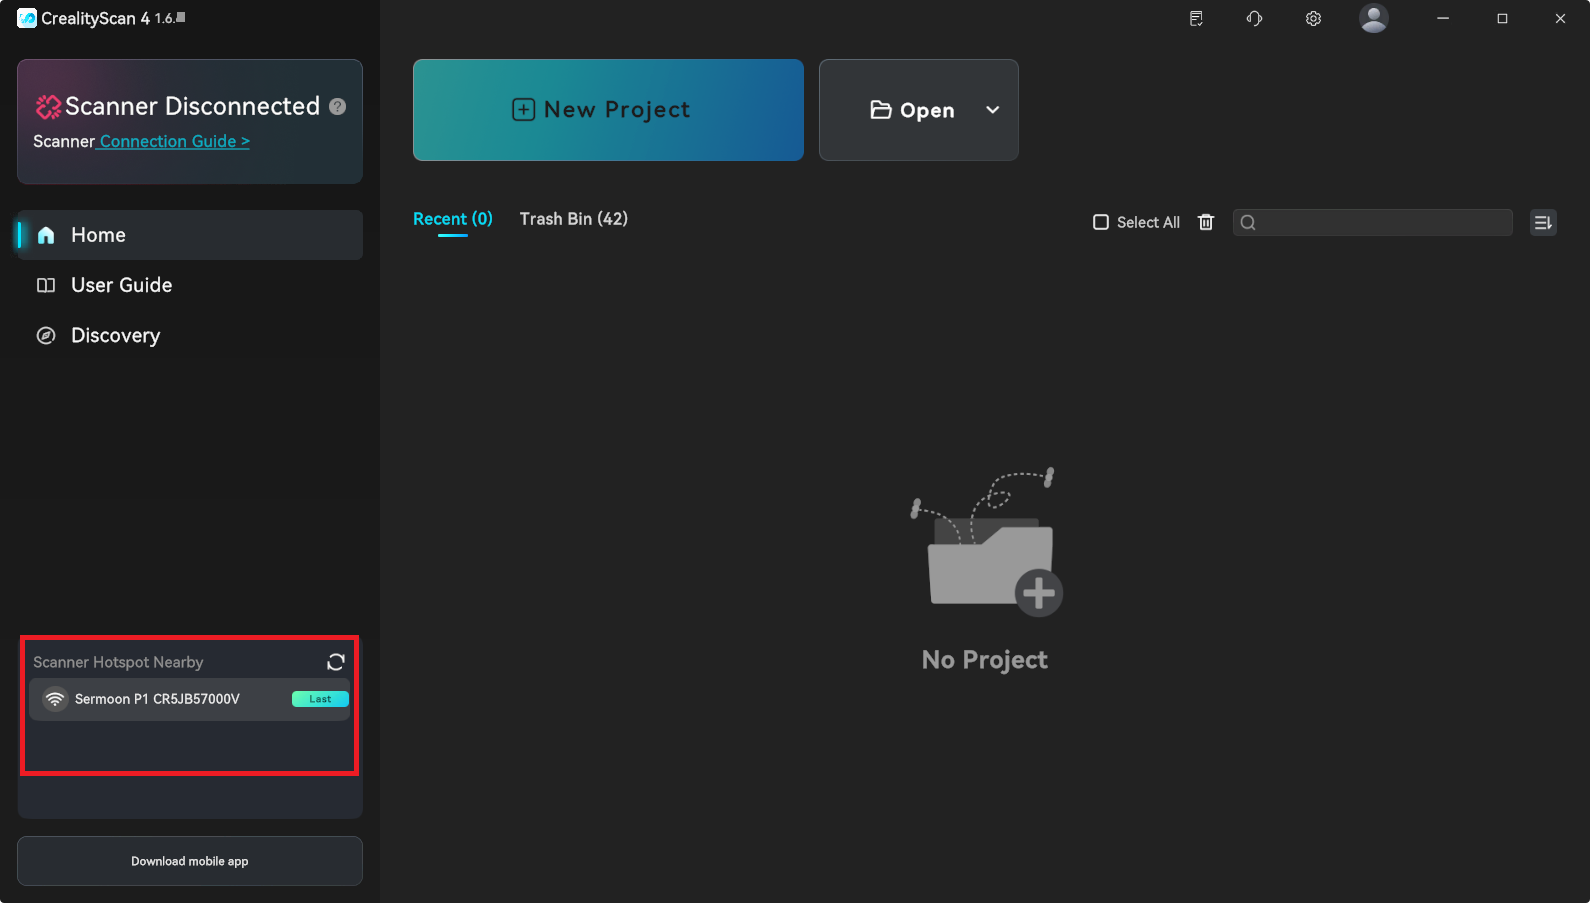
○ In your computer's Wi-Fi settings, find the hotspot network name of the Creality Sermoon P1, click to connect, and enter the password.
● Step 3: Software Connection
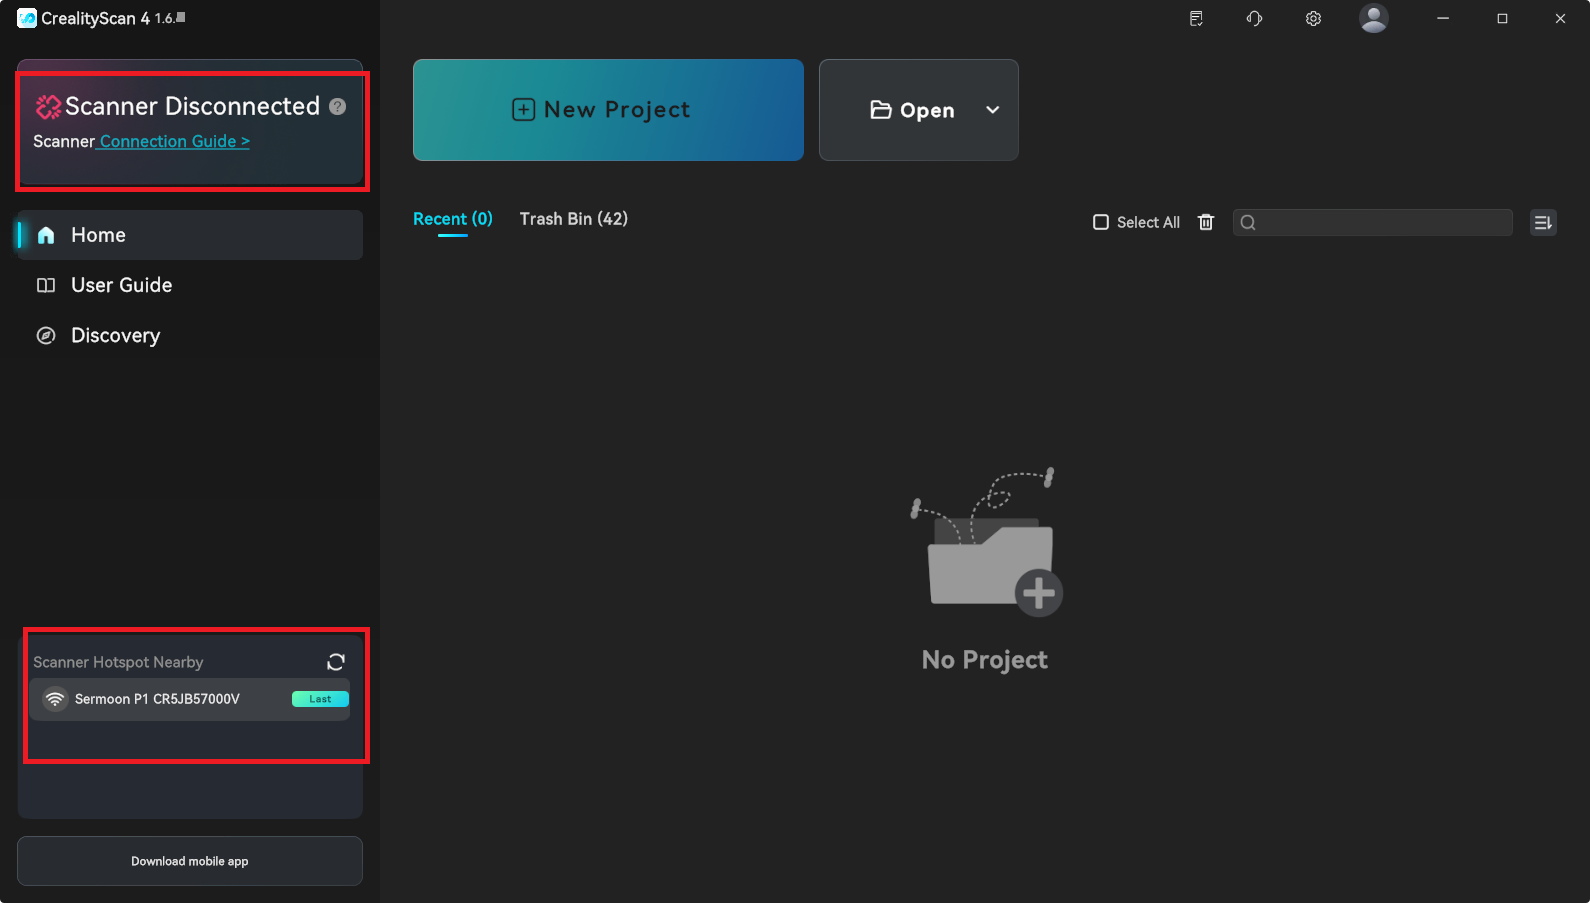
○ Open the CrealityScan 4 software on your computer.
○ In the software interface, the software will automatically identify and display the connected Creality Sermoon P1 device.
¶ 2.2.3 Start Scaning
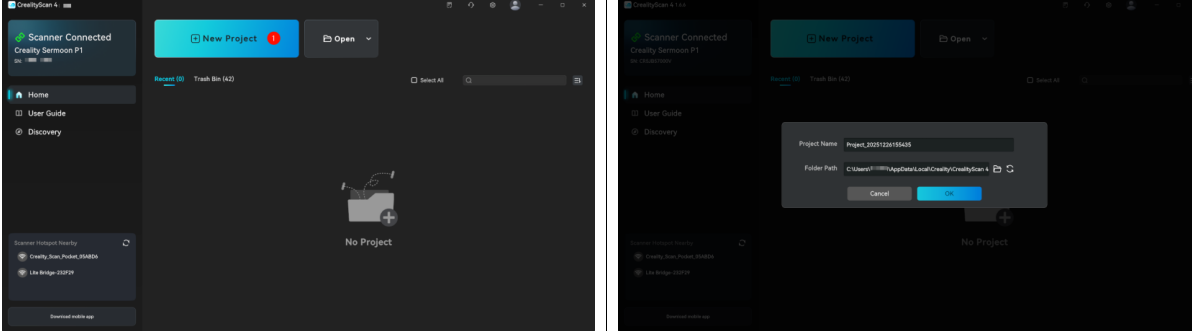
● In the CrealityScan 4 software, click "New Project", enter the "Project Name" in the pop-up window, select the "Folder Path", and then click "OK".
● Select the appropriate scan mode and related settings based on the features of the object being scanned.
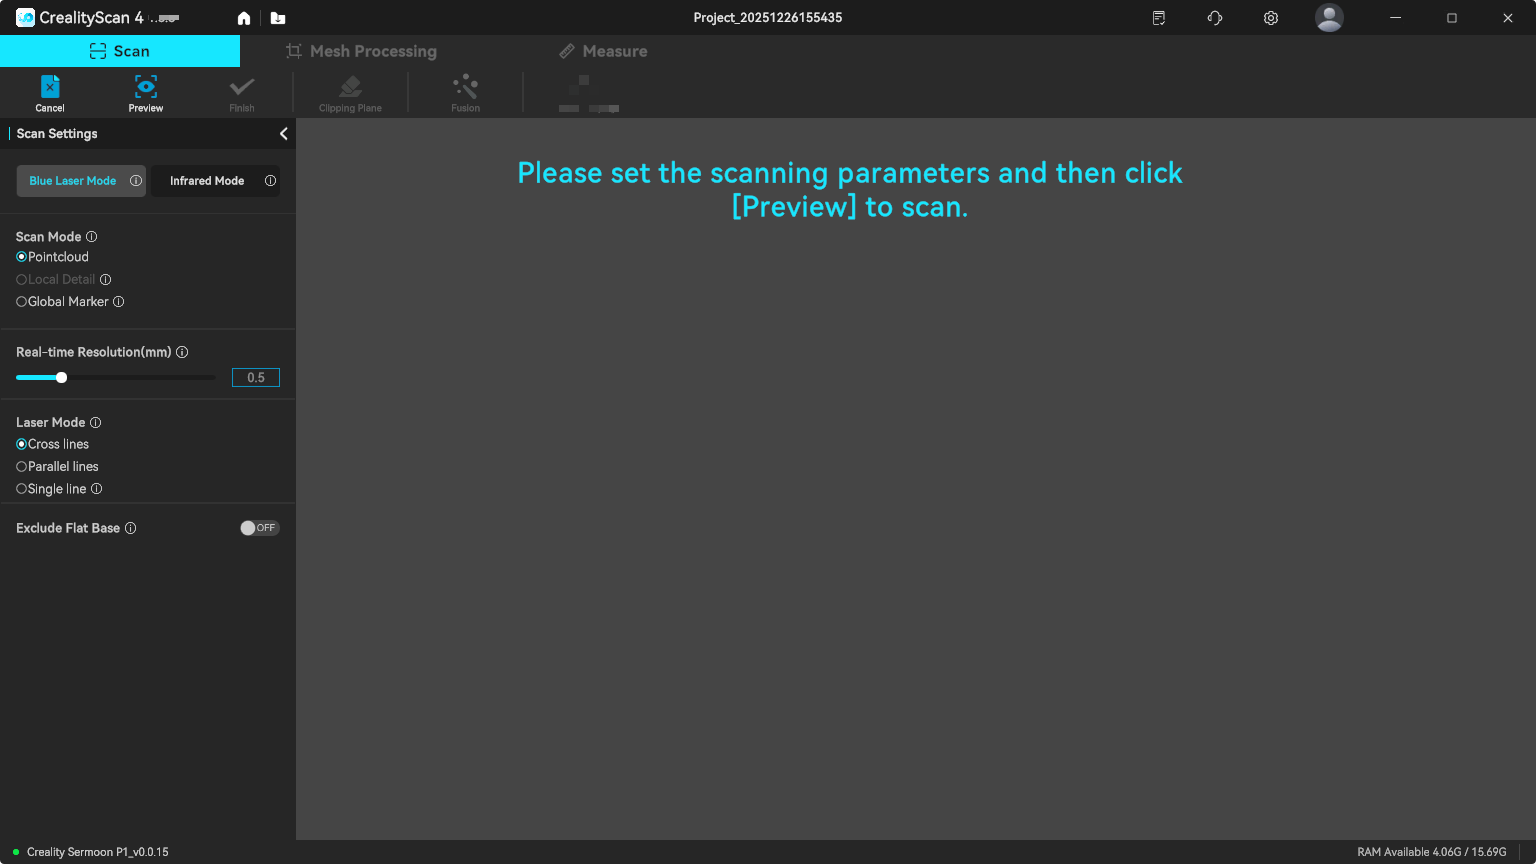
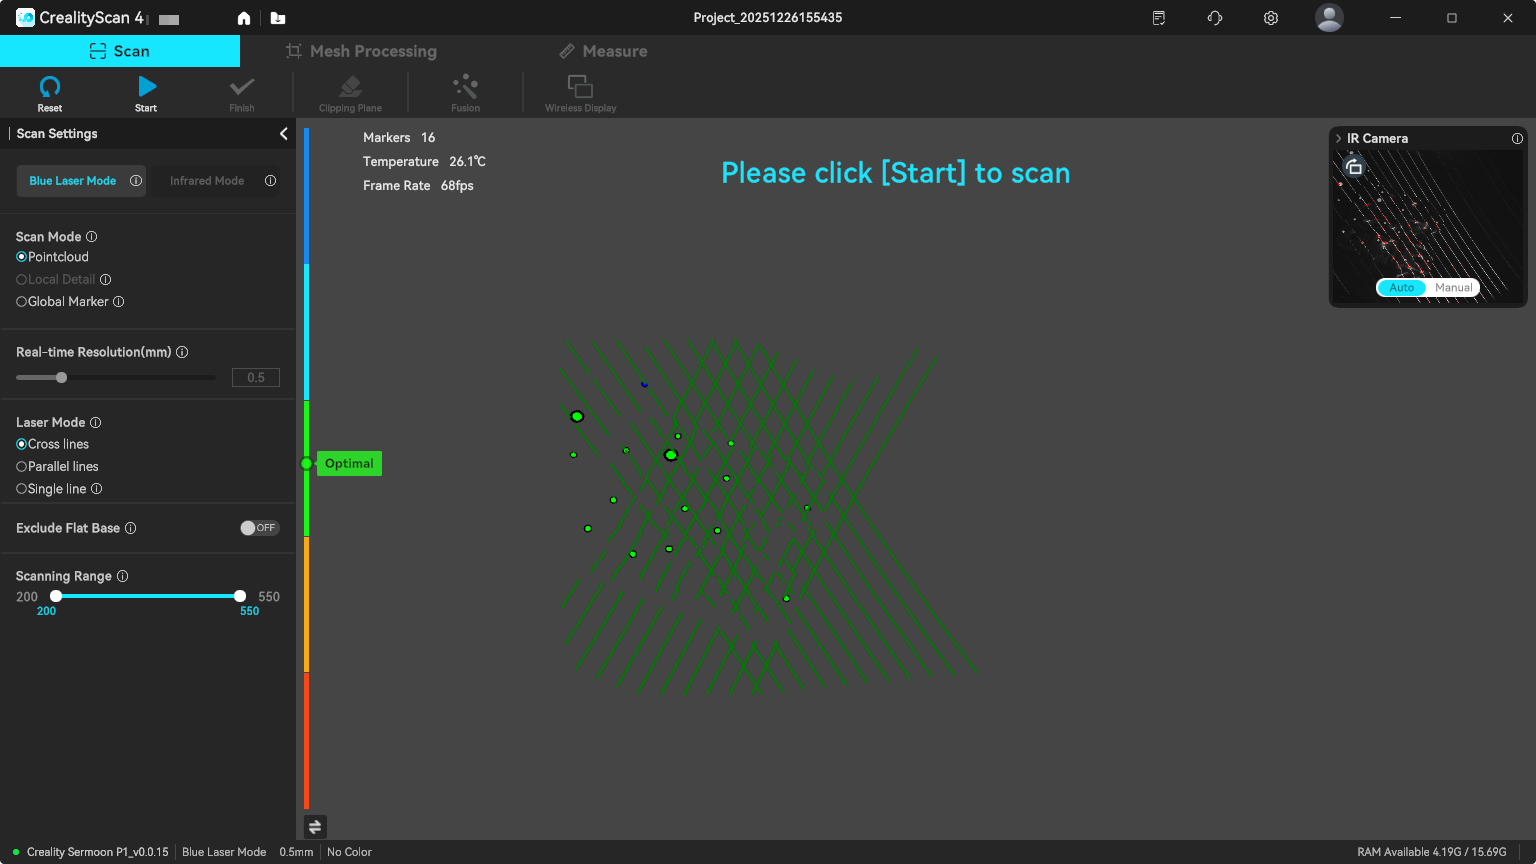
● Adjust the Scanning Distance: Move the scanner to adjust its distance from the scanned object. When the distance indicator bar on the software interface is in the green "optimal" range, it indicates that the current scanning distance is ideal for scanning.
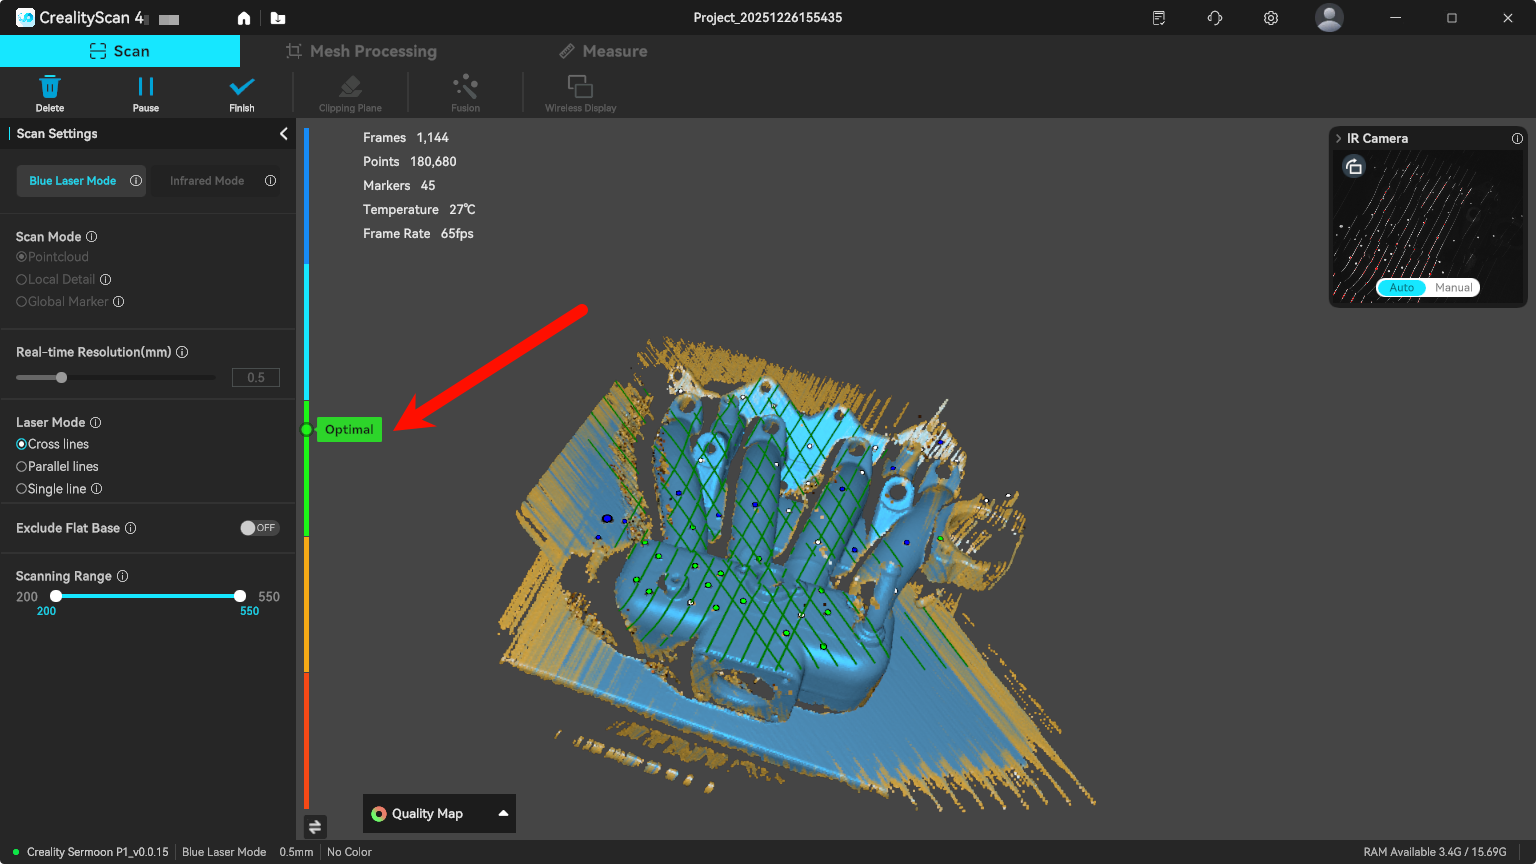
● Complete Scanning: Once the data acquisition is complete, press and hold the Start/Pause button on the scanner for more than 2 seconds, or click "Finish" in the software interface. The scanned point cloud data will be automatically displayed in the software.
¶ 2.2.4 Model Processing
After the scan is completed, you need to use the post-processing function of CrealityScan 4 software to generate the final 3D model from the point cloud data.
● One-Click Process: For beginner users, the software's "One-Click Process" function can be used, which will automatically complete point cloud fusion, meshing, and color mapping (if applicable).
● Manual Processing Procedure (recommended):
(1) Fusion: Fuse multiple frames of point cloud data collected during the scanning process into a complete point cloud.
(2) Alignment: Multiple scans can be aligned into a complete model for result preview.
(3) Meshing: Convert point cloud data into triangular mesh surfaces to generate the basic shape of the model.
(4) Color Mapping (if applicable): If color information was captured during scanning, this step will map the color and texture onto the model surface.
For more detailed model processing tutorials, please visit the official Creality Wiki: https://wiki.creality.com/3d-scanner
¶ 3. Detailed Explanation of Scanning Modes
¶ 3.1 Blue Laser Mode
Suitable for scanning objects requiring high accuracy and rich details, it usually needs to be used with markers.
● Cross Line Laser:
○ Features: Fast scanning speed and high efficiency.
○ Applicable scenarios: Scanning large objects. It is necessary to attach markers directly to the object's surface.
● Parallel Line Laser
○ Features: Best details.
○ Applicable scenarios: For detailed scanning of objects, resulting in richer model details . If the object is small, markers can be placed on the table around the object.
● Single Line Laser
○ Features: Excellent at capturing hard-to-reach areas such as deep holes and grooves.
○ Applicable scenarios: Supplemental scanning of objects with deep hole features.
Tips
● Real-Time Resolution: The smaller the resolution, the finer the model. However, this will occupy more computer memory and may affect scanning smoothness. Please select according to your computer performance and model requirements.
● Alignment: If you need to scan multiple sides of an object (such as the front and back), you can scan them in multiple steps and then use the software's "Alignment" function to combine them into a complete model.
¶ 3.2 Infrared Mode
Suitable for scanning faces, bodies , sculptures , or other objects with rich features, usually without the need to attach markers.
● Features: Safe, fast, invisible light, and harmless to human eyes .
● Applicable scenarios: Face scanning, cultural relic protection, medical rehabilitation, etc.
● Infrared mode also supports "Texture" tracking and "Marker" tracking to meet different needs.
¶ 4. Other Functions
¶ 4.1 Calibration
If you notice a decrease in scanning accuracy or if the scanner has not been used for an long time, calibration is recommended. Please use the included "High-Precision Glass Calibration Board" and follow the on-screen instructions on your Creality Sermoon P1 device to restore the scanner's factory accuracy.
¶ 4.2 System Upgrade
Creality releases system updates periodically to optimize performance and add new features. Please keep your Creality Sermoon P1 device up to the latest system version and upgrade as prompted for the best user experience.
¶ 4.3 File Transfer
Select the project you want to share from the "Recent Projects" list , tap the "Share" button in the “...” icon at the top left corner, and follow the on-screen instructions to complete the file transfer.
¶ 5.Specifications
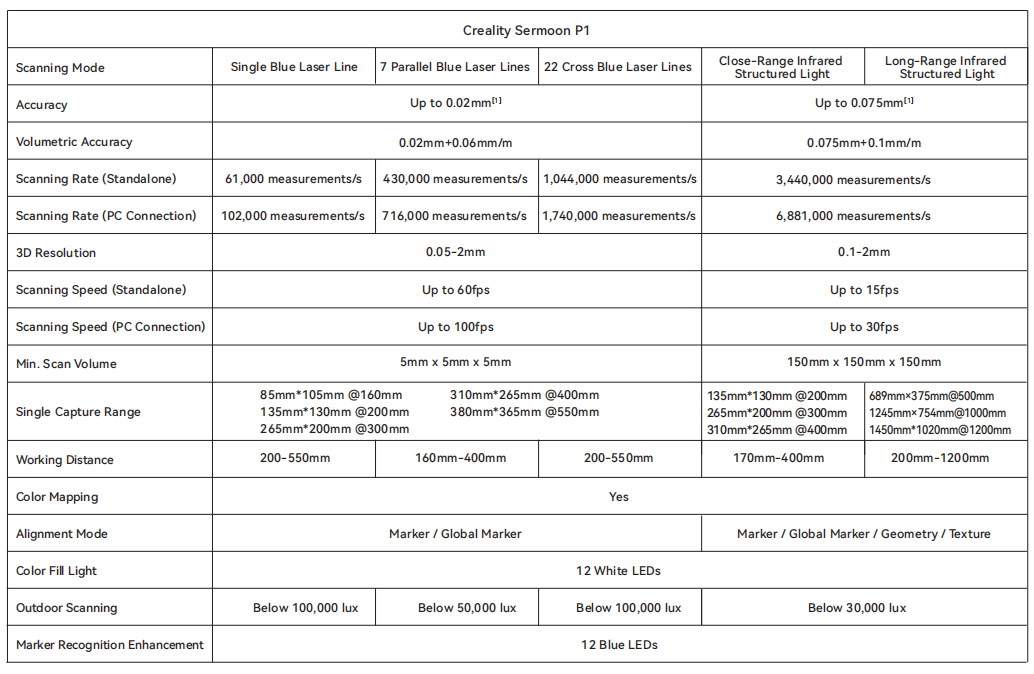
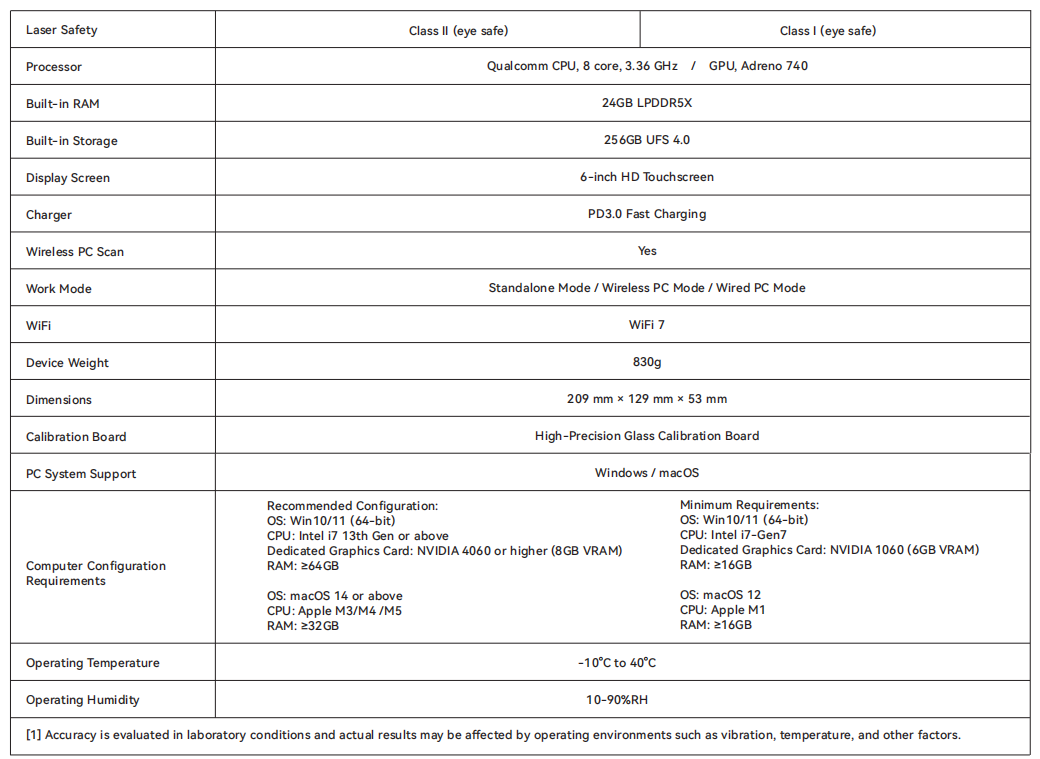
¶ 5.1 Hardware Parameters
¶ 6.Safety Notice
About the Creality Sermoon P1 3D Scanner
● Please do not disassemble or assemble the equipment yourself.
● Please use the dedicated accessories included with the product, such as charger and calibration board.
¶ 6.1 Usage Notes
Please note the following points, otherwise it may cause equipment damage or machine malfunction.
● Please avoid significant vibrations and impacts when using this product. The Creality Sermoon P1 3D scanner is a high-precision device with a delicate internal structure; severe vibrations or impacts may damage the structure and cause damage to the optical components.
● Please use this device at the recommended temperature and humidity.
● Please ensure the usage environment is suitable, and when using a wired connection, ensure the cable connector is intact.
¶ 6.2 Maintenance Notes
● To clean the equipment, please use a cotton cloth dampened with diluted neutral detergent, wring it out, and wipe it. Do not use a damp cloth, volatile oil, thinner, or other liquids to wipe the equipment, as this may damage the equipment's exterior or, in severe cases, damage the equipment parts.
● Store the equipment in its instrument case in a cool, dry place with a relatively stable temperature. Avoid storing it in the following places:
- Places with excessively high or low temperature and humidity
- Places with a lot of dust
- Places containing corrosive or flammable gases
- Places containing corrosive or flammable liquids
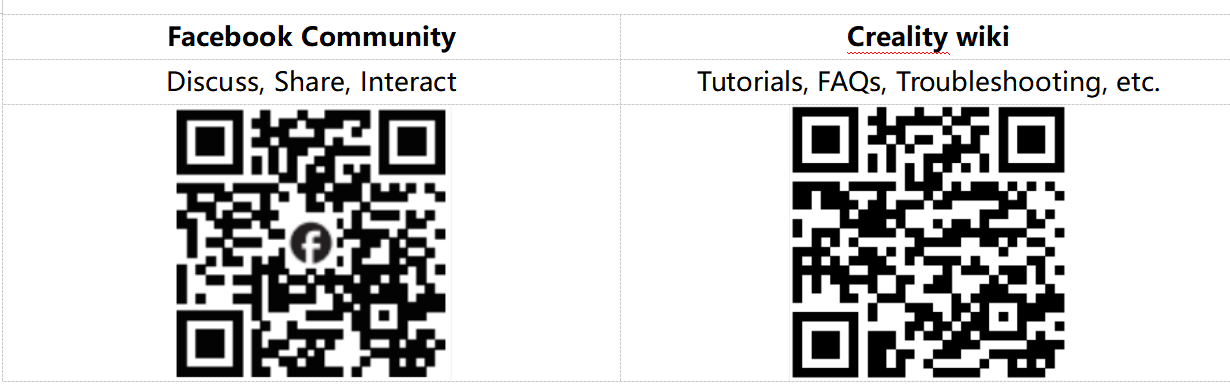
Shenzhen Creality 3D Technology Co., Ltd.
Official website: www.creality.com
Tel: +86 755 3396 5666 Customer Service : cs@creality.com
Company Address: 18F, JinXiuHongDu Building, Meilong Blvd., Longhua Dist. Shenzhen, 518131 China
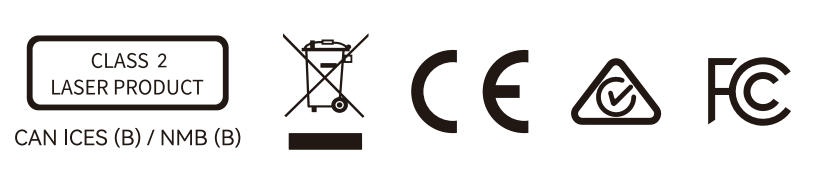
Your device has been certified by the relevant countries and regions. You can view this electronic certification information on your device: Go to the device's "Settings" menu, select "My Device", tap "Certification Information" to find all applicable electronic certification marks and details.
WARNING/ CAUTION: for CRS14SP1 (Creality Sermoon P1)
– Replacement of a battery with an incorrect type may defeat a safeguard;
– Disposal of a battery into fire or a hot oven, or mechanically crushing or cutting of a battery, may result in an explosion;
– Leaving a battery in an extremely high temperature surrounding environment, such as sunshine, fire, or hot surface may result in an explosion or the leakage of flammable liquid or gas;
– A battery subjected to extremely low air pressure may result in an explosion or the leakage of flammable liquid or gas.
Single battery Type-C input:DC 5V 2.5A
The SAR limit of Europe is 2.0 W/kg for the head and Body, 4.0W/kg for the limbs. Device types CRS14SP1 has also been tested against this SAR limit. The highest SAR value reported under this standard during product certification for use when properly worn on the body is 1.711W/kg, limbs is 9.127/kg.This device was tested for typical body-worn operations with the back of the handset kept 0cm from the body. To maintain compliance with RF exposure requirements, use accessories that maintain a 0cm separation distance between the user's body and the back of the handset. The use of belt clips, holsters and similar accessories should not contain metallic components in its assembly. The use of accessories that do not satisfy these requirements may not comply with RF exposure requirements, and should be avoided.
| Operation Frequency | Max. EIRP | |
| WLAN 5G: | 5180MHz-5240MHz | 21.78dBm |
| 5745MHz-5825MHz | 13.58dBm | |
| WLAN 6G: | 5955MHz–6415MHz | 21.53dBm |
The device for operation in the band 5150–5350 MHz and 5955-6415MHz (for IC:5150-5350MHz) is only for indoor use to reduce the potential for harmful interference to co-channel mobile
satellite systems.

This charger is for indoor use only.
This product can be used across EU member states.
LASER RADIATION
DO NOT STARE INTO BEAM
CLASS 2 LASER PRODUCT
CONSUMER LASER PRODUCT
EN 50689:2021
EU Regulatory Conformance
Hereby, Shenzhen Creality 3D Technology Co., LTD. declares that this device is in compliance with the essential requirements and other relevant provisions of Directive 2014/53/EU.
For the declaration of conformity, visit the Web site www.creality.com

RCM:
Our goods come with guarantees that cannot be excluded under the Australian Consumer Law.
You are entitled to a replacement or refund for a major failure and compensation for any other reasonably foreseeable loss or damage.
You are also entitled to have the goods repaired or replaced if the goods fail to be of acceptable quality and the failure does not amount to a major failure.
FCC statements:
This device complies with part 15 of the FCC rules. Operation is subject to the following two conditions: (1) this device may not cause harmful interference, and (2) this device must accept any interference received, including interference that may cause undesired operation.
NOTE: The manufacturer is not responsible for any radio or TV interference caused by unauthorized modifications or changes to this equipment. Such modifications or changes could void the user’s authority to operate the equipment.
NOTE: This equipment has been tested and found to comply with the limits for a Class B digital device, pursuant to part 15 of the FCC Rules. These limits are designed to provide reasonable protection against harmful interference in a residential installation. This equipment generates uses and can radiate radio frequency energy and, if not installed and used in accordance with the
instructions, may cause harmful interference to radio communications. However, there is no guarantee that interference will not occur in a particular installation. If this equipment does cause harmful interference to radio or television reception, which can be determined by turning the equipment off and on, the user is encouraged to try to correct the interference by one or more of the following measures:
‐ Reorient or relocate the receiving antenna.
‐ Increase the separation between the equipment and receiver.
‐Connect the equipment into an outlet on a circuit different from that to which the receiver is connected.
‐Consult the dealer or an experienced radio/TV technician for help.
The SAR limit of USA (FCC) is 1.6 W/kg averaged over one gram of tissue, 1.0 mW/cm2for iPD and APD in 4cm2. Device types CRS14SP1 (FCC ID: 2AXH6-CRS14SP1) has also been tested against this SAR limit.
The highest SAR value reported under this standard during product certification for use when properly worn on the body is 1.443 W/kg.
This device was tested for typical body‐worn operations with the back of the handset kept 0mm from the body.
To maintain compliance with FCC RF exposure requirements, use accessories that maintain a 0mm separation distance between the user's body and the back of the handset. The use of belt clips, holsters and similar accessories should not contain metallic components in its assembly. The use of accessories that do not satisfy these requirements may not comply with FCC RF exposure requirements, and should be Avoided.
Transmitters in the 5.925-7.125 GHz band are prohibited from operating to control or communicate with unmanned aircraft systems.
IC statements:
This device complies with Industry Canada license-exempt RSS standard(s).
Operation is subject to the following two conditions:
(1)this device may not cause interference, and
(2)this device must accept any interference, including interference that may cause undesired operation of the device.
Cet appareil est conforme avec Industrie Canada RSS exemptes de licence standard(s).
Son fonctionnement est soumis aux deux conditions suivantes:
(1) cet appareil ne peut pas provoquer d'interférences, et
(2) cet appareil doit accepter toute interférence, y compris celles pouvant causer un mauvais fonctionnement de l'appareil.
This Class B digital apparatus complies with Canadian ICES-003.
Cet appareil numérique de la classe B est conforme à la norme NMB-003 du Canada.
This device has been tested for compliance with IC SAR values at a typical operating near the body. To ensure that RF exposure levels below the levels tested, use accessories with this equipment to maintain a minimum separation distance of 0 mm between the body of the user and the device. These accessories should not contain metallic components. It is possible that the accessories used close to the body that do not meet these requirements are not consistent with the SAR limits and it is advisable to avoid using them.
Ce dispositif a été testé pour la conformité avec les valeurs SAR à un fonctionnement typique près du corps . Pour assurer que les niveaux d'exposition aux radiofréquences en deçà des niveaux testés , utiliser des accessoires avec cet équipement pour maintenir une distance de séparation minimale de 0 mm entre le corps de l'utilisateur et l'appareil. Ces accessoires ne doivent pas contenir
des composants métalliques. Il est possible que les accessoires utilisés près du corps qui ne répondent pas à ces exigences ne sont pas compatibles avec les limites SAR et il est conseillé d'éviter de les utiliser.
Les appareils fonctionnant dans la bande 5150 - 5350 MHz sont destinés à un usage intérieur uniquement afin de réduire les interférences nuisibles aux systèmes mobiles par satellite à canal
identique.
Devices shall not be used for control of or communications with unmanned aircraft systems.
Devices shall not be used on oil platforms.
Devices shall not be used on aircraft, except for the low-power indoor access points, indoor subordinate deviceslow-power client devices, and very low-power devices operating in the 5925-6425 MHz band, that may be usedon large aircraft as defined in the Canadian Aviation Regulations, while flying above 3,048 metres (10,000 feet).
Devices shall not be used on automobiles.
Devices shall not be used on trains.
Devices shall not be used on maritime vessels.
Les dispositifs ne doivent pas être utilisés pour contrôler ou communiquer avec des systèmes d'aéronefs sans pilote.
Les dispositifs ne doivent pas être utilisés sur des plateformes pétrolières.
Les dispositifs ne doivent pas être utilisés sur les aéronefs, à l'exception des points d'accès intérieurs à faible puissance, des dispositifs intérieurs subordonnés, des dispositifs clients à faible puissance et des dispositifs à très faible puissance fonctionnant dans la bande 5925-6425 MHz, qui peuvent être utilisés sur les grands aéronefs tels que définis dans le Règlement de l'aviation
canadien, au-dessus de 3 048 mètres (10 000 pieds).
Les dispositifs ne doivent pas être utilisés sur les automobiles.
Les dispositifs ne doivent pas être utilisés dans les trains.
Les dispositifs ne doivent pas être utilisés sur les navires maritimes.