¶ Product introduction
Creality Otter Lite is a high-precision, handheld, all-in-one 3D scanner compatible with scanning small, medium and large objects, with a maximum accuracy of 0.05mm. From small screws to large human bodies and large automotive parts (20mm³~2000mm³) , it can effortlessly scan objects of various size. The ability to adapt objects of various sizes is achieved by its innovative four-eye stereoscopic vision design. This includes a set of long focal length binoculars and a set of short focus length binoculars. The former is used to capture the details of small objects at close range; the latter has a larger FOV and is used to scan medium and large objects, to ensure stable tracking with minimal loss.
This scanner is equipped with a depth computing specialized chip independently developed by us, which ensures smooth scanning with a maximum frame rate of up to 30fps. Using unique single-frame 3D imaging technology, it has excellent anti-shake performance. Advanced DOE structured light projection technology enables 3D scanning even outdoors(≤30,000 lux). With professional-grade texture fill light, it can smoothly complete full-color scans even in low light environments, and give objects exquisite and realistic textures.
In addition, Otter Lite has a built-in wireless Wi-Fi module, and when used with the battery handle Lite Bridge, scanning can be freed from the constraints of cables . When scanning wirelessly, a mobile phone can be used as the scanner screen, making the scanning process easier and more convenient.
¶ Create a new scan project
1. Connect the device and open the Creality Scan software.
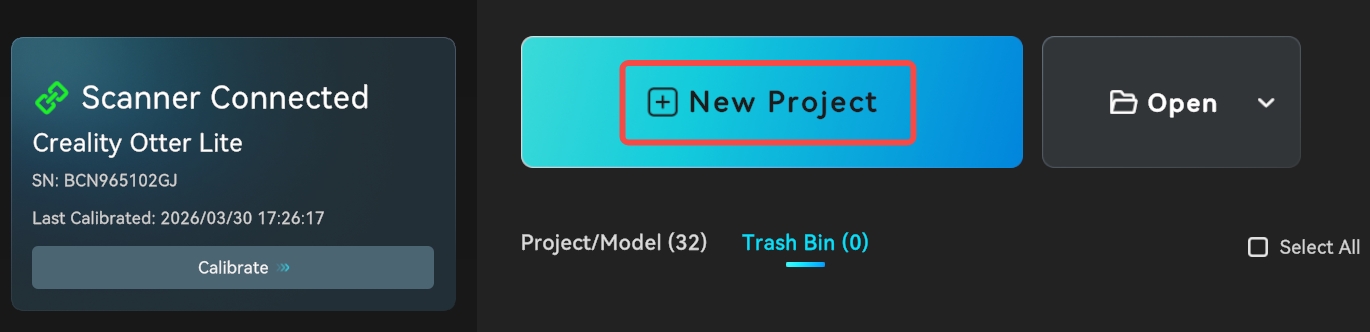
2. In Creality Scan, click "New Project", as shown below.
3. Enter the project name in the pop-up bar, select the folder path, and then click the "OK" button, as shown below. It is recommended to use the name of the scanned object as the project name to facilitate subsequent file identification.
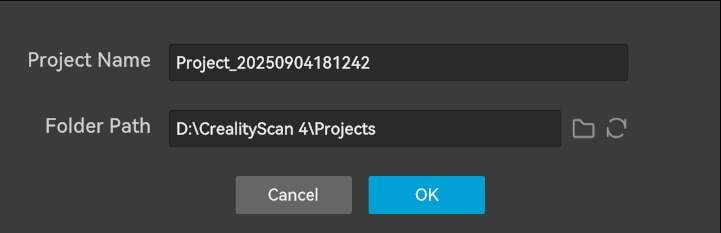
4. After clicking "OK", you will enter the scanning settings page.
¶ Scanning steps (taking the test piece as an example)
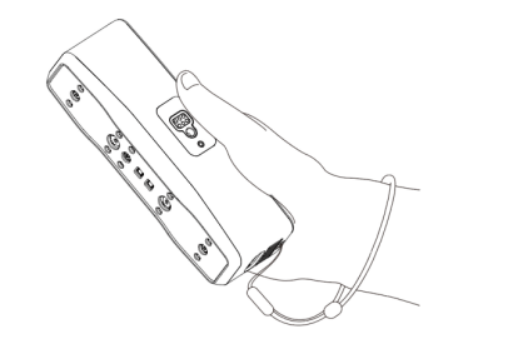
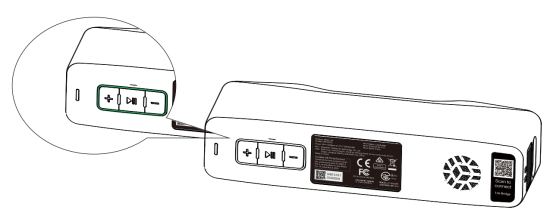
1. Note: During handheld scanning, to prevent the scanner from slipping out of your hand and causing damage to the scanner, you can fix one end of the free lanyard to the scanner and put the other end around your wrist, as shown in the figure.
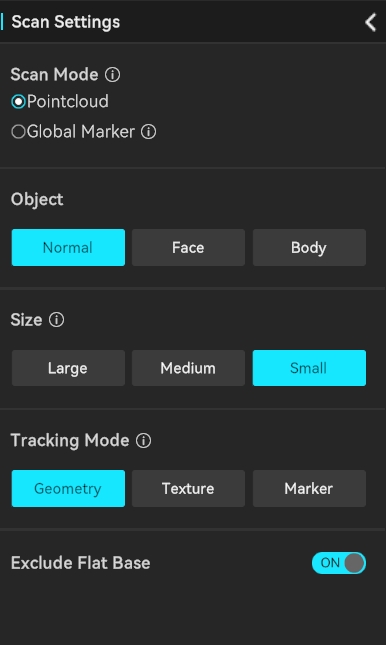
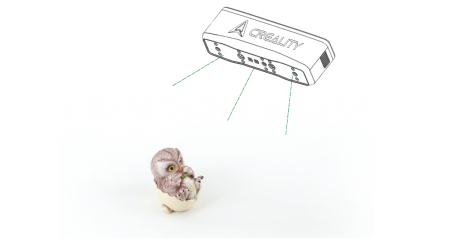
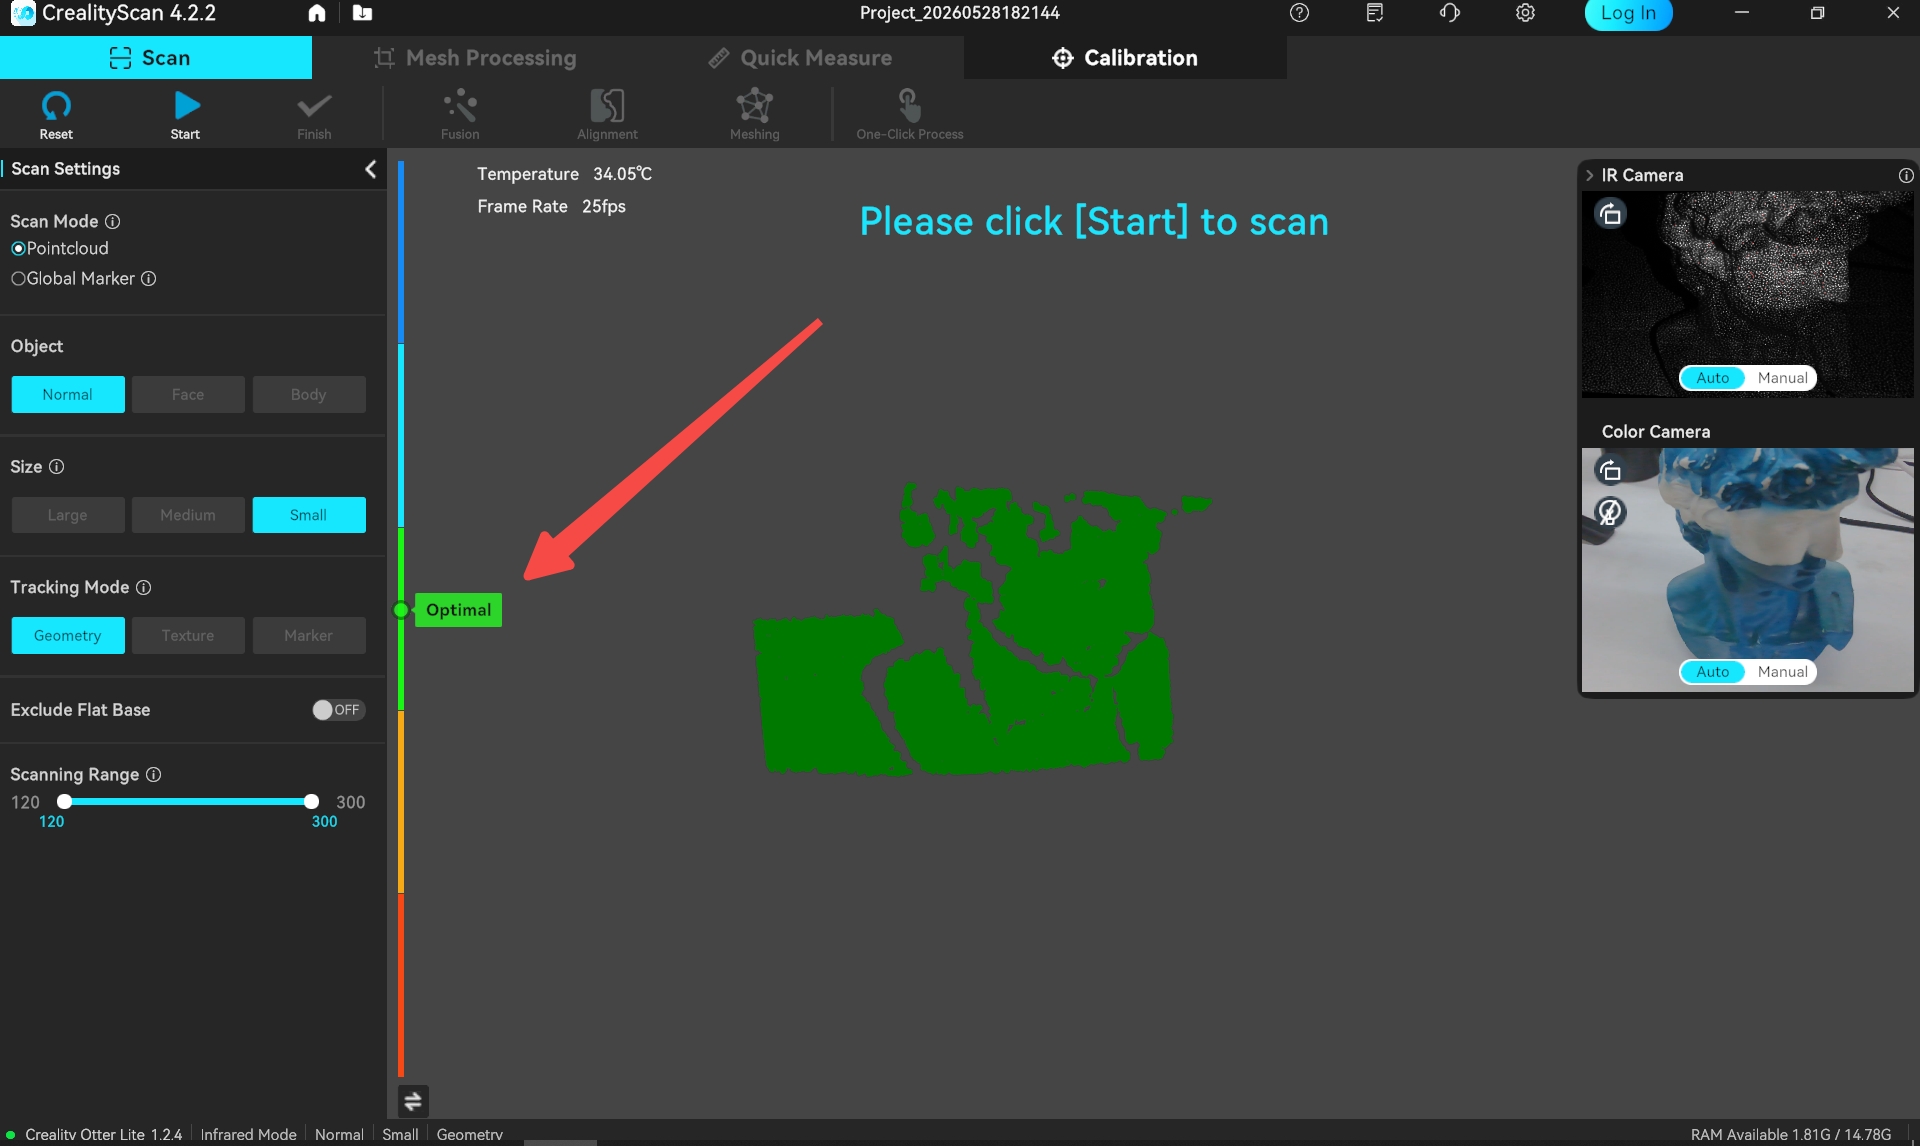
2. Launch the installed Creality Scan software to scan the test piece (owl) included in the package for the first scanning experience. The scanning parameters are configured as shown in the figure below:
3.Ensure that the scanning environment is clean and open, and adjust the scanner and the scanned test piece to an appropriate distance. That is, when the scanner indicator light is green, or the distance indicator bar on the software interface is at the optimal (green) position, it indicates that the scanning distance is optimal.
4. Short press on the scanner, or click "Start Scan" on the software interface to start scanning. Move the scanner slowly and try to keep the test piece in the center of the software preview window. Continue scanning until the model color turns green.
5. When a part of the scan is completed, you can click to pause, change the model angle and click Continue Scan. The scan will be completed if it takes more than 2 seconds or you click "Complete Scan" on the software.
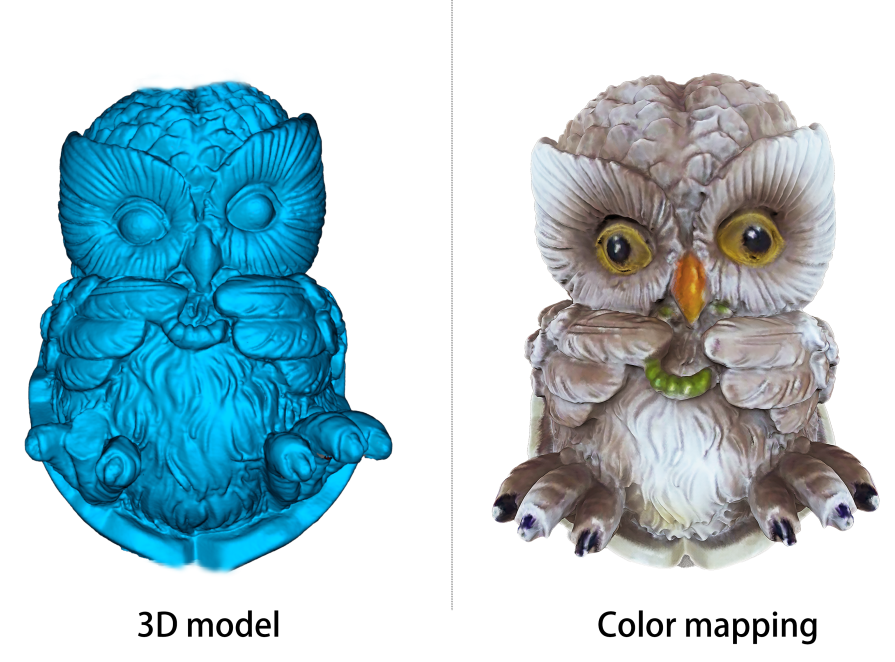
6. Data processing: Perform data processing (one-click processing/step-by-step processing) in the Creality Scan software to obtain a complete 3D model (the resolution is recommended to be set to 0.1mm ). The effect is as follows:
Note: To view tutorials on scanning and processing different objects, please check: Tutorials for Creality Scan Software | Creality Wiki
¶ Scan setting
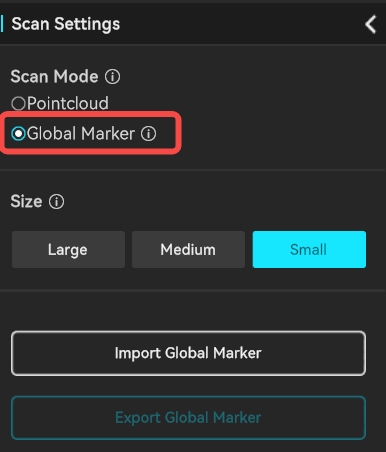
¶ Scanning mode selection
Point Cloud scanning: Directly obtain all model information of the object.
Global Marker Scanning: For medium and large-sized objects or those with fewer feature points, it is recommended to scan the Global Marker first and then the point cloud, which can achieve higher model accuracy.
¶ Selection of scanned object and target size
Select based on the scanned object: object, human face, human body.
The size of the scanned object can be selected based on the actual size:
Large:500x500x500~2000x2000x2000mm³
Medium:250x250x250~500x500x500mm³
Small:20x20x20~250x250x250mm³
¶ Infrared Tracking Mode Selecting
Geometry
Relies on the object’s geometric shape for tracking. For objects with rich and irregular geometric features, it is recommended to use Geometry Mode for scanning.
Texture
Suitable for objects with rich and irregular textures but limited geometric features (e.g., patterned vases, oil paintings, etc.).
Marker
If an object has neither obvious geometric nor texture features, Marker Mode can be used for scanning. This mode requires attaching reflective circular markers on or around the object to assist with tracking. For large objects, markers with an inner diameter of 6mm should be used, while for small objects, markers with an inner diameter of 3mm are suitable.
Please refer to the link for details: Guidelines for Using Markers
¶ Basic Terms and Concepts
¶ Scanning distance
The accuracy of all scanners is related to the scanning distance. The Otter Lite scanner has a minimum working distance of 120 mm and can reach a maximum distance of 1200 mm. The scanner should maintain an appropriate distance from the object to ensure reliable tracking without losing accuracy. Follow the instructions provided by the scanning software to maintain the "Optimal Distance".
¶ Exposure time
Creality Scan offers two camera exposure control modes: Automatic Exposure and Manual Exposure.
- For relatively large targets, such as human face and body, Auto-Exposure can be used for scanning.
- For smaller objects, automatic exposure may not be accurate. It is recommended to manually adjust the exposure time of the IR camera.
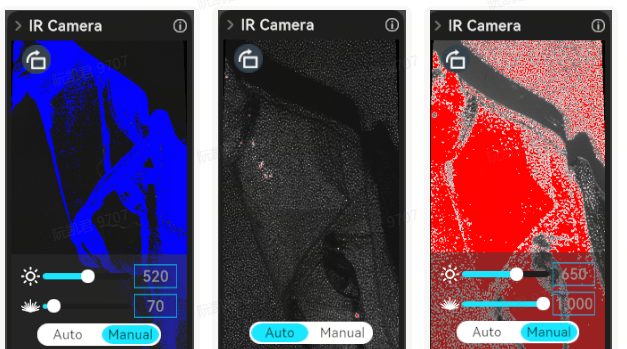
For infrared mode, adjust the IR camera's exposure time so that the markers have sufficient brightness but are not overexposed. The areas marked in red in the IR image window indicate overexposed regions.
1. First, adjust the IR camera's exposure time so that the fiducial points have sufficient brightness but are not overexposed. The areas marked in red in the IR image window indicate overexposed regions.
2. Then, adjust the brightness of the laser so that it has sufficient brightness but does not overexpose.
¶ Markers
When use the Marker tracking mode, the reflective circular markers are required for assistance in scanning. When the object is small, the markers do not need to be attached to the surface of the object; they can be placed on the scanning pad or tabletop. However, when the object is larger, the markers need to be attached to the surface of the object, as shown in the following image. Note that, makers should be **randomly** placed.
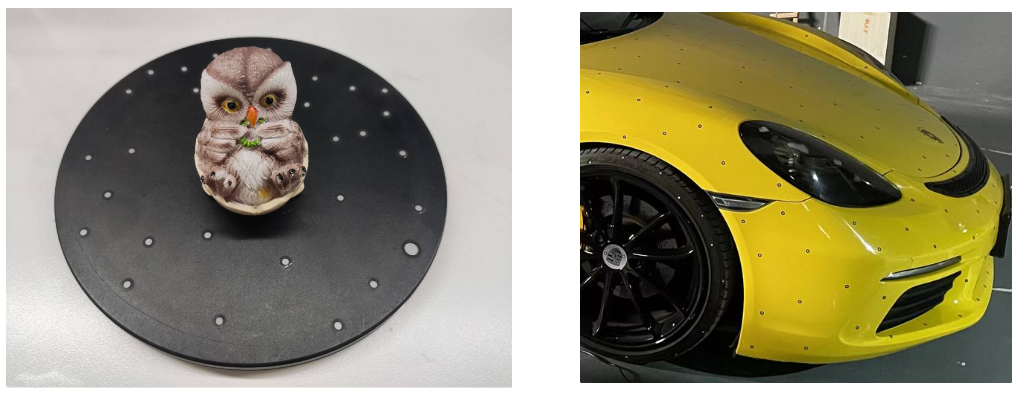
Two types of markers with diameters of 3mm and 6mm are supported. It is recommended to use the 3mm markers for smaller objects, while the 6mm markers are recommended for larger objects.
¶ Scanning speed
For better performance, we recommend that users use solid-state drives (SSD) or high-speed mechanical hard drives. The GPU has a significant impact on frame rate. The Creality Scan software allows users to manually select their graphics card.
.png)
¶ Quality map
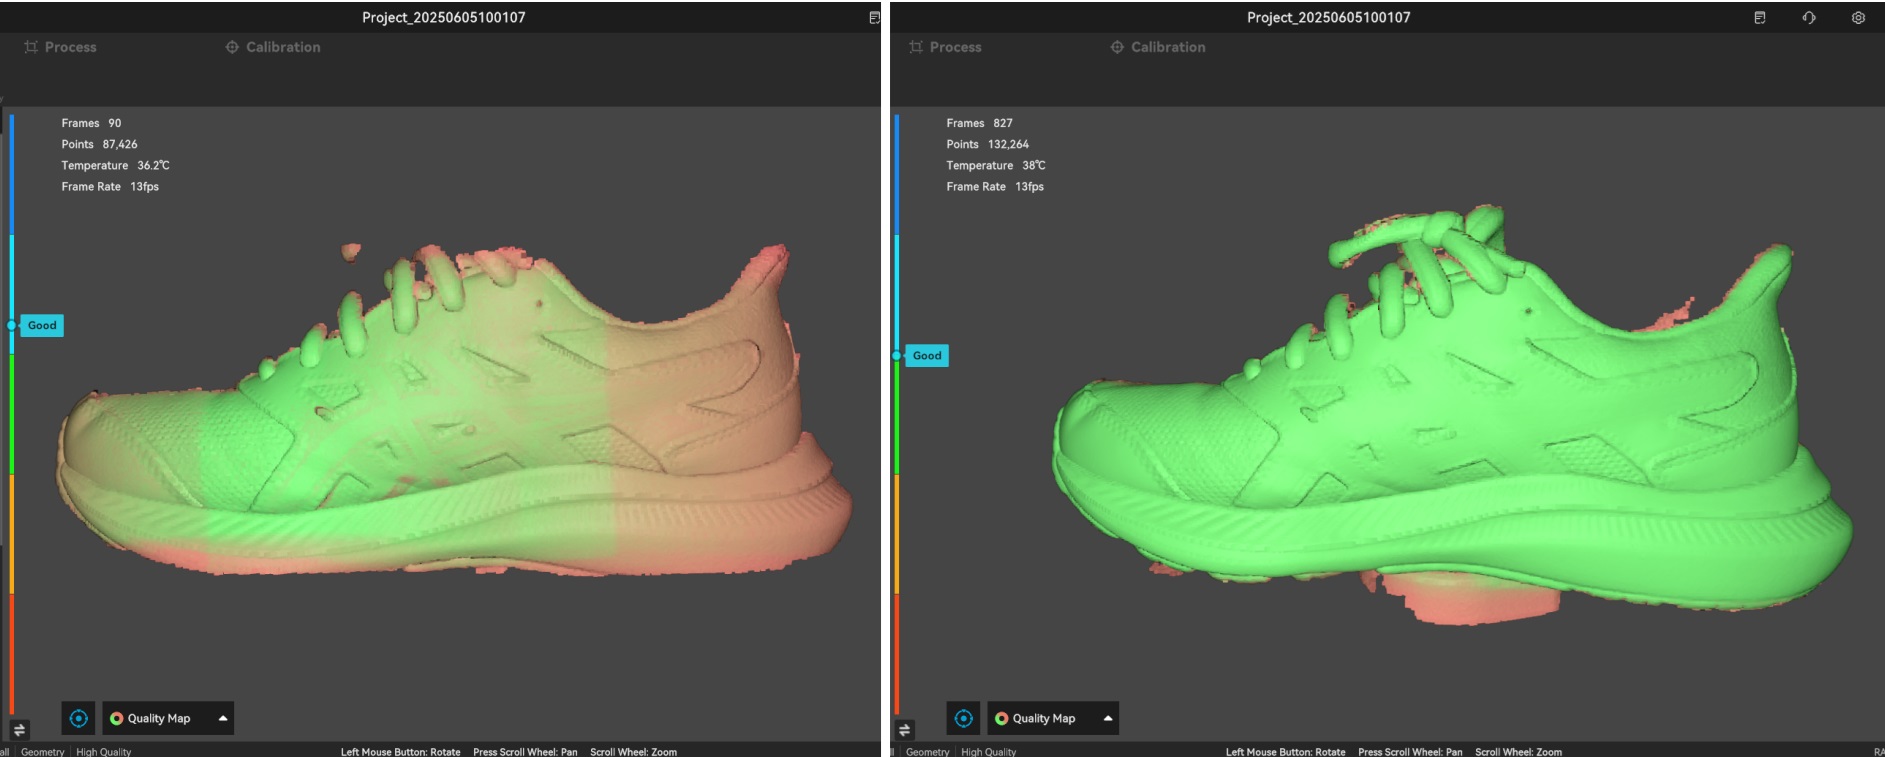
During the scanning process, Creality Scan provides a quality map for point clouds to indicate whether the current scan quality is high enough. The following image is an example of determining scan completeness based on the quality colormap of point clouds.
The object on the left shows a mix of red and green, indicating a relatively poor quality of the scanned point cloud, while the object on the right appears uniformly green, indicating a relatively good quality of the scanned point cloud.
¶ Pointcloud Fusion
After the scanning process, it is necessary to perform pointcloud fusion to fuse the multiple scanned frames of point clouds (several hundred or even thousands of frames) and obtain a higher quality pointcloud.
Resolution is one of the important parameters for this process. A smaller resolution setting will capture more details in the model but may require longer processing time.
When dealing with smaller objects, such as those below 25cm, or when seeking better details, it is recommended to set the resolution to 0.2 mm or 0.3 mm. Using a resolution of 0.2mm, we can achieve sufficiently good detail for most objects. For larger objects, it is recommended to use a larger resolution. For example, when scanning a car door, a resolution of 0.5mm can be used.
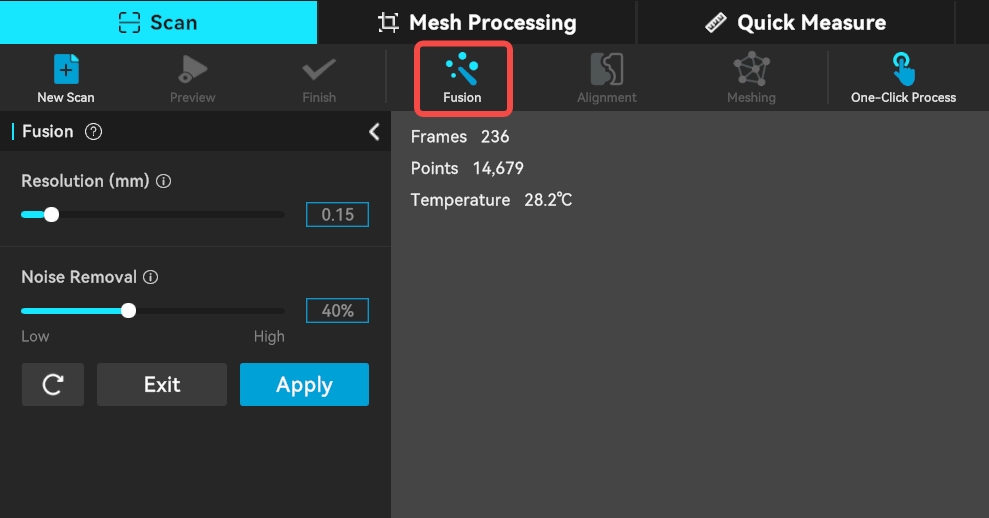
Noise Removal: The lower the noise reduction level, the more data can be retained.
Remove Markers: This function is only displayed when markers are set in tracking mode. It is used to remove markers and fill the corresponding holes.
The CrealityScan software allows users to perform pointcloud fusion multiple times. For instance, if you are not satisfied with the current results, you can modify the parameters and re-run the pointcloud fusion step.
¶ One-click Process
One-click processing is designed for beginners who have little experience with 3D scanners. If you require better scan quality, it is not recommended to use One-click Processing and instead manually adjust the parameters for each processing step.
.png)
¶ Model editing
Creality Scan provides pointcloud editing functionality.
After scanning is complete, you can immediately use the point cloud editing feature to remove unnecessary parts, which can accelerate the data processing process.
| Icon | Function Description |
 |
Penetrate Selection: Supports selecting the mesh behind the selected area. For the raw data, selection always has a penetrate selection effect by default, so this option cannot be turned off. |
 |
Lasso Select: Selects an area by dragging the mouse. |
 |
Rectangle Select: Selects an area in a rectangular shape. |
.png) |
Connected Component: Select all connected points in the clicked area. |
 |
Invert Selection: Automatically selects the unselected area (opposite of the current selection). |
 |
Unselect: Cancels the current selection. |
 |
Delete Selection: Removes the selected part. |
 |
Undo: Reverts the last deletion operation. |
 |
Redo: Restores the last undone deletion operation. |
 |
Cancel Edit: Exits the editing mode without saving changes. |
 |
Saved Edit: Saves the editing changes and exits the editing mode. |
.png)
¶ Meshing
The meshing operation converts pointcloud data into a triangular mesh model.

During the process of meshing, you can manually configure the number of faces of the generated mesh, adjust the level of smoothness of the mesh, and choose whether to fill holes and close the model.
The more triangles in the mesh, the finer the model, but it also takes longer to generate the mesh.
.png)
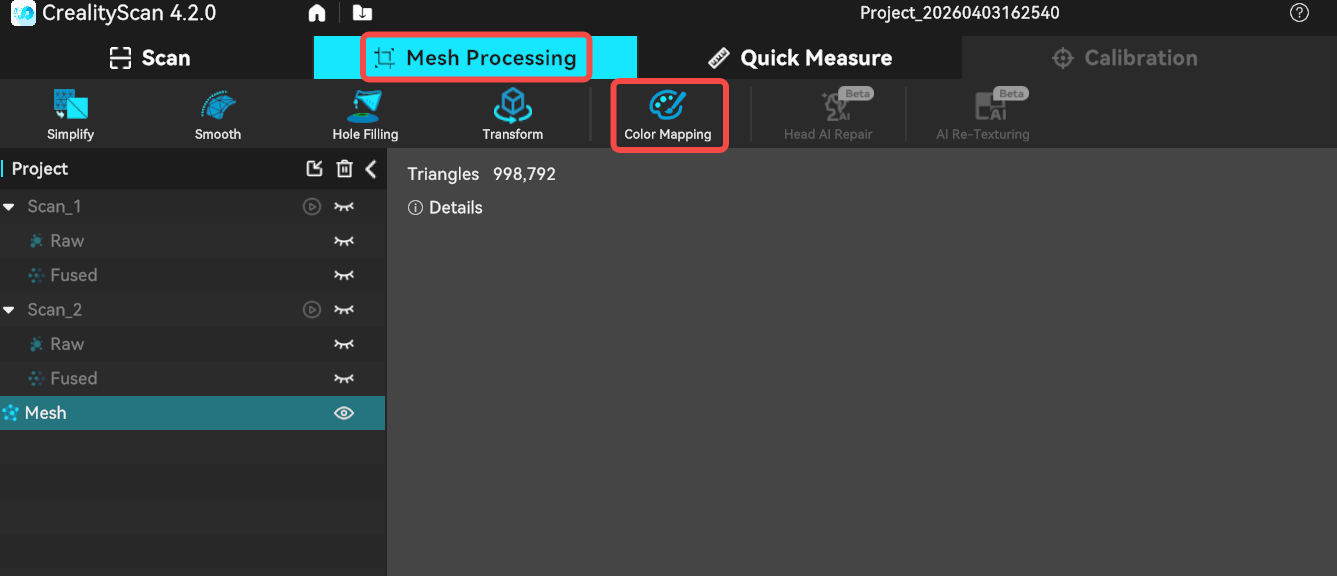
¶ Color Mapping
The Otter Lite scanner is equipped with a high-definition RGB camera, allowing for the capture of true-color textures for 3D models.

After meshing is complete, if the color mapping function is enabled in the scanning settings, you can click **Mesh Processing -> Color Mapping** to apply the texture.
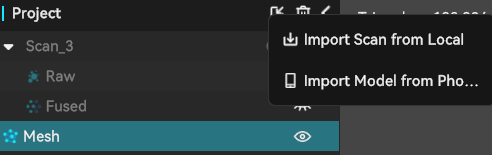
¶ Import Scanned File
When scanning with a PC, if you don't have time to wait for the post-processing to complete, you can click "Complete" and use the "Import Scanned File" feature in the future to import the scan project file into the software for further processing.
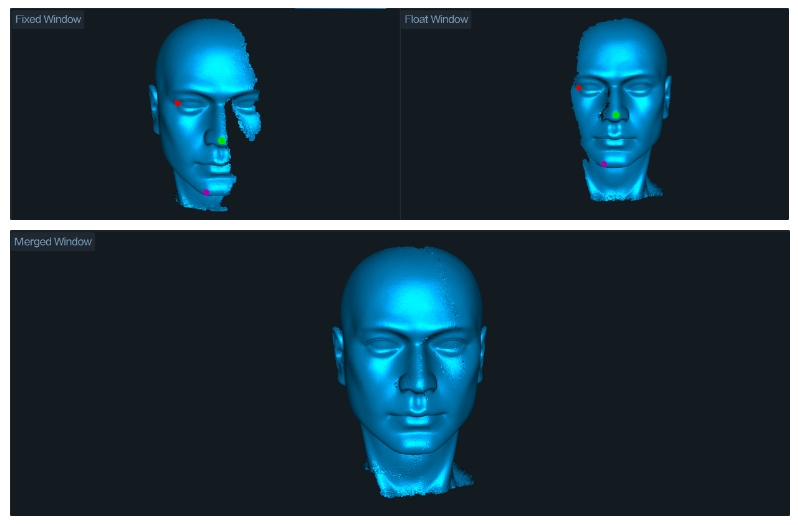
¶ Alignment
If it is unable to capture all the data of an object in one scan, you can perform multiple scans. you can use the alignment feature to combine them into a complete model. This is extremely helpful for scanning larger objects.
.png)
How to scan the bottom of an object?
When you need to scan the bottom of an object, you can place the object on a tabletop and scan the visible parts first. Then, create a new project and position the object on its side or upside-down for another scan. Use the alignment feature to merge these two sets of pointclouds together, creating a complete 3D model of the object. During both scans, make sure that there are sufficient overlapping areas being captured.
After completing the first scan and performing pointcloud fusion, you can start a new scan by selecting "New Scan."
.png)
On the page for alignment, you can automatically or manually align the fused point clouds. Below is an example of manual alignment.
¶ Calibration
When the scanner is bumped or hasn’t been calibrated for a long time, calibrating it with the included calibration board can restore the scanner’s measurement accuracy.
Additionally, if your scan requires high precision, please preheat for 30 minutes before starting the calibration, and commence scanning your target after the calibration is complete.
Creality Otter-series : Calibration Tutorial (for CrealityScan 4)