¶ Feature Overview
Gaussian Splatting is an 3D rendering technique that enhances the realism and visual quality of scanned models. Based on this technology, CrealityScan provides two features for generating Gaussian Splatting models:
- Native Gaussian Reconstruction
- Gaussian Generation with AI Re-texturing
¶ Native Gaussian Reconstruction
Native Gaussian Reconstruction uses the original RGB images captured by the scanner to directly reconstruct and render a 3D Gaussian Splatting model.
Unlike traditional color texture mapping, which projects textures onto a mesh surface, Gaussian reconstruction preserves the object's original lighting, material appearance, and fine surface details. It produces smoother lighting transitions, reduces flat-looking textures and color discontinuities, and delivers a more photorealistic result that closely resembles the real object.
The generated model can be used directly for digital archiving, presentations, and sharing.
¶ Gaussian Generation with AI Re-texturing
A new Gaussian Rendering option has been added to the AI Re-texturing feature. The workflow is identical to the existing AI Re-texturing process.
After capturing additional images of the object from multiple angles with a smartphone or camera, users can generate a Gaussian Splatting model based on these images. The additional multi-view photos help recover texture details in areas that were difficult to scan and improve lighting consistency, resulting in more accurate colors and more realistic material appearance.
¶ System Requirements
- Currently supported on Windows only. macOS is not supported at this time.
- An NVIDIA GeForce RTX 2060 or higher graphics card is required, with at least 8 GB of VRAM.
- Install the latest official NVIDIA graphics driver for optimal compatibility and performance.
¶ Workflow
¶ Native Gaussian Reconstruction
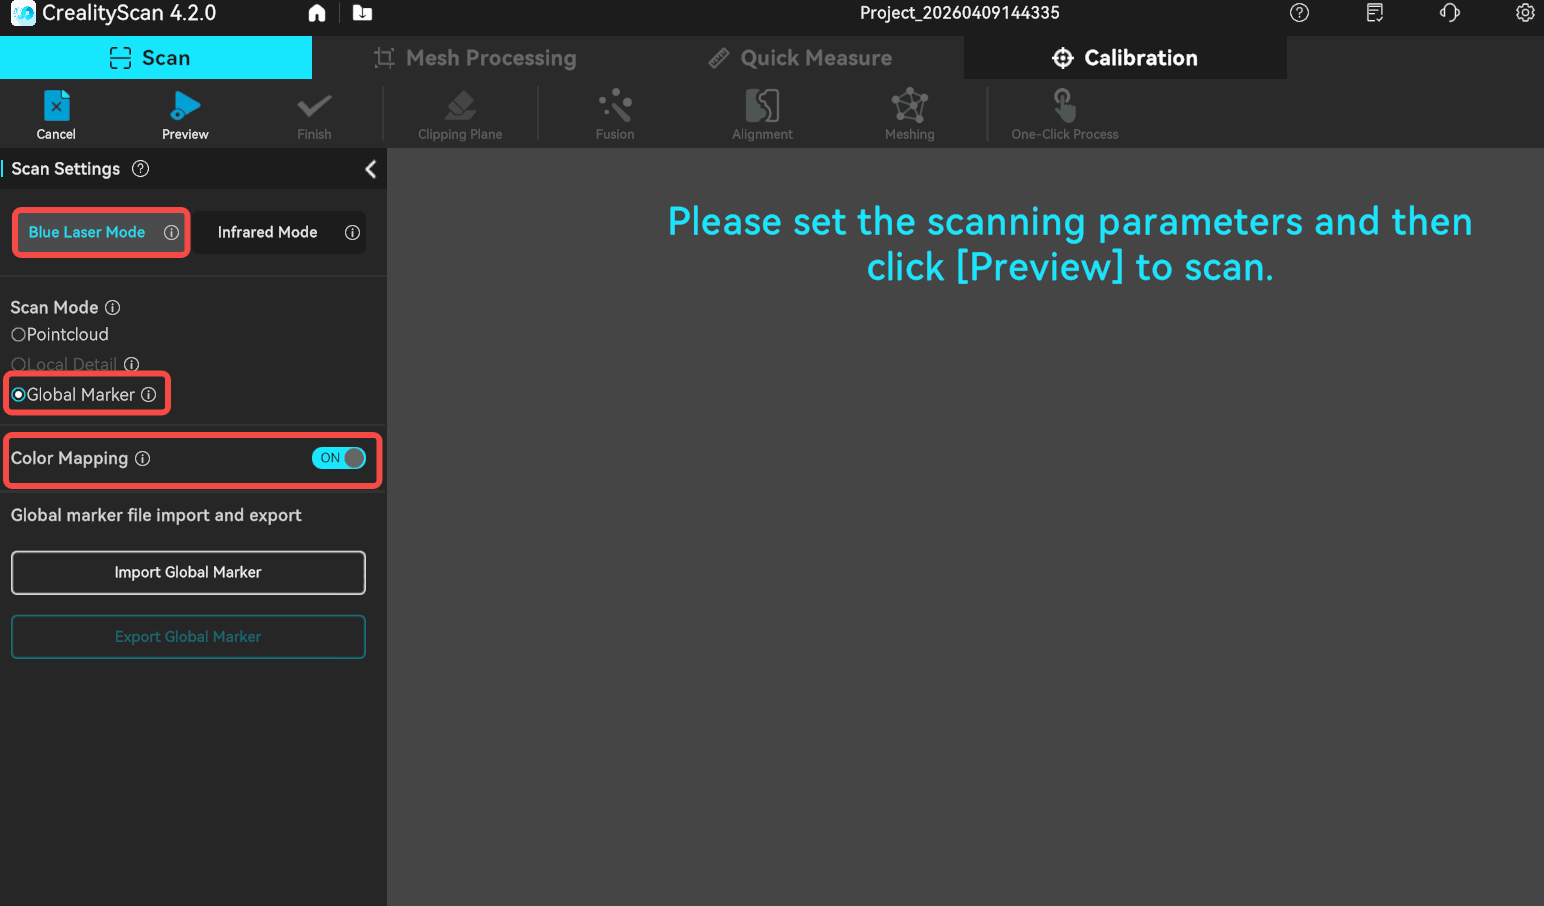
- Create a new scan project and enable Color Mapping before scanning.
- In Infrared Mode, color information is captured automatically during scanning. No additional settings are required.
- In Blue Laser Mode, select Global Marker Mode and enable Color Mapping. While scanning the markers, move around the object to perform a full 360° scan to capture complete color information.
- Complete the Fusion, Meshing, and Color Mapping processes.
.png)
- Select the Texture data, then click: Mesh Processing → Gaussian Rendering. Wait for the software to complete Gaussian training.
.png)
¶ Gaussian Generation with AI Retexturing
- Create a new scan project and enable Color Mapping, then complete the scan.
- Complete the Fusion, Meshing, and Color Mapping processes.
- Capture additional photos around the model from all directions (360°). Take at least 10 images from different viewing angles to maximize coverage. Supported image formats: JPEG, JPG, and PNG. Transfer the captured high-resolution images to your computer.
.png)
¶ Photography Guidelines
- Keep the photo capture environment consistent with the scanning environment. Try to capture photos in the same environment as scanning, and avoid large changes in lighting and color. During capture, ensure correct exposure, accurate color, a fixed focal range, and clear focus.
.png)
.png)
.png)
- After the photos are ready, select the Texture data and click: Mesh Processing → AI Re-texturing.
.png)
- In the pop-up window, enable Gaussian Rendering. Click to import images, browse to the folder containing the photos, select all images, and import them.
.png)
- Click Preview and wait for the software to complete Gaussian rendering. After processing is finished, rotate the model to preview the result.
- Click Apply to save the Gaussian Rendering effect.
.png)
¶ Exporting the Model
The generated Gaussian-rendered model can be exported as a .ply file. Click Export Model in the upper-right corner of the interface to export the result.
.png)