AI Re-Texturing allows you to use high-definition images captured by devices such as mobile phones or DSLR cameras to generate a finer textured model.
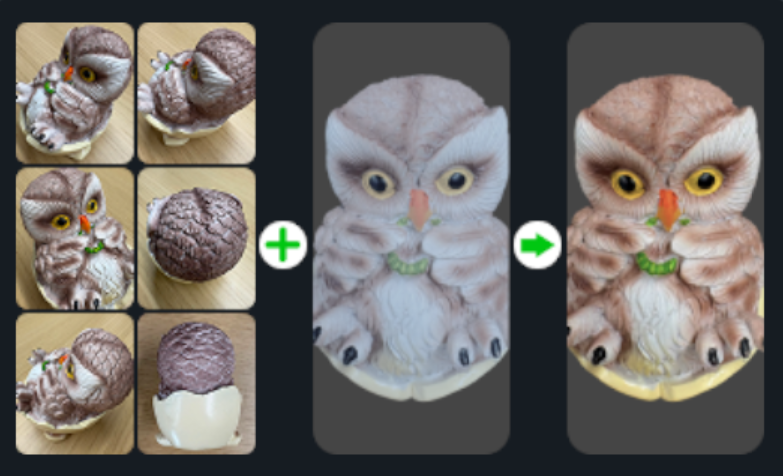
¶ Notes for AI Re-Texturing
1. Keep the photo capture environment consistent with the scanning environment. Try to capture photos in the same environment as scanning, and avoid large changes in lighting and color. During capture, ensure correct exposure, accurate color, a fixed focal range, and clear focus.
.png)
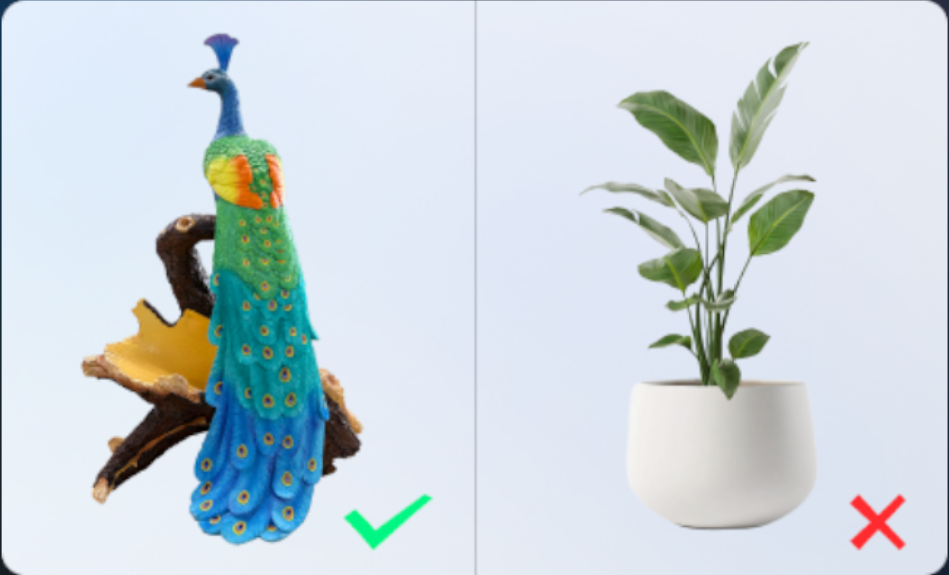
2. This function is not suitable for flexible objects (e.g., cloth, plants, etc.), as such materials are prone to subtle movements. It is recommended to apply this function to rigid objects with clear textures; objects with weak textures may yield unsatisfactory results. During capture, keep the background clean, emphasize the main subject, and reduce distractions from clutter.
3. Keep the object stationary. Please secure the scanned object in place and avoid moving it or using a turntable during capture. Move the camera to capture from different angles to ensure good texturing results.
.png)
4. Perform 360° surround shots around the model that requires AI Re-Texturing, it is recommended to take more than 10 photos. Insufficient number of images or range of angles may lead to poor results. Supported image formats: JPEG, JPG, PNG. Import the captured high-definition images into your computer.
.png)
¶ Step-by-Step Instructions
In CrealityScan, open the project that requires AI Re-Texturing. Note: This feature can only be used on projects that have already undergone color mapping processing. Click Mesh Processing → AI Re-Texturing.
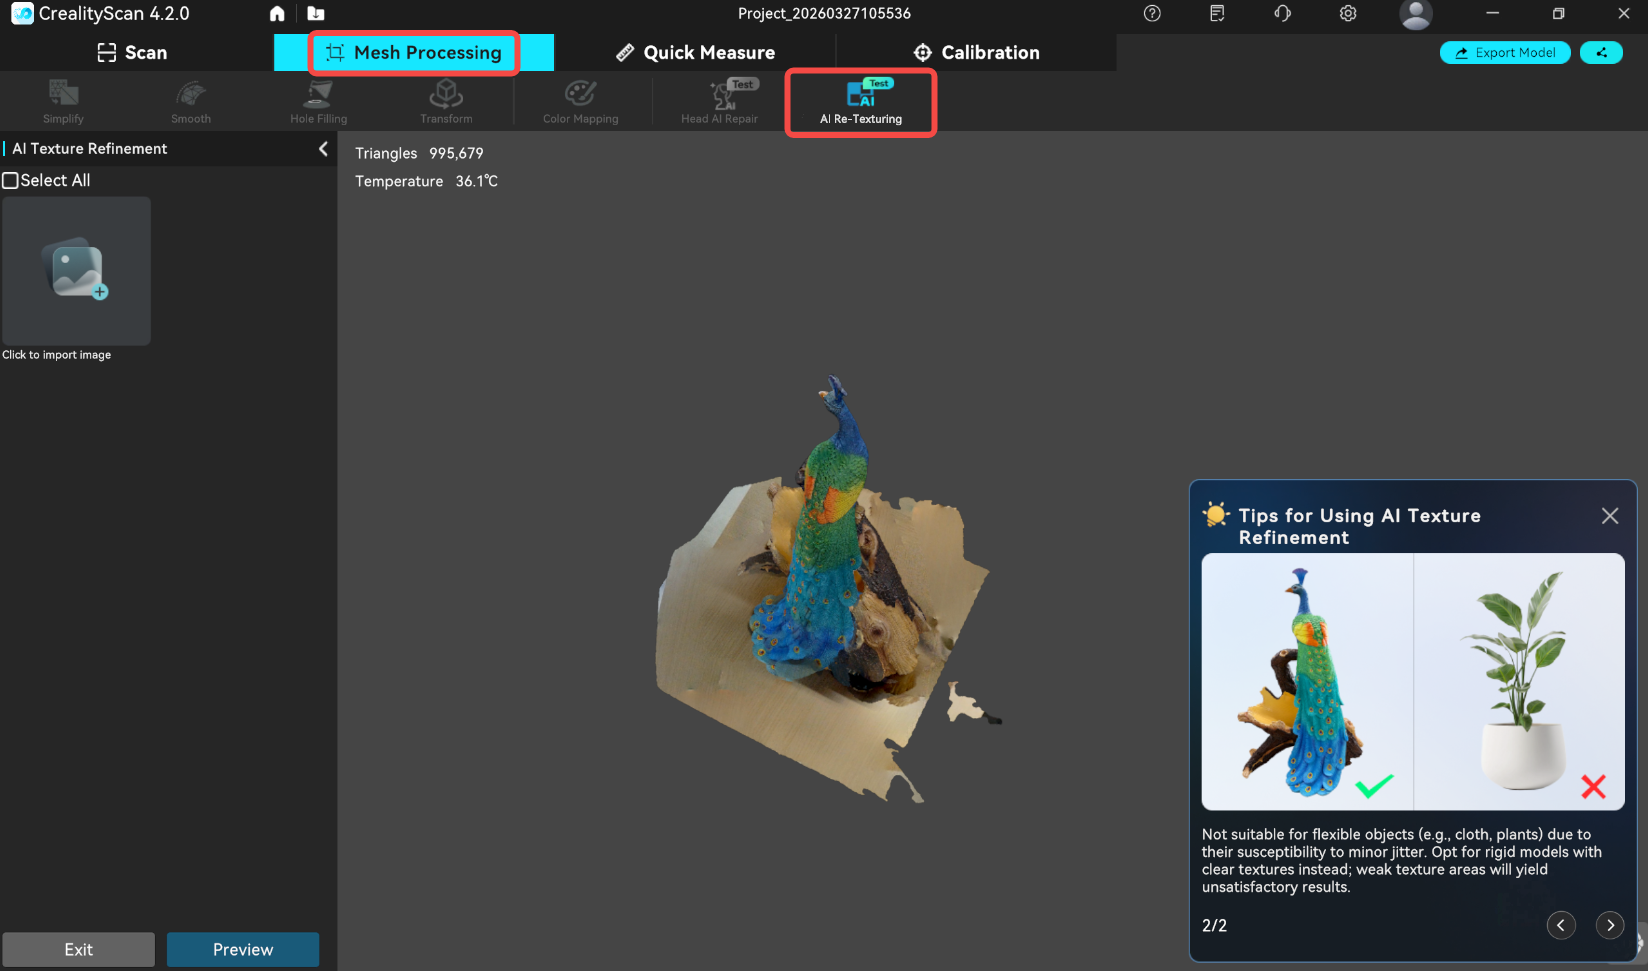
In the pop-up window, click to import images, browse to the folder where the images are stored and import them.
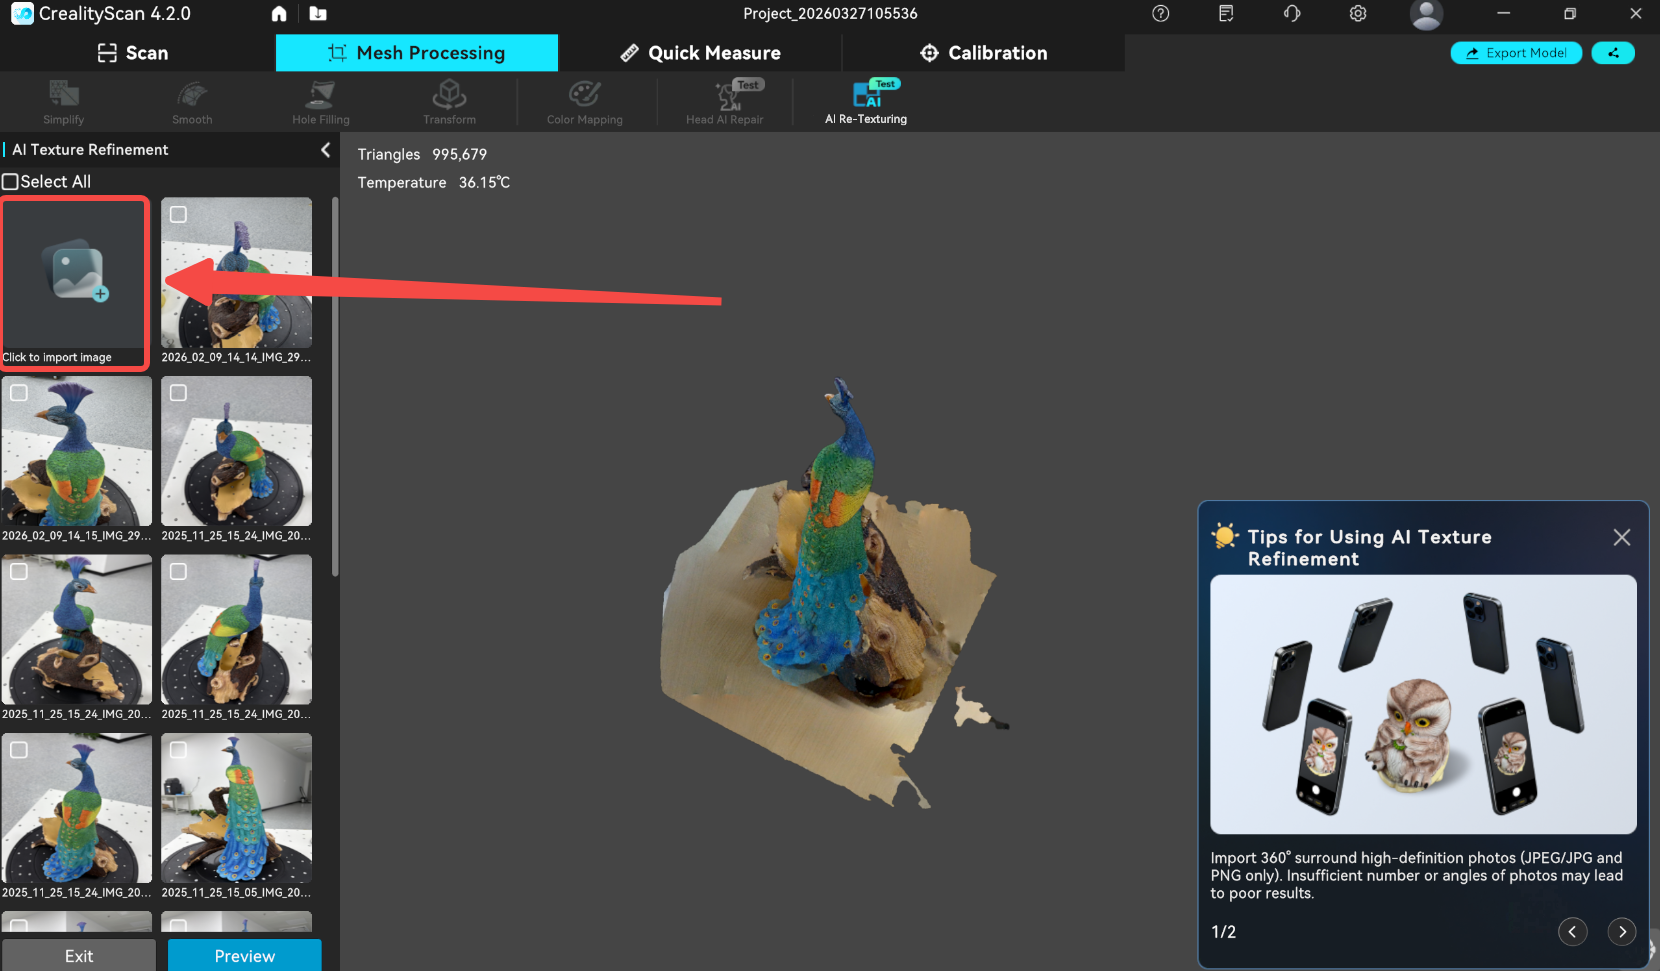
Click Preview and wait for the software to complete the AI Re-Texturing process.
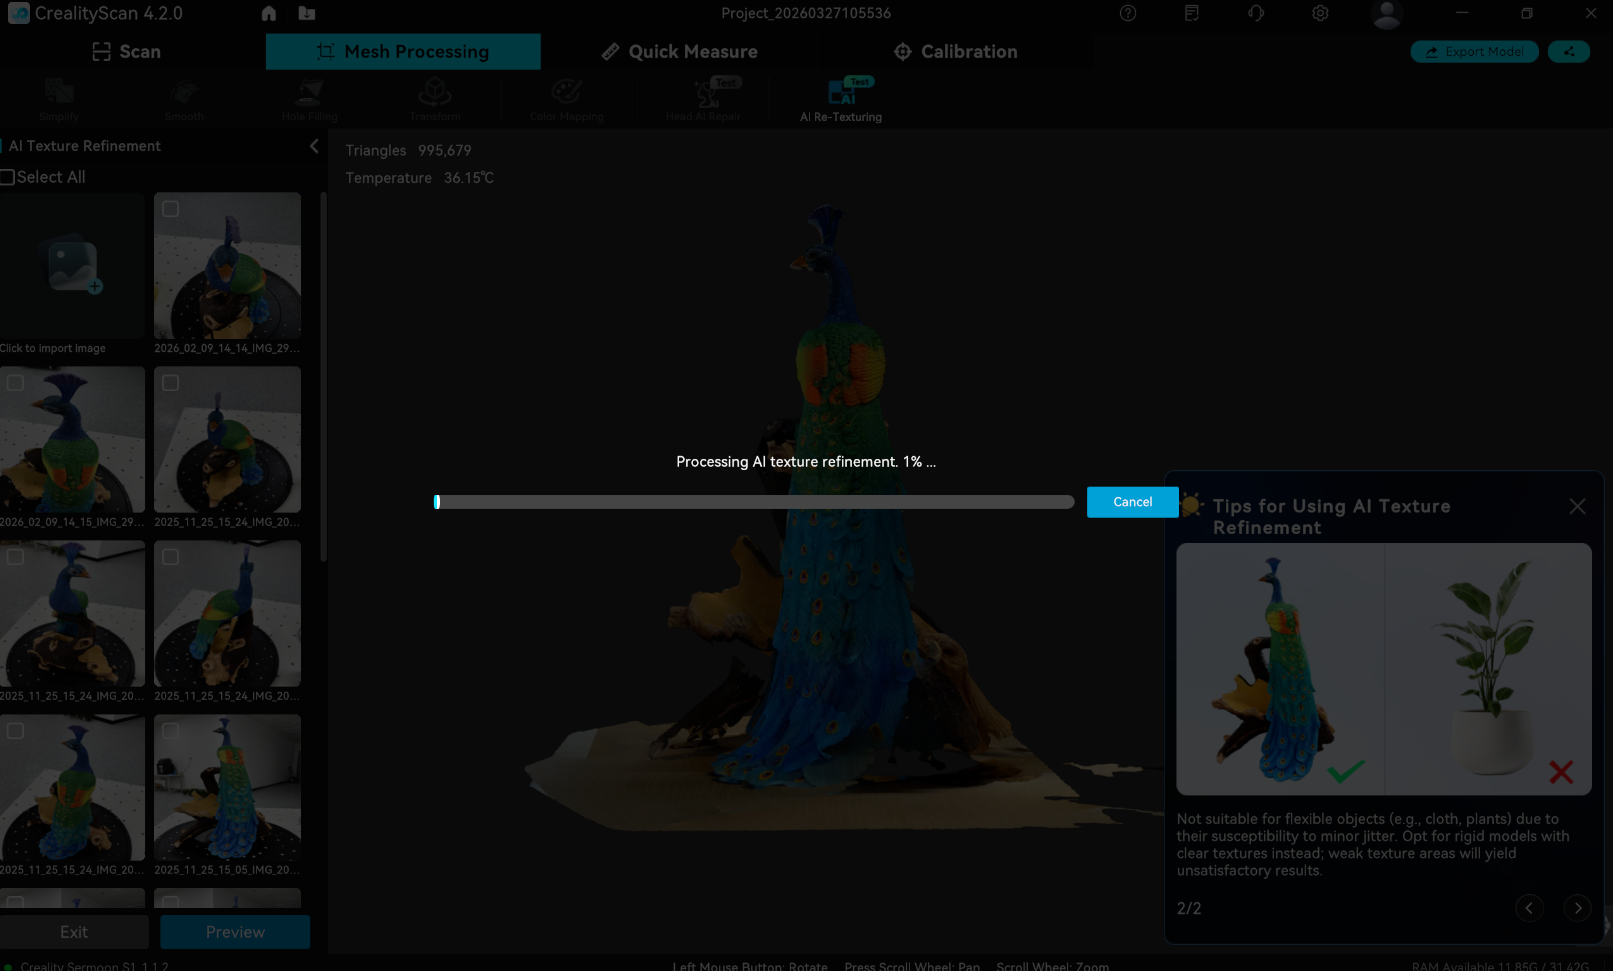
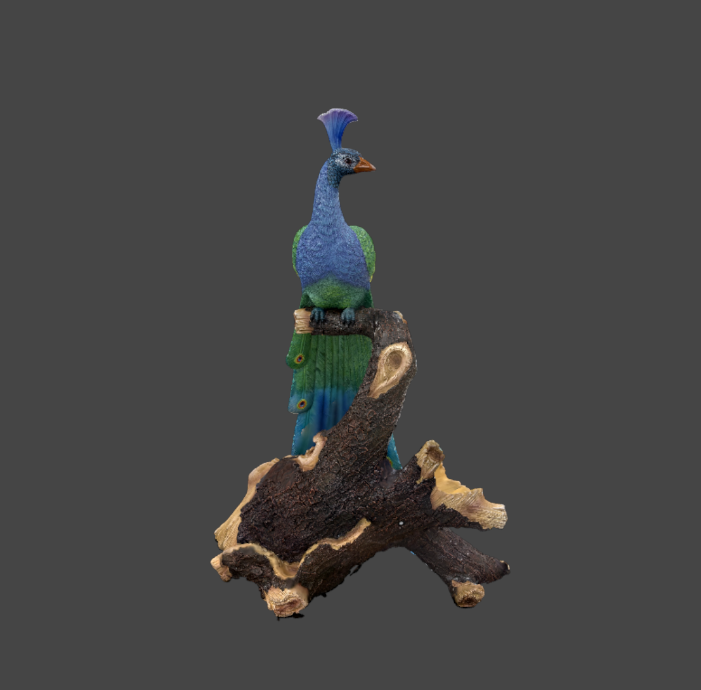
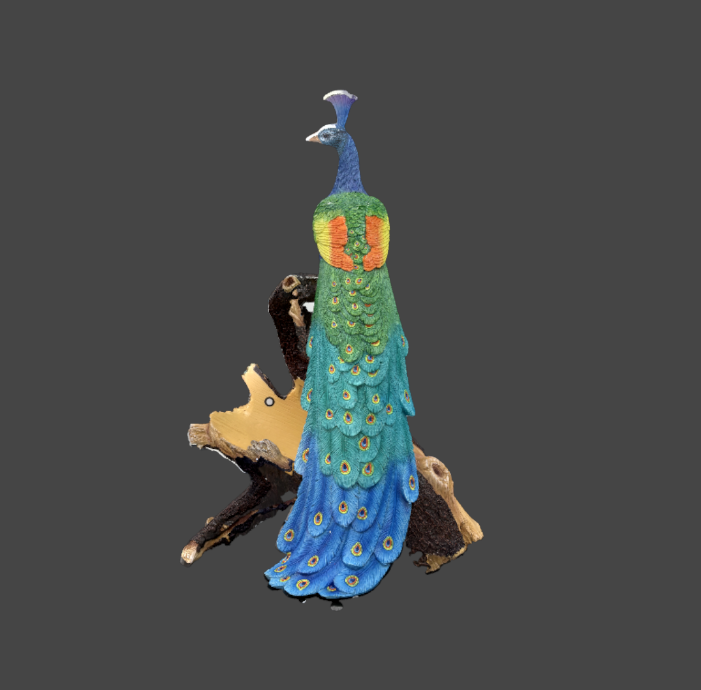
Once the process is complete, you can rotate the model to preview the effect.
| AI Re-Texturing Effect – Front | AI Re-Texturing Effect – Back |
 |
 |
¶ Step-by-Step Instructions for Gaussian Rendering
The AI Re-texturing feature also supports Gaussian Rendering. The workflow is the same as AI Re-texturing. After importing the captured images, you can choose to generate a 3D Gaussian Splatting model.
.png)
¶ System Requirements
- Currently supported on Windows only. macOS is not supported at this time.
- An NVIDIA GeForce RTX 2060 or higher graphics card is required, with at least 8 GB of VRAM.
- Install the latest official NVIDIA graphics driver for optimal compatibility and performance.
¶ Photo Requirements
- To achieve the best Gaussian rendering results, keep the object stationary during image capture. Do not move objects while taking photos.
- The object should have rich, non-repetitive textures. Use a clean, uncluttered background and ensure the subject is clearly distinguishable from the background.
- Take at least 10 images from different angles to ensure sufficient coverage of the model.