¶ 1. Product Introduction
¶ 1.1 APP Overview
This software requires a connection with a Creality 3D scanner. It allows users to capture 3D data, process models, and share models.
¶ 1.2 Supported Devices
Creality 3D Scanner
Raptor Series:Raptor、Raptor X、Raptor Pro(requires accessory use)
Otter Series:Otter Lite、Otter、Otter Lite Basic(requires accessory use)
Ferret Series:Ferret SE、Ferret、Ferret Pro
Sermoon Series:Sermoon S1(requires accessory use)
Note: Connecting to a mobile phone wirelessly requires a Wi-Fi Scan Bridge or Wireless Bridge(for Ferret Series). Some models do not come with the Wi-Fi Scan Bridge and need to be purchased separately.
¶ 1.3 System Requirements & Recommended Devices
| Platform | Ferret/ Otter Series | Raptor Series/Sermoon S1 | ||
| Recommended Specs | Android | Chip | Qualcomm Snapdragon 8gen1 or above | Qualcomm Snapdragon 8gen3 or above |
| Operation System | Android 10.0+ | Android 10.0+ | ||
| RAM | 8GB + | 12GB + | ||
| iOS | Chip | A15 or higher | A16 or higher | |
| Operation System | iOS 15+ | iOS 15+ | ||
| RAM | 6GB + | 8GB + | ||
| Platform | Ferret Series | Otter Series | Raptor/Raptor X | Raptor Pro | Sermoon S1 | |
|
Examples of Recommended models |
Android |
Samsung S24 Series Xiaomi:14 Series Redmi:K70pro OPPO:Find N3 Vivo: X90 Pro+ Honor:Magic 5 |
Samsung:S24 Series Xiaomi:14 Series Redmi:K70pro OPPO:Find N3 Vivo: X90 Pro+ Honor:Magic 5 |
Samsung:S25 Series Xiaomi:15 Series Redmi:K70pro OPPO:Find N3 Vivo: X90 Pro+ Honor:Magic 5 |
Samsung:S25 Series Xiaomi:15 Series Redmi:K70pro OPPO:Find N3 Vivo: X90 Pro+ Honor:Magic 5 |
Samsung:S25 Series Xiaomi:15 Series Redmi:K70pro OPPO:Find N3 Vivo: X90 Pro+ Honor:Magic 5 |
| iOS | iPhone 15 | iPhone 15 | iPhone 15pro | iPhone 16pro | iPhone 1pro6 | |
| Platform | Ferret Series | Otter Series | Raptor/Raptor X | Raptor Pro | Sermoon S1 | |
| Phone models examples for the lowest configuration | Android |
Samsung:S21 Series Xiaomi:12 Series OPPO:Find X5 Pro Vivo: X100 Honor:Magic 4 |
Samsung:S21 Series Xiaomi:12 Series OPPO:Find N3 Vivo: X90 Pro+ Honor:Magic 4 |
Samsung:S22 Series Xiaomi:12 Series OPPO:Find N3 Vivo: X90 Pro+ Honor:Magic 5 |
Samsung:S22 Series Xiaomi:15 Series OPPO:Find N3 Vivo: X90 Pro+ Honor:Magic 5 |
Samsung:S22 Series Xiaomi:15 Series OPPO:Find N3 Vivo: X90 Pro+ Honor:Magic 5 |
| iOS | iPhone12 | iPhone 13 | iPhone 14 | iPhone 14 | iPhone 15 |
¶ 2. Quick Start
¶ 2.1 Update APP
Ensure you are using the latest version for the best experience:
● iOS: Update via App Store
● Android: Update via Google Play
● Or download from the official website: https://www.creality.com/download#sparkx
¶ 2.2 Connect Scanner
Before use, make sure you have the following items ready:
● A Wi-Fi Scan Bridge is required to power the scanner and enable connection
● Follow the Connection Guide or User Manual to correctly connect the scanner and Wi-Fi Scan Bridge
● Ensure the device is powered on and successfully connected to the APP
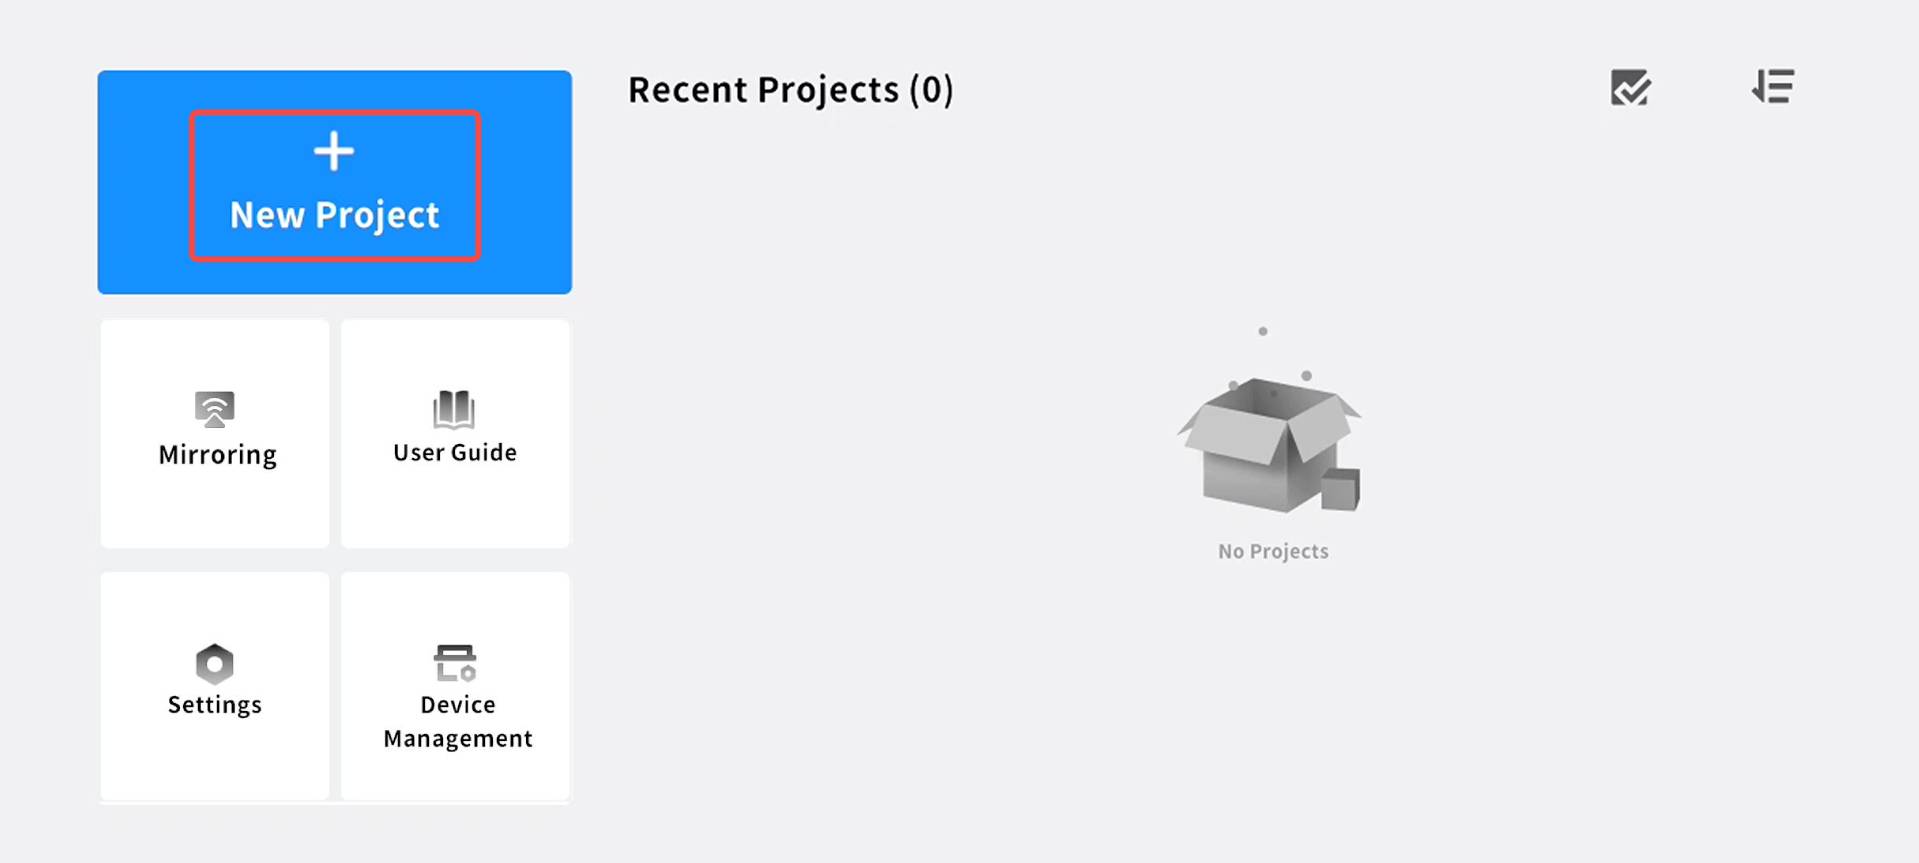
¶ 2.3 Create a Scan Project
Tap New Project, then enter the scan preview interface
1)Select Scan Mode
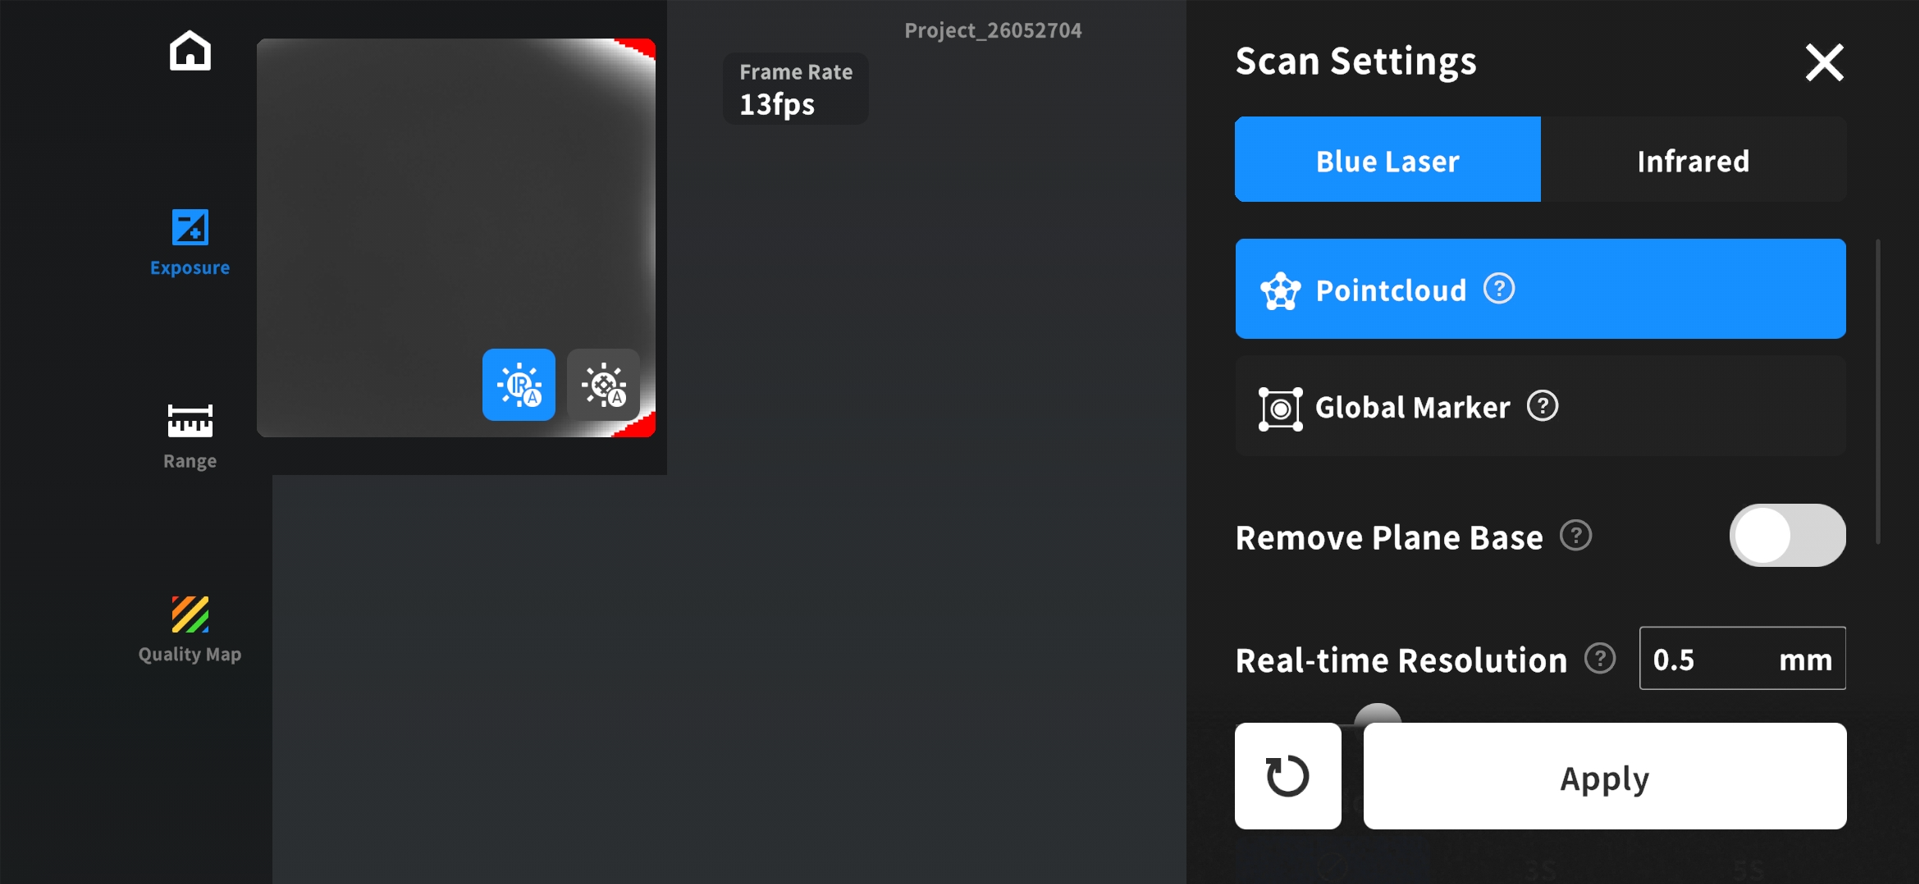
a)Choose the appropriate mode from Scan Settings on the right
●Light Source Selection:
Select either the blue laser mode (supported on Raptor Series and Sermoon S1) or the infrared mode for scanning. The choice should be determined based on specific scanning requirements and the characteristics of the object.
| Scanning Light Source Selection | Applicable Scenarios |
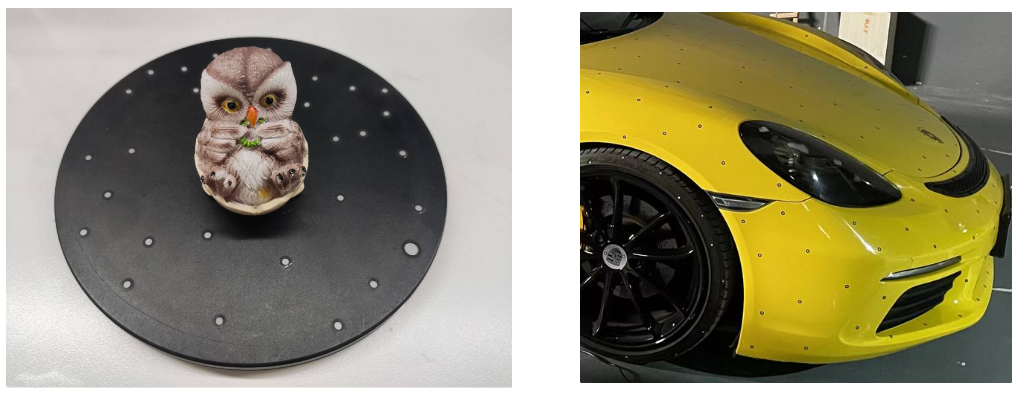
| Blue laser mode | Suitable for scanning objects with rich details and special surface materials. Particularly applicable to industrial manufacturing and inspection scenarios with high precision requirements, which require circular reflective markers for scanning and tracking. |
| Infrared mode | Suitable for rapid scanning, supporting geometric tracking (marker-free, ideal for scanning targets such as human bodies, human faces, sculptures, and cultural relics), texture tracking, and marker tracking. Performs excellently in face/human body scanning (infrared structured light is invisible light and harmless to human eyes), medical rehabilitation, digitization of cultural relics and artworks, and scenarios sensitive to ambient light. |
●Pointcloud: Directly obtain all the model information of the object.
●Global Marker: Only scan the marker of the object. For medium and large-sized objects (≥250×250×250 mm³), it is recommended to scan the markers first and then the point cloud. This not only saves the memory space occupied by the model but also captures the object features faster and achieves higher model accuracy.
●Remove Plane Base: Automatically remove the planar background detected during scanning.
●Real-time Resolution(only supported in blue laser mode): The fineness of scanned data; smaller spacing yields more detail but higher performance consumption.
●Setting in infrared mode
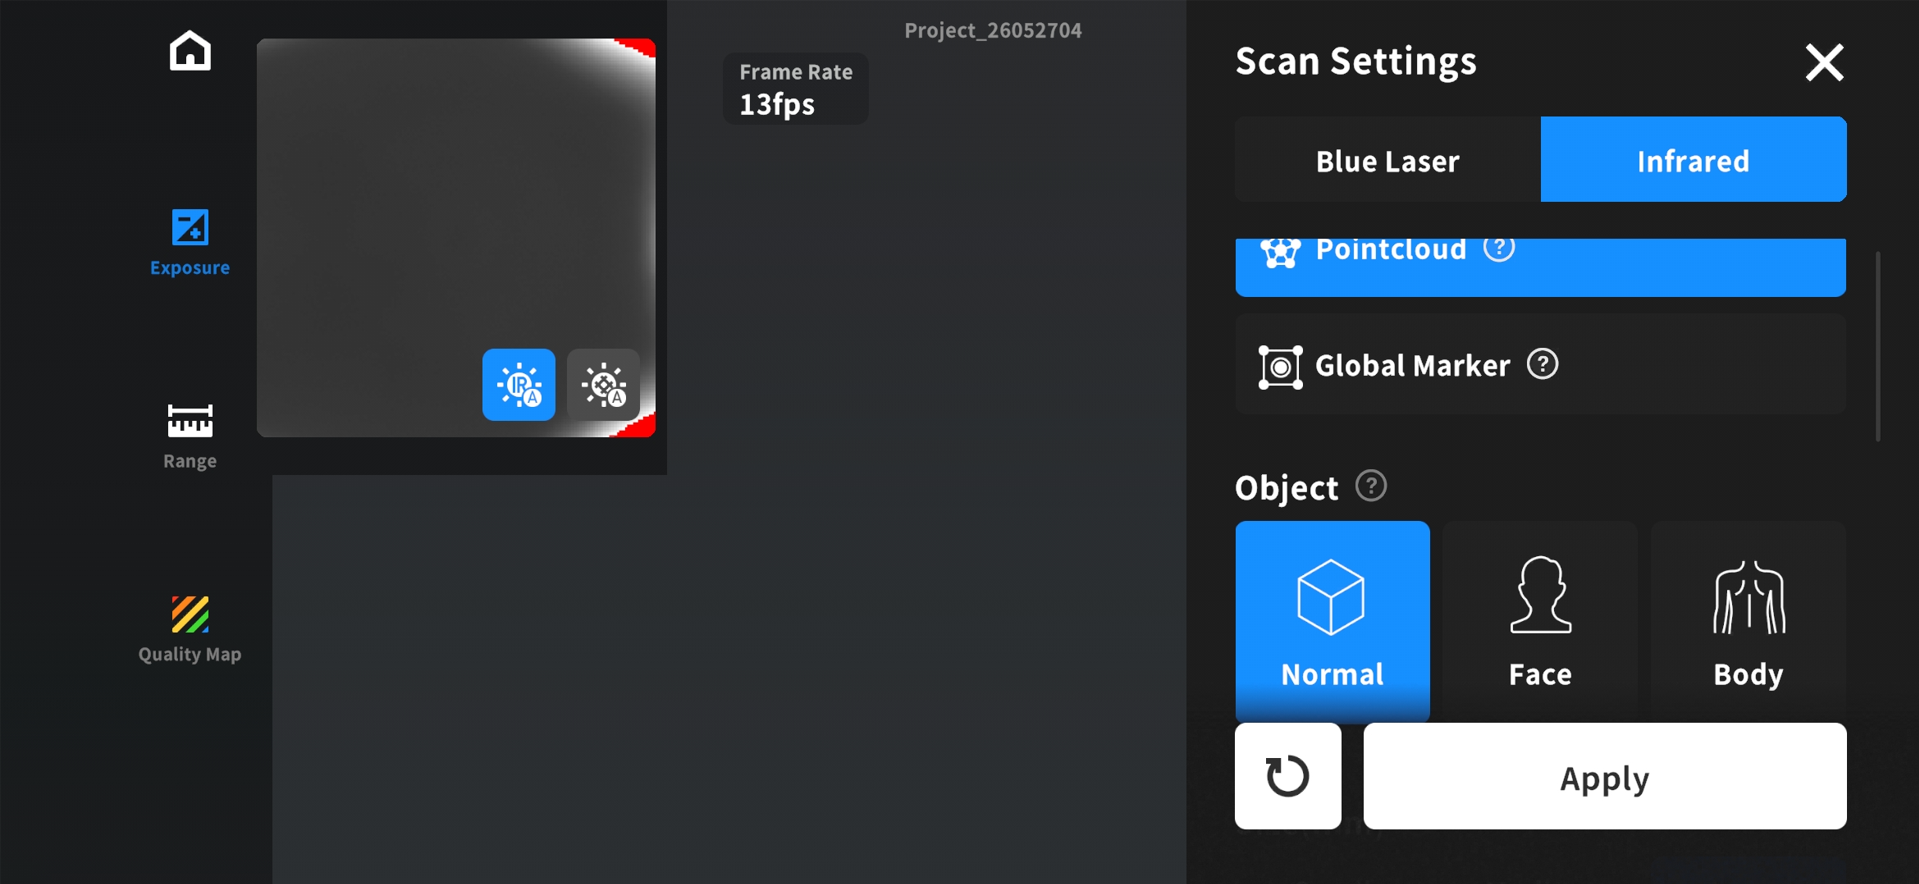
○Select based on the scanned object: Normal, Human Face, Human Body.
○The size of the scanned object can be selected based on the actual size. (Note: The size range of the target varies depending on the scanner model)
○Large:500 x 500 x 500~2000 x 2000 x 2000mm³
○Medium:250 x 250 x 250~500 x 500 x 500mm³
○Small:150 x 150 x 150~250 x 250 x 250mm³
●Infrared Tracking Mode Selecting:
○Geometry: Relies on the object‘s geometric shape for tracking. For objects with rich and irregular geometric features, it is recommended to use Geometry Mode for scanning.
○Texture: Suitable for objects with rich and irregular textures but limited geometric features (e.g., patterned vases, oil paintings, etc.).
○Marker: If an object has neither obvious geometric nor texture features, Marker Mode can be used for scanning. This mode requires attaching reflective circular markers on or around the object to assist with tracking. For large objects, markers with an inner diameter of 6mm should be used, while for small objects, markers with an inner diameter of 3mm are suitable.
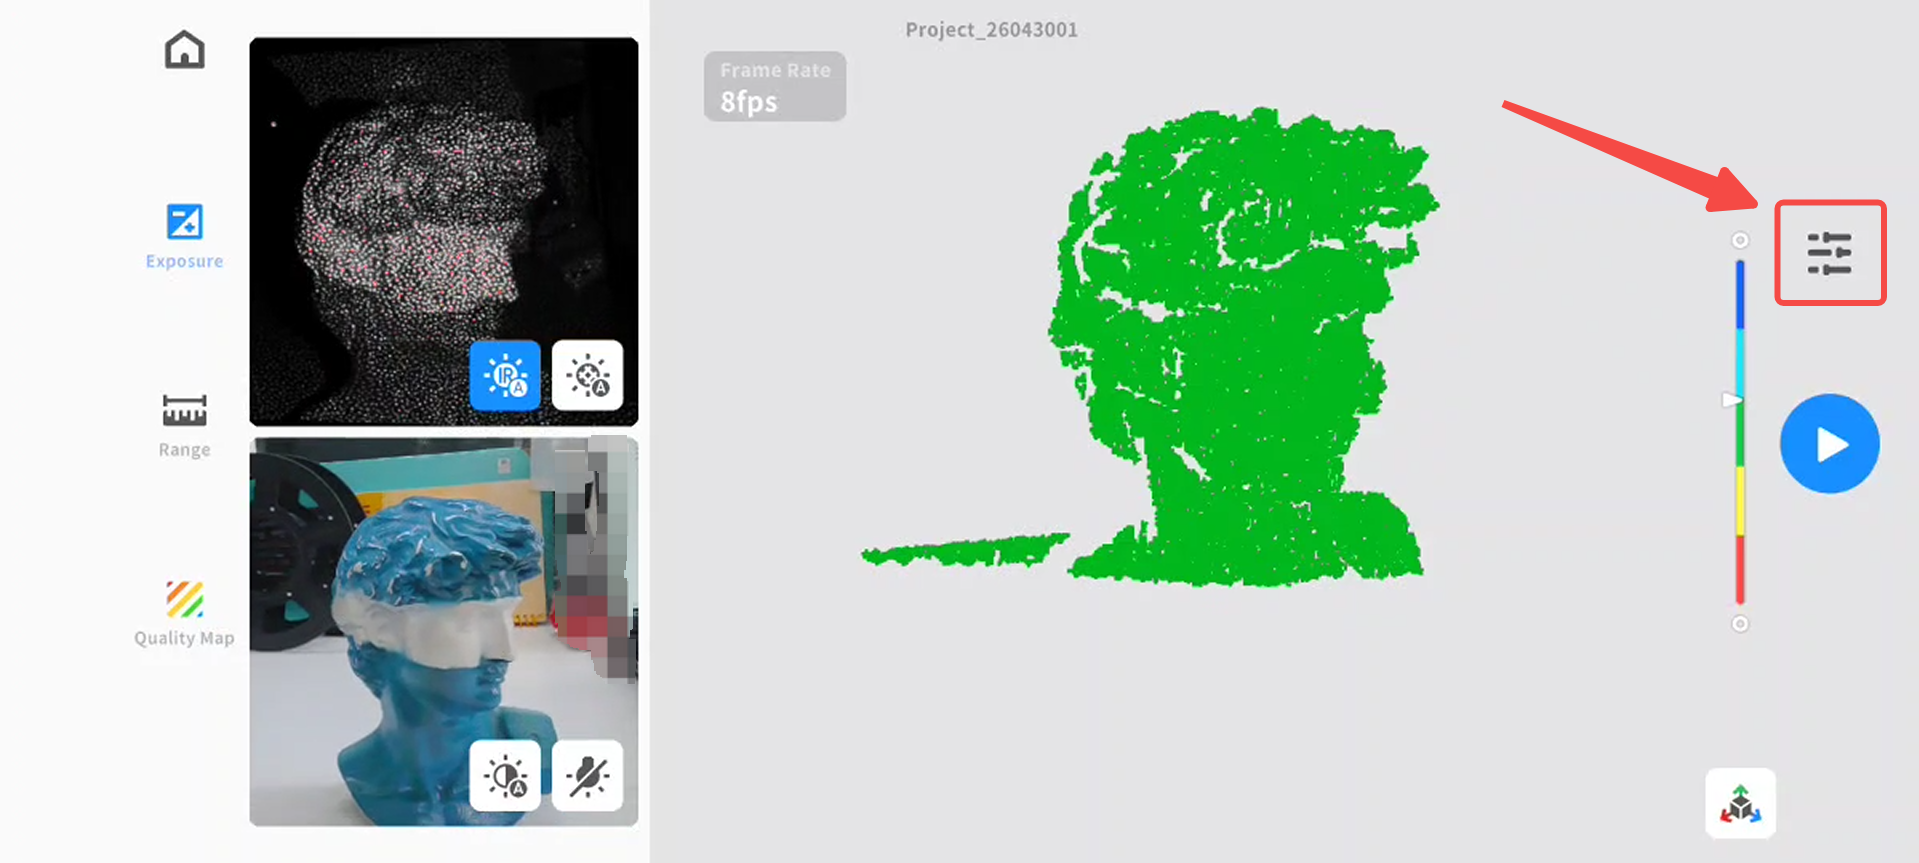
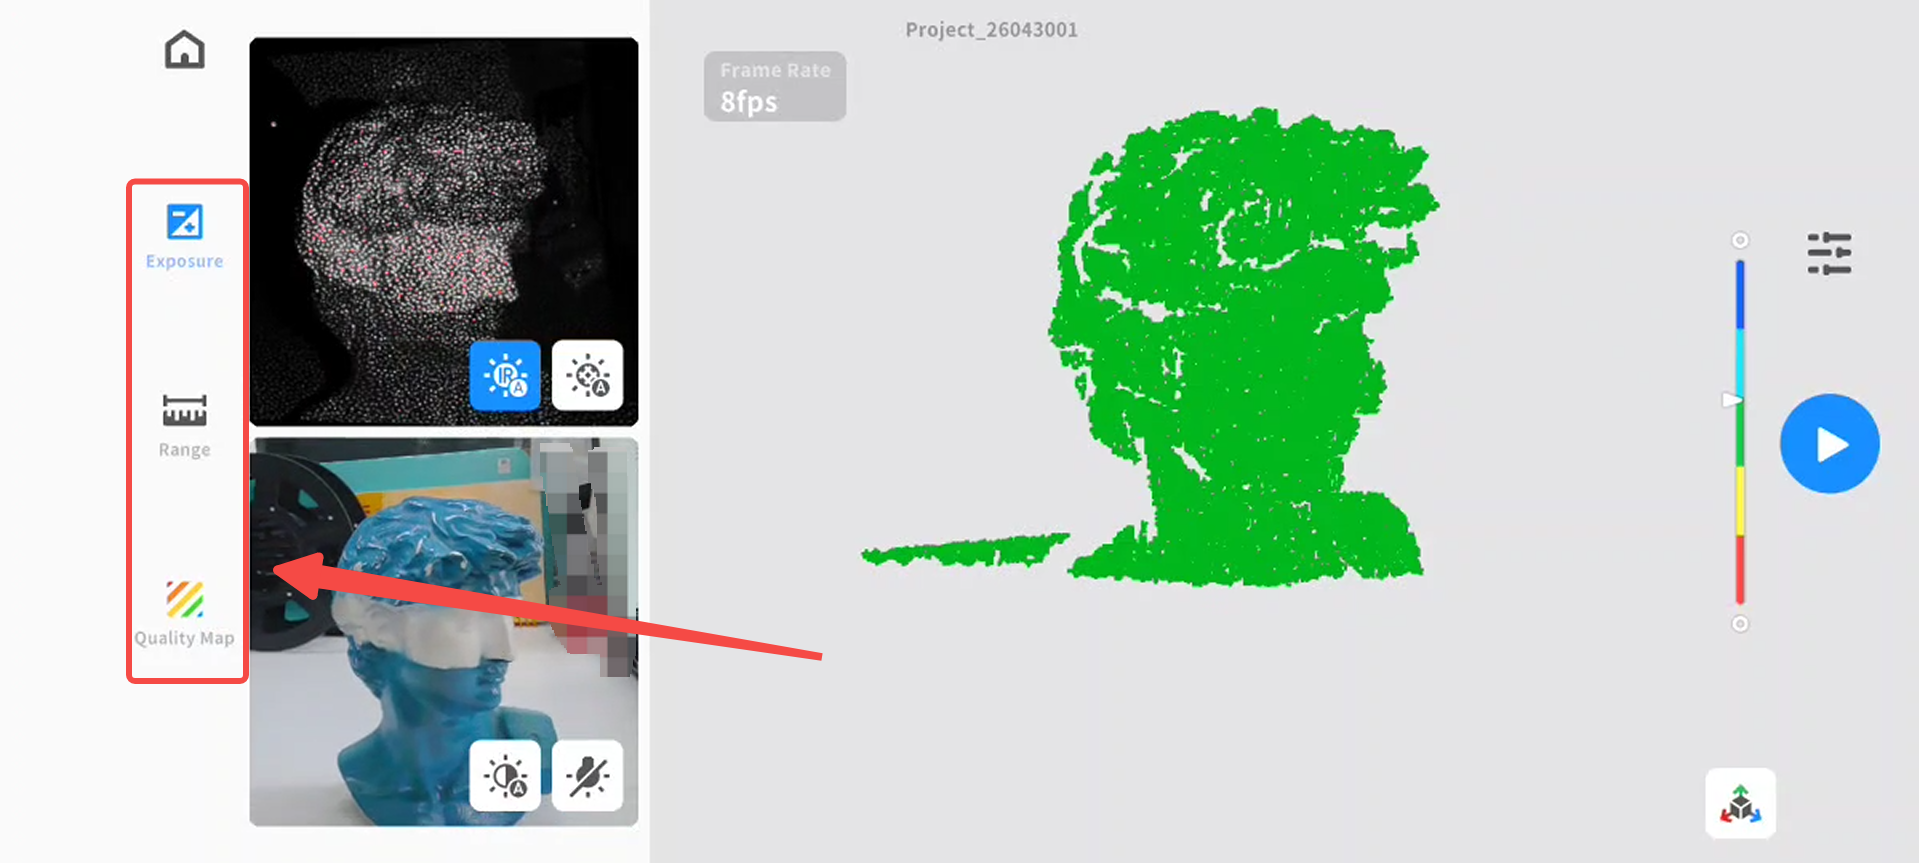
b)The left area includes Exposure Adjustment, Scan Range, and Quality Map settings for auxiliary scanning.
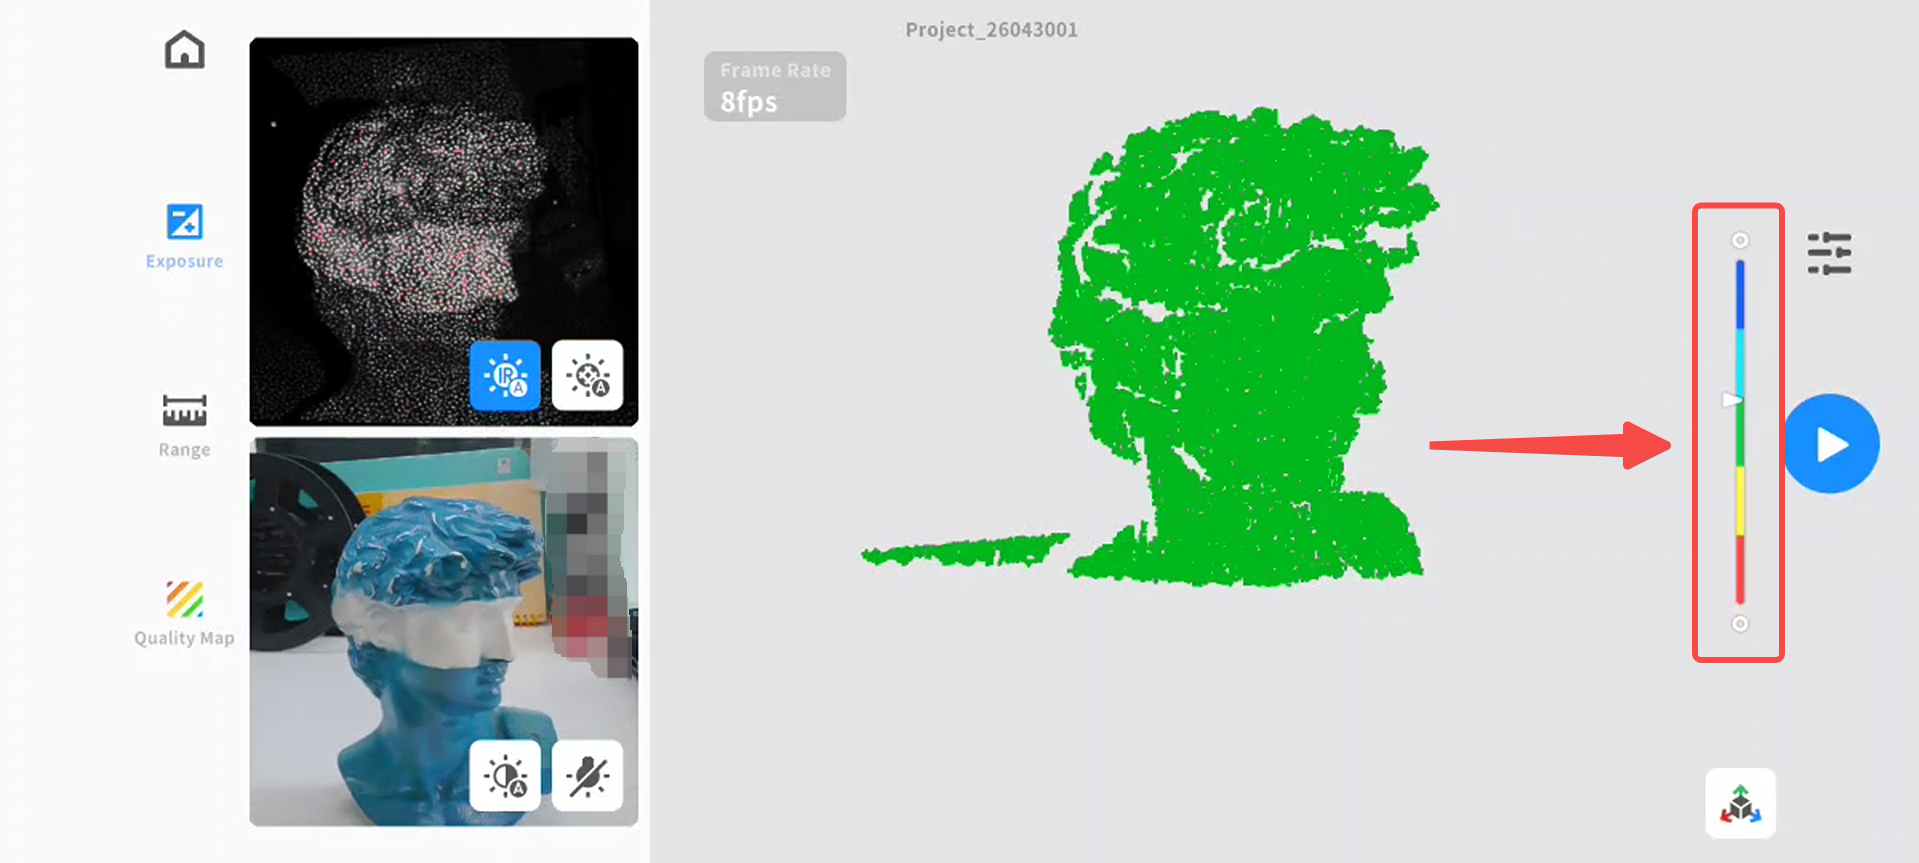
2)Adjust Scan Distance
a)Aim the scanner at the target object
b)Adjust distance according to the on-screen indicator: red means too close, green means optimal distance, and blue means too far.
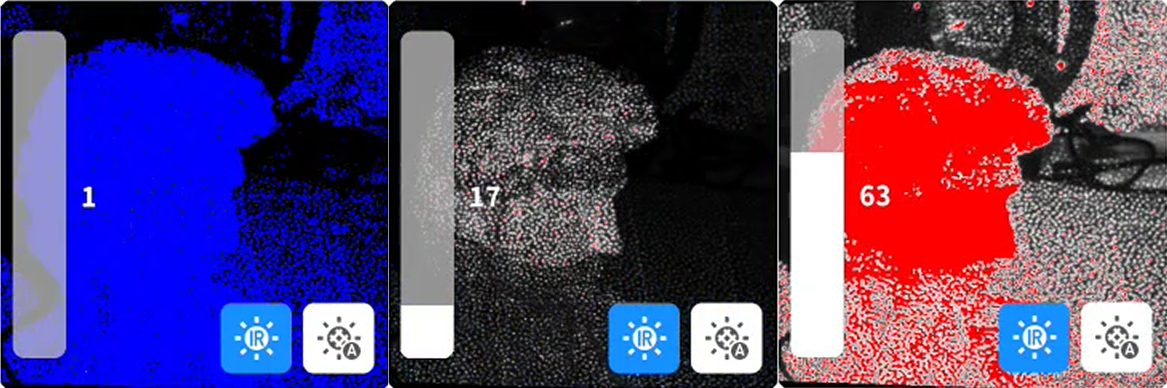
3)Set Exposure
a)The default setting is [Auto Exposure]
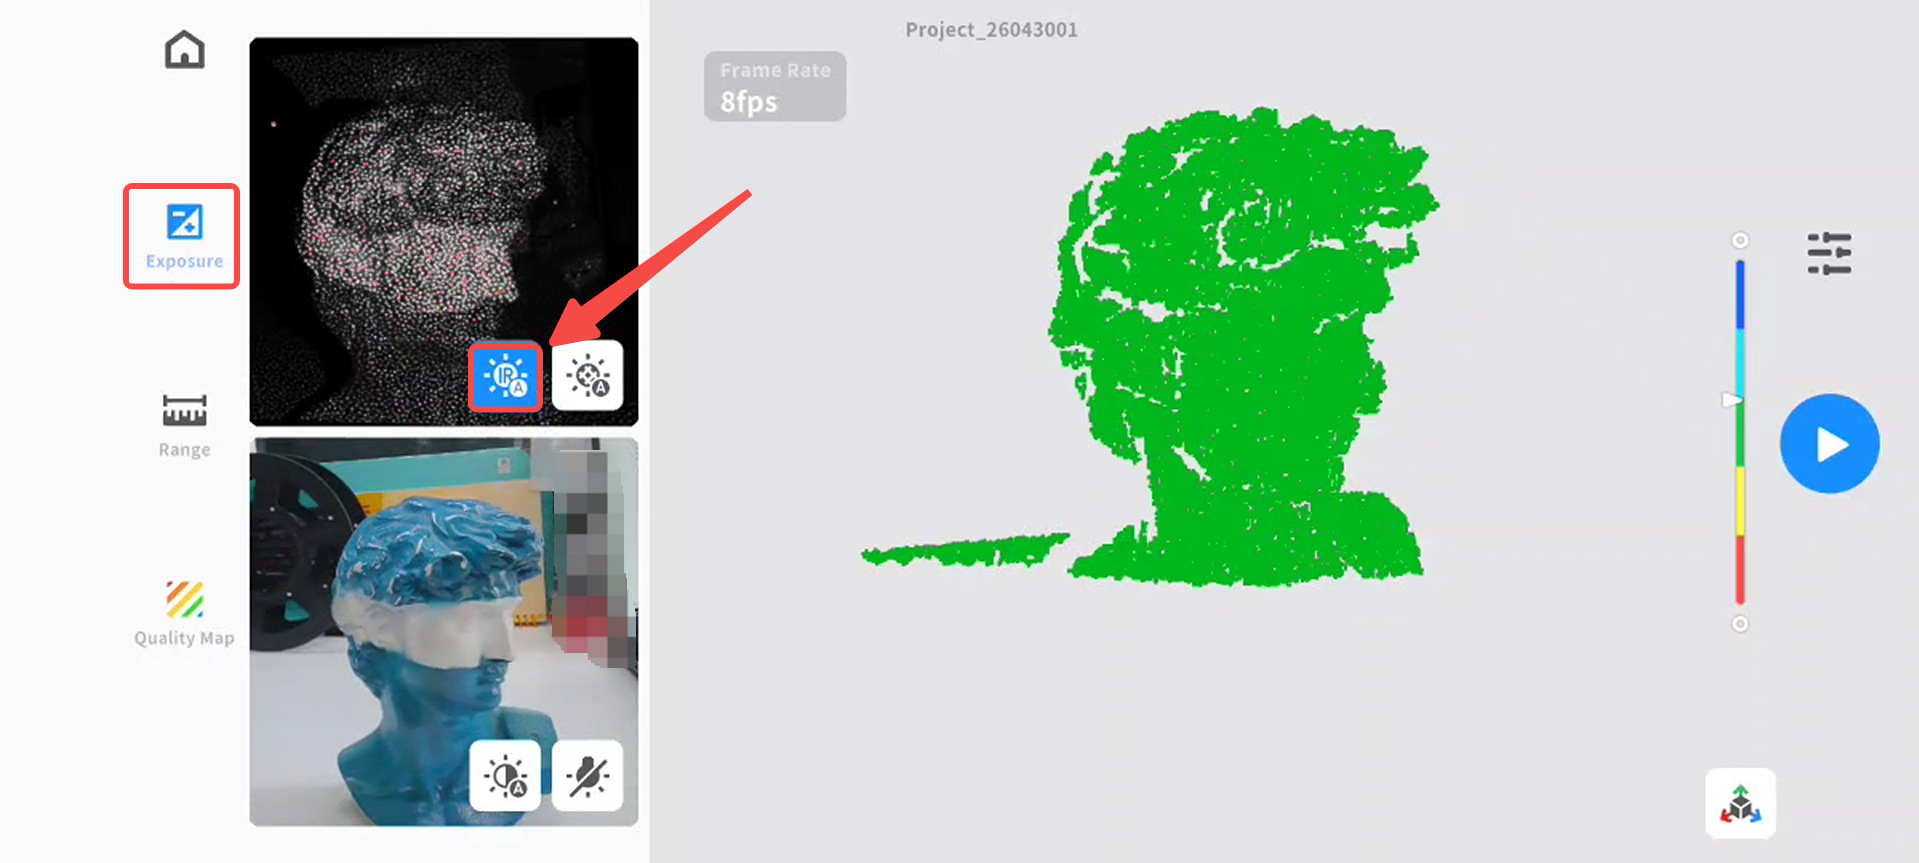
b)For manual adjustment, switch to Manual Mode and adjust the slider:
i)Overexposure → model appears red
ii)Underexposure → model appears blue
iii)As shown in the image below, from left to right: underexposed, ideal exposure, overexposed.
¶ 2.4 Start Scanning
● Tap Start to begin scanning
● Blue Laser Mode: place markers on or around the object
● Infrared Mode: Aim at the object to be scanned, Tap Start, and then move the scanner slowly and steadily
● Follow on-screen instructions for optimal results

¶ 2.5 Process & Share Model
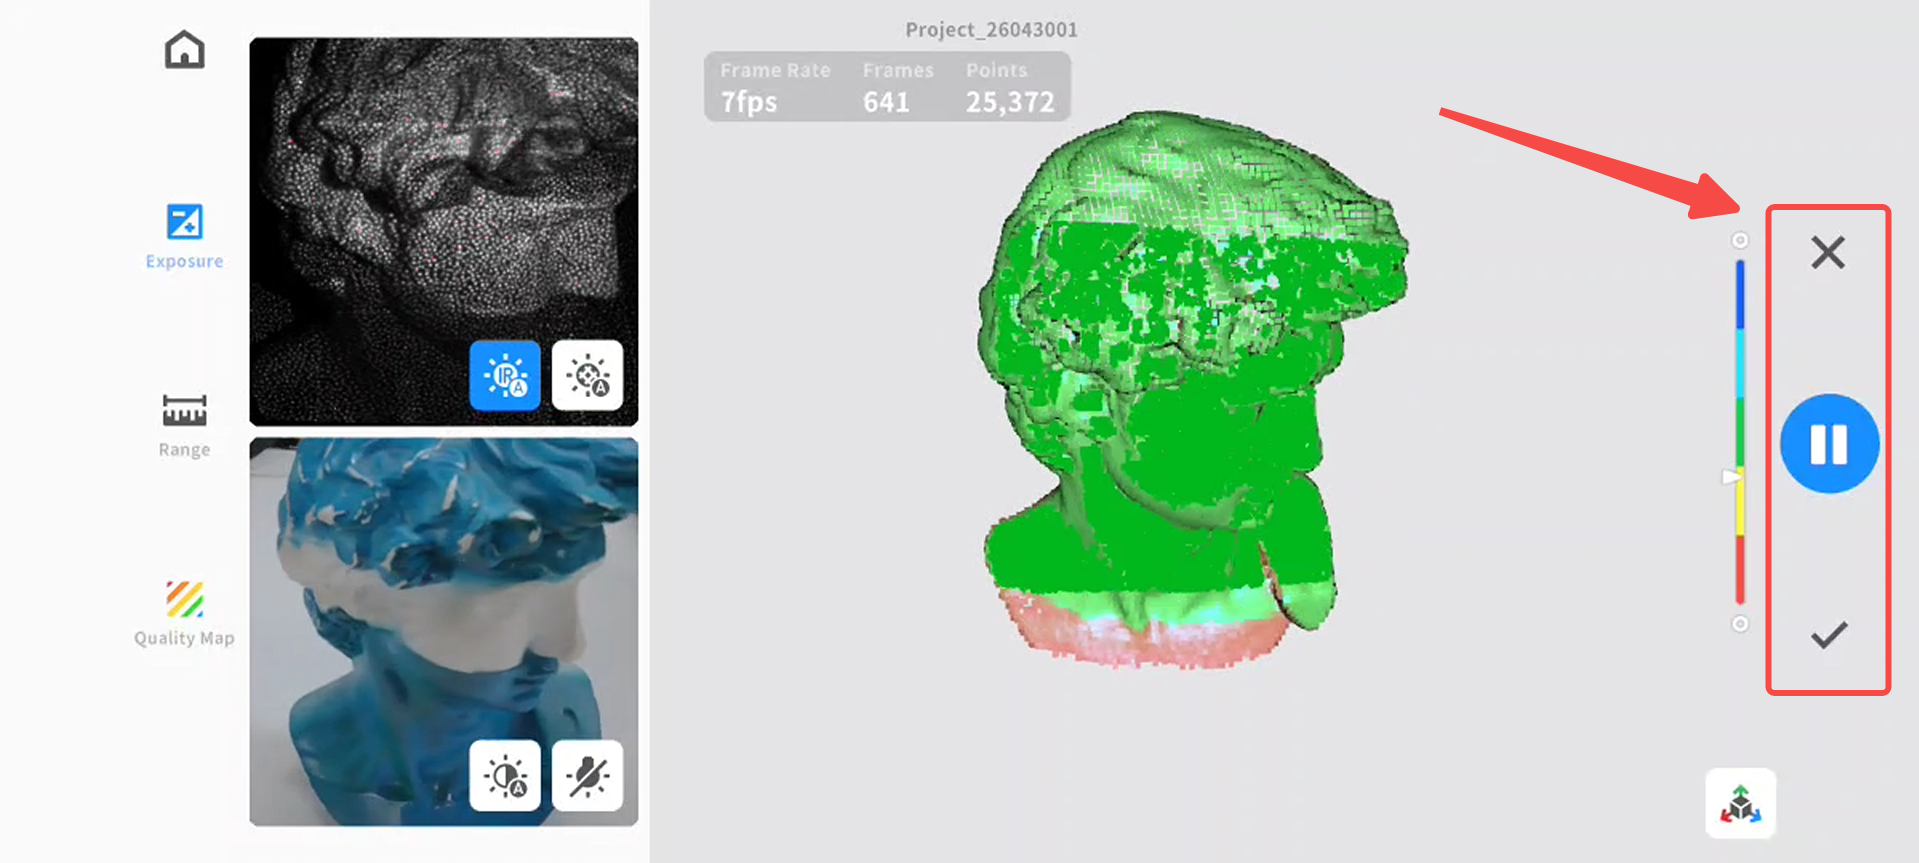
1)During Scan
a)Pause at any time using the Pause button
b)When paused, rotate the view angel to check the scanned model
c)Tap Finish to enter post-processing
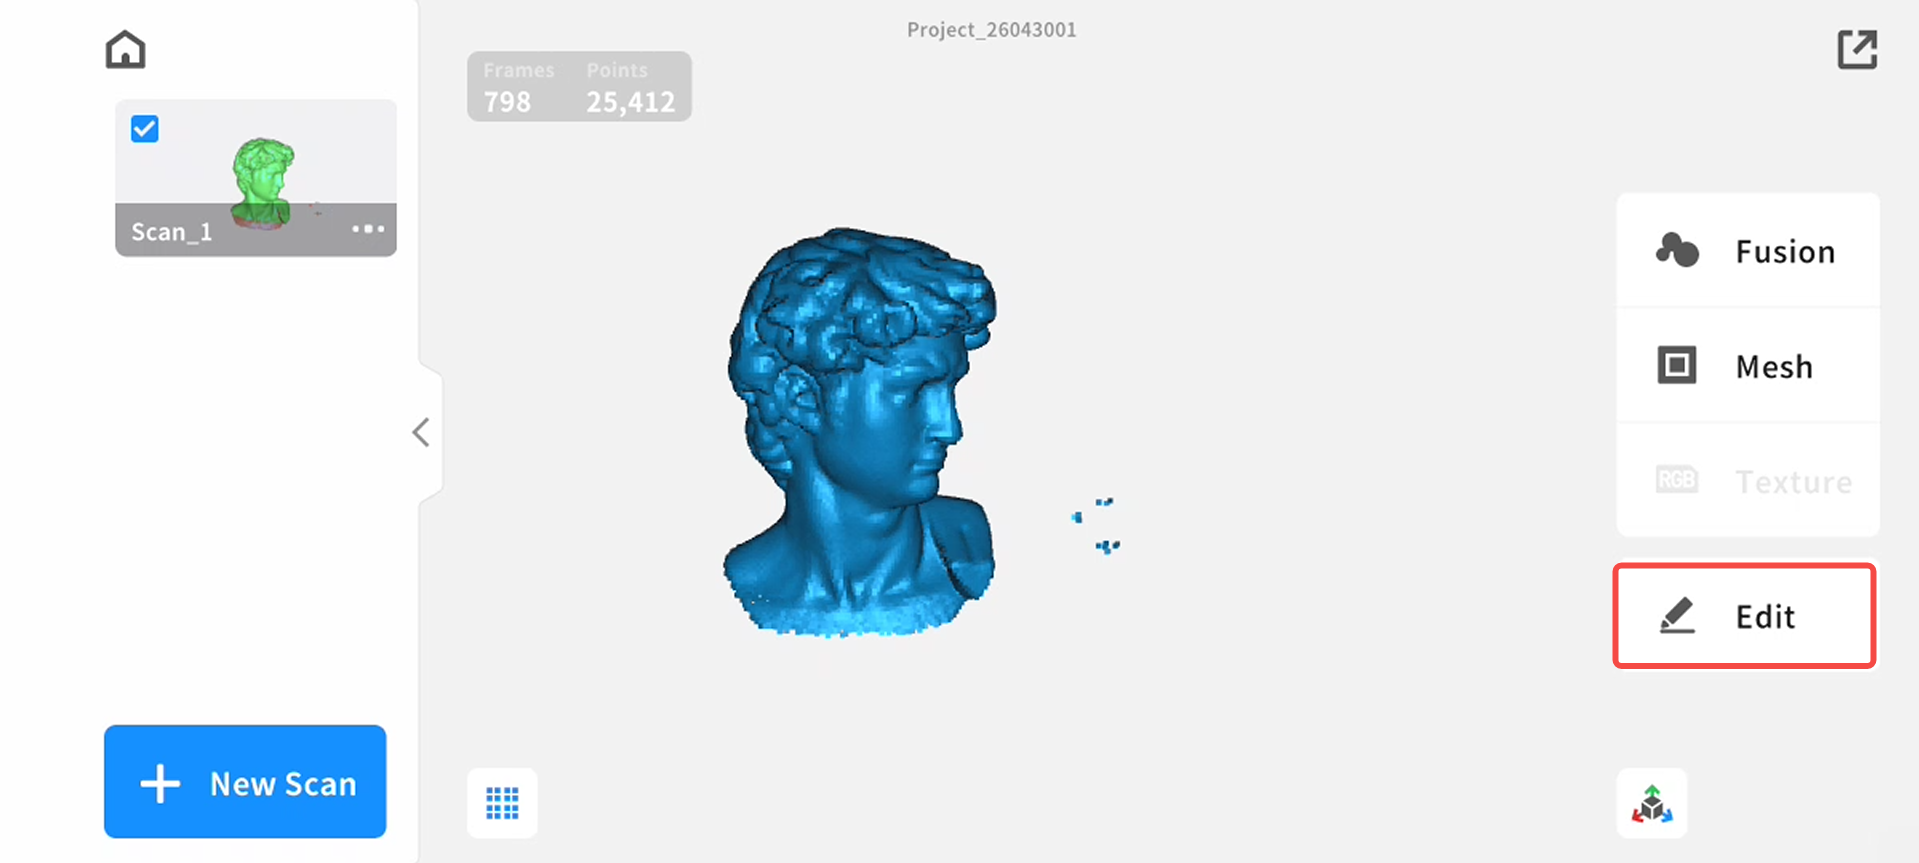
2)Post-Processing
a)Edit Model: Remove unnecessary data or crop unwanted areas
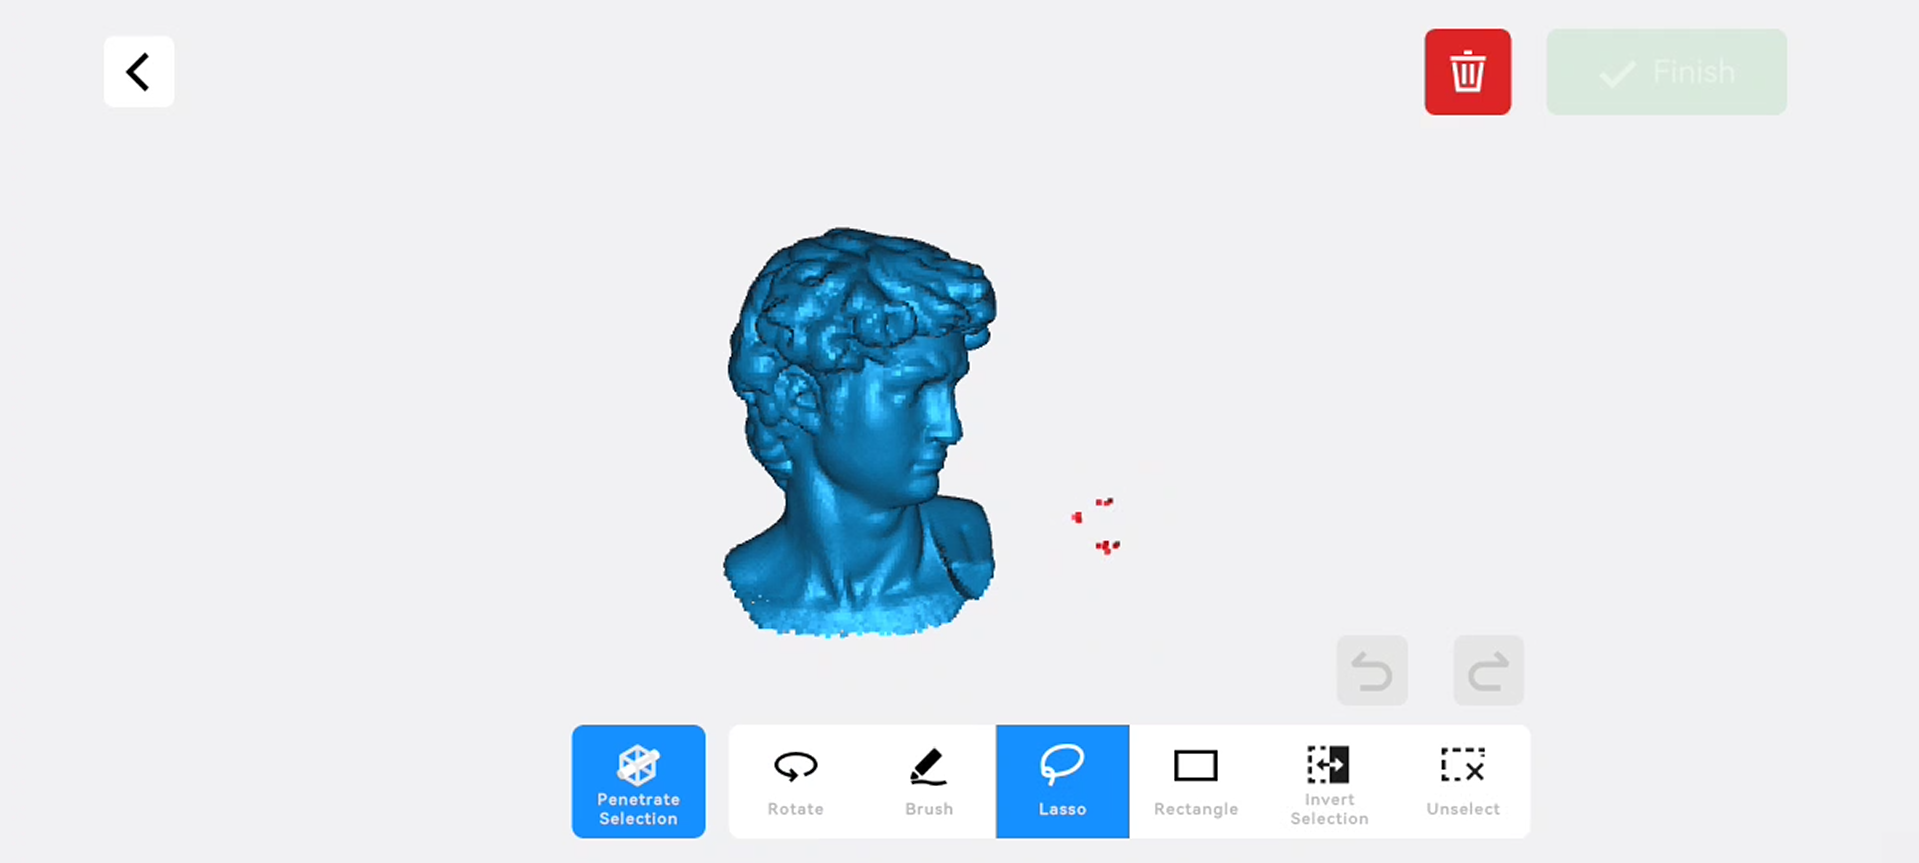
Tap Edit to enter the edit interface, which includes the following tools:
i)Penetrate Selection - Supports selecting the point cloud/mesh behind the selected area.
ii)Rotate – Touch and drag on the screen to rotate the view and inspect the model.
iii)Brush – Swipe your finger on the screen to delete point cloud data.
iv)Lasso Select– Touch and drag your finger on the screen to draw an area.
v)Rectangle Select– Selects an area in a rectangular shape.
vi)Invert Selection – Automatically selects the unselected area (opposite of the current selection).
vii)Unselect – Cancels the current selection.
viii)Undo – Reverses the last deletion operation.
ix)Redo – Restores the last undone deletion operation.
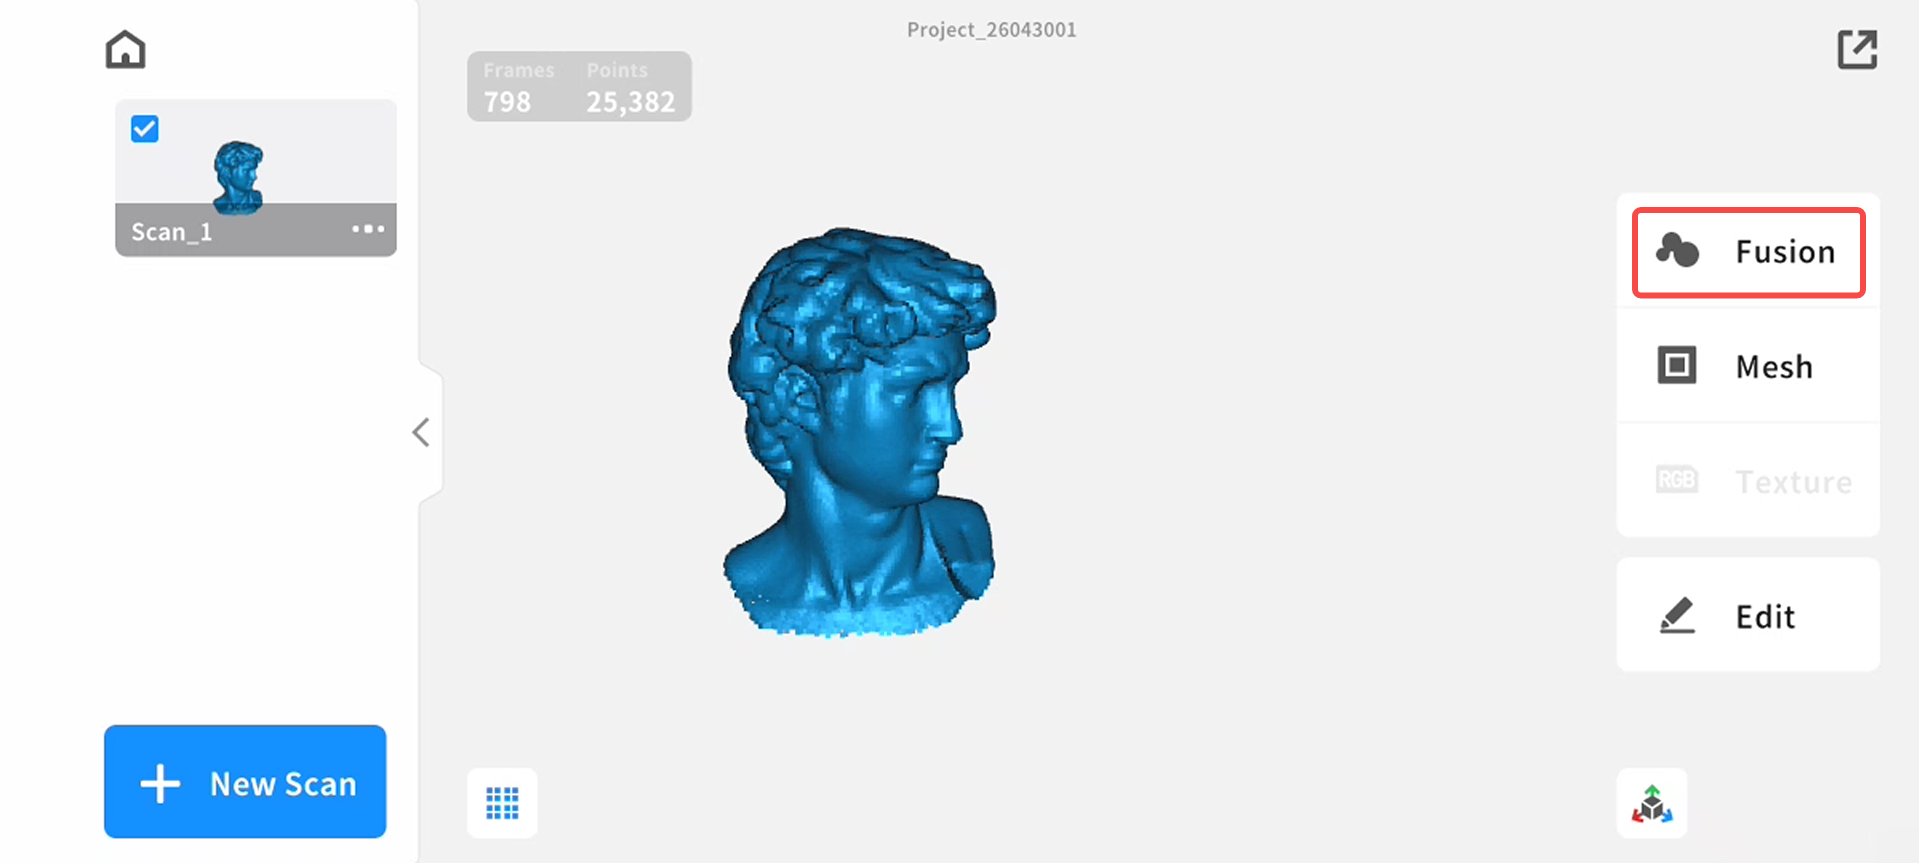
b)Fusion:
Merge point cloud data into a complete model
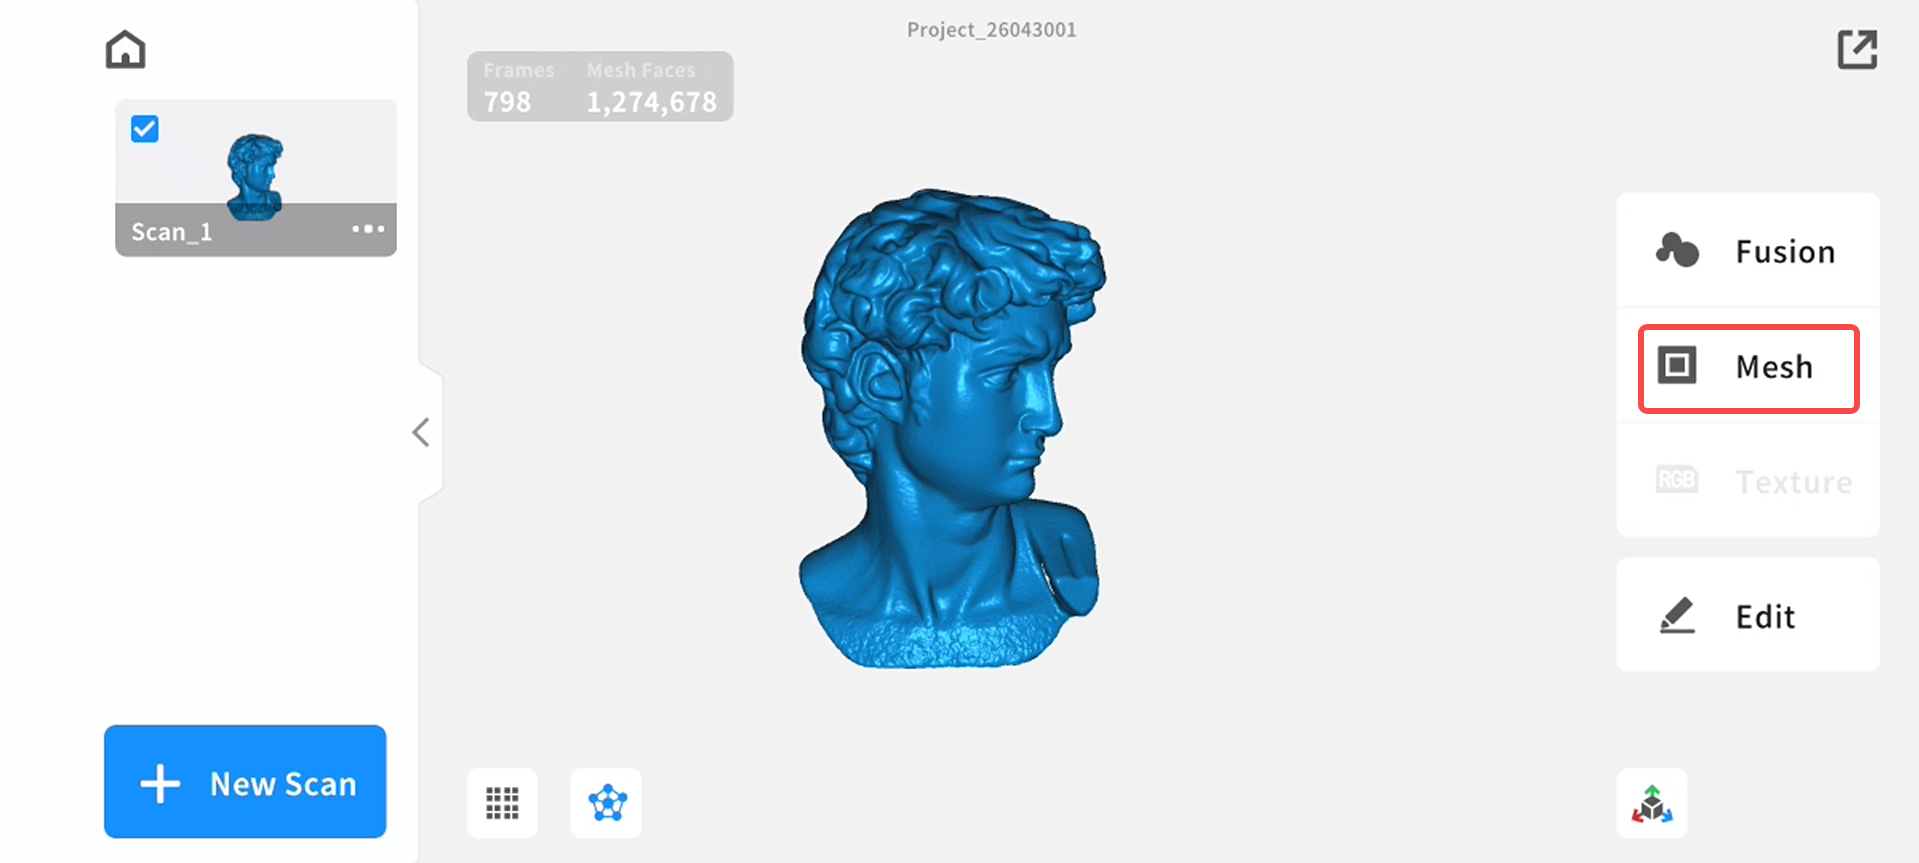
c)Meshing:
Generate a closed mesh model
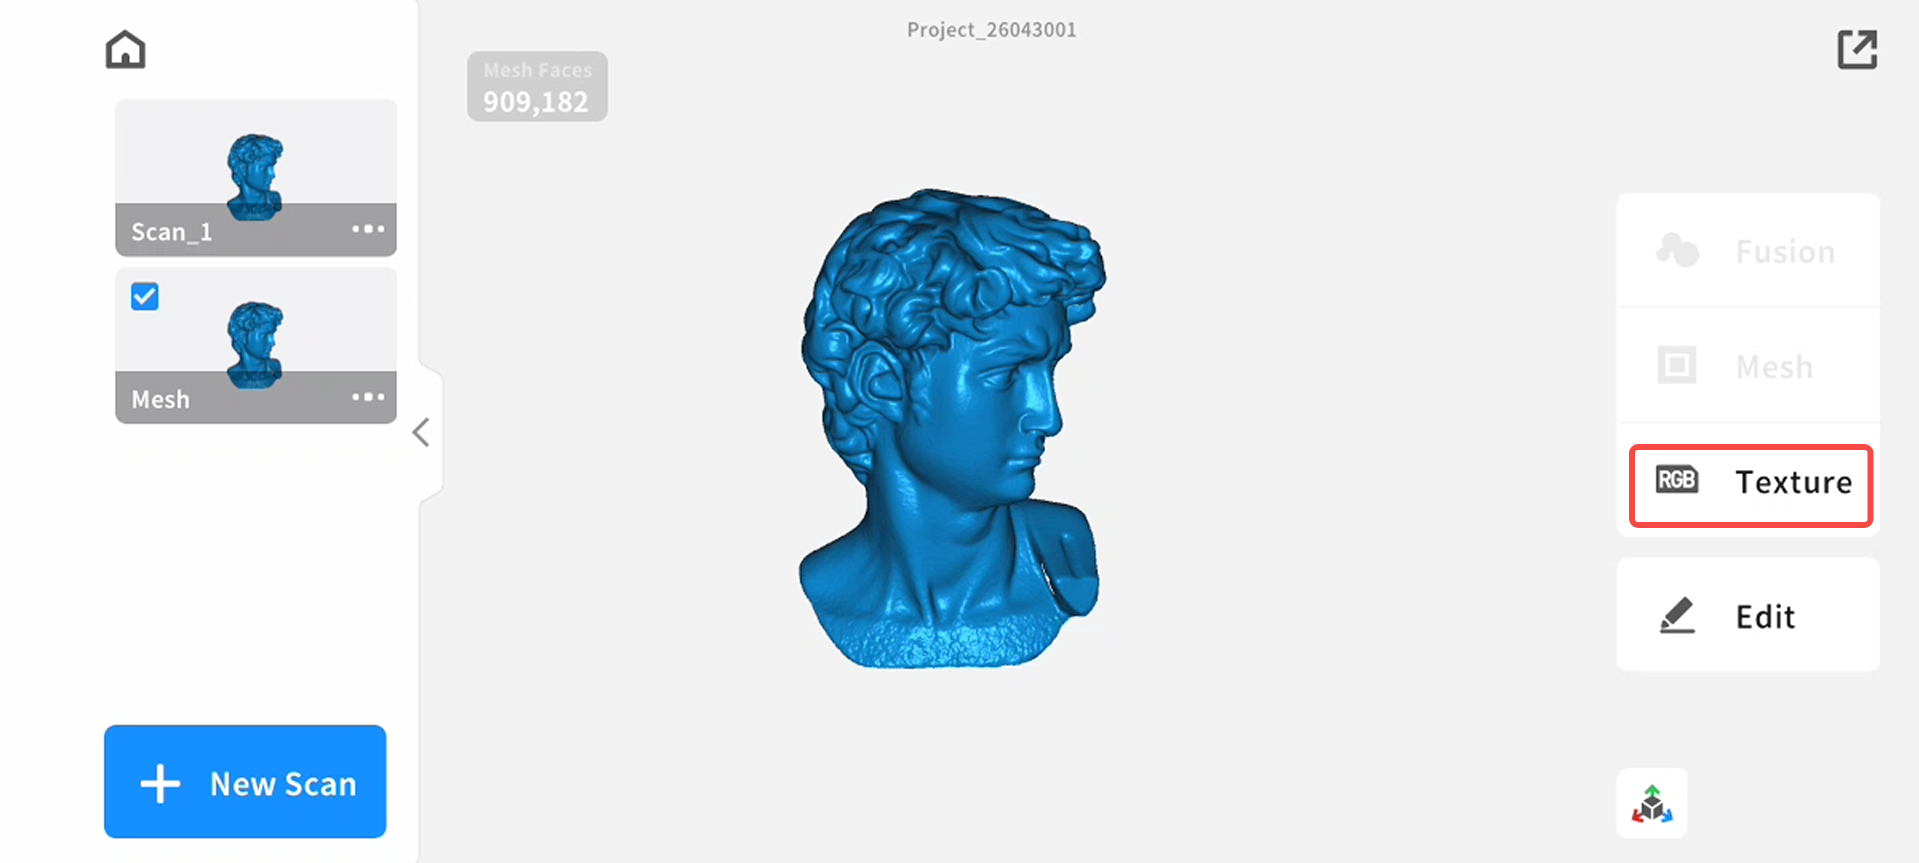
d)Texture:
Apply RGB texture on the model if color mapping is enabled
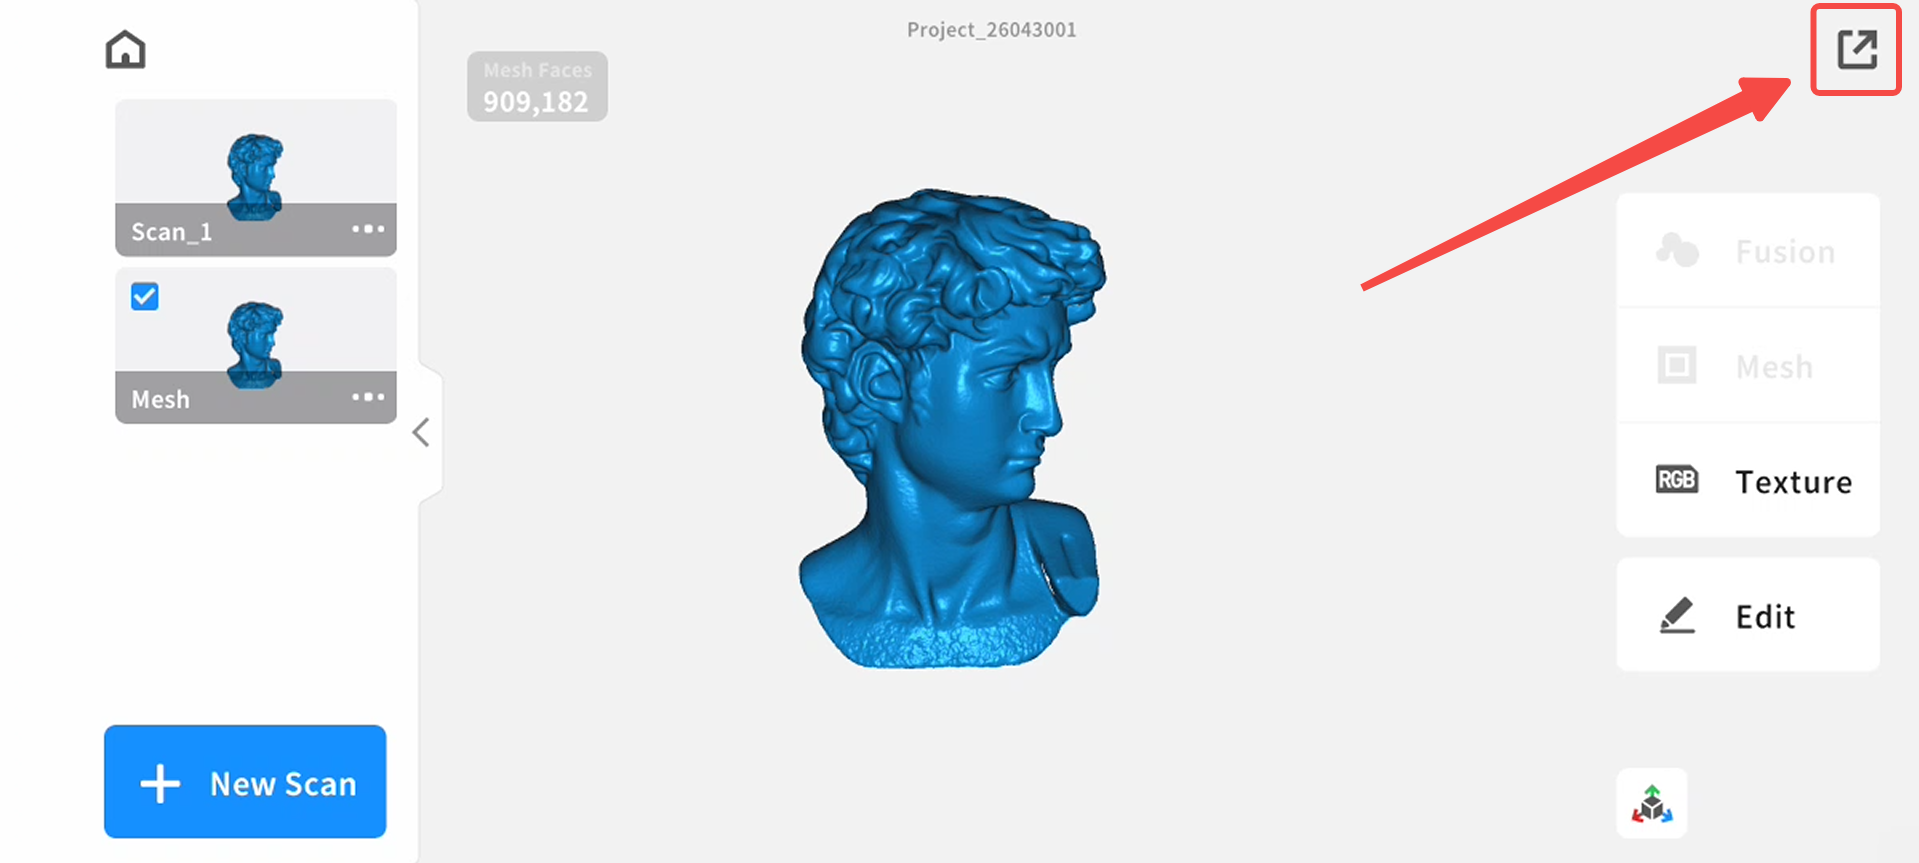
3)Share Model
a)Tap Share in the top-right corner. Choose a sharing method; you can export in PLY, STL, OBJ, ASC formats, or all formats together.
b)Choose either:
i)Share via Mobile Apps (social or storage apps)
ii)Share to PC (follow on-screen instructions)
¶ 3. APP Interface Overview
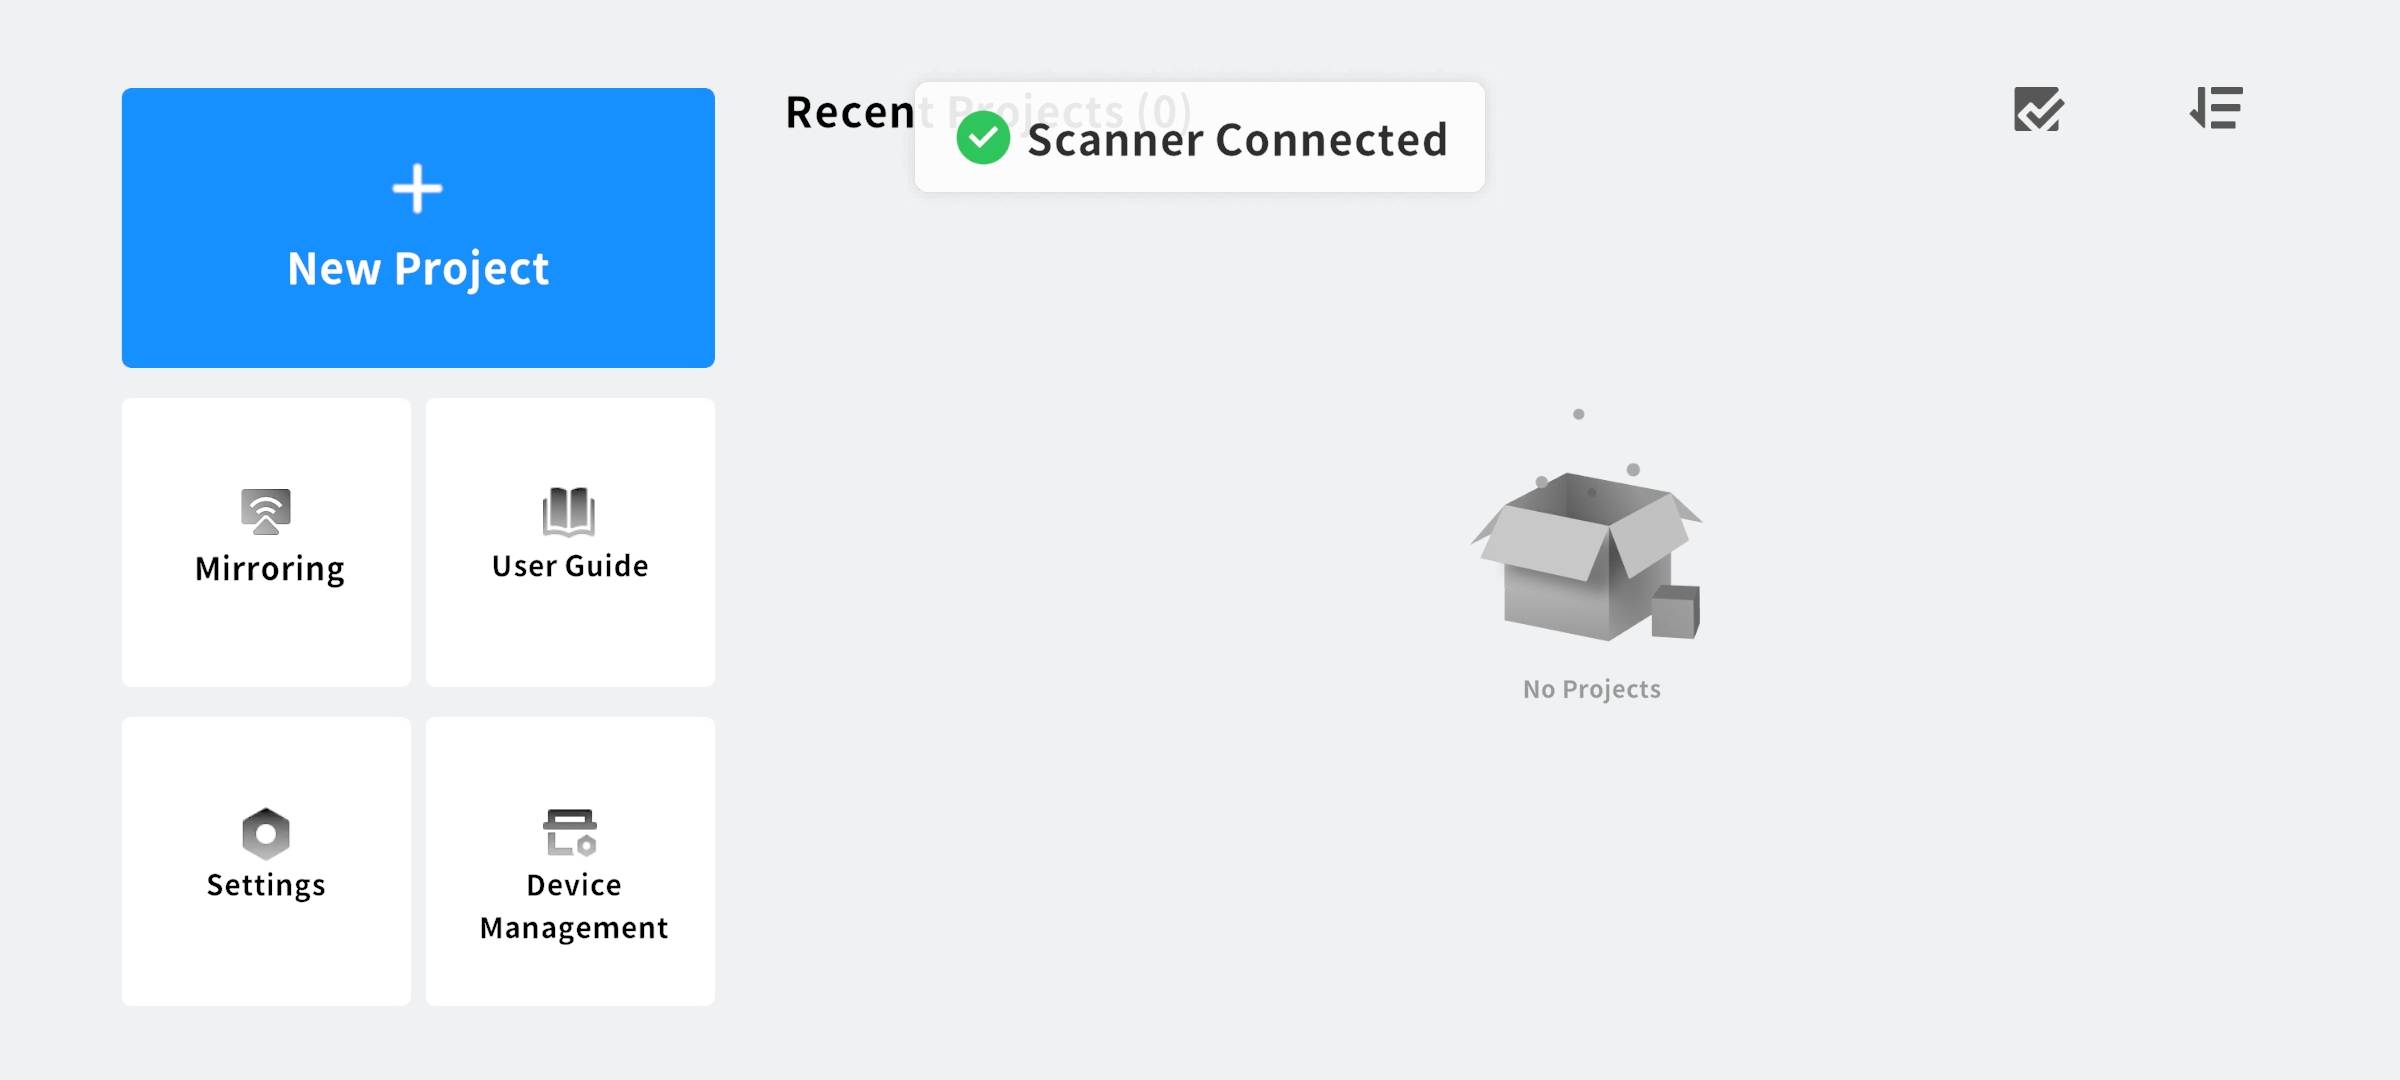
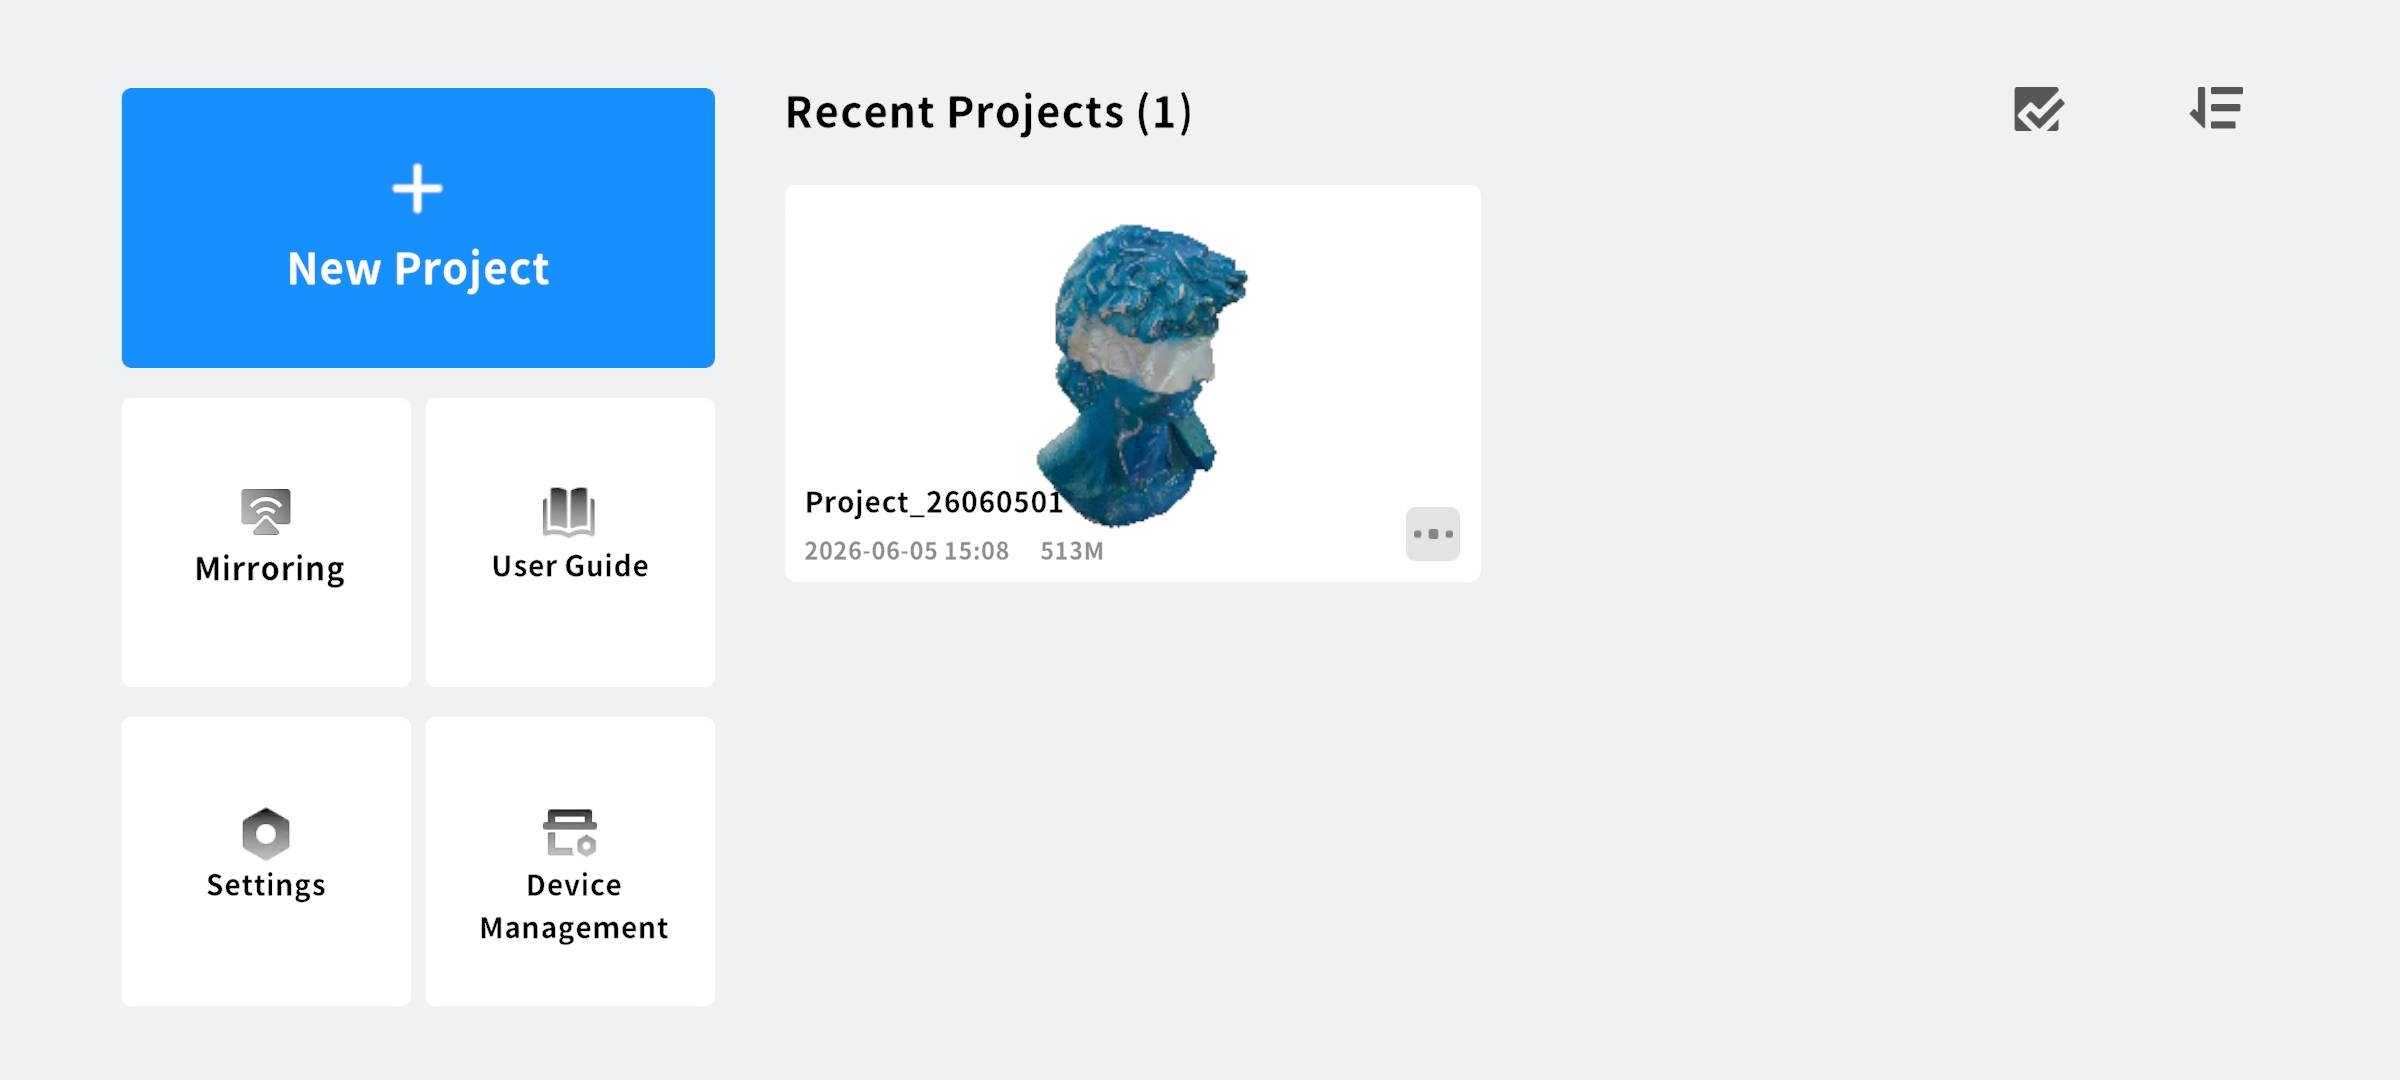
¶ 3.1 Home
● Scan Entry: Quickly create a new scan project
● Project List: View history projects
● Device Status: Display current connection status
● Mirroring: Display the scanning view from the computer on a mobile device
● User Guide: Access the app user guide
● Settings: Enter system and preference options
● Device Management: Enter device info page
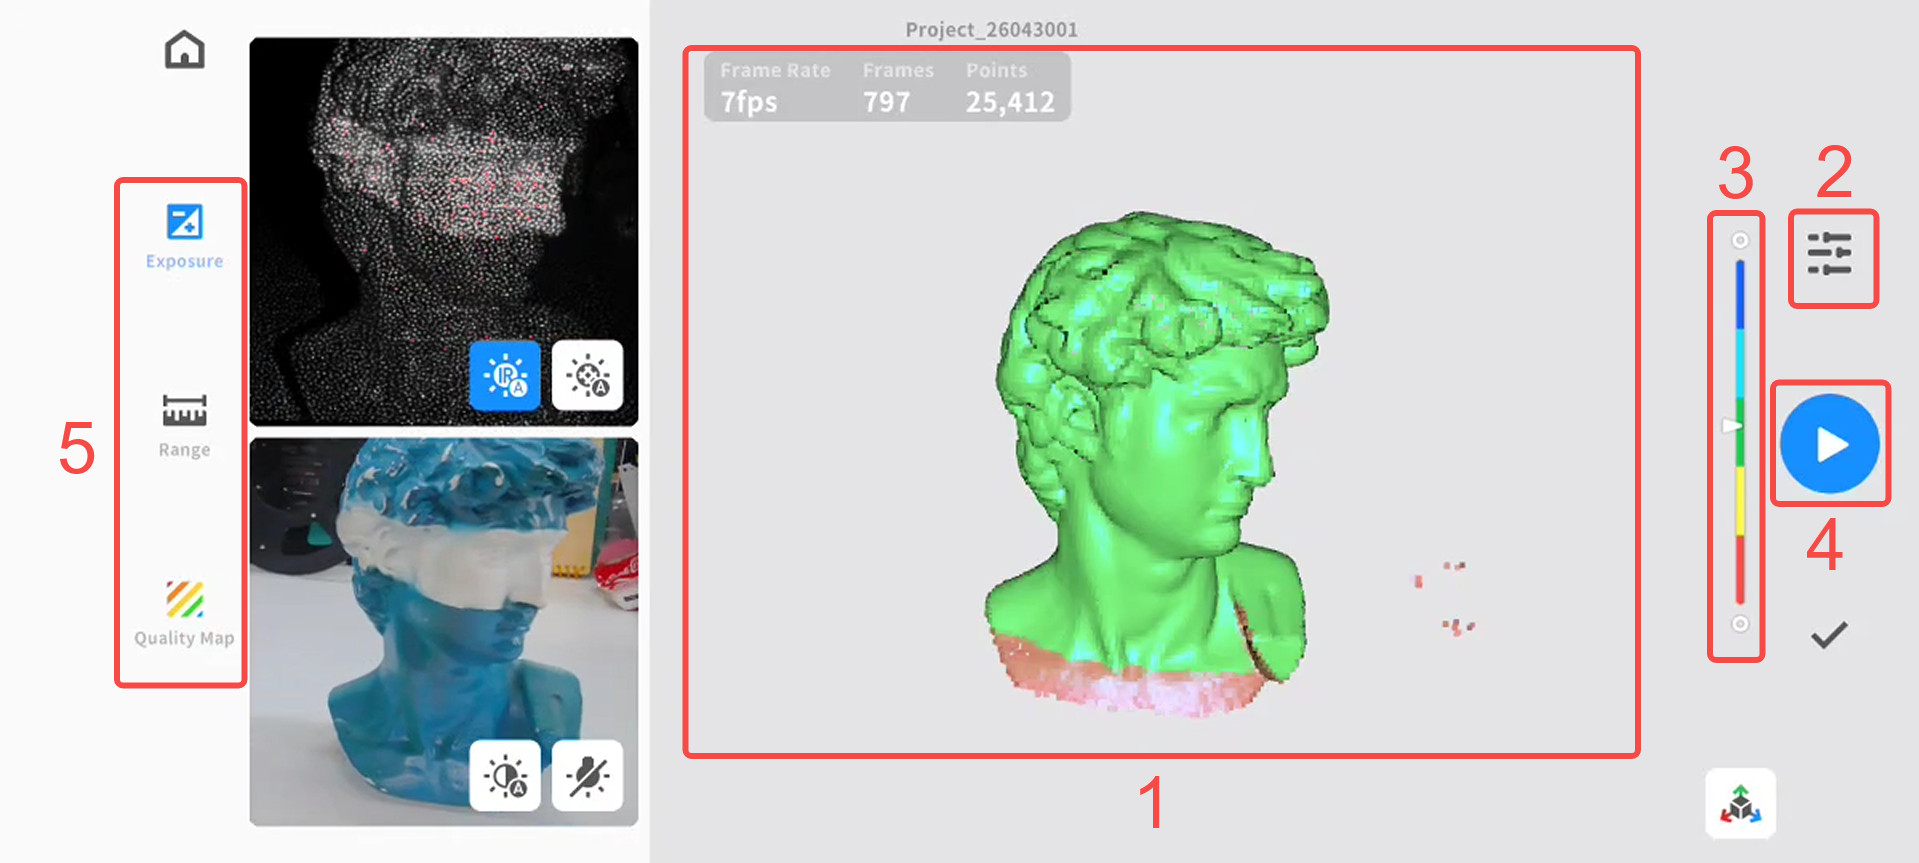
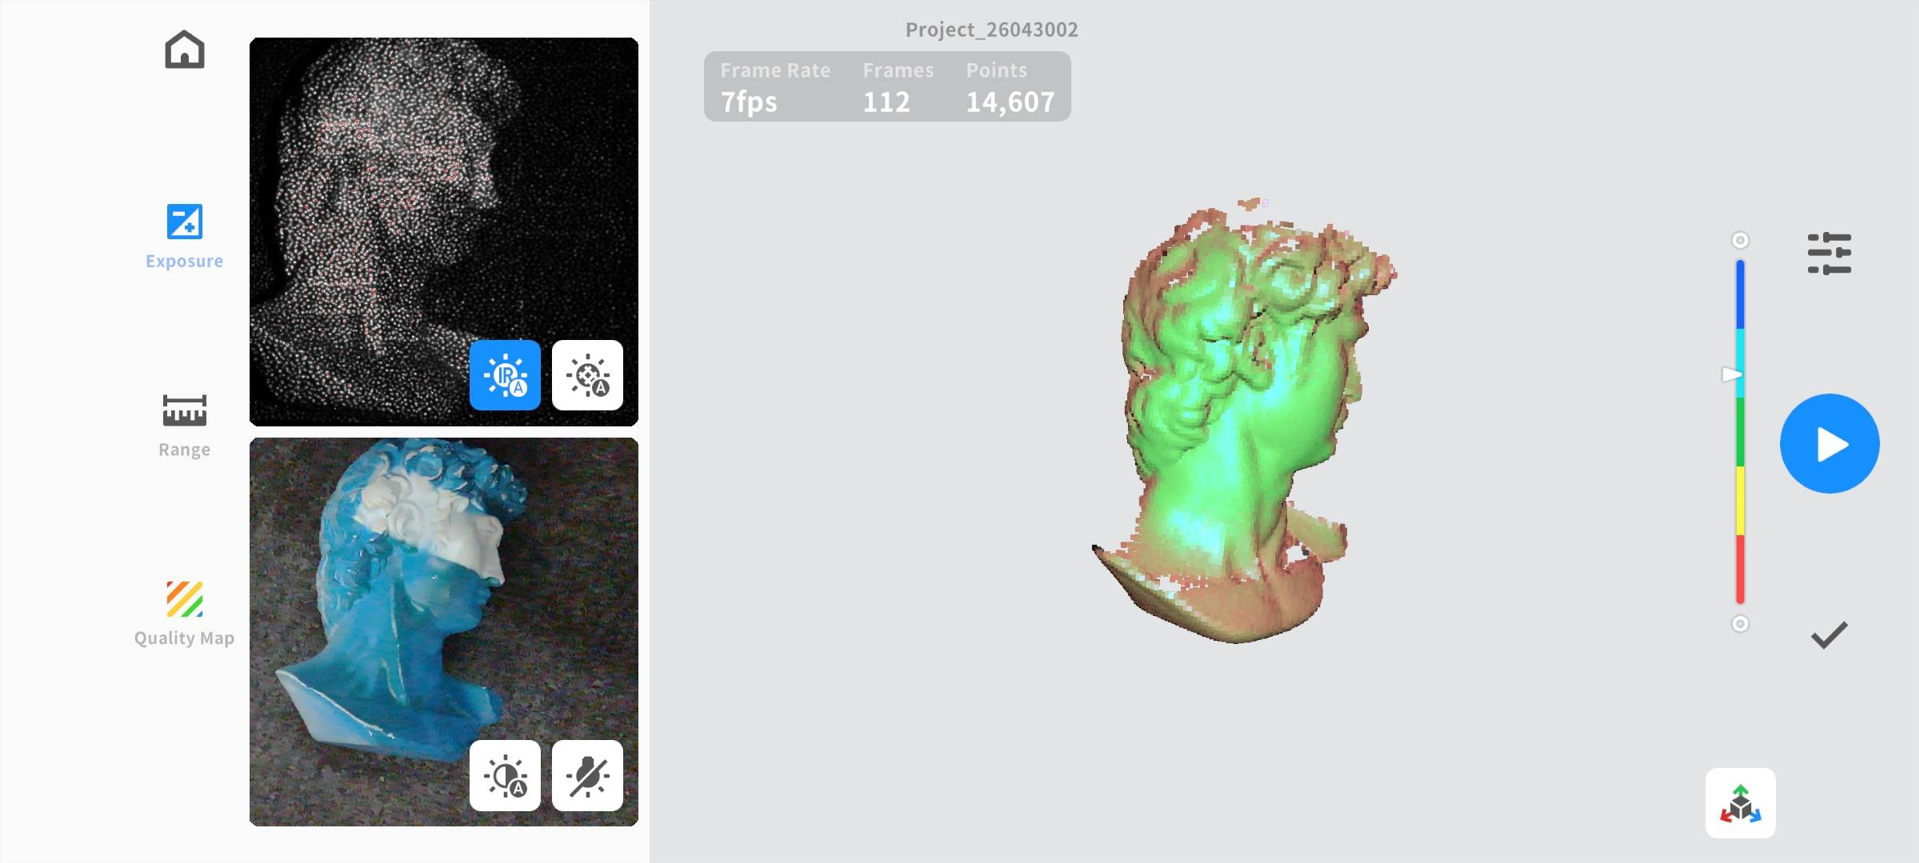
¶ 3.2 Scan Interface
1. Real-time Scan View: Display the scanning process and model generation
2. Scan Parameters: Adjust scanning mode
3. Real-time Feedback: display distance prompts
4. Scan Control Buttons: Start, pause, stop scanning
5. Tool Group Settings: Auxiliary scanning tools
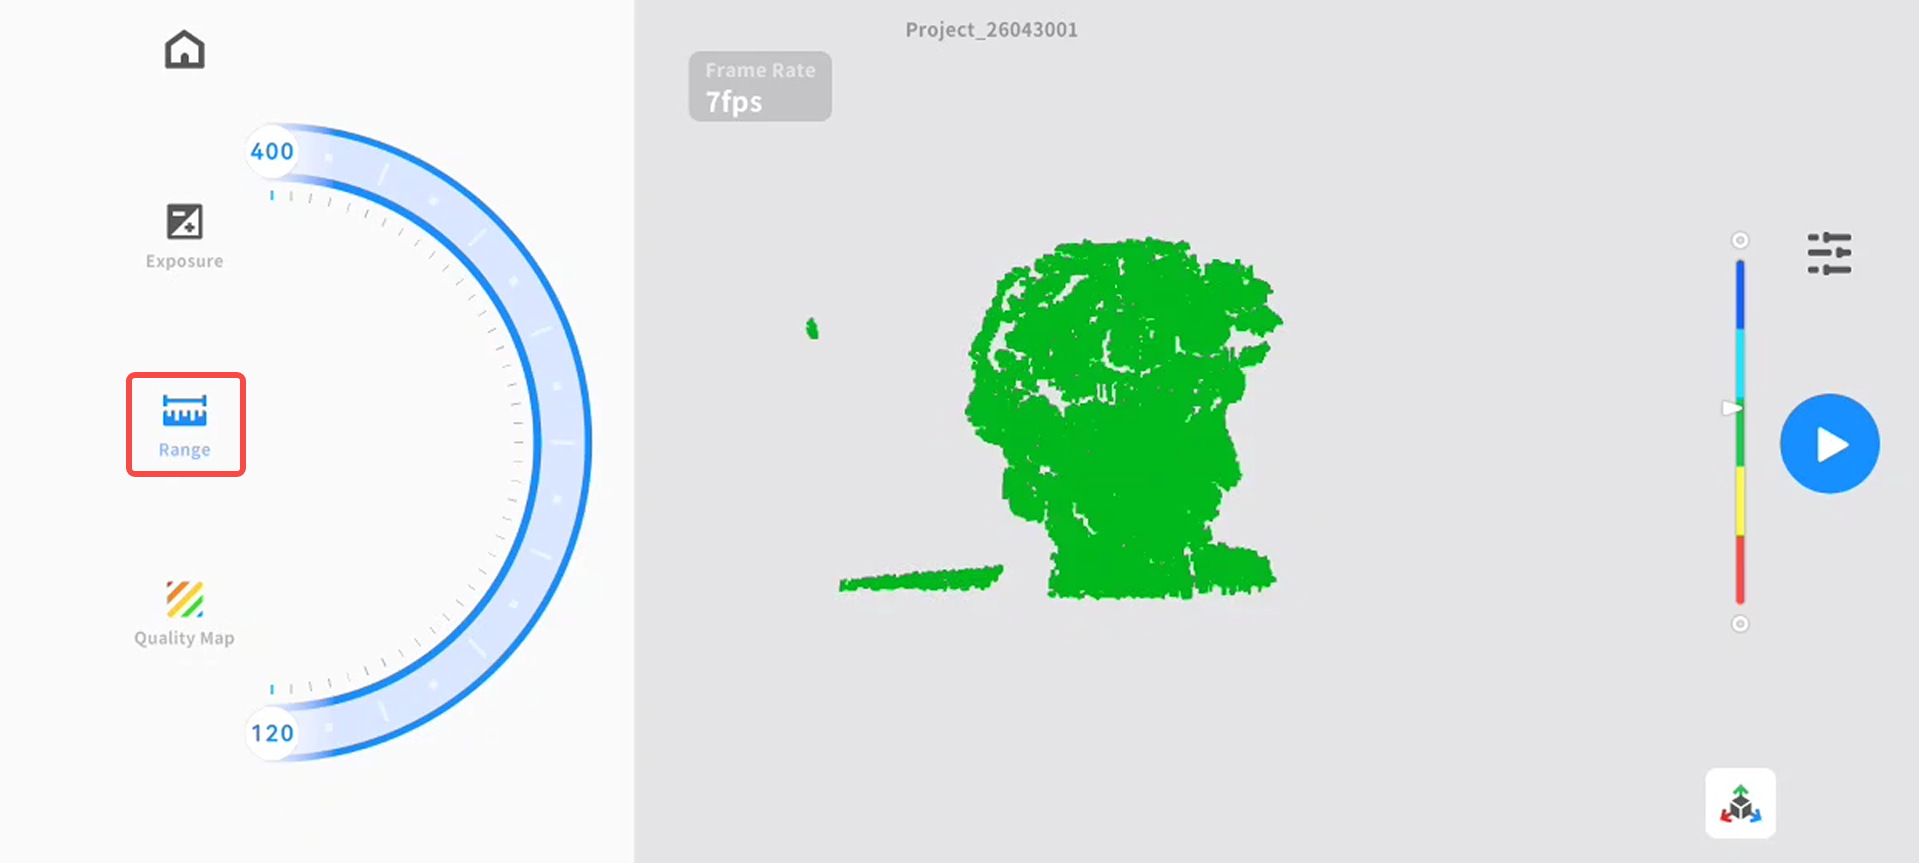
Scanning Range Introduction
Supports adjusting the distance range for point cloud collection. Point clouds outside this range will not be collected or displayed in the real-time scan view area.
Quality Map Introduction
The quality map helps you confirm the scan quality.
Blue laser mode: Continue scanning until the quality map on the model turns blue. Yellow indicates insufficient scanning.
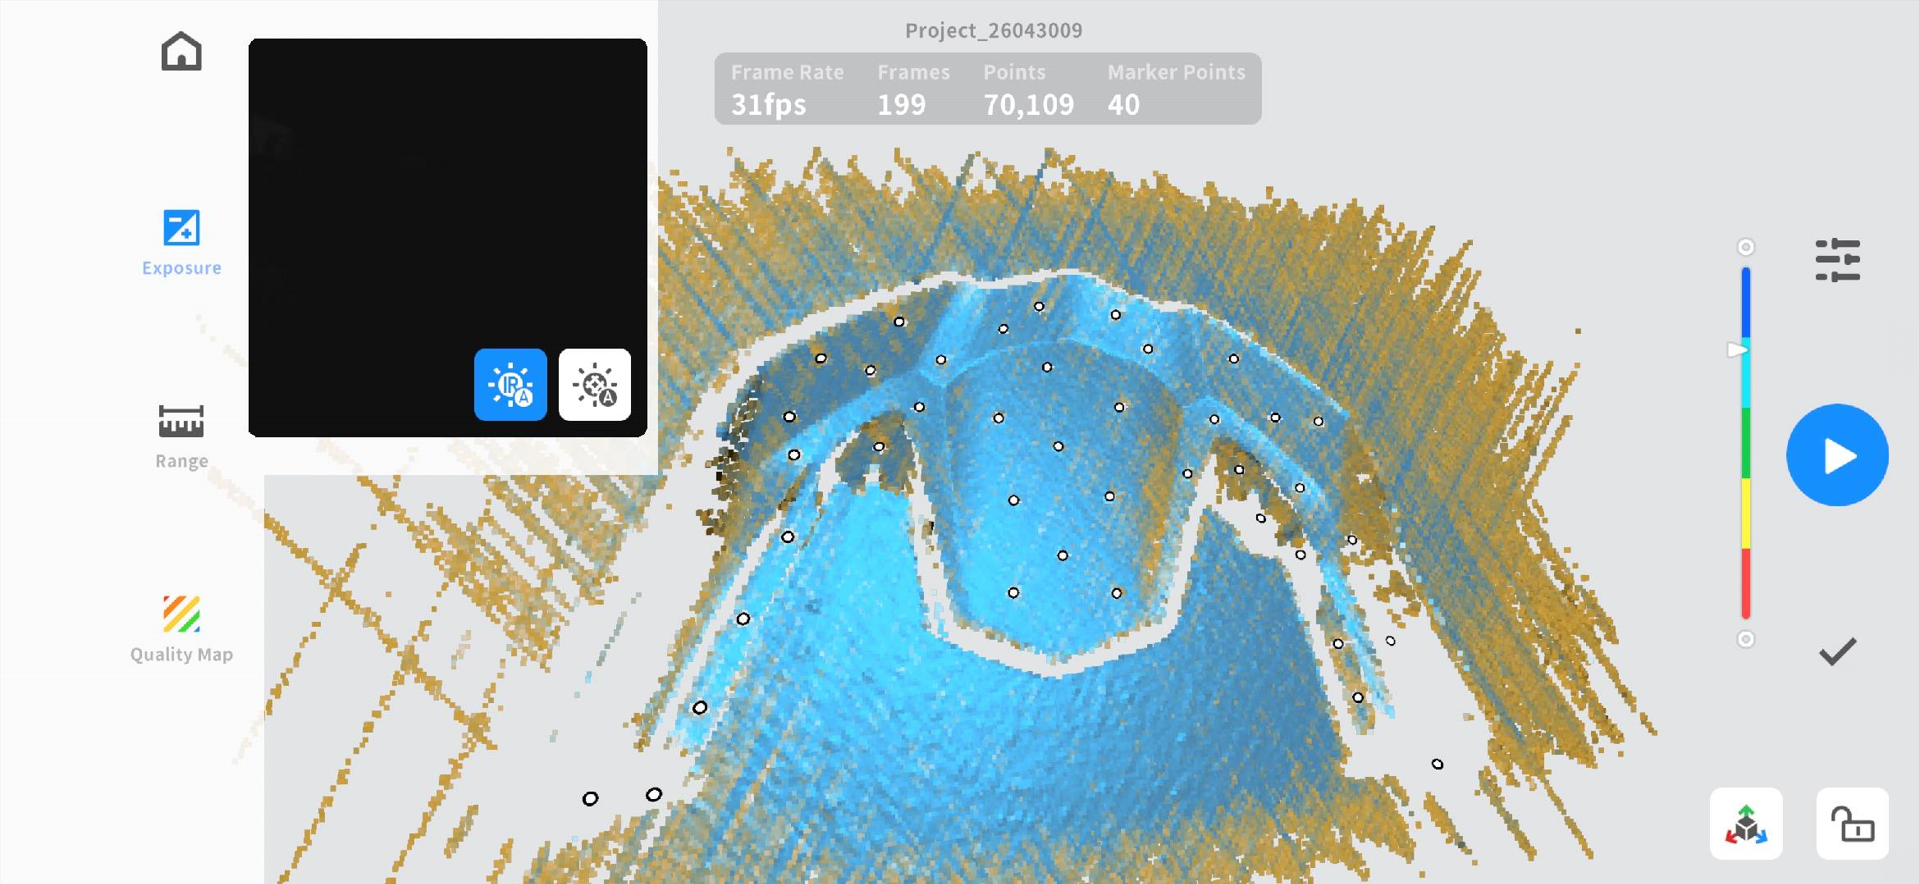
Infrared structured light mode: Green indicates sufficient scanning, while red indicates insufficient scanning.
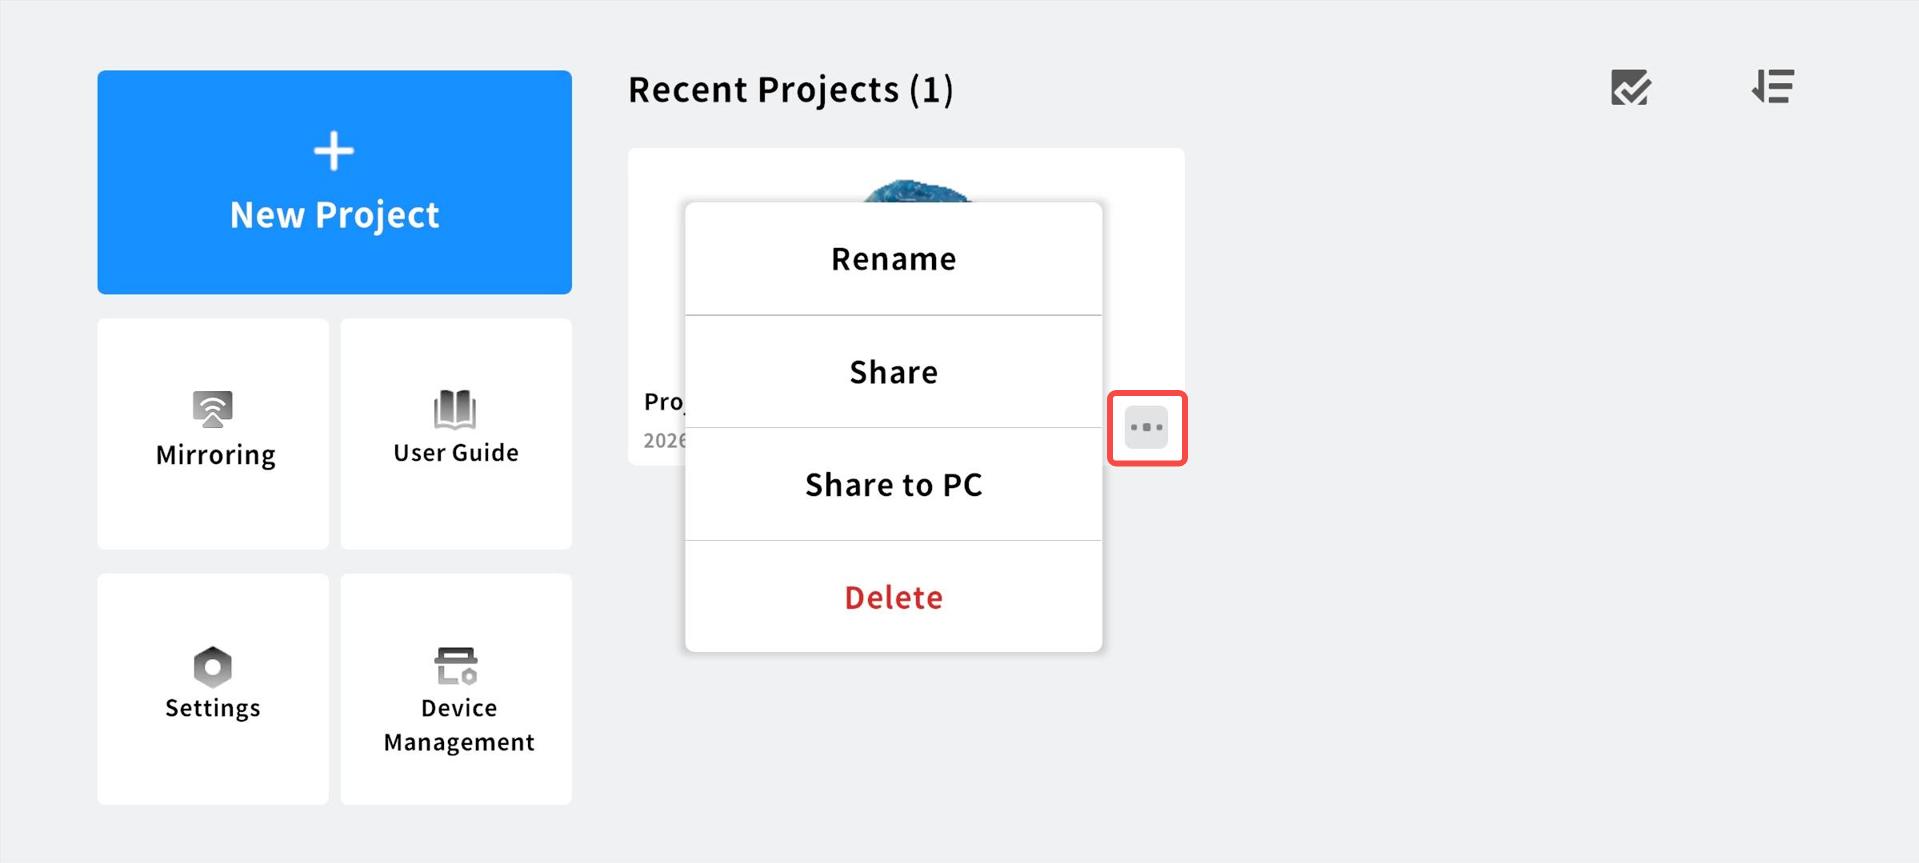
¶ 3.3 Project Management
On the home screen, user can manage scanned projects:
● View project list
● Open & continue editing projects

Tap the icon in the lower right corner of the target project to:
● Rename project
● Delete project
● Share project
¶ 3.4 Screen Mirroring:
Display the scanning view from the computer on a mobile device. Both the computer and the mobile device must be connected to the scanner's hotspot.
● Scan QR code to connect
● Show connection status
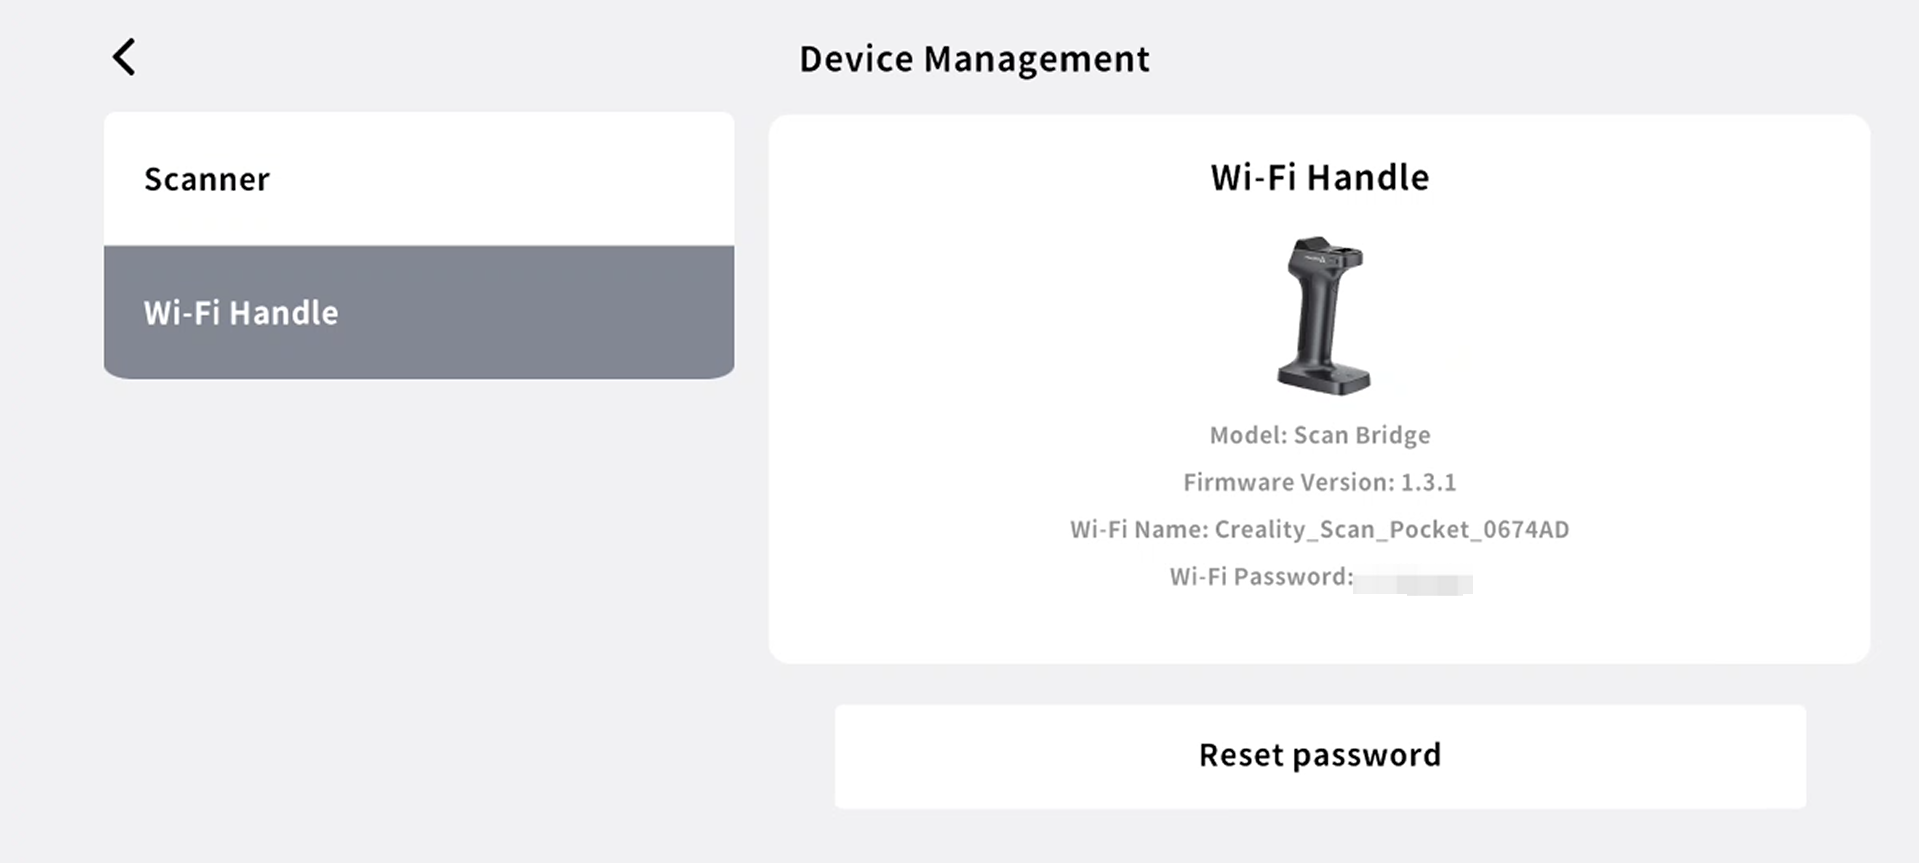
¶ 3.5 Device Management
Device management is used to view information about connected devices, including scanners and Wi-Fi Scan Bridge devices:
● Scanner: Model, SN, firmware version, and Last Calibration Time
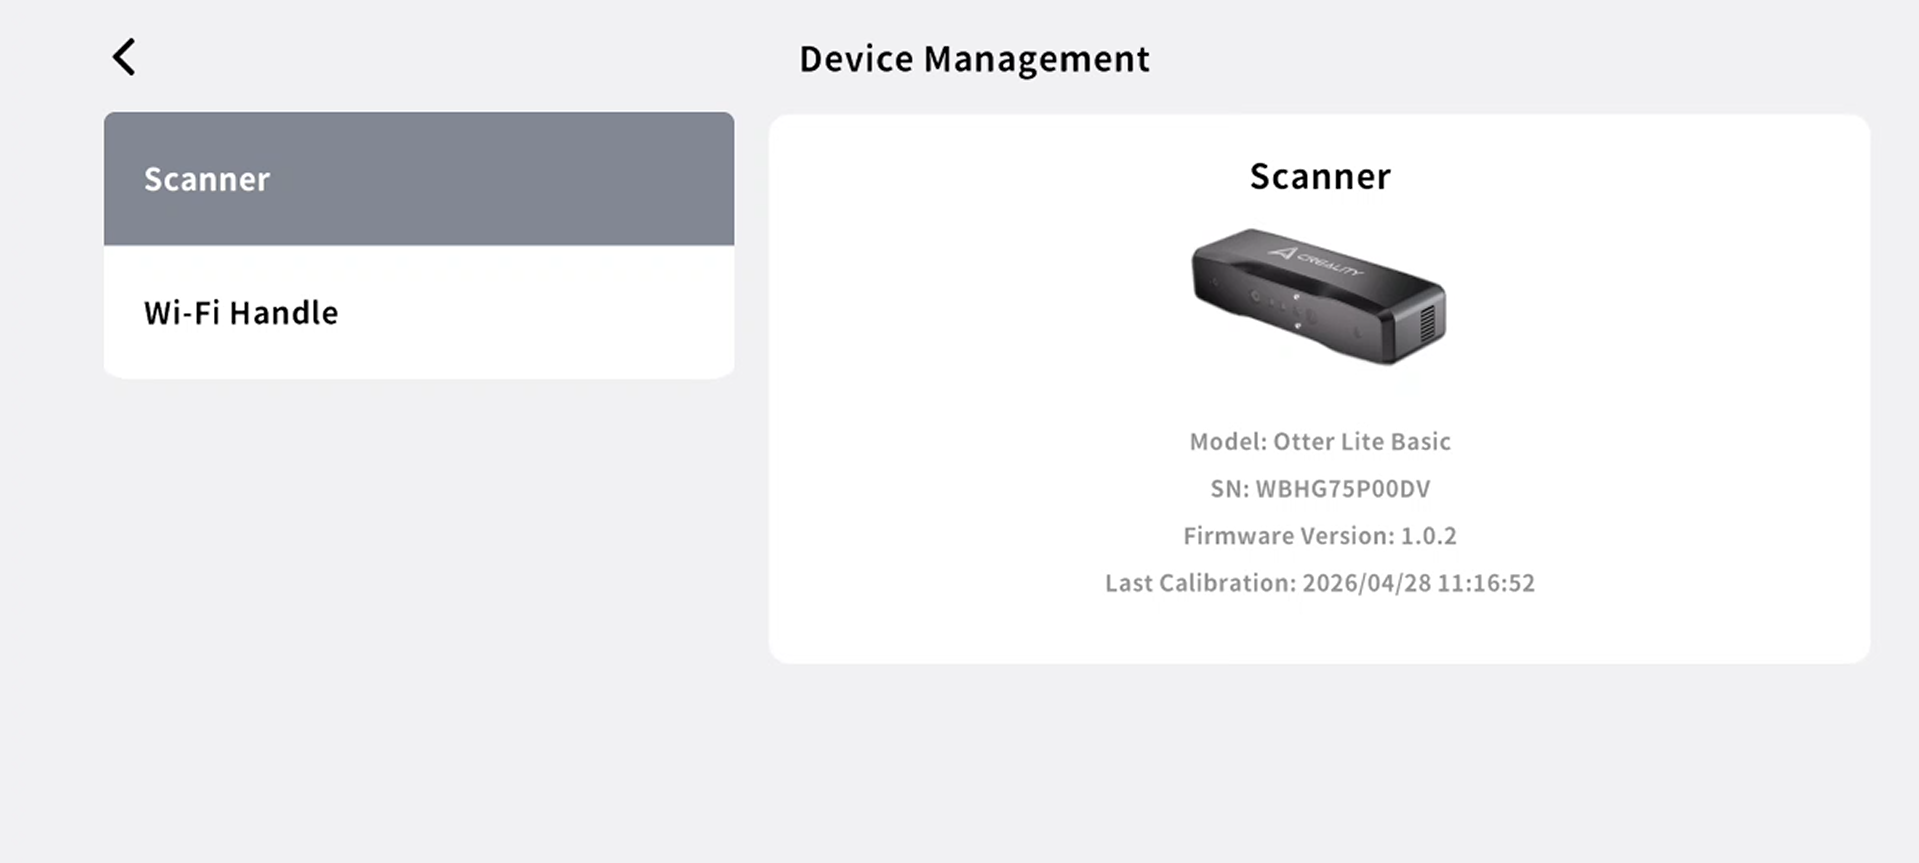
●Wi-Fi Scan Bridge: Model, SN, firmware version, Wi-Fi password and Reset password
¶ 3.6 Settings
The settings page is used for application configuration and user preference management, including the following functions:
1)Account Login: Login, logout, sync cloud projects, view account info
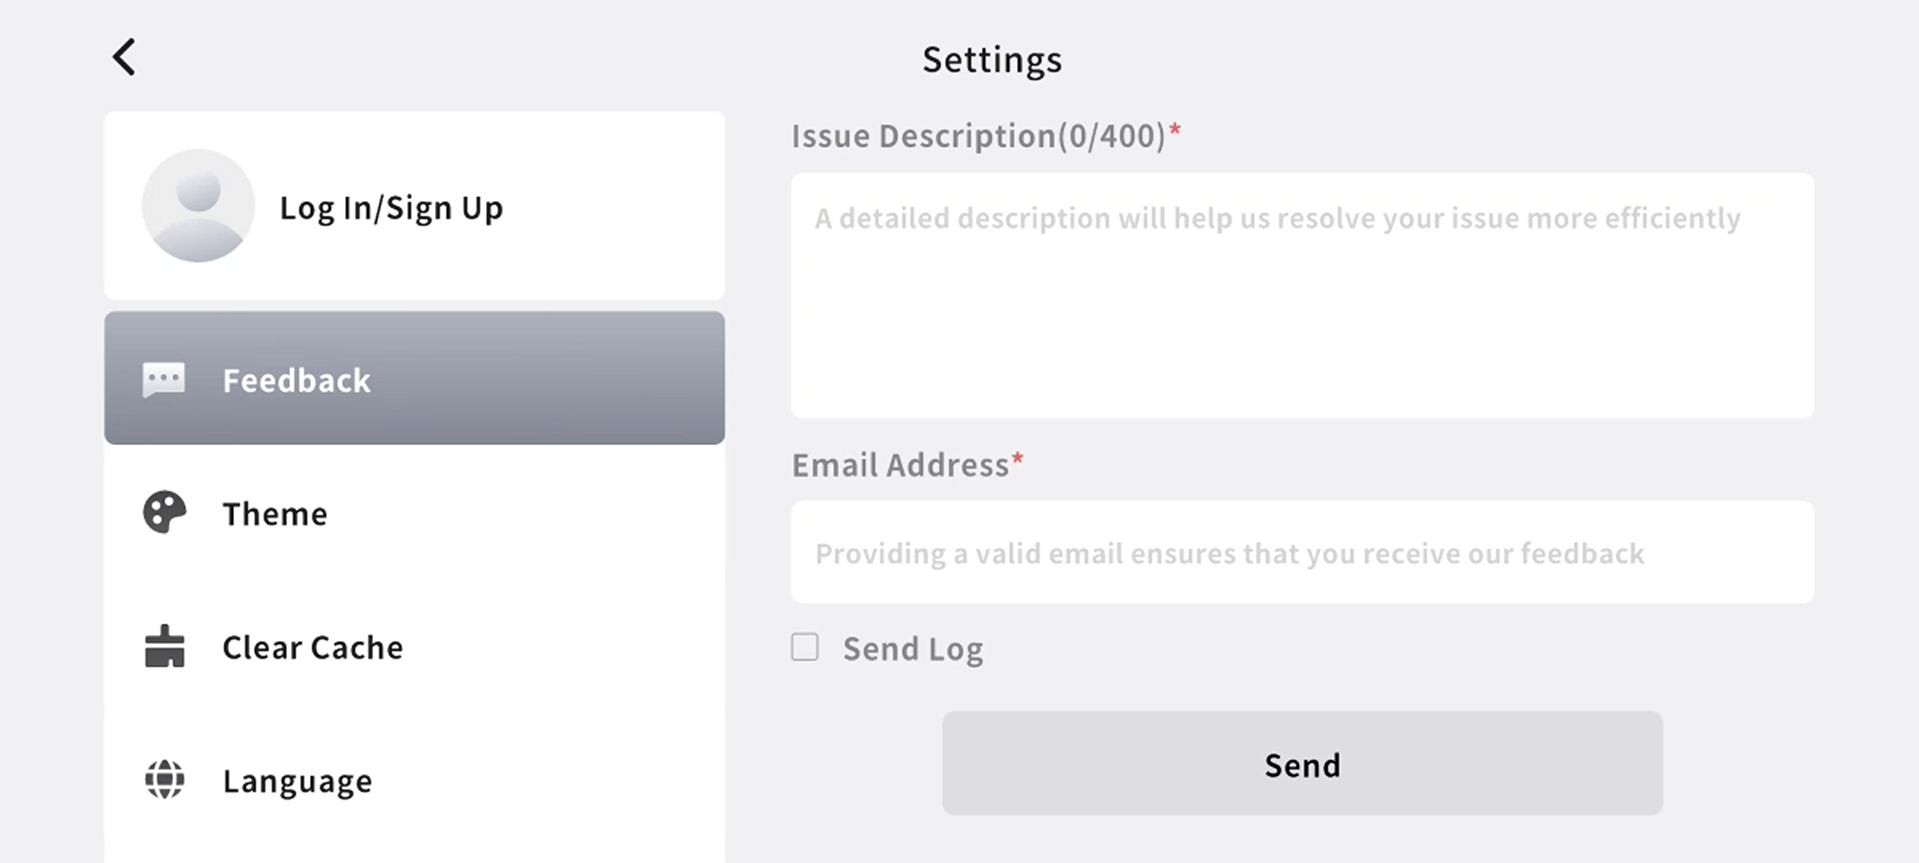
2)Feedback: Submit issues, upload logs, view feedback history
3)Theme: Light / Dark mode
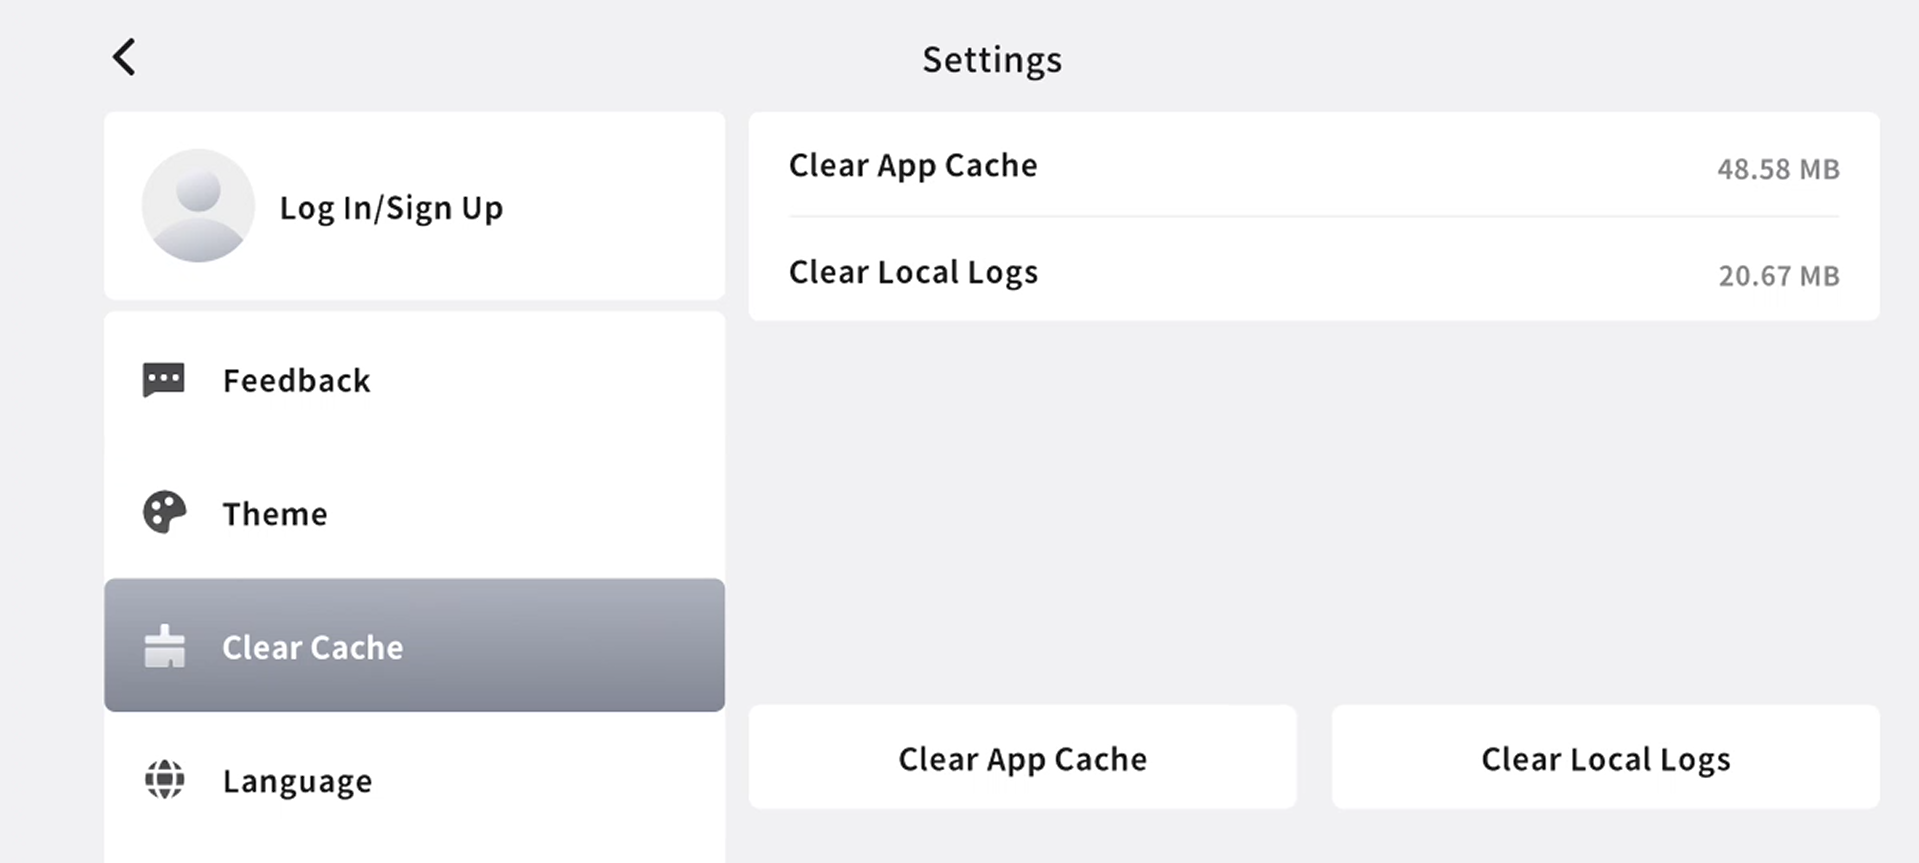
4)Clear Cache: Show cache size, clear app cache and local logs (projects unaffected)
5)Language: switch application language, take effect immediately after switching
6)About APP: Version info, update log, Privacy Policy & Software License and Service Agreement
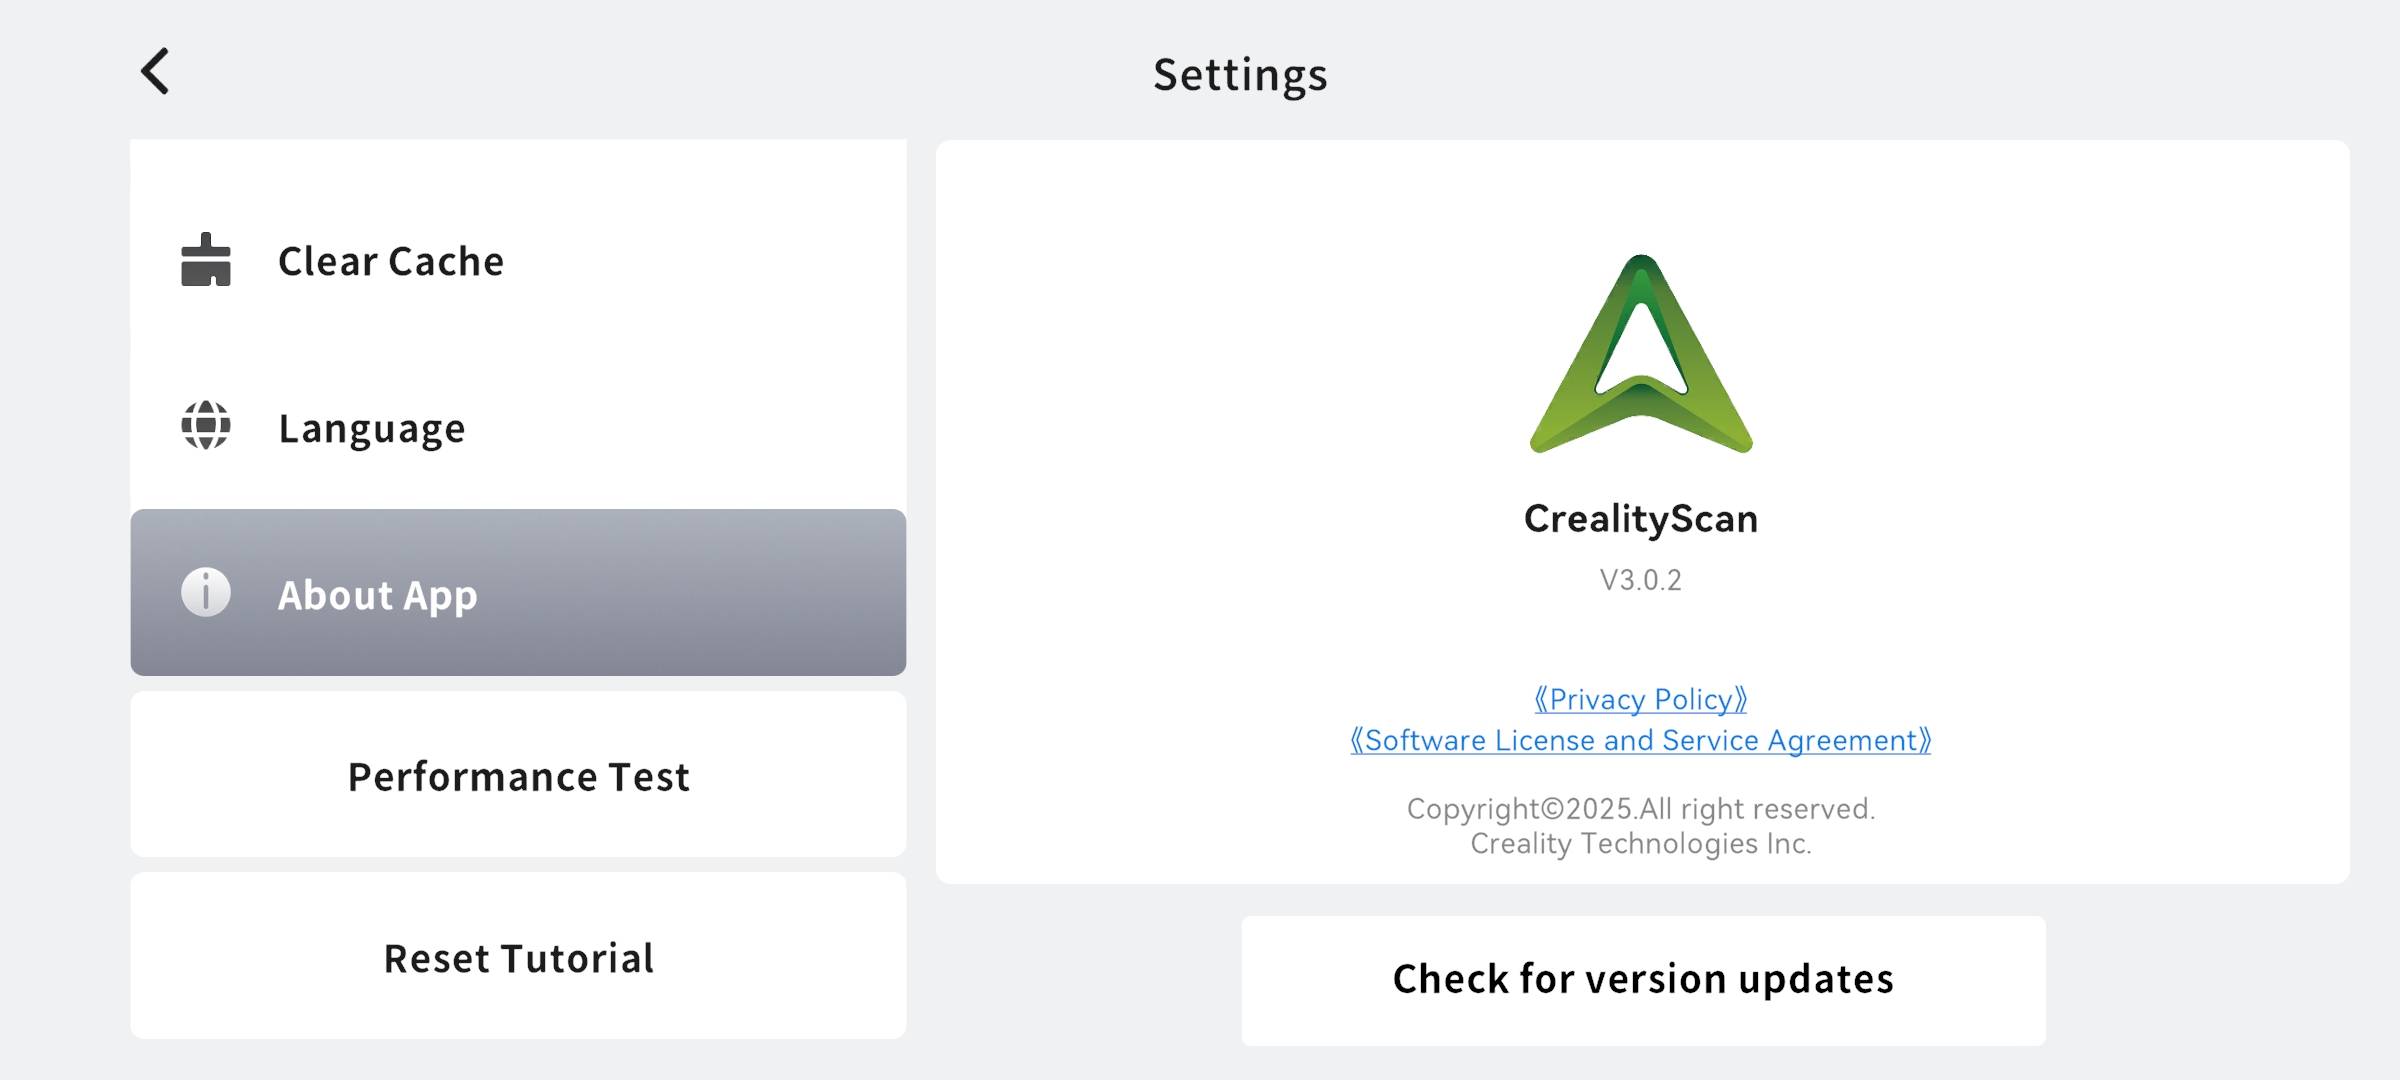
7)Performance Test: Detect device performance, output device performance rating, and recommend post-processing settings
8)Reset Tutorial: Restore first-time user guide
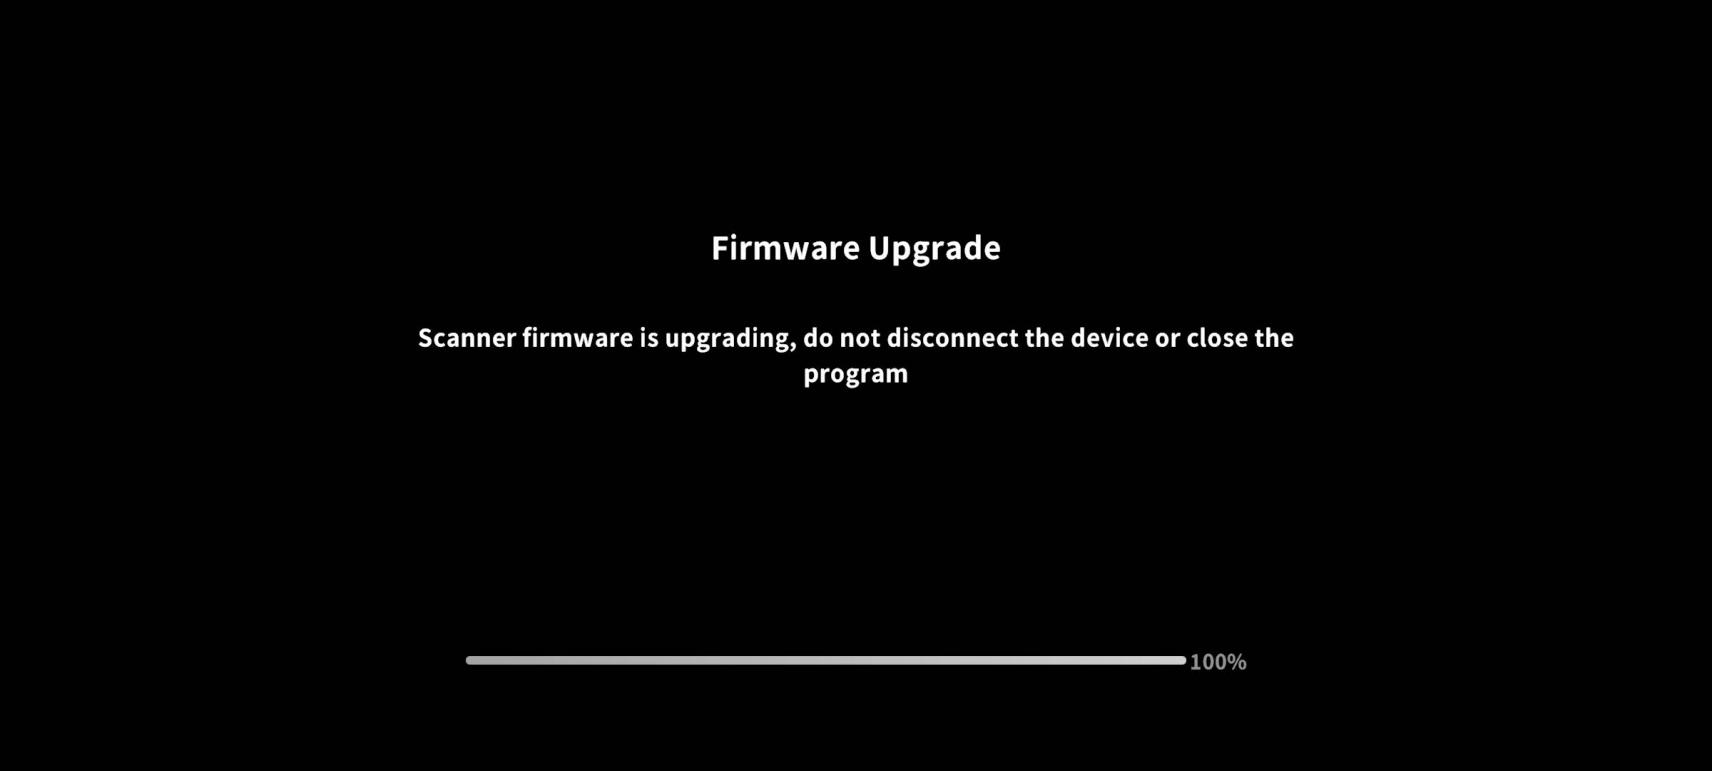
¶ 4. Device Firmware Upgrade
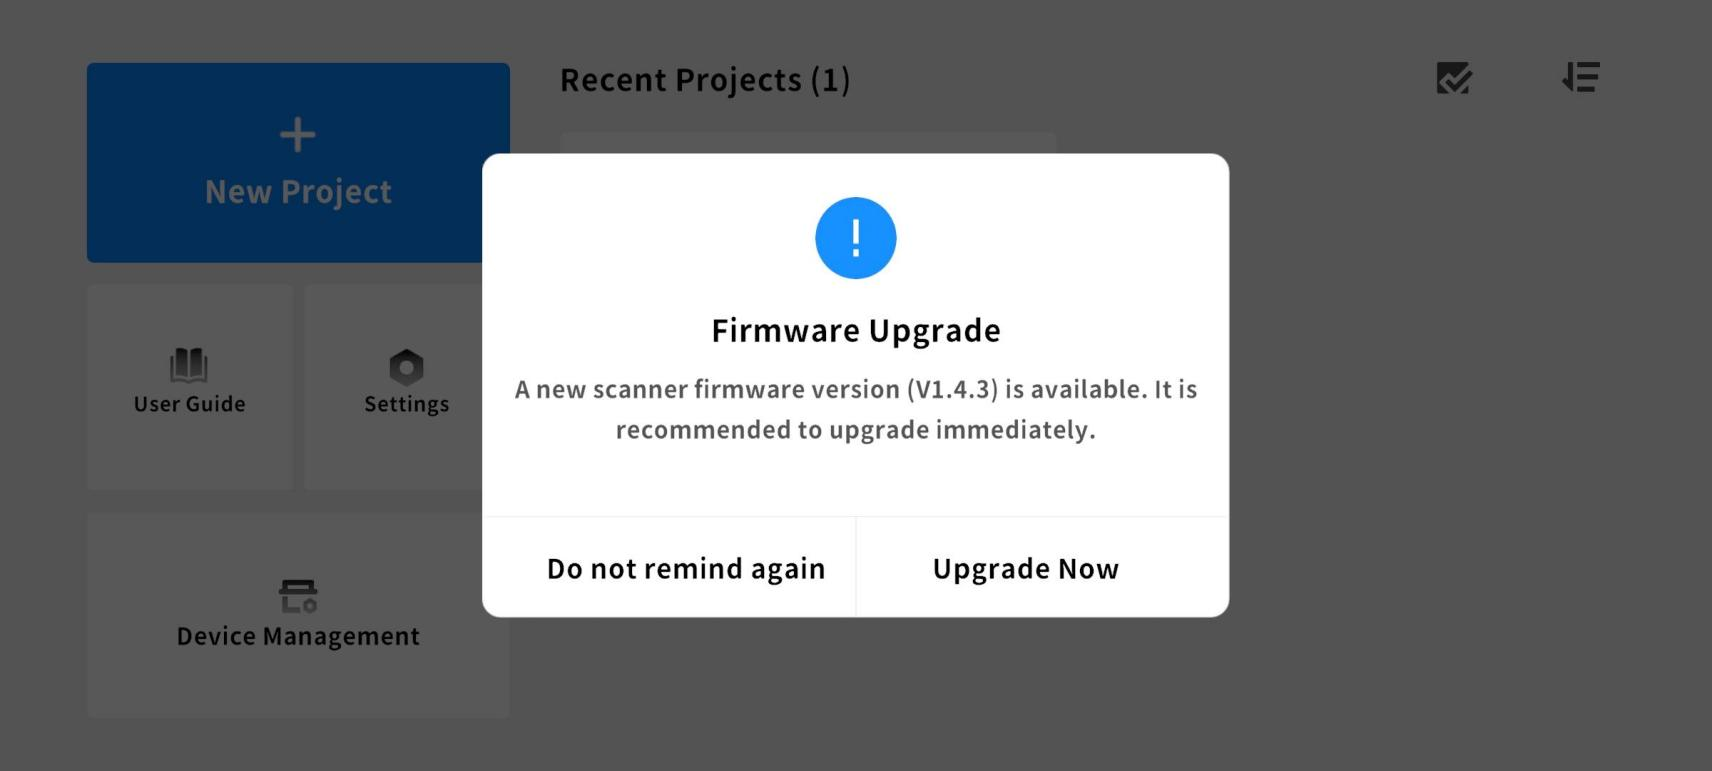
● The app will automatically detect the device firmware version and prompt the user to upgrade when a new version is detected. The scanner and Wi-Fi Scan Bridge firmware are typically updated separately; please follow the prompts to complete the update process.
¶ 4.1 Upgrade Process
1) Connect device to APP
2) Go to Device Management
3) If a new version is available, tap Upgrade Now
4) Follow instructions to upgrade the scanner or Wi-Fi Scan Bridge
5) The device will auto-reboot after the upgrade
¶ 4.2 Upgrade Notes
To ensure a stable upgrade process, please note the following:
● Do not power off the scanner during the upgrade
● Ensure sufficient battery
● Keep the app in the foreground
● Do not switch networks or disconnect Wi-Fi
¶ 4.3 Upgrade Troubleshooting
If any issues arise during the upgrade process, please try the following:
● Reconnect the mobile phone and retry the upgrade
● Restart mobile phone & APP
● Check network stability
● Submit logs via Feedback if unresolved
¶ 5.Scanning Tips
To obtain higher quality scan results, it is recommended to pay attention to the following tips during use:
¶ 5.1 Basic Tips
● Keep the scanner steady and move slowly
During the scanning process, move the scanner at a constant speed to avoid data loss due to shaking or rapid movement.
● Keep the object within the scan range
Observe the real-time scan view window during scanning to prevent the target from moving out of the scanning area.
● Monitor distance indicator
Refer to the distance indicator bar on the interface to keep the device within a suitable range, avoiding being too close or too far to prevent affecting scanning accuracy.
¶ 5.2 Mode-Specific Tips
● Blue Laser:
Place markers to the object surface or the environment around it
Markers should be evenly distributed, avoiding clustering or sparse placement
Do not use a calibration board as markers
●Infrared:
- Suitable for objects with rich geometric features and textures
- Move the device slowly during scanning to improve model quality
- Use scanning spray for dark objects; use marker stickers for featureless/textureless objects
¶ 5.3 Environment & Object Recommendations
● Avoid strong light or reflective surfaces: Direct strong light or highly reflective surfaces will affect data acquisition quality
● Scan in evenly lit environment: Scan in an evenly lit, stable environment
● Treat special surfaces: for transparent, highly reflective, or pure black objects, use scanning spray as a surface treatment

¶ 5.4 Scanning Process Recommendations
● Pause when needed to check the scanned model quality
● For complex structures, scan in separate areas and then align them together
● If tracking is lost, move back to an already scanned area to re-establish tracking
¶ 6. FAQ
¶ 1)What to do if the device cannot connect?
a)Make sure the scanner and Wi-Fi Scan Bridge are properly connected and powered on
b)Check that the device has sufficient battery
c)Ensure the phone is connected to the device’s Wi-Fi (e.g., Creality_Scan_xxx)
d)Turn the phone’s WiFi off and on again, then retry
e)Restart both the scanner and the app
f)Make sure no other similar device is connected, which could cause a conflict
g)If the issue persists, submit logs via Feedback for support
¶ 2)What to do if the scanned model is incomplete?
Possible causes and solutions:
a)Moving too fast during scanning → Move the device slowly and steadily
b)Object goes out of the scanning range → Keep the object within the scan view
c)Lack of feature or texture → Use markers or scanning spray
d)Incorrect scanning distance → Adjust to the recommended range using the distance indicator
e)Environmental interference (bright light/reflections) → Change to an evenly lit environment
¶ 3)What to do if scanning is laggy?
Try these optimizations:
a)Close other apps running in the background
b)Lower the scanning resolution or parameter settings
c)Ensure your phone meets the performance requirements
d)Keep the connection between the scanner and phone stable (avoid signal interference)
e)Restart the app or device and try again
¶ 4)What to do if tracking is lost during scanning?
a)Move the scanner back to an already scanned area to re-establish tracking
b)Keep the movement steady; avoid fast or large motions
c)Add more markers or place other feature-rich objects around the target to assist tracking
¶ 5)What to do if the scanner does not recognize the object?
a)Check if the object surface lacks texture or features
b)Add markers or use scanning spray to help recognition
c)Change the scanning angle; avoid a single vantage point
d)Ensure exposure settings are correct (avoid overexposure or underexposure)
¶ 6)What to do if the scan result is noisy or uneven?
a)Scan at a slower, steadier speed
b)Avoid scanning in bright or reflective environments
c)Adjust scanning distance to the recommended range
d)Use the Fusion or Smoothing function during post-processing to improve the model
¶ 7)What to do if the device disconnects during scanning?
a)Check that the Wi-Fi connection is stable
b)Keep the phone close to the scanner
c)Make sure the Wi-Fi Scan Bridge has enough battery
d)Close other apps that may be using the network
e)Reconnect the device and resume scanning
¶ 8)Why is the color of the scanned model abnormal?
a)Check if the display model set to with texture mode
b)Adjust exposure parameters; avoid overexposure or underexposure
c)Avoid overly bright ambient light or colored light sources
d)Make sure the scanner lens is not obstructed or dirty
¶ 9)What to do if model processing fails or gets stuck?
a)Ensure your mobile phone performance meets the processing requirements
b)Reduce the model data size (e.g., lower the resolution)
c)Close background apps to free up memory
d)Restart the app and try processing again
¶ 10)What to do if the model is not watertight?
a)Check if the scan data is complete (any missing areas)
b)Rescan any missing parts
c)Perform necessary cropping and cleaning before post-processing
d)Enable hole filling and watertight options when performing Meshing
¶ 11)Why can’t I share the model?
a)Make sure the model processing (e.g., fusion/meshing) is complete
b)Check that the network connection is working
c)Ensure the app has storage permissions enabled
d)Try a different sharing method (phone/computer)
¶ 12)What to do if screen mirroring fails?
a)Make sure the phone and computer are on the same network
b)Check that screen mirroring is enabled
c)Rescan the QR code
d)Turn screen mirroring off and on again
¶ Appendix A Glossary
To help users better understand relevant features, the following are commonly used terms:
¶ A.1 Basic Concepts
● Scan Project – A complete scan task data set, including raw data and processed results.
● Point Cloud – Three-dimensional spatial point data collected by the scanner, forming the basis for model generation.
● Mesh Model – A triangular surface structure model generated from point clouds, used for display and export.
¶ A.2 Scanning Related
● Marker – Auxiliary recognition points attached on or around the object to improve tracking stability. They are available in two sizes: 6mm inner diameter / 10mm outer diameter, and 3mm inner diameter / 6mm outer diameter.

● Scan Distance – The recommended working distance range between the scanner and the target object.
● Real-time Resolution – The fineness of scanned data; smaller spacing yields more detail but higher performance consumption.
● Exposure – Parameter controlling the brightness of the captured image, affecting scanning recognition quality.
¶ A.3 Mode Explanation
● Blue Laser Mode – Uses blue laser for scanning, suitable for high-precision scenarios, typically requires markers.
● Infrared Mode – Uses infrared structured light for scanning, suitable for medium-to-large objects with texture; easier operation.
¶ A.4 Post-Processing Related
● Fusion – The process of merging multiple frames of point cloud data into a complete model.
● Meshing – Converting point clouds into a closed mesh model.
● Texture – Adding real color information to the model.
● Edit – Removing unnecessary scan data.
¶ A.5 Device and System
● Firmware – Software running inside the device to control hardware functions.
● SN Number – Unique identification number of the device.