¶ Tools
Hexagonal wrench
Scraper
Phillips screwdriver
Cutting pliers
Alcohol wipe
¶ Operating Steps
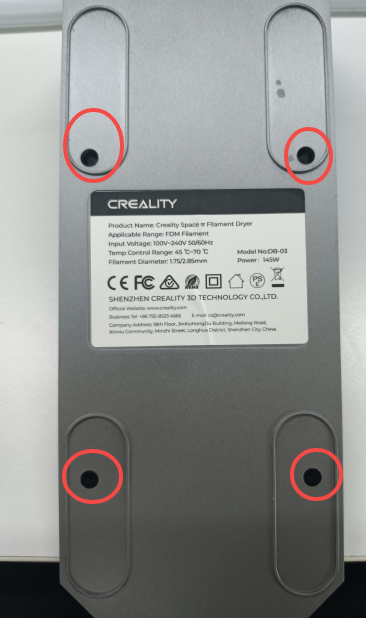
- Remove the foot pads and use the hexagonal wrench to remove four screws.
- Use a scraper or other tools to pry up and remove the screen sticker from the Creality Space Filament Dryer.

- Use a Phillips screwdriver to remove two screws securing the dryer's PC board, then remove the PC board.
 |
 |
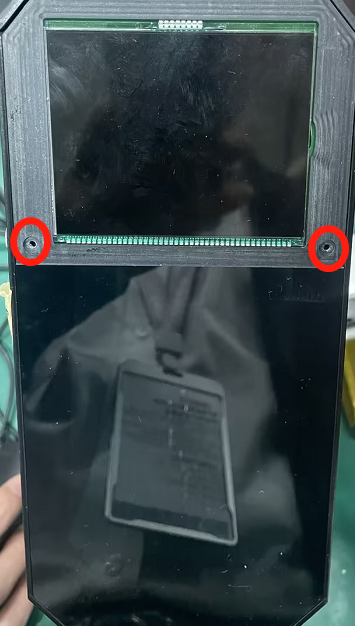
- Use a Phillips screwdriver to remove four screws securing the screen, move the screen aside, and remove two screws securing the bottom shell.
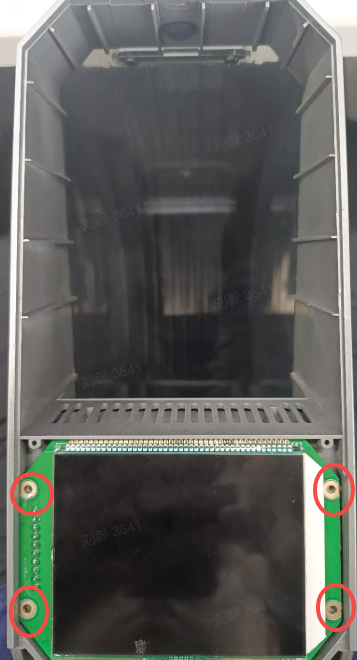 |
 |
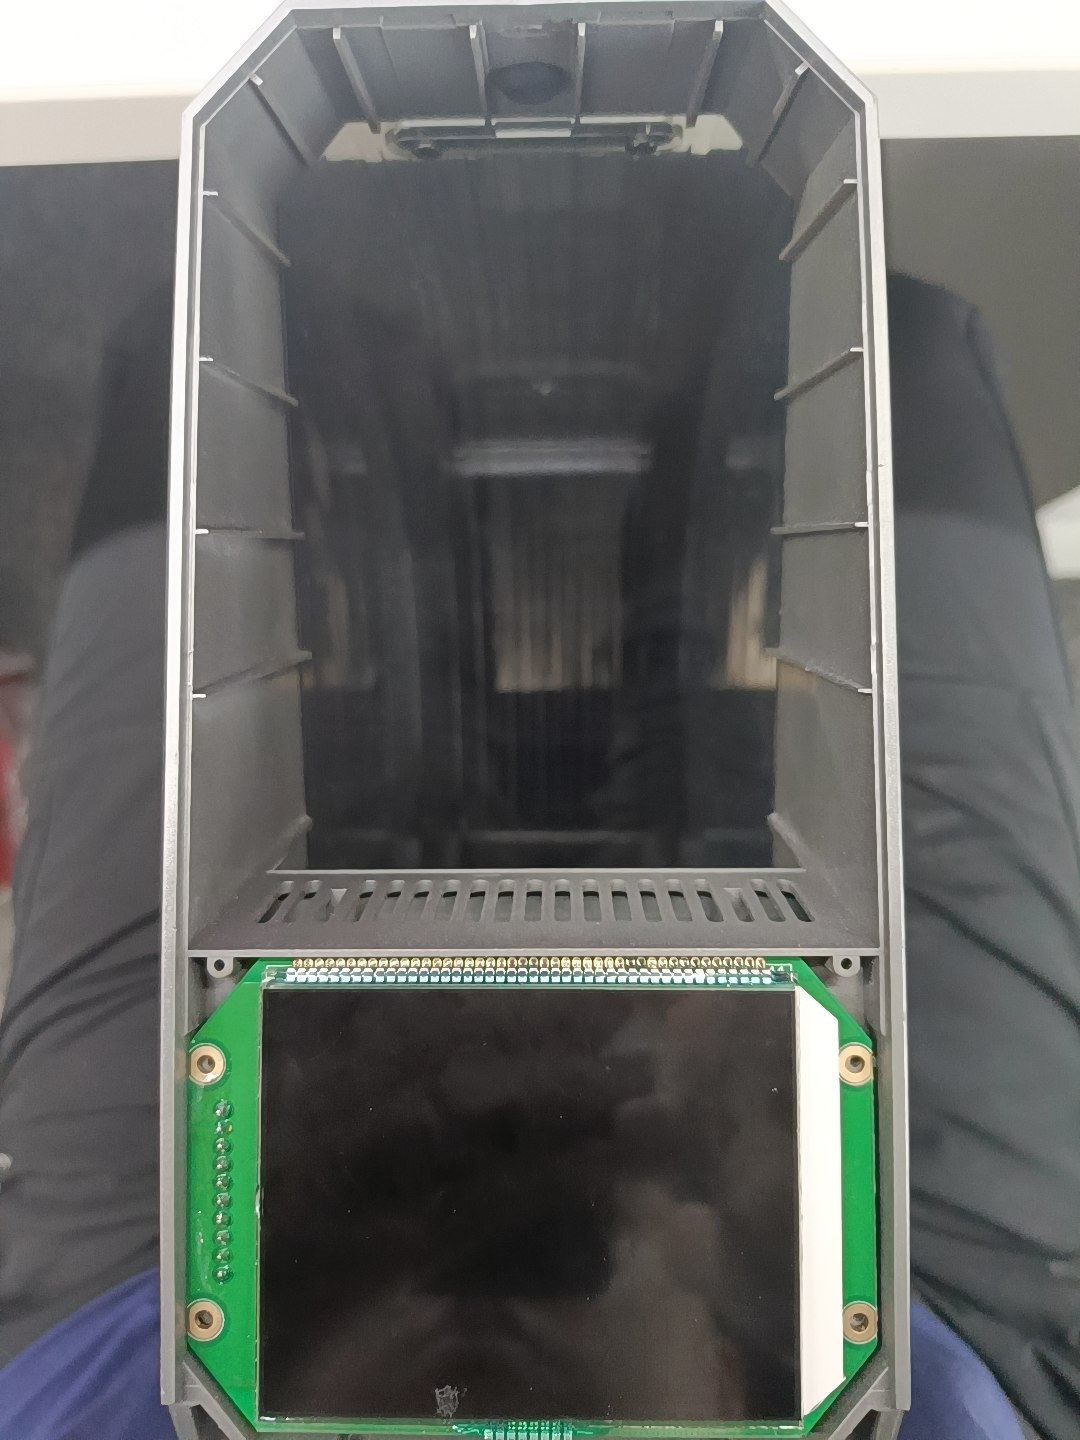
- Remove the bottom shell.
Be careful not to damage the screen cable
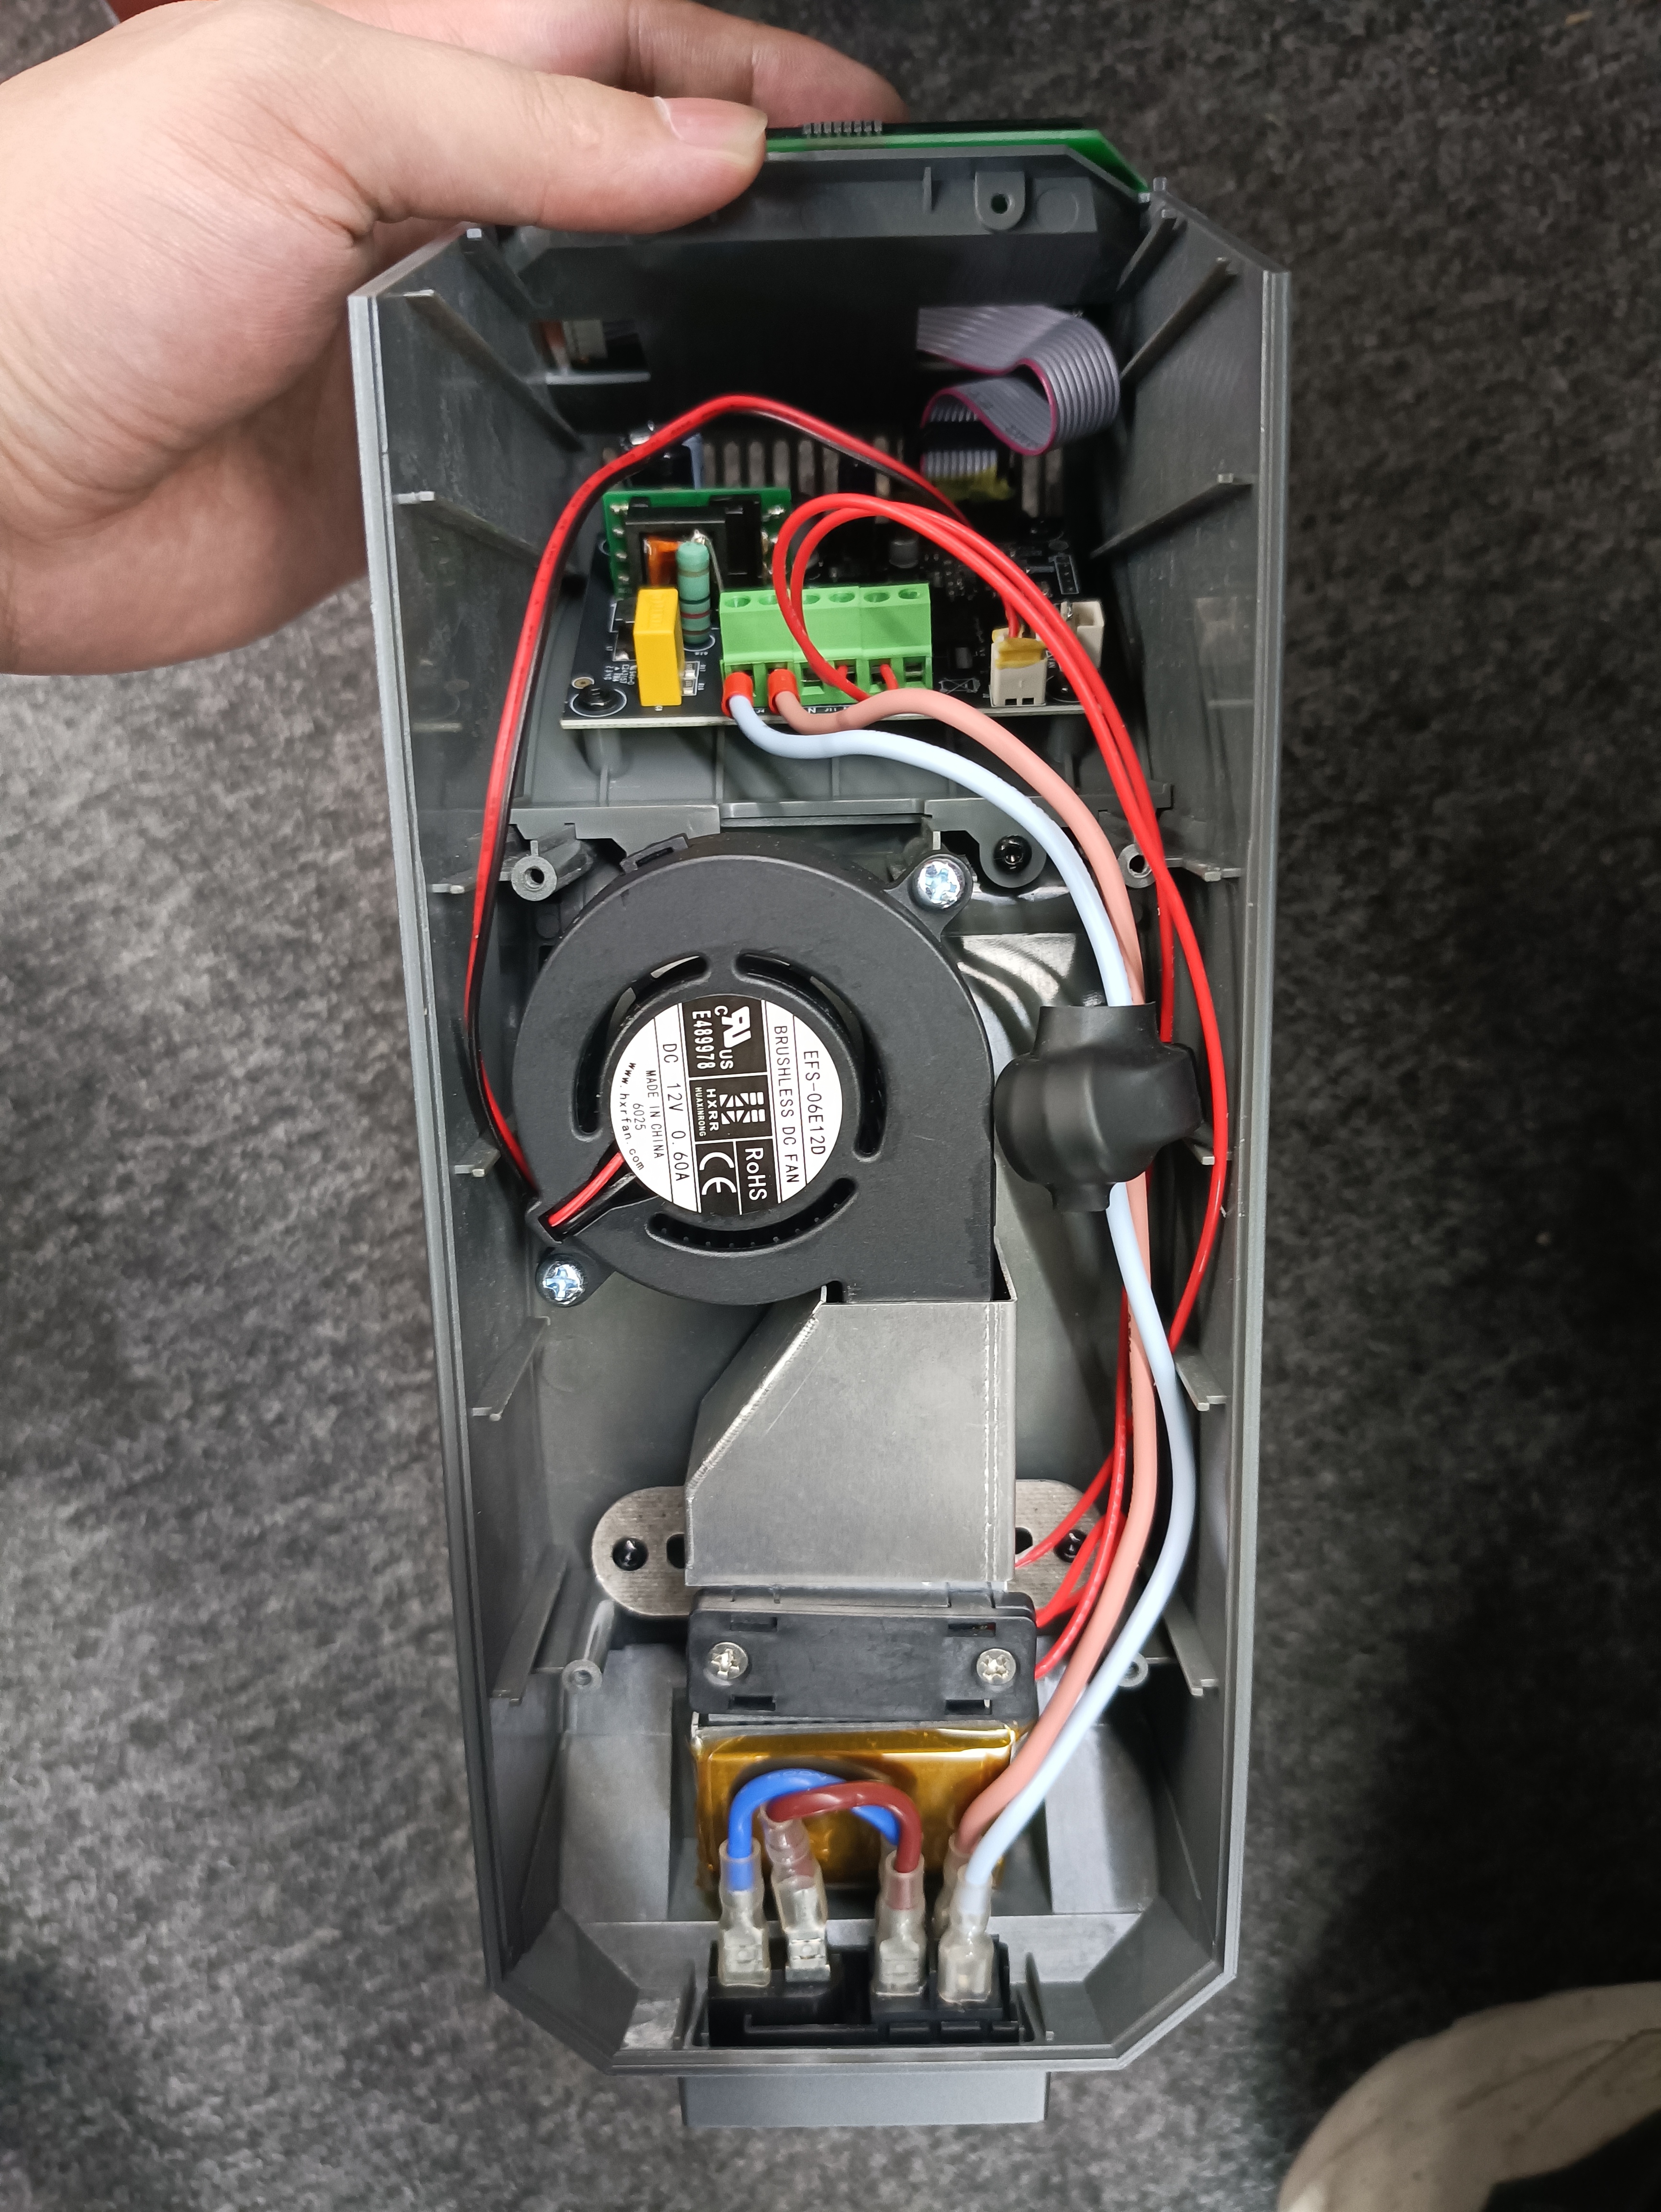
- Use cutting pliers or other tools to remove the yellow glue on the fan wire from the motherboard and disconnect the fan wire.

- Use a Phillips screwdriver to remove the fan securing screws, replace with a new fan, and secure with screws; reconnect the fan wire to the motherboard.

- Buckle the bottom shell, and secure it with Phillips screws. Then you need to reinstall the screen, and secure the screen with Phillips screws.
Note: ensure correct direction of screen cable.

- Use alcohol wipe or other cloth to clean the screen; ensure no fingerprints are left.
- Reinstall the dryer's PC board and secure it with screws; attach the dryer's screen sticker.
- Secure the bottom shell with four Allen bolts at the foot pad positions and attach the foot pads.
Friendly Reminder:
If you encounter any questions or difficulties during the replacement process, please contact our official after-sales technical team (cs@creality.com) promptly.