¶ Tutorial
Troubleshooting Filament Oozing and Nozzle Clogging
¶ Tool
Cutting pliers
L-shaped hex key / Allen wrench
Glue stick
Dry cloth
May need new nozzle kit and fan cover
¶ Phenomenon Description
¶ Case 1
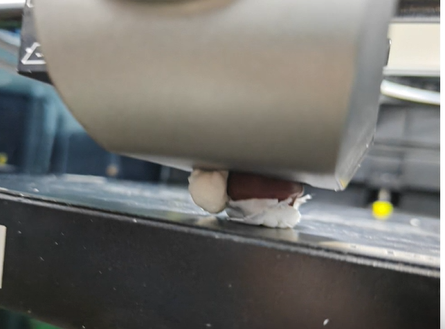
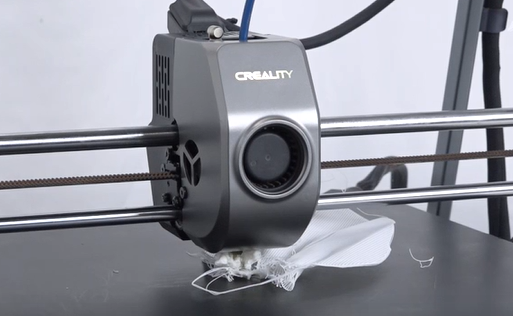
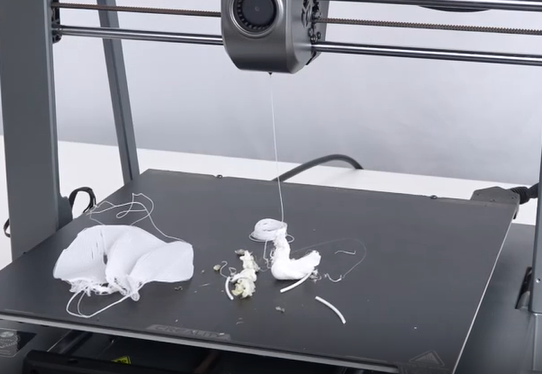
Filament oozing around the nozzle./Filament covering the print head during printing.
 |
 |
 |
 |
¶ Case 2
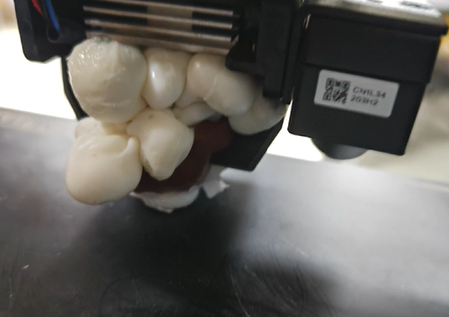
During printing, the first layer doesn't adhere to the platform, and the nozzle shifts the model position, causing nozzle clogging and filament covering the nozzle.
¶ Troubleshooting
¶ Scenario 1: Fan cover intact, cleaning the ooze
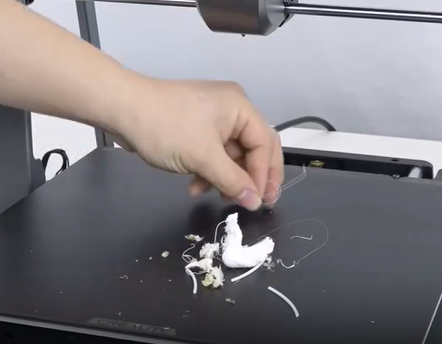
After heating the nozzle, use cutting pliers to clean the ooze.
If the ooze can be completely cleaned, the nozzle can be used normally without replacement.
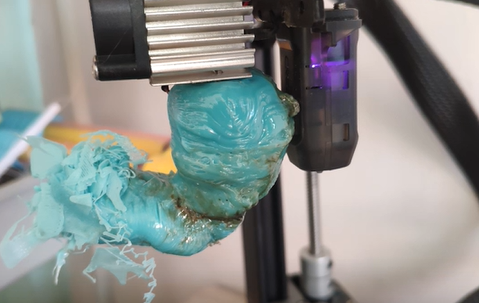
If the ooze cannot be cleaned completely, a new nozzle kit needs to be replaced.
¶ Steps for Scenario 1
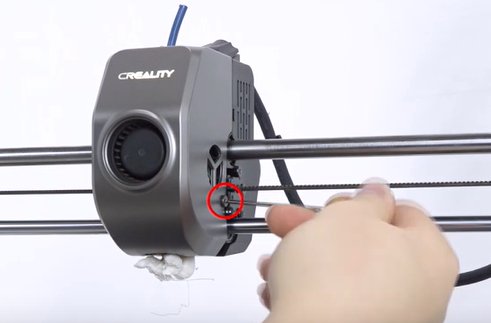
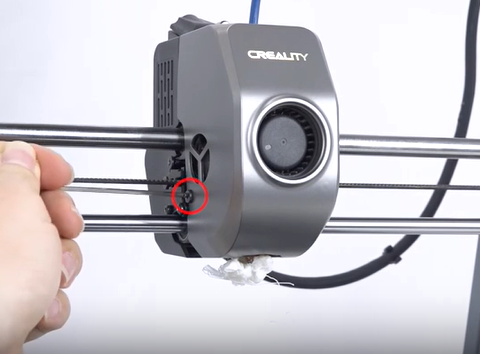
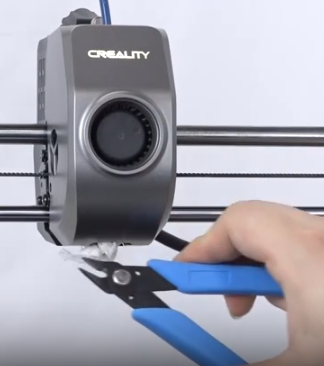
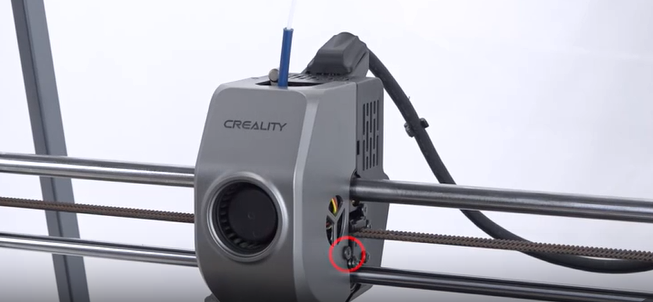
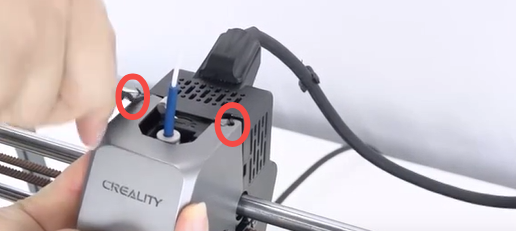
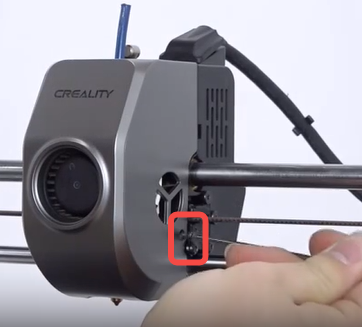
Unscrew the 2 screws of the fan cover.
 |
 |
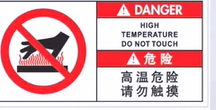
Note: The following steps require heating the nozzle. When cleaning the ooze, do not touch the hot end to prevent burns.
Different filaments require different heating temperatures. This tutorial uses PLA/TPU filament as an example.
| Filament Type | PLA/TPU | PETG/ABS | Carbon Fiber |
| Heating Temp | 240° | 260° | 300° |
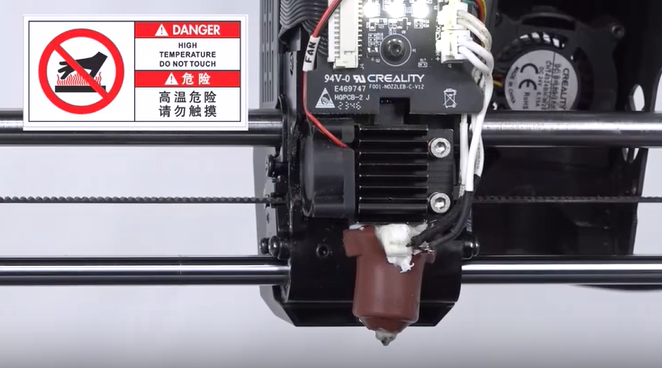
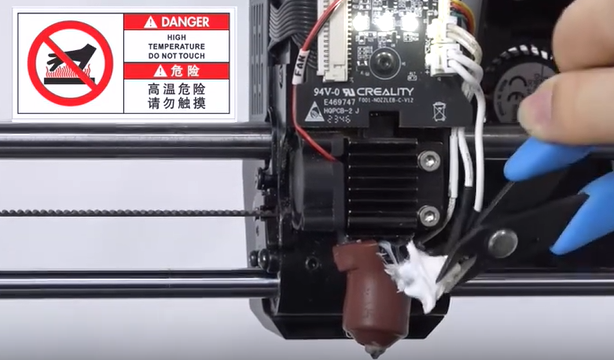
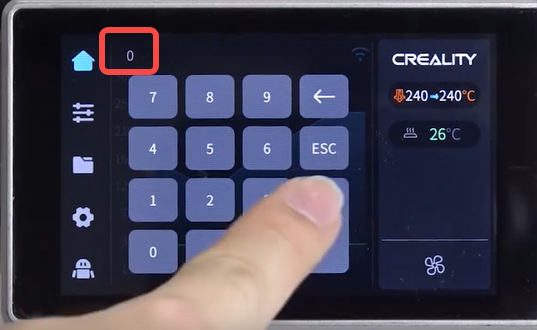
Heat the nozzle to 240°. After the nozzle temperature rises to 240°, wait for 4-5 minutes to allow the ooze to soften fully before proceeding with cleaning.
Note: When cleaning the ooze, do not touch the nozzle with your hands. Use tools like cutting pliers to prevent burns.
 |
 |
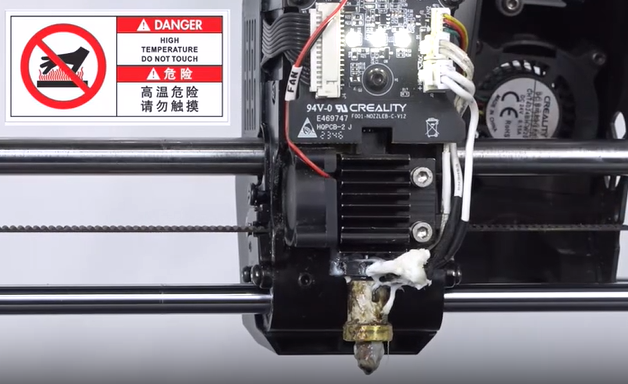
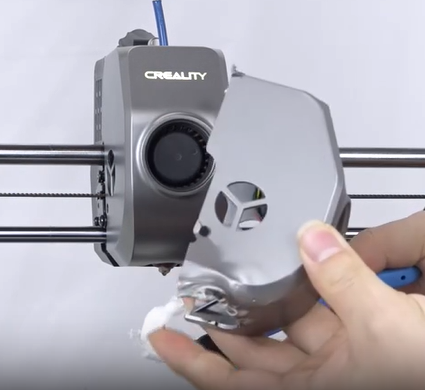
Remove the fan cover. Do not touch it directly to prevent burns.

If the ooze can be cleaned completely, the nozzle can be used normally without replacement.
 |
 |
|
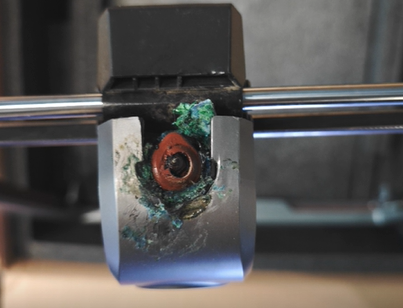
If the ooze is stuck to the wiring and the nozzle cannot be cleaned, a new nozzle kit needs to be replaced.
 |
 |
|
¶ Scenario 2: Fan cover damaged, cleaning the ooze
If improper handling of the ooze leads to a damaged fan cover that cannot be removed, both the nozzle and fan cover need to be replaced.
¶ Steps for Scenario 2
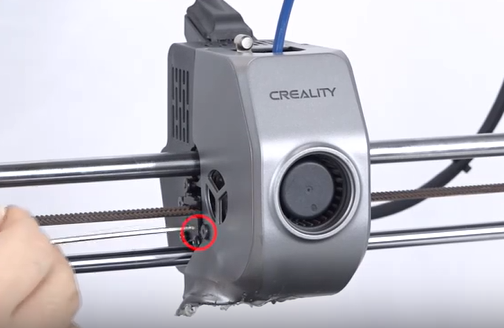
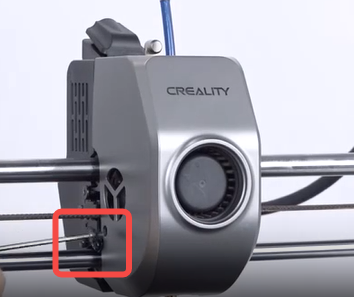
Unscrew the 2 screws of the fan cover because the ooze prevents the fan from being removed.
 |
 |
Cut the clips directly and remove the damaged fan cover.
 |
 |
 |
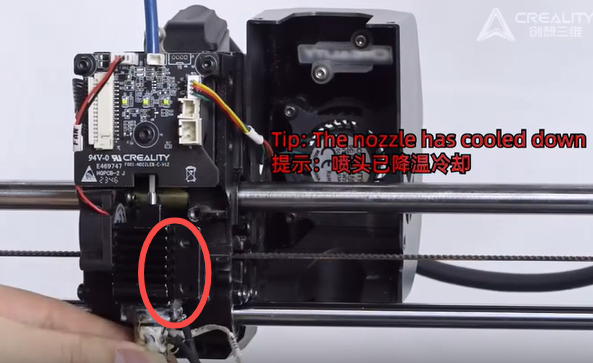
Remove the nozzle.
Note: The nozzle should be removed at room temperature to avoid burns.
Set the nozzle temperature to 0° and wait for it to cool down to room temperature.
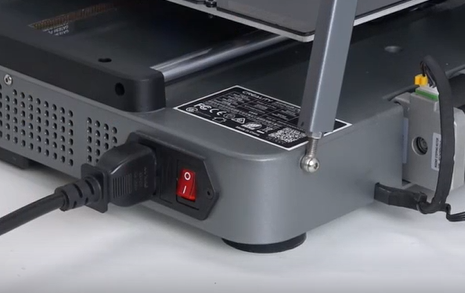
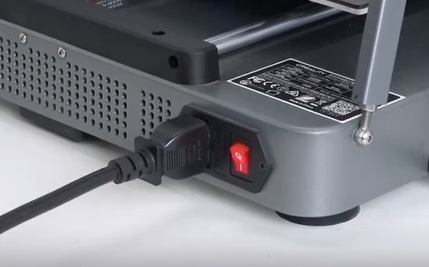
Power off the printer.
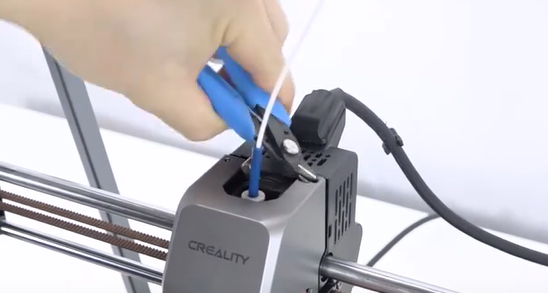
Cut the filament.
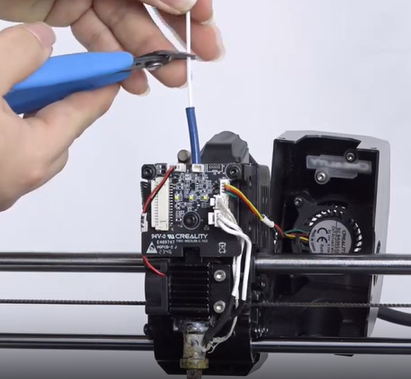
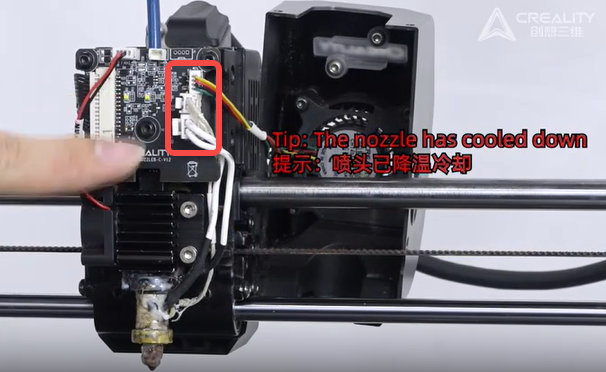
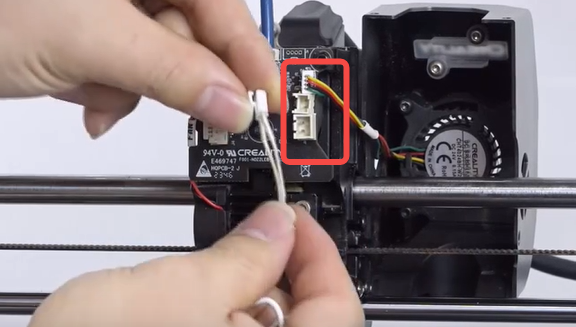
Unplug the wiring.
Note: Ensure the nozzle has cooled down before operating.
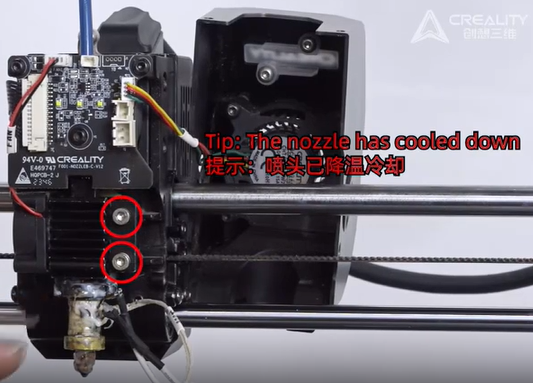
Unscrew 2 screws and remove the nozzle kit that cannot be cleaned.
 |
 |
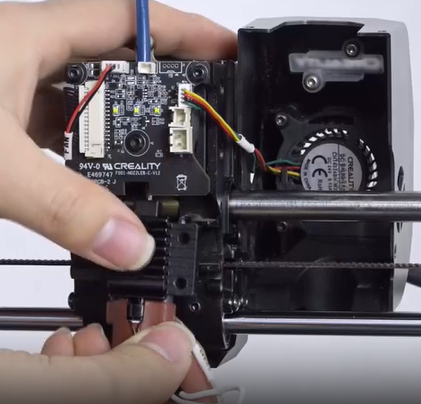
Install the new nozzle.
 |
 |
Connect the wiring.
 |
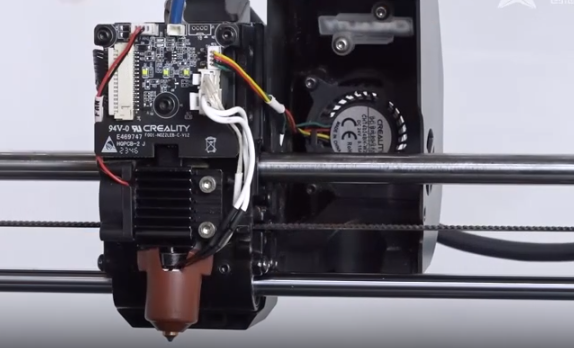 |
Install the fan cover.
 |
 |
 |
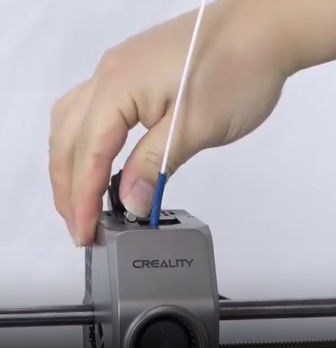
Insert the filament.
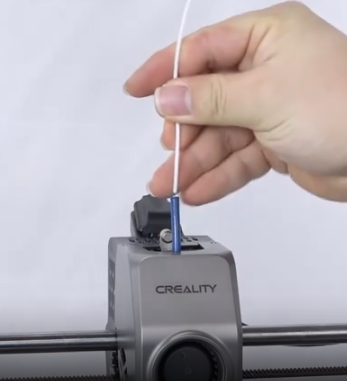
Toggle the extruder clamp.
Power on the printer.
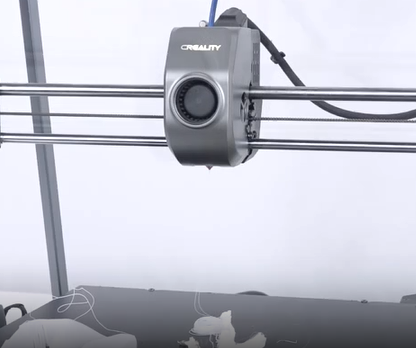
Click 'Extrude' on the screen and observe if the nozzle extrudes smoothly.
 |
 |
Clean the print platform.
Note: After cleaning the platform, you can apply glue or remove the platform plate.
Clean the platform plate with water, dry it, and make sure the nozzle is clean.
Click on the screen “self-check” is required after replacement.
¶ Friendly reminder
If you still haven't resolved the issue after following the steps in this document, or if you encounter any difficulties during the process, you can click the right corner of the wiki page online support to contact our after-sales team for more help.